.png)
1. Branch Creation Overview
1.1 Dashboard
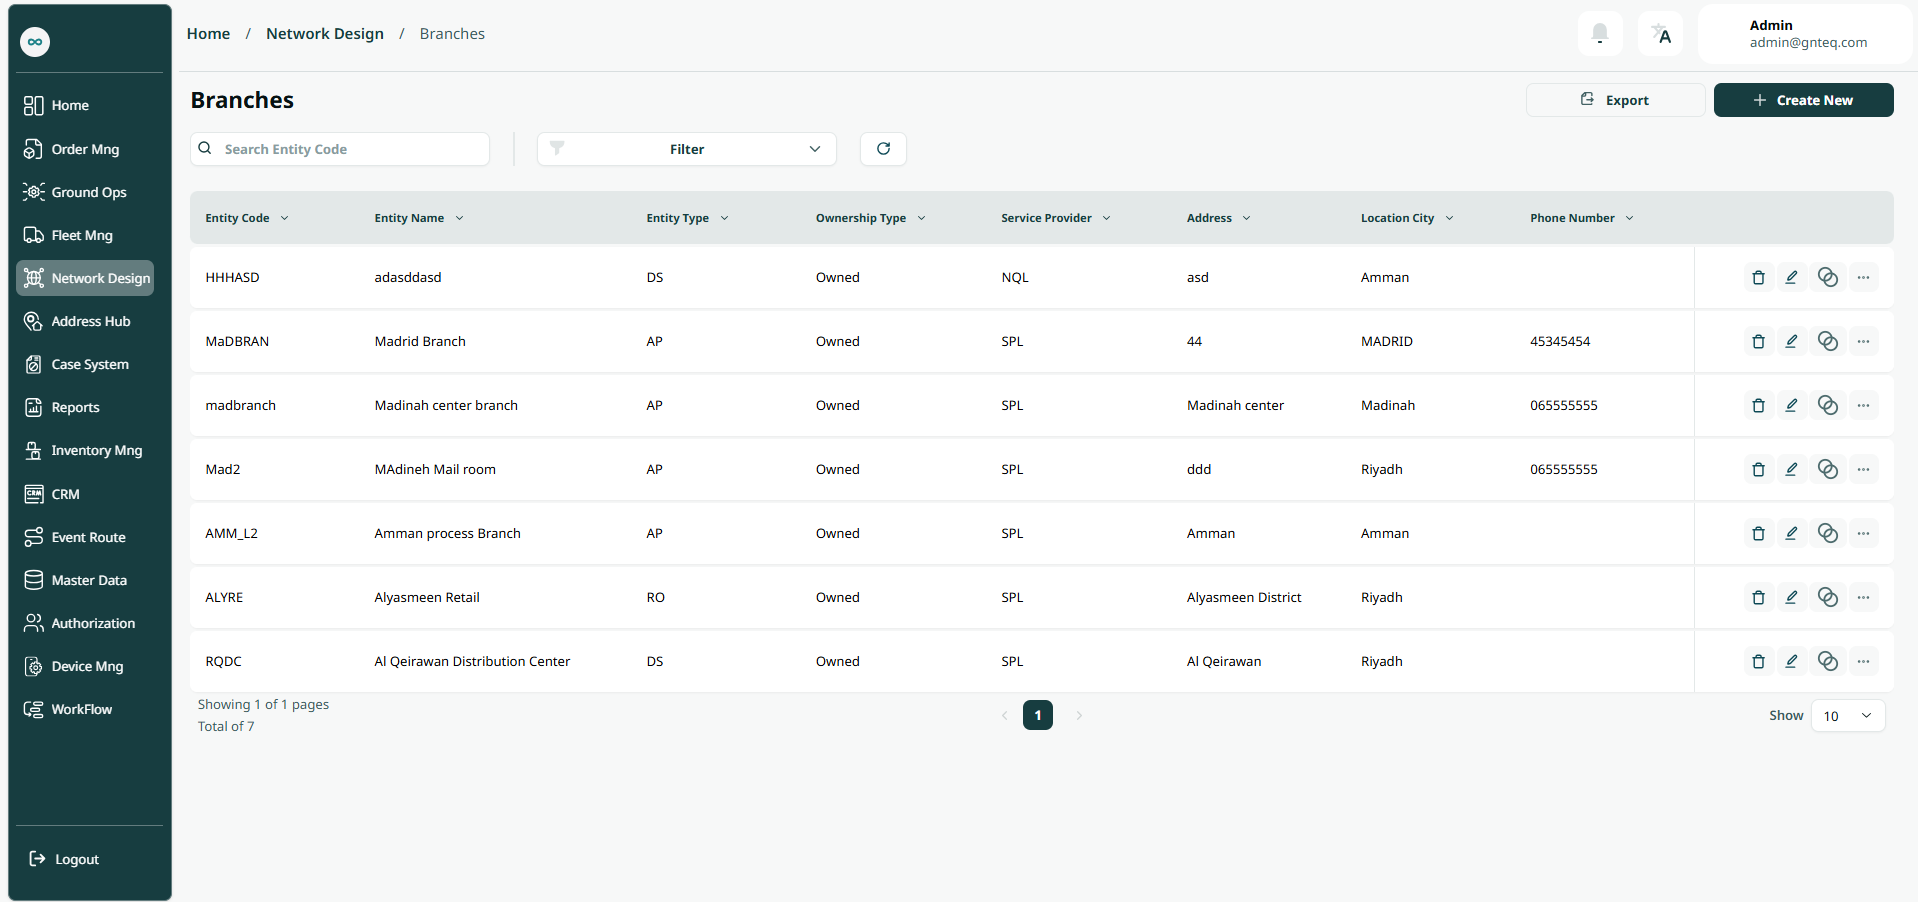
The user can view the defined branches in the system by navigating to the ‘Branches’ screen in the Network Design Module from the left navigation panel as follows:
-
New Branch: the user can add a new branch by clicking on Create New.
-
Export: the user can export list of regions an Excel file by selecting export button.
-
Rows Per Page: the user can select the number of items to show on each page.
-
Actions: by clicking on Action, the user can edit information, delete branch, add covered districts, add PO boxes, add zip codes, add allow entities.
1.1.1 Covered Districts
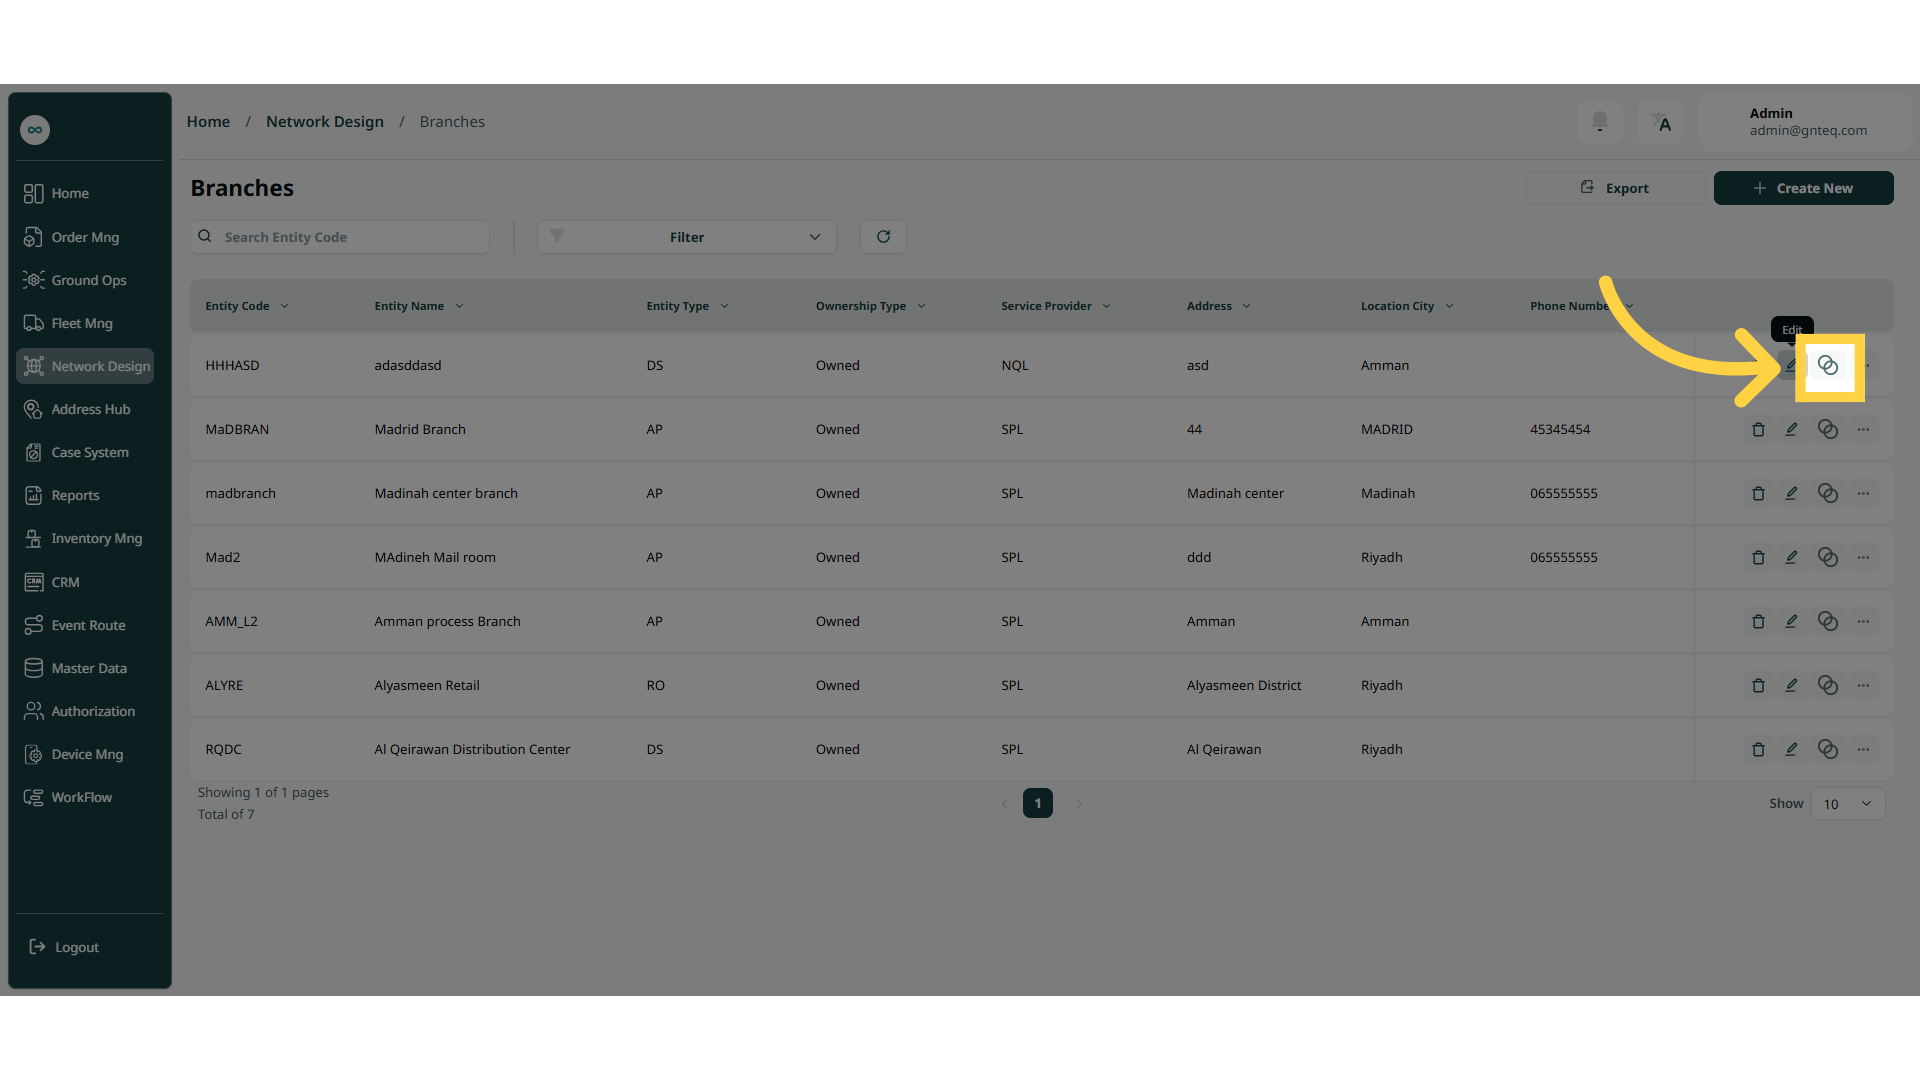
The user can add covered districts to an existing district by navigating to the ‘Branches’ screen via the Network Design Module and clicking on the Covered Districts button:
-
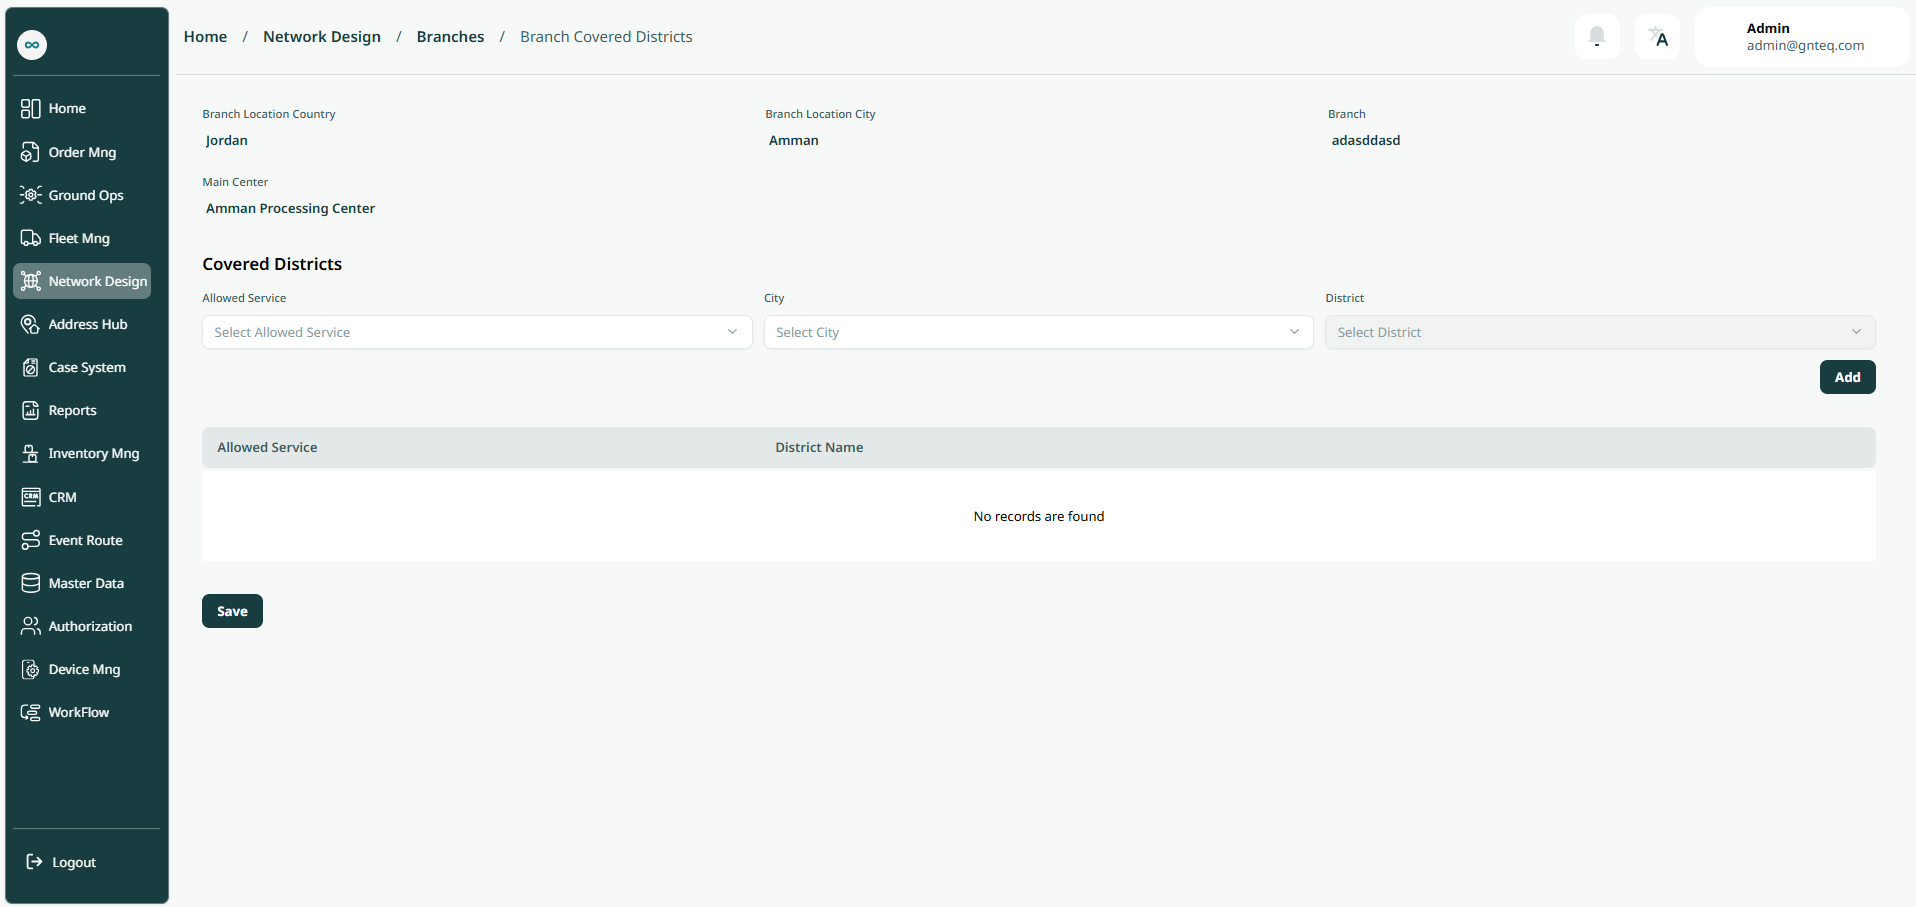
Allowed Services: this field represent the services that allowed in the city.
-
City: this field represent the name of the city.
-
Districts: this field represents the name of the district.
By clicking on Save the covered district will be added successfully.
1.1.2 Edit Information
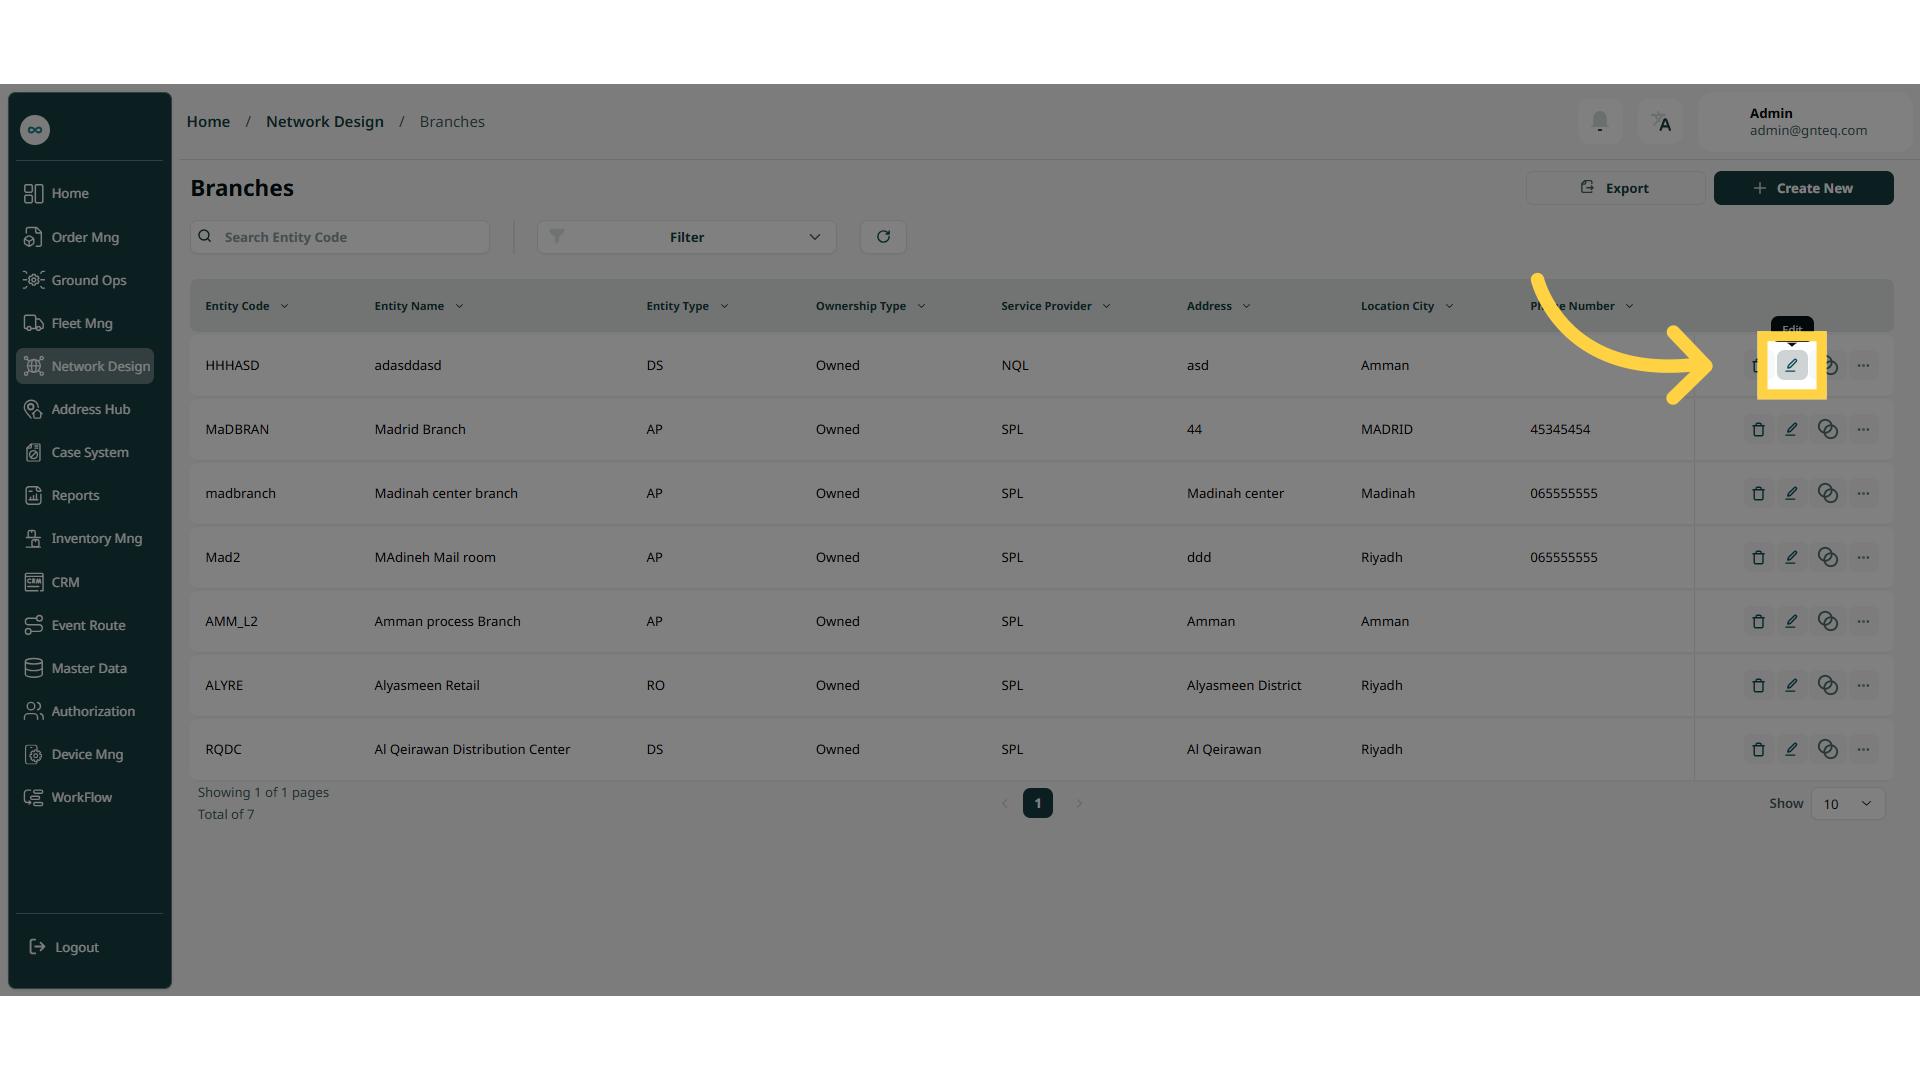
The user can edit information of an existing branch by navigating to the ‘Branches’ screen via the Network Design Module and clicking on Edit Branch button:
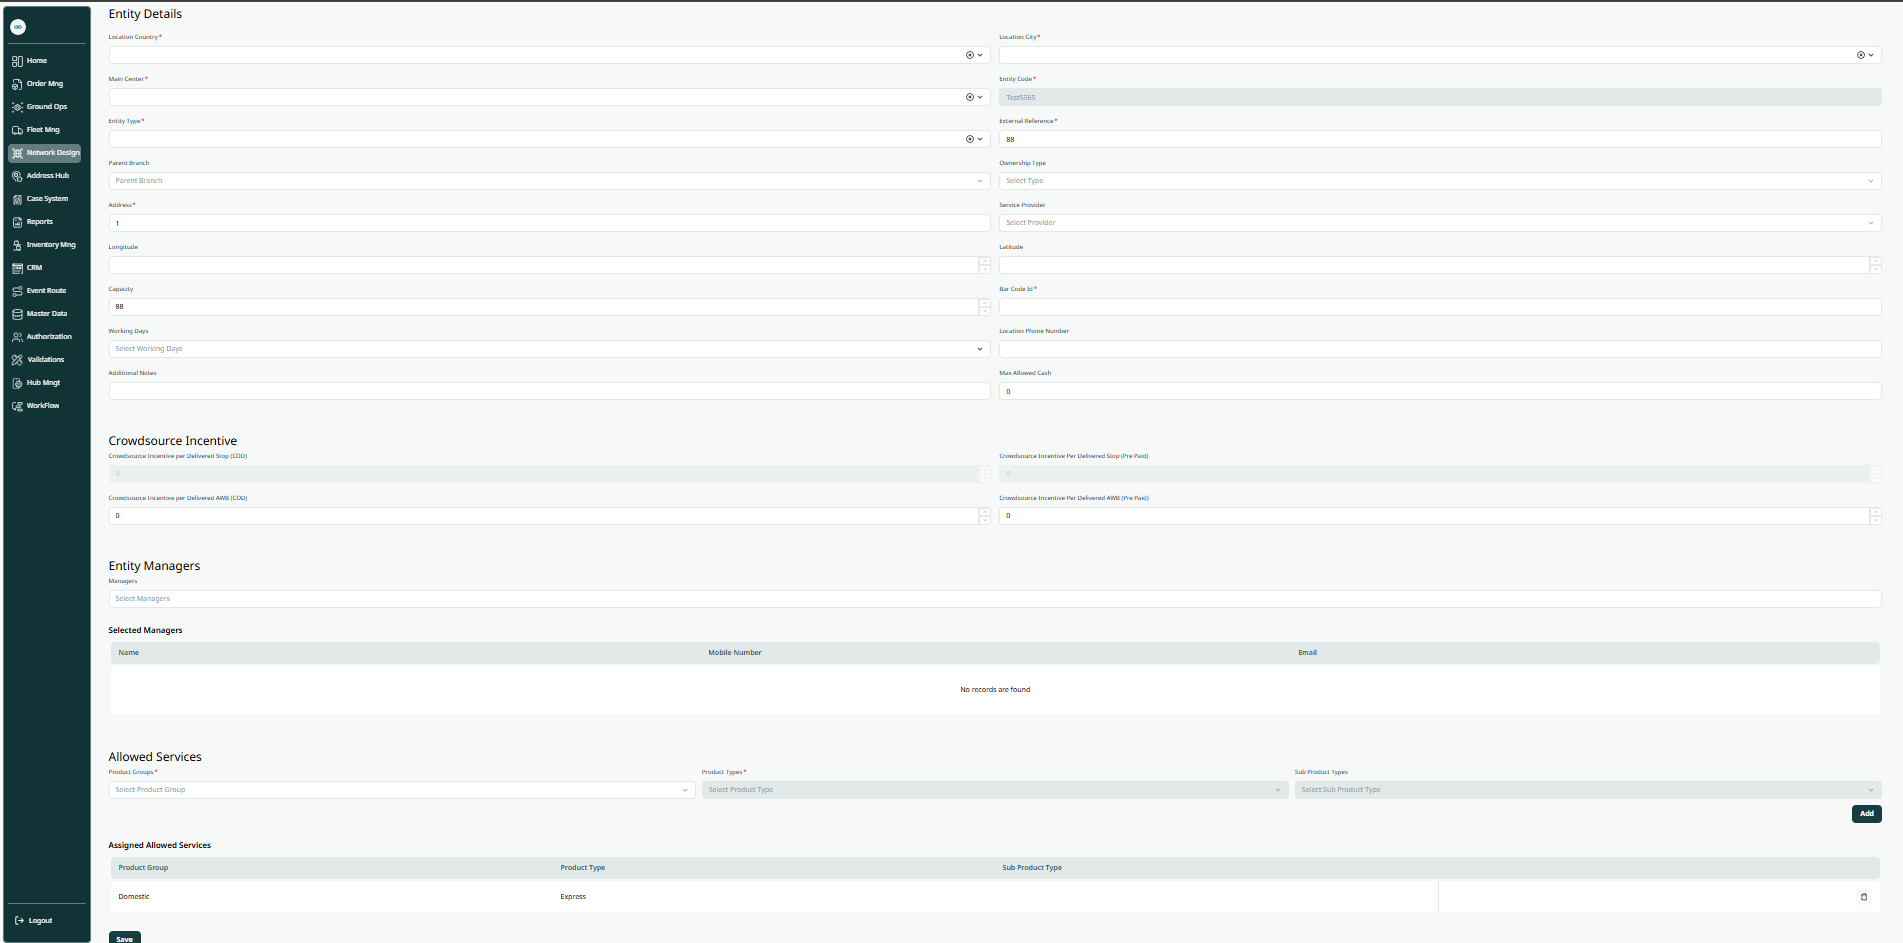
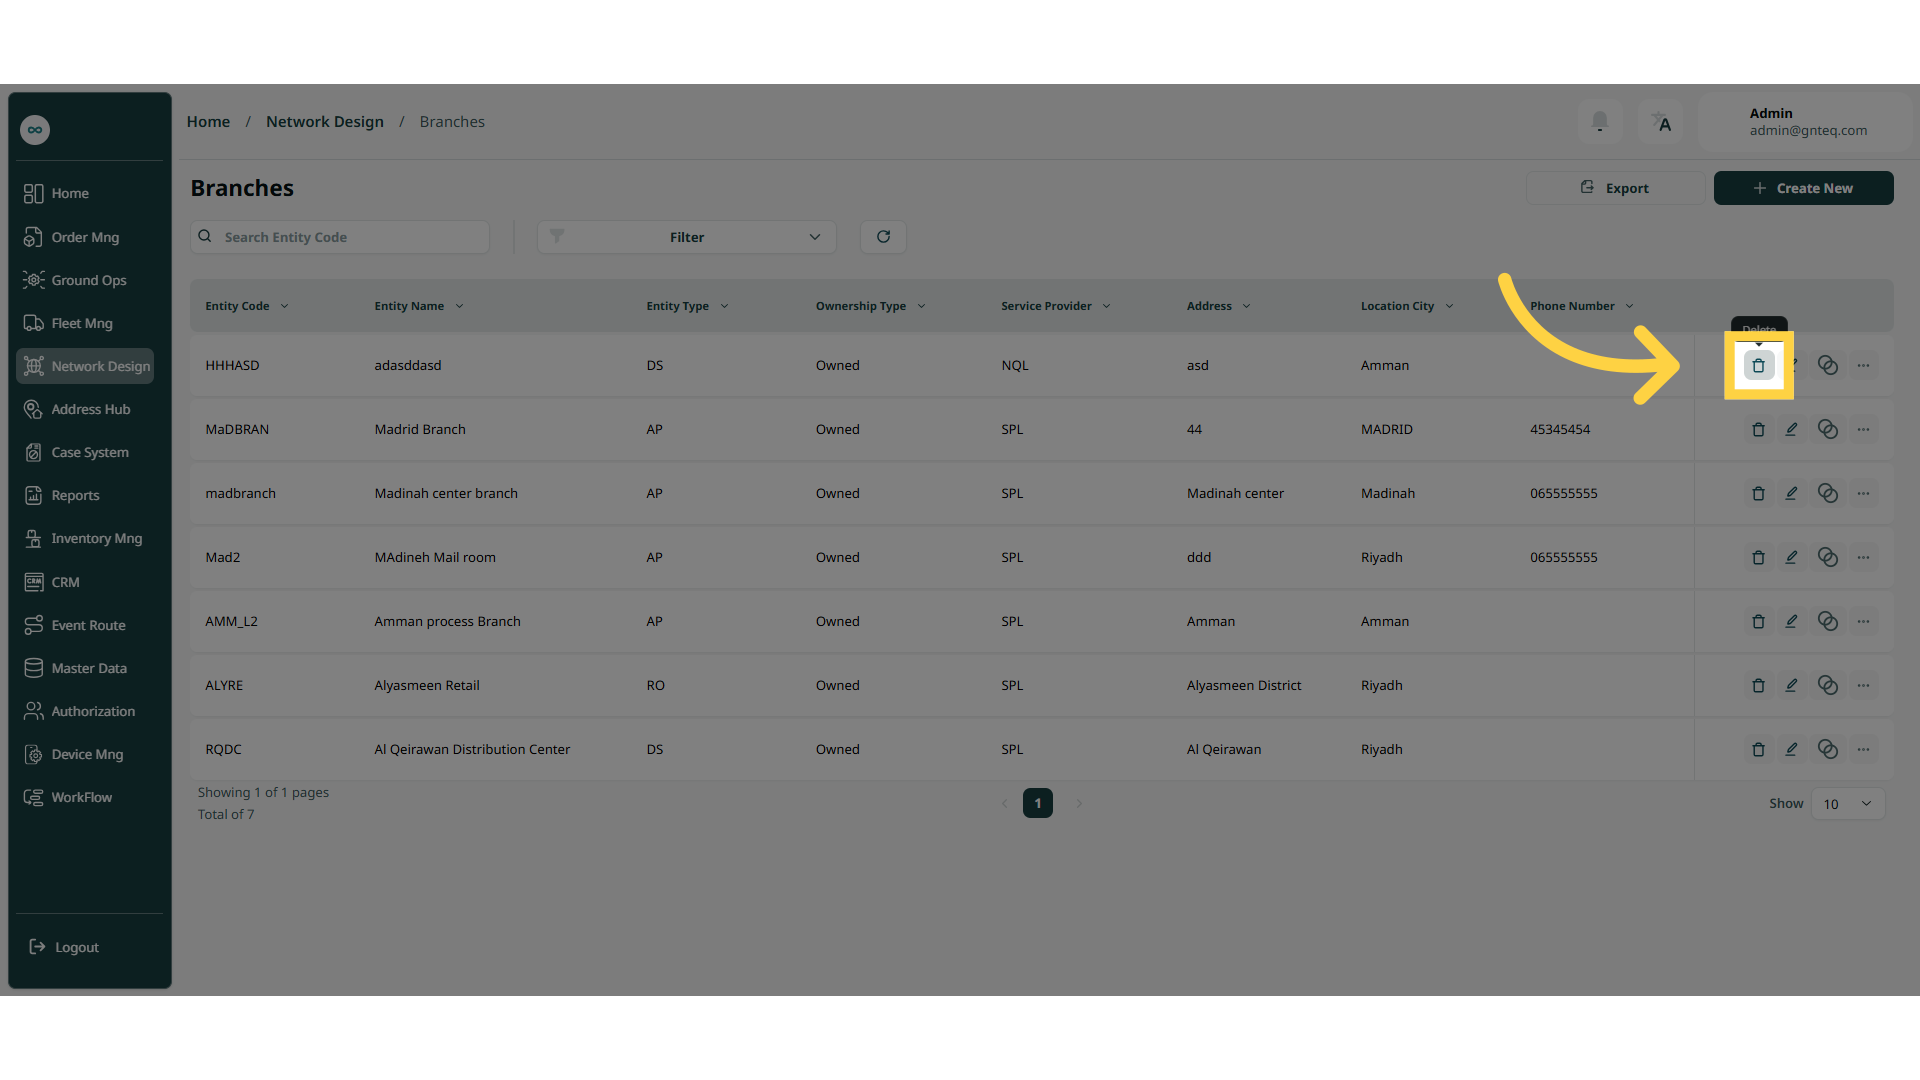
1.1.3 Delete Branch
The user can delete information of an existing branch by navigating to the ‘Branches’ screen via the Network Design Module and clicking on Delete Branch button:
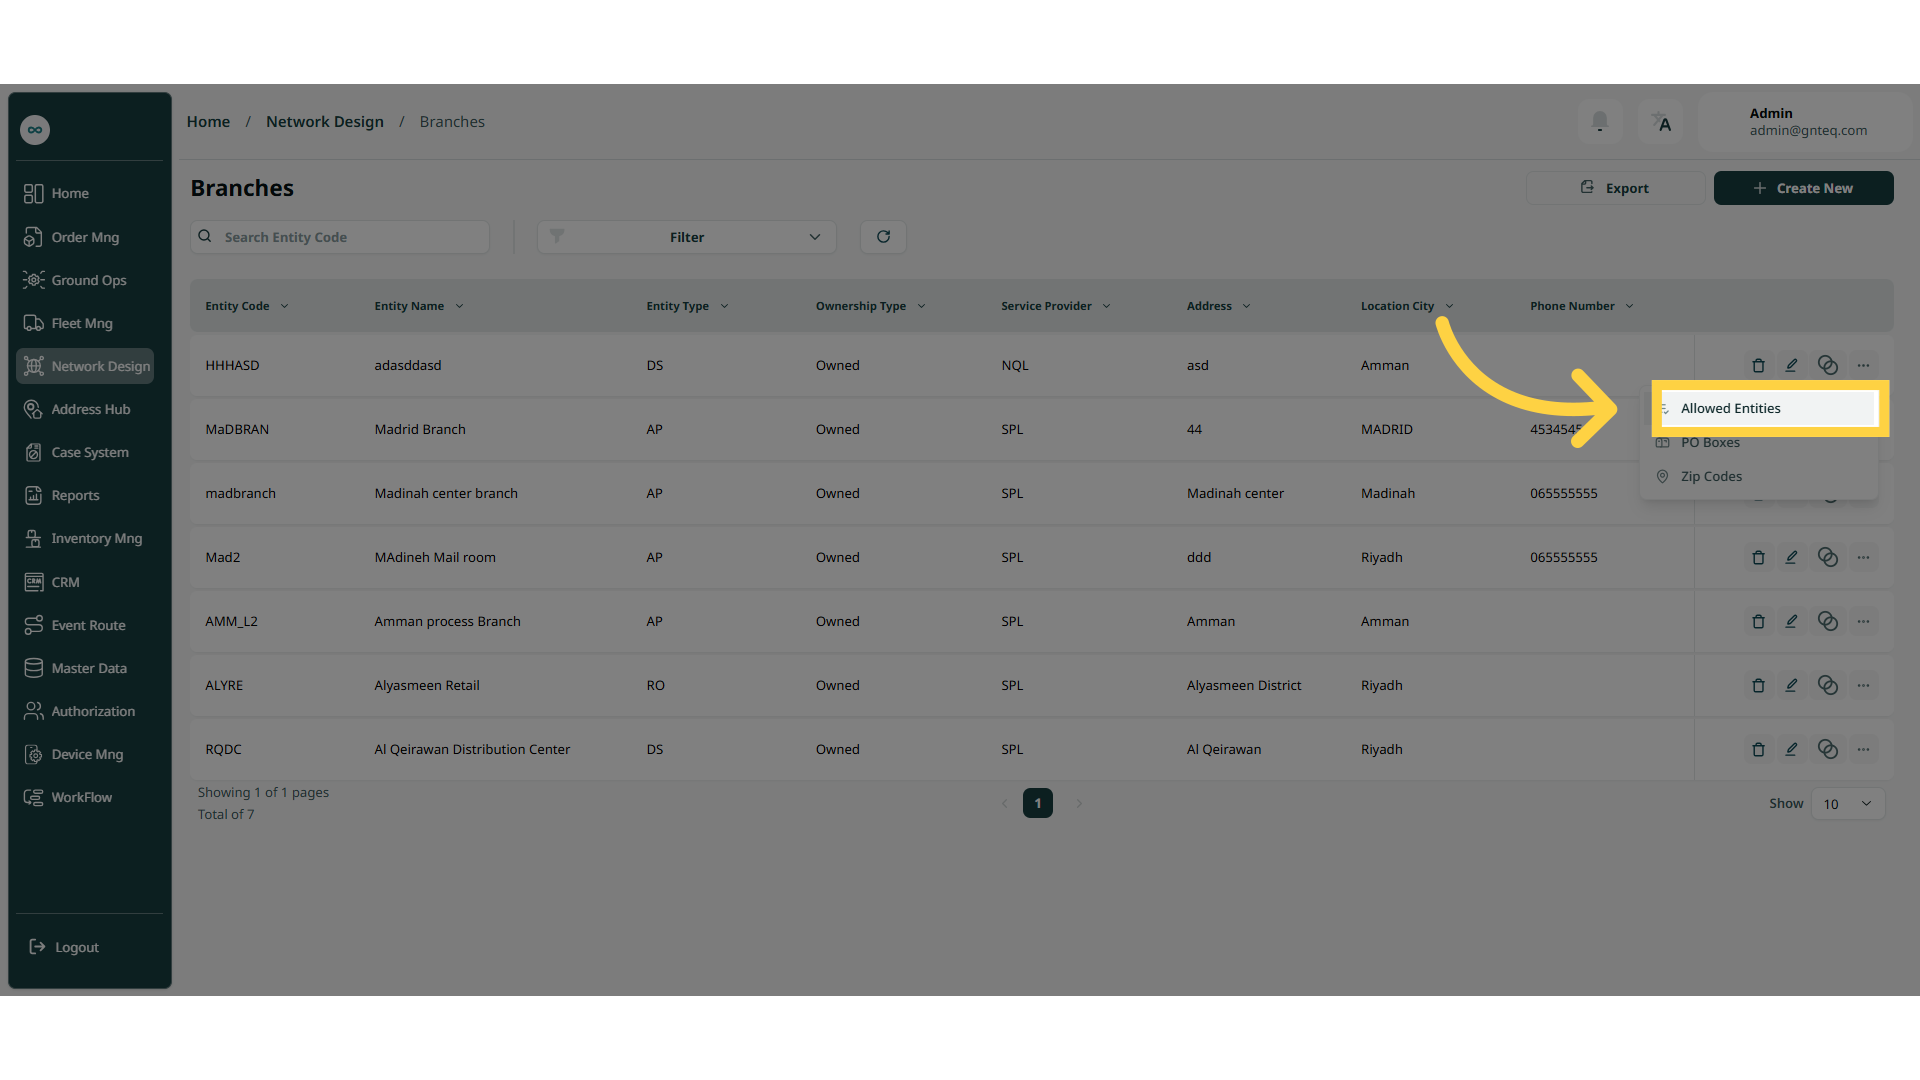
1.1.4 Allowed Entities
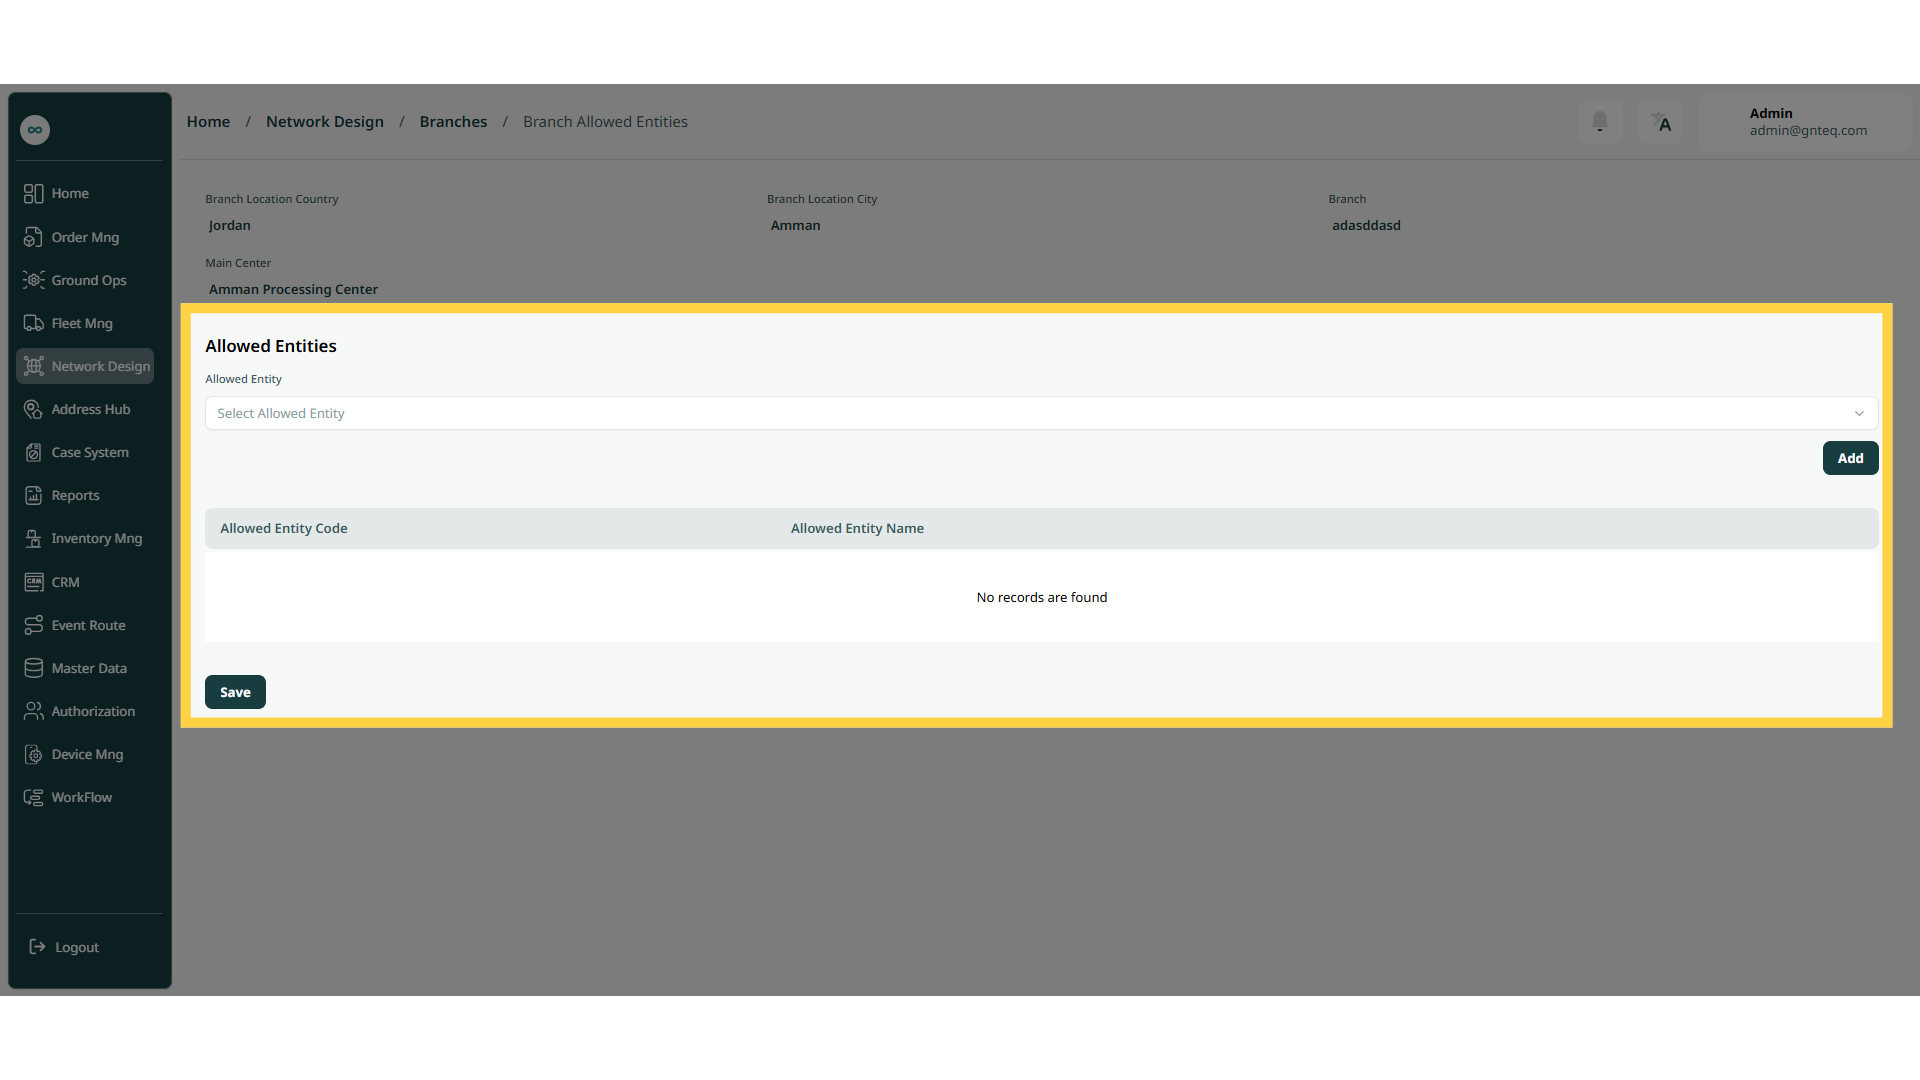
The user can add the allowed entities of an existing branch by navigating to the ‘Branches’ screen via the Network Design Module and clicking on Allowed Entities button:
-
Allowed Entities: this field represent the entities that allowed in the branch.
By clicking on Save the entity will be added successfully.
1.1.5 Covered PO Boxes
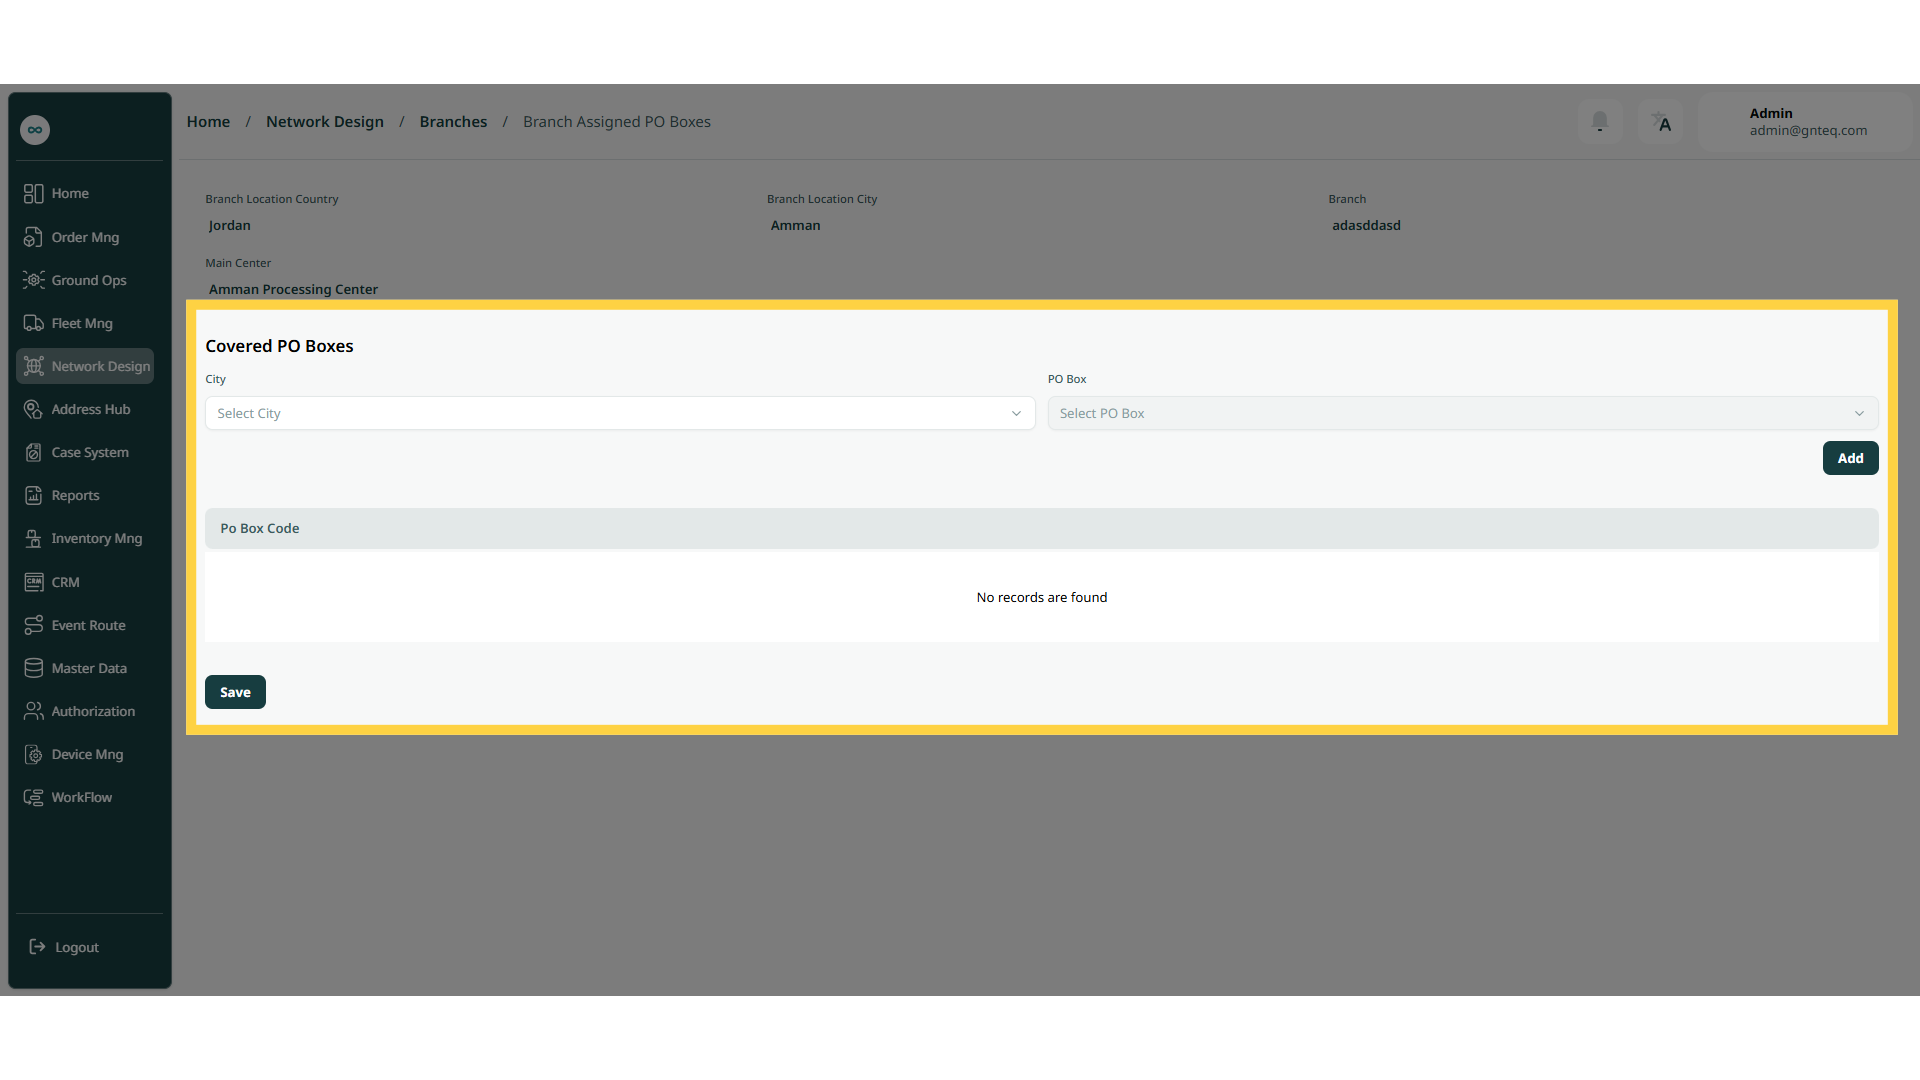
The user can add the covered PO boxes of an existing branch by navigating to the ‘Branches’ screen via the Network Design Module and clicking on PO Boxes button:
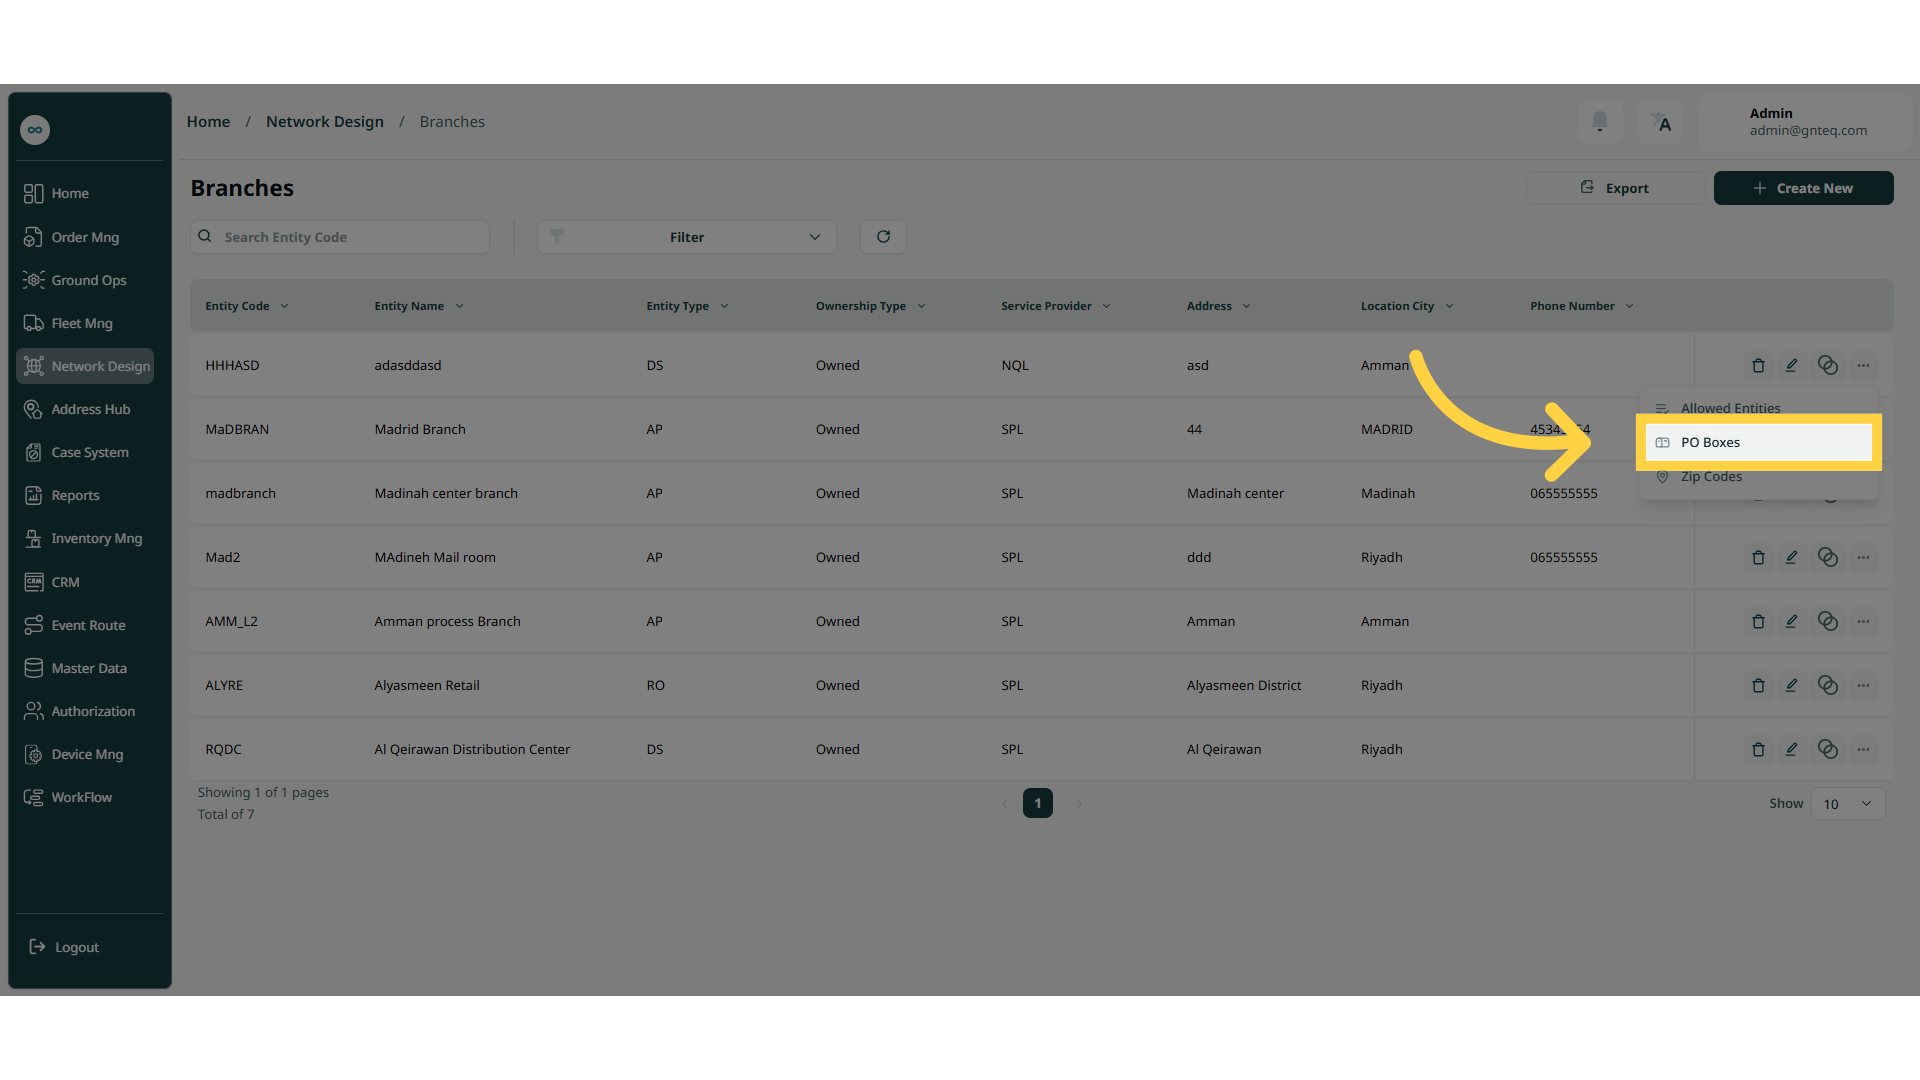
-
City: this field represent the name of the city.
-
PO Box: this field represent the number of the PO box.
By clicking on Save the covered PO box will be added successfully.
1.1.6 Covered Zip Codes
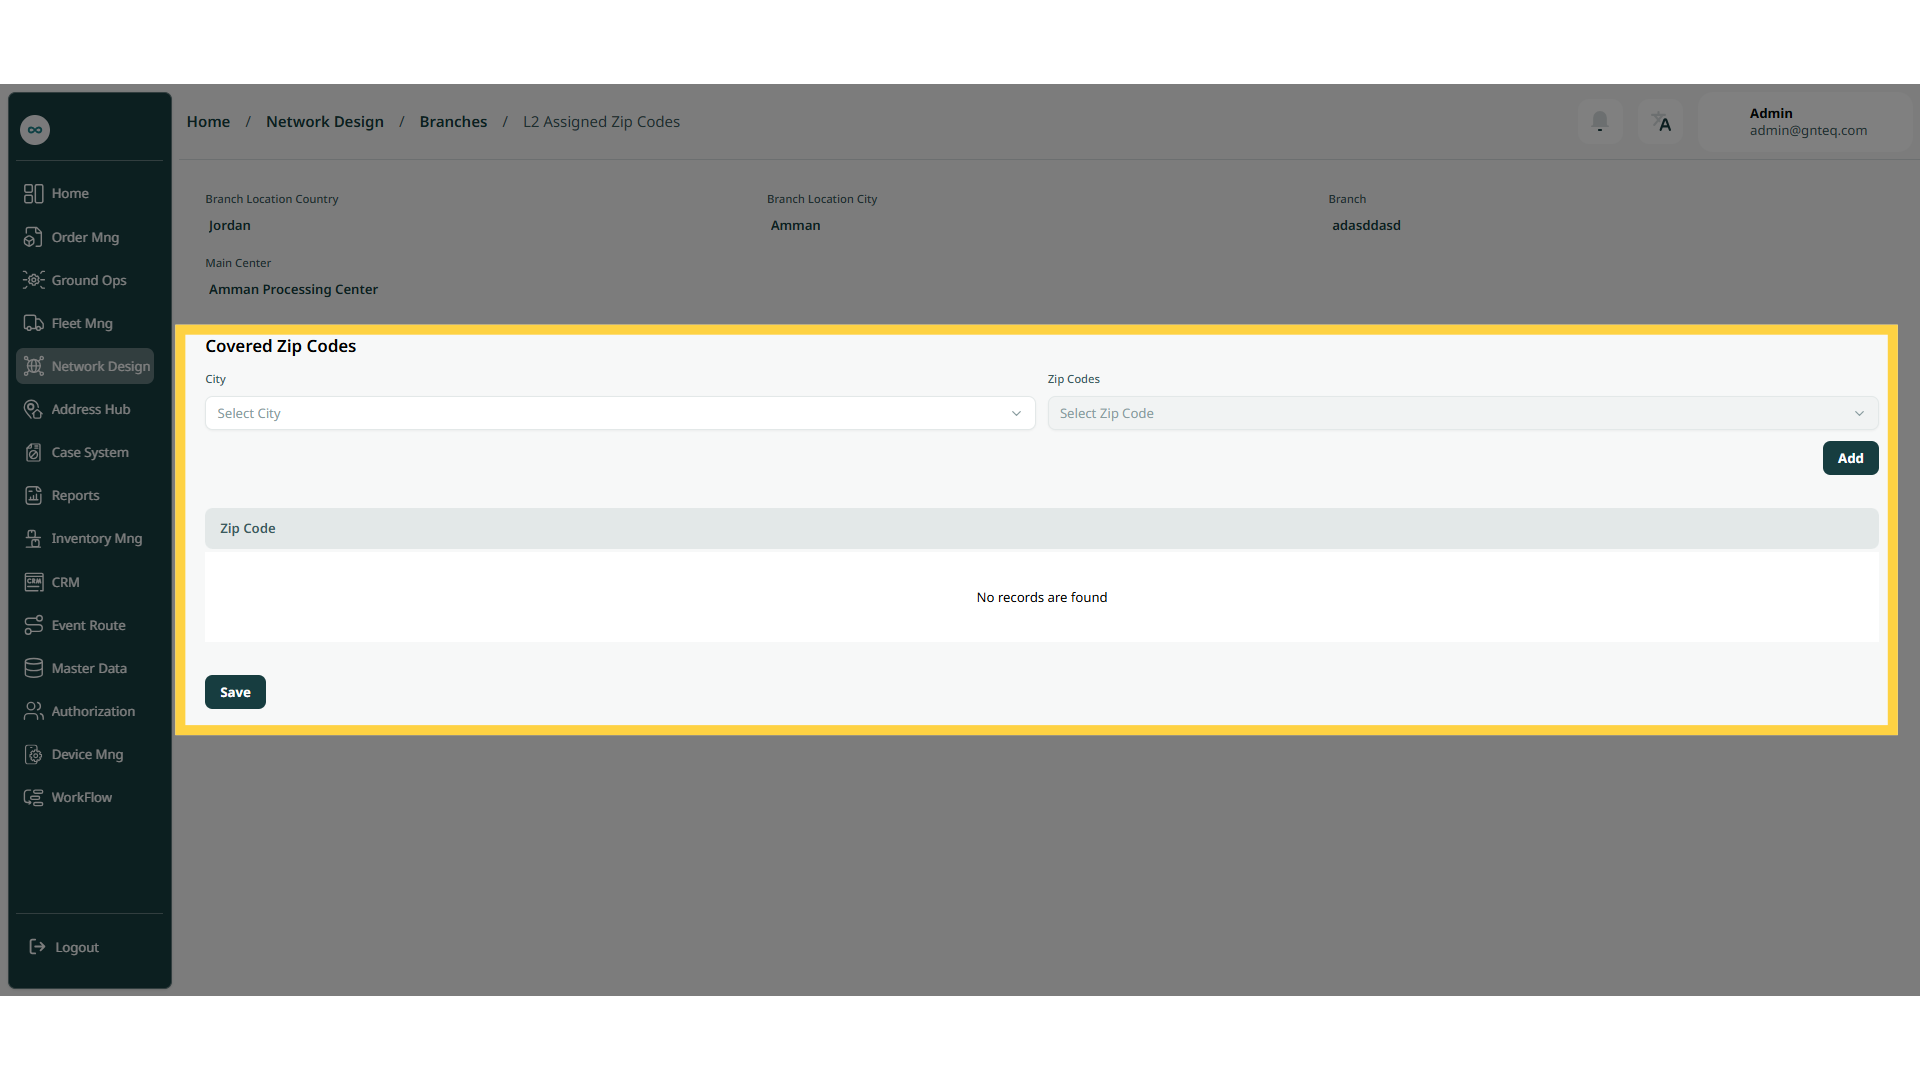
The user can add the covered zip codes of an existing branch by navigating to the ‘Branches’ screen via the Network Design Module and clicking on Zip Codes button:
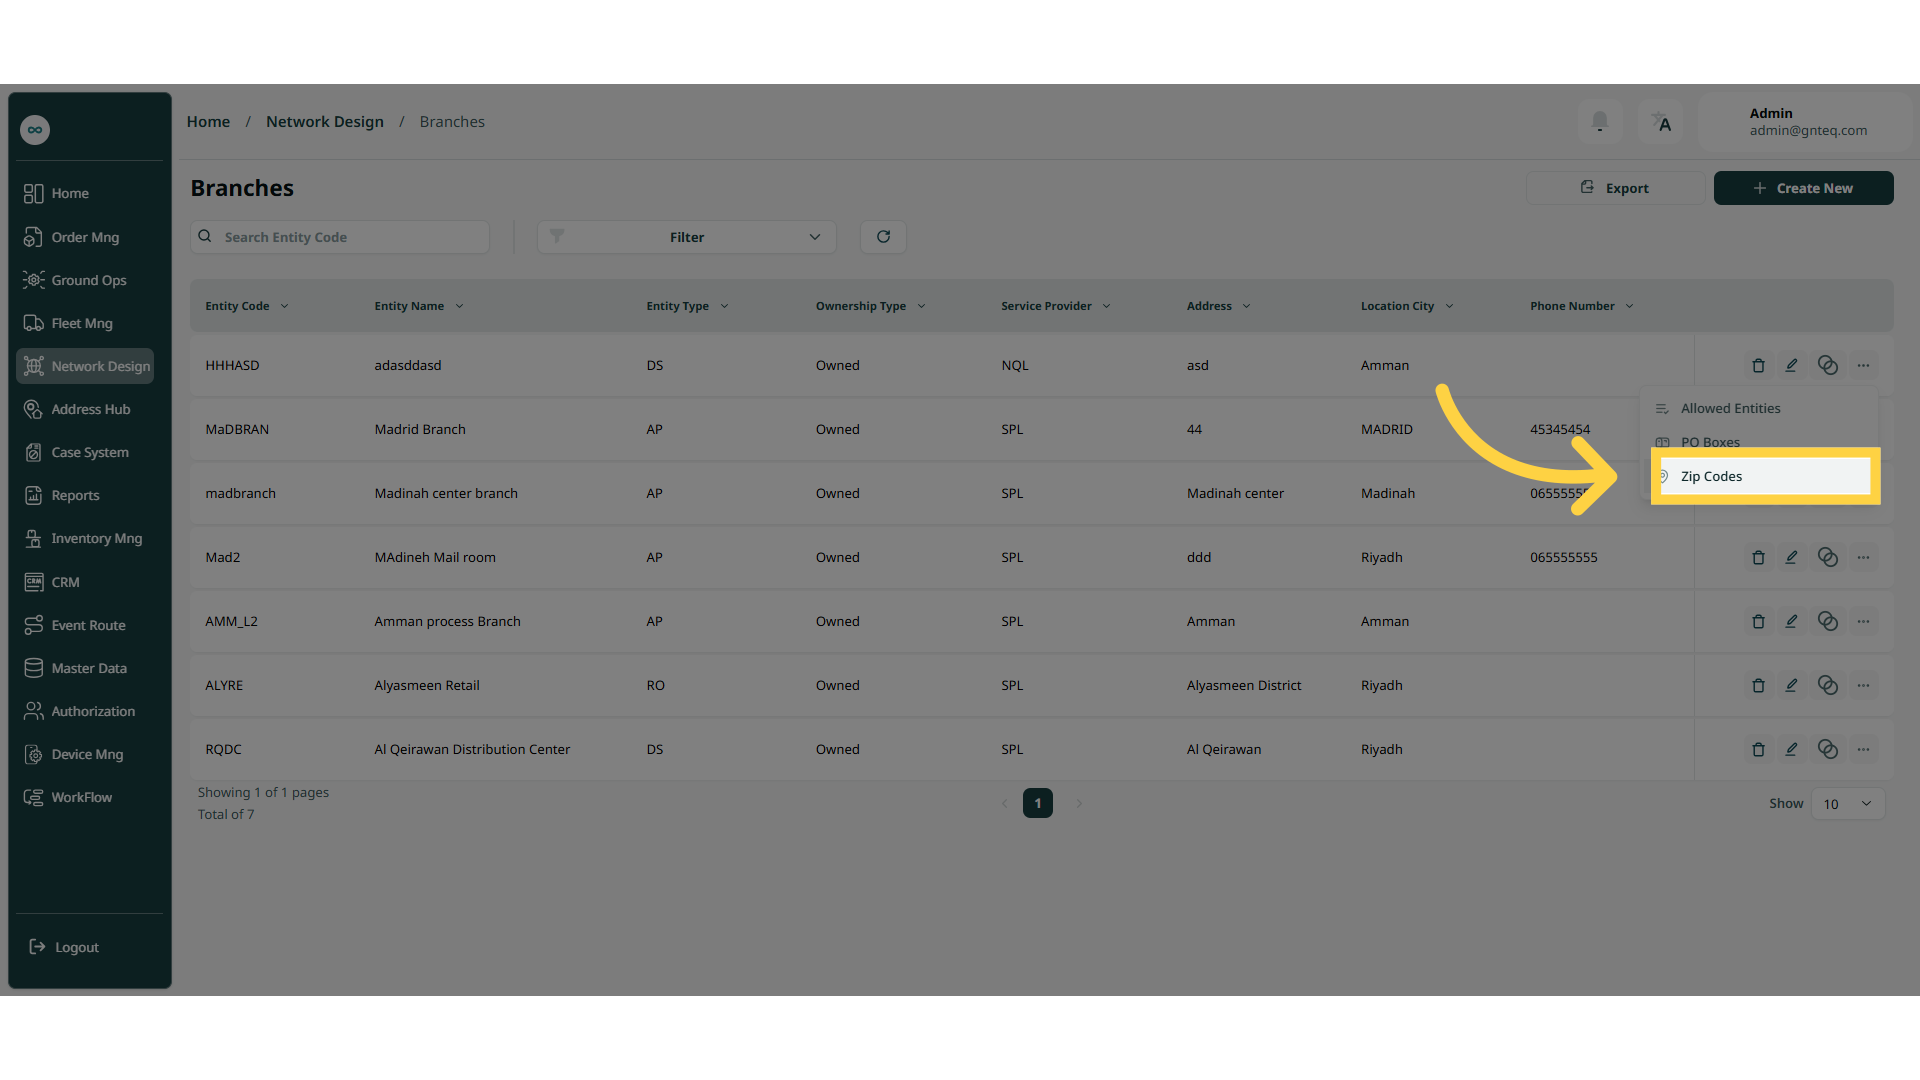
-
City: this field represent the name of the city.
-
Zip Codes: this field represent the number of the zip code
By clicking on Add the zip codes will be added successfully.
By clicking on Save the covered zip codes will be saved successfully.
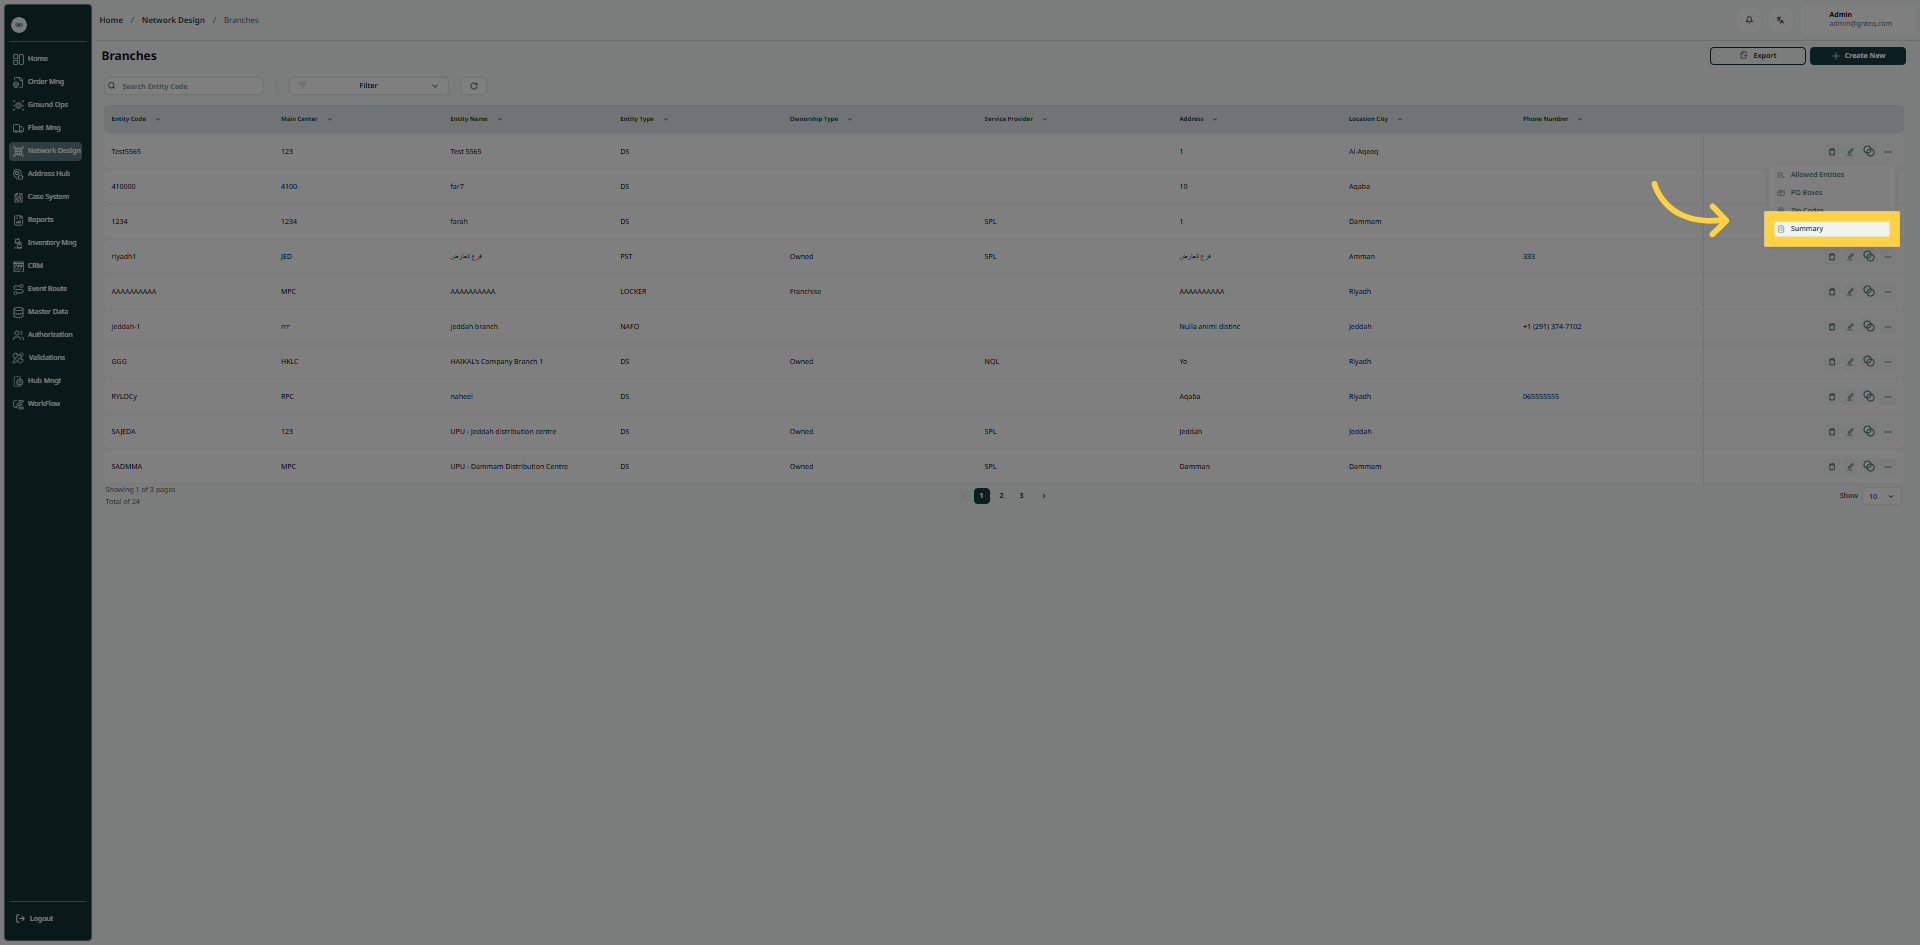
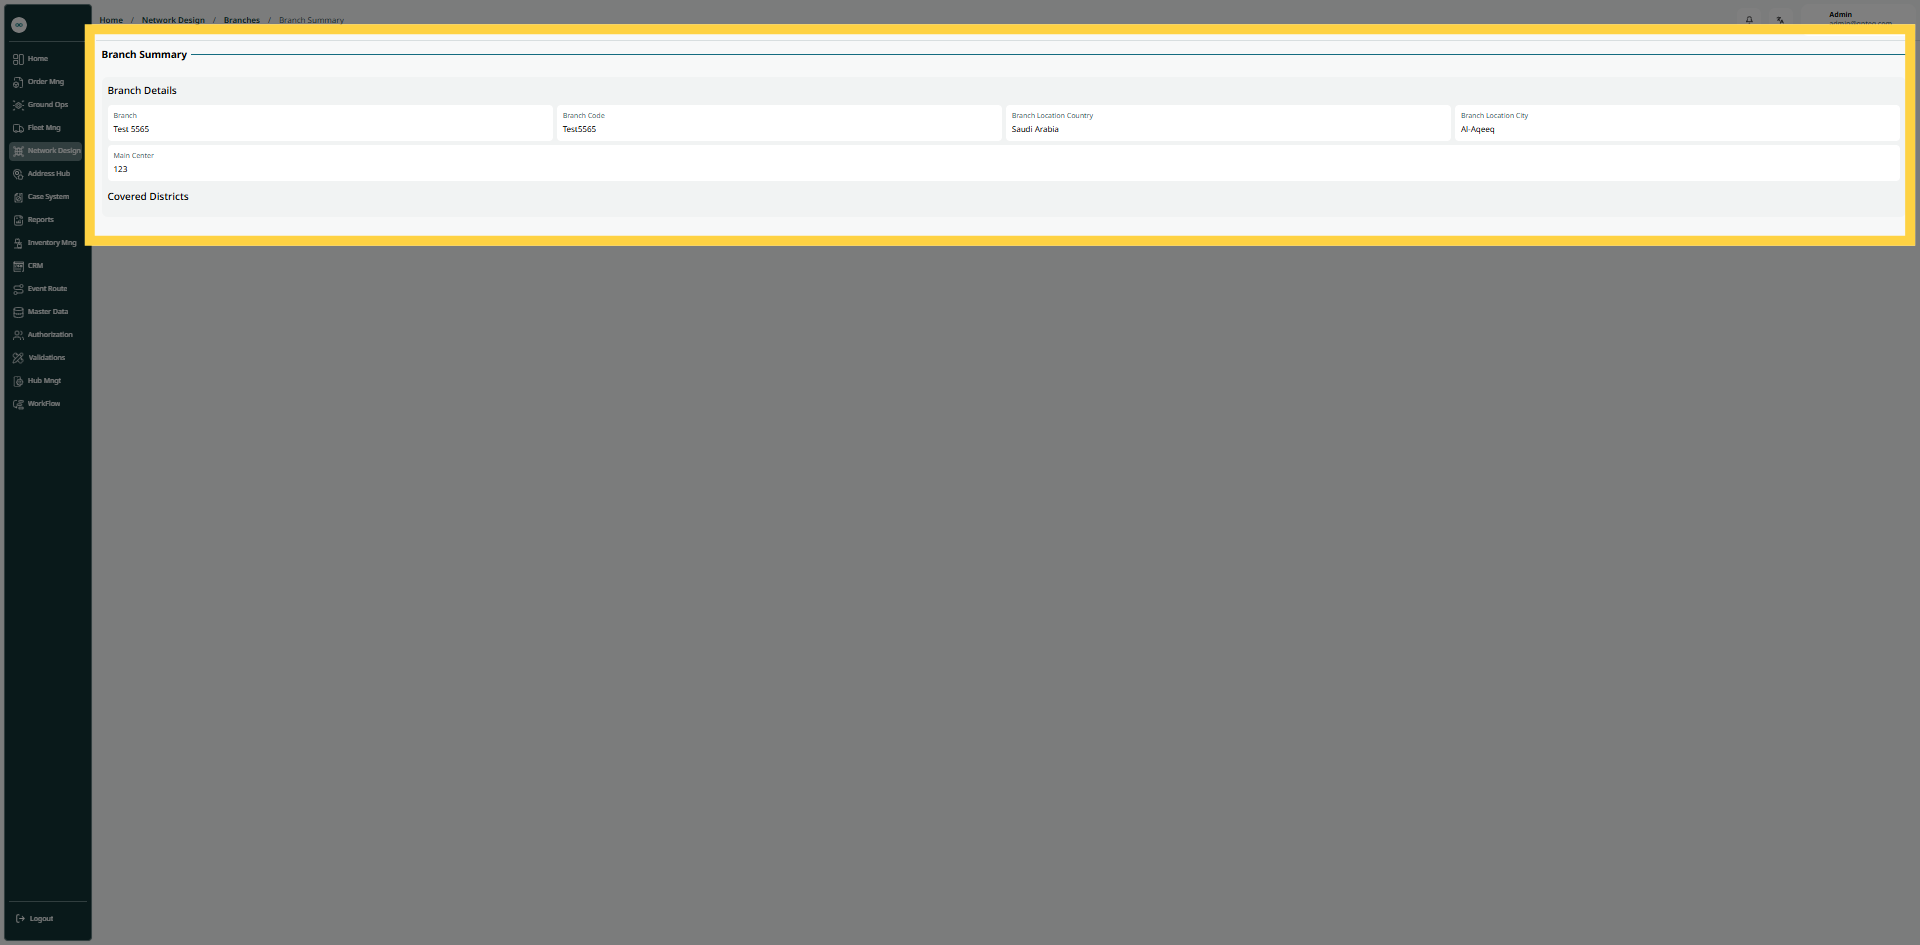
1.1.7 Summary
The user can view summary of existing branch by navigating to the ‘Branches’ screen via the Network Design Module and clicking on Summary button:
1.2 Add New branch
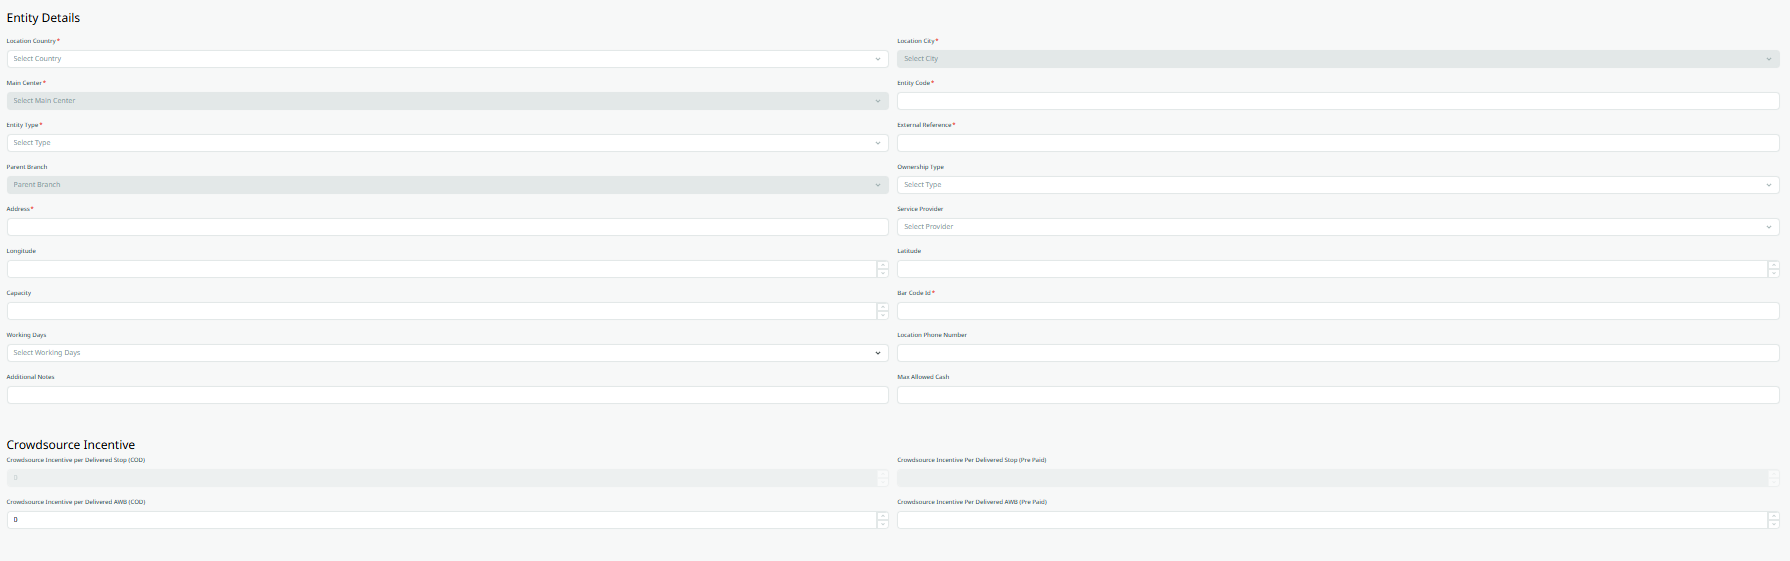
The user can create a branch by going to the “Branches” screen via the Network Design module and clicking on Create New button:
-
Location Country: This field represents the country of the location to be added.
-
Location City: This field represents the city of the location to be added.
-
Main Center: This field represents the main center of the location to be added.
-
Entity Code: This field represents the code of the location to be added.
-
Entity Type: This field represents the type of services the location provides.
-
Ownership Type: This field represents the type of ownership of the location.
-
Addresses: This field represents the addresses saved in the system.
-
Service Provider: This field represents the service provider.
-
Longitude: This field represents the longitude of the address to locate.
-
Latitude: This field represents the latitude of the address to locate.
-
Capacity: This field represents the quantity that can be received.
-
Bar code ID: this field represents the branch bar code.
-
Working Days: This field represents the number of working days.
-
Crowdsource Incentive per Delivered Stop (COD): This field represents the collaborator's fee for each delivered shipment.
-
Crowdsource Incentive Per Delivered Stop (Pre Paid): This field represents the collaborator's fee for a successful delivery point.
-
Location Phone Number: This field represents the site's phone number.
-
Additional Notes: This field represents additional notes about the site.
-
Maximum Cash Allowed: This field represents the maximum cash limit.
-
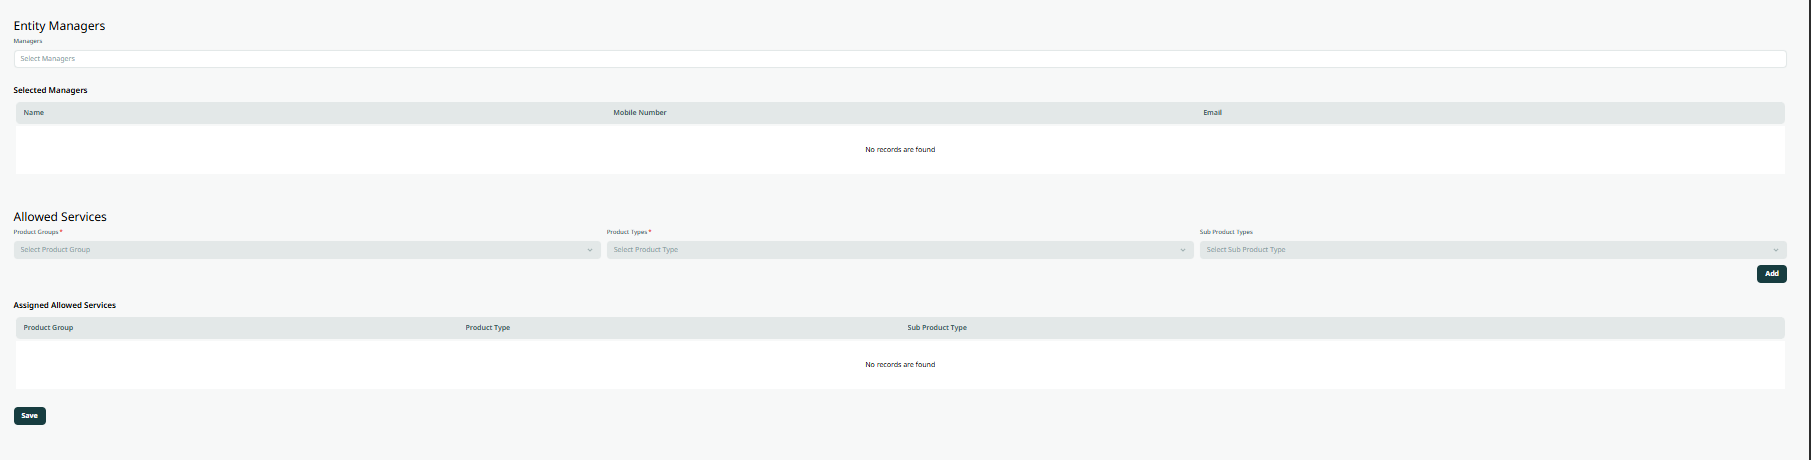
Managers: This field represents the developer's name and the location.
-
Product Group: This field represents a delivery service (local, Irish).
-
Product Types: This field represents the type of delivery service, such as home appliance delivery, office delivery, direct delivery, etc.
-
Sub Product Type: This field represents the direct service type (banks, official documents, etc.).
By clicking on Add, the allowed services will be added successfully.
By Clicking on Save, the branch will be added successfully to the system.