.png)
1. Collections
1.1 Dashboard
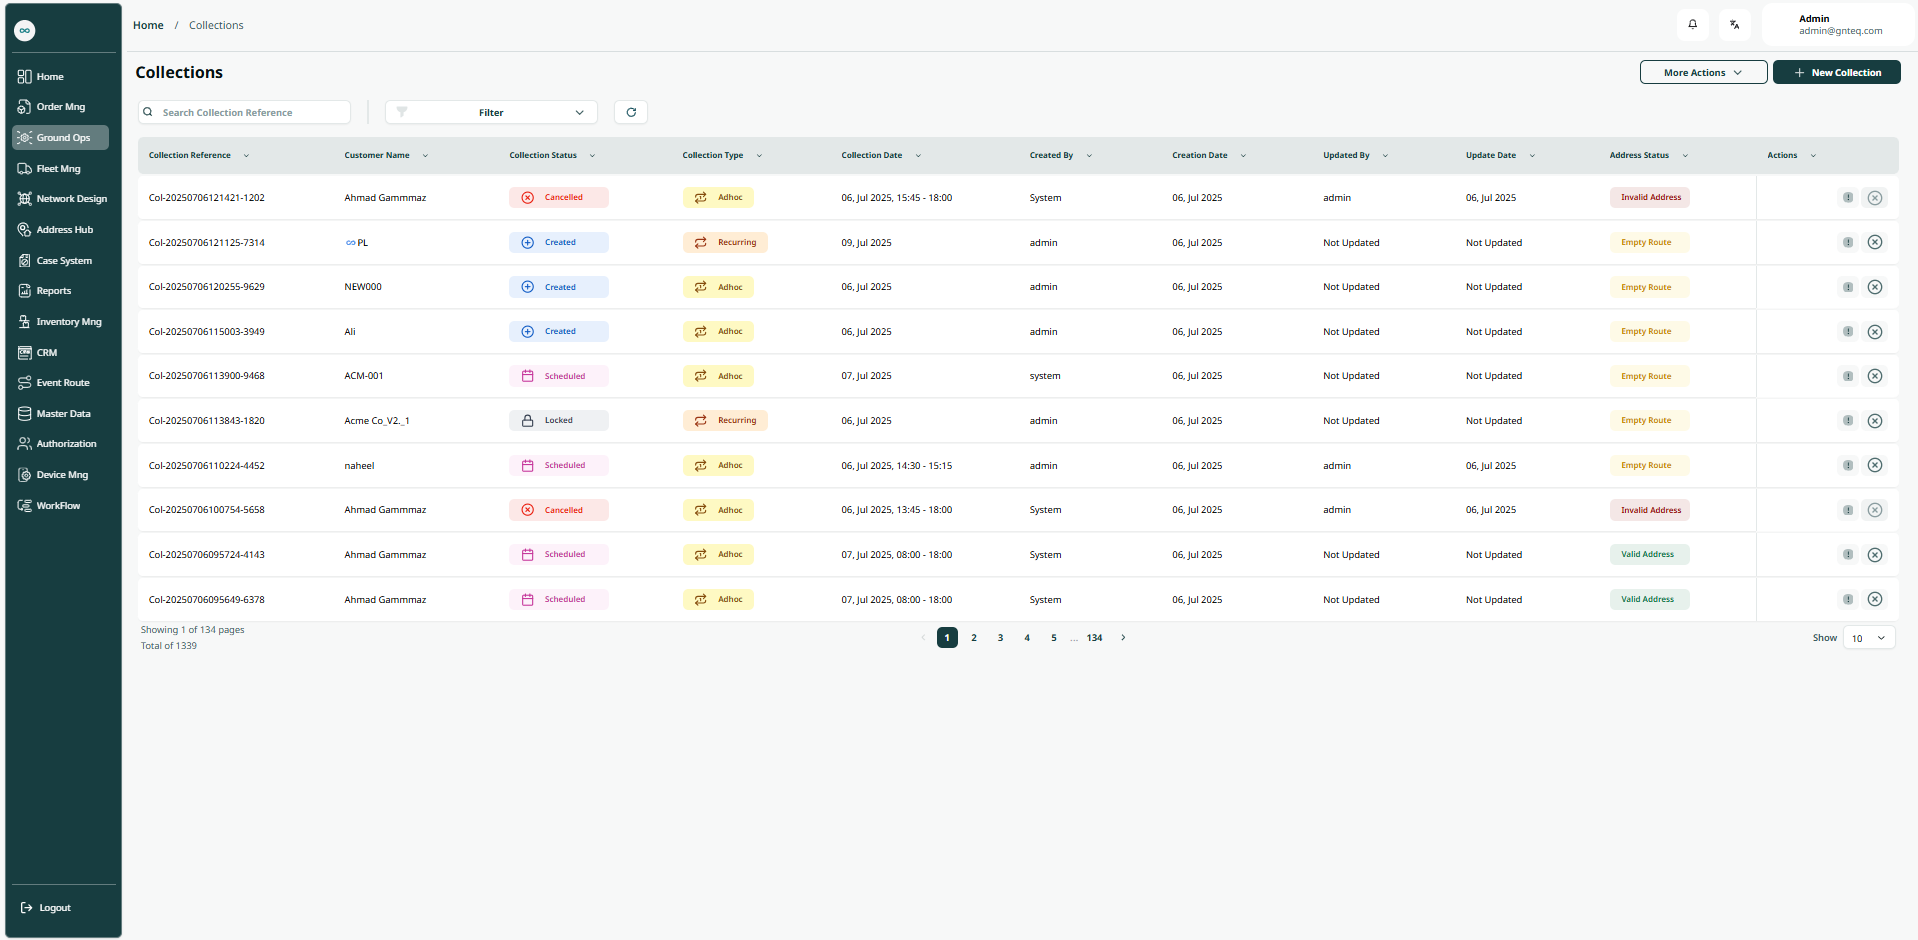
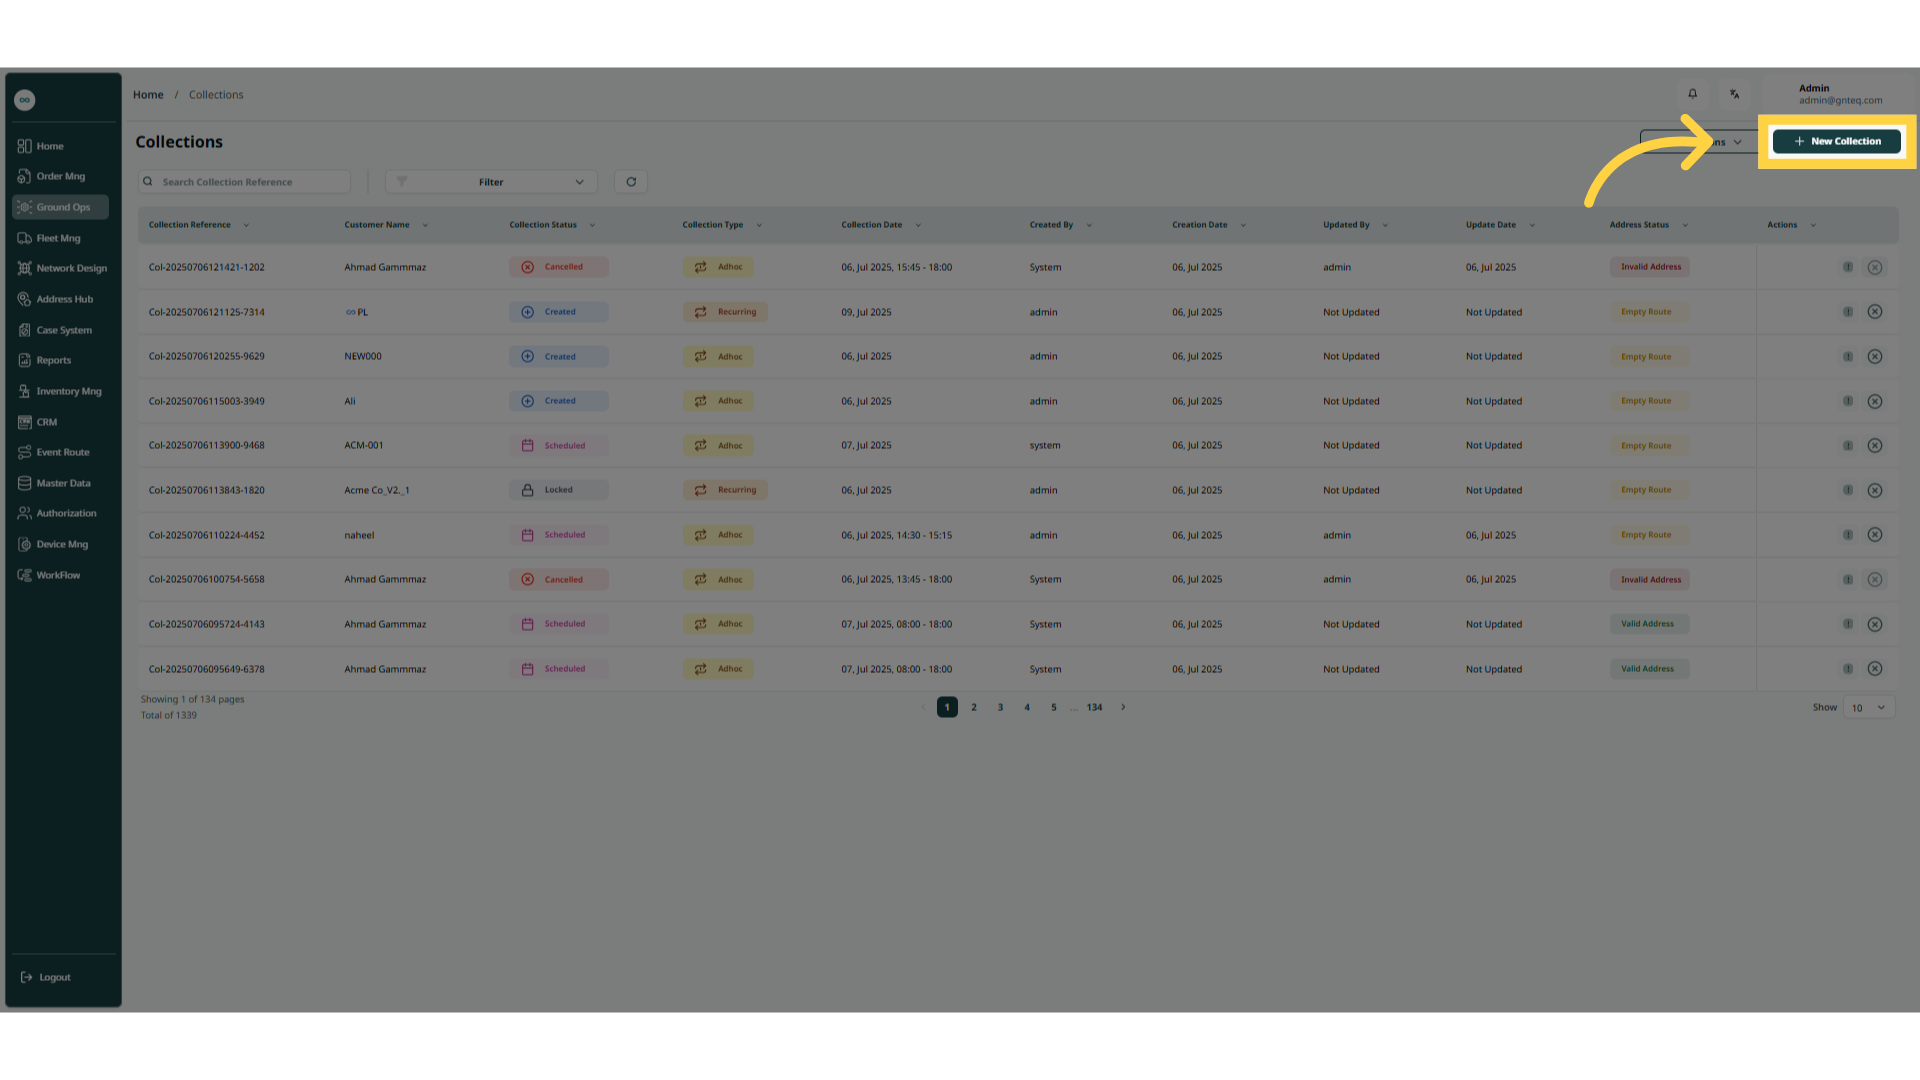
The user can view their defined collections in the system by navigating to the ‘Collections’ screen in the Operations module from the left navigation panel as follows:
-
New Collection: the user can create new collection by clicking on ‘New Collection'.
-
Add Multiple Events: the user can add multiple events by clicking on More Actions.
-
Export Collections: the user can export the list as an Excel file by clicking on More Actions
-
Import Collections: the user can upload the list as an Excel file by clicking on More Actions
-
Download Template: the user can download the empty Excel template for bulk upload clicking on More Actions.
-
Filter: the user can search for the collection by customer name, address validations, collection date,…….etc.
-
Rows Per Page: the user can select the number of items to show on each page.
-
Actions: by clicking on this button the user can edit, delete.
1.1.1 View Details
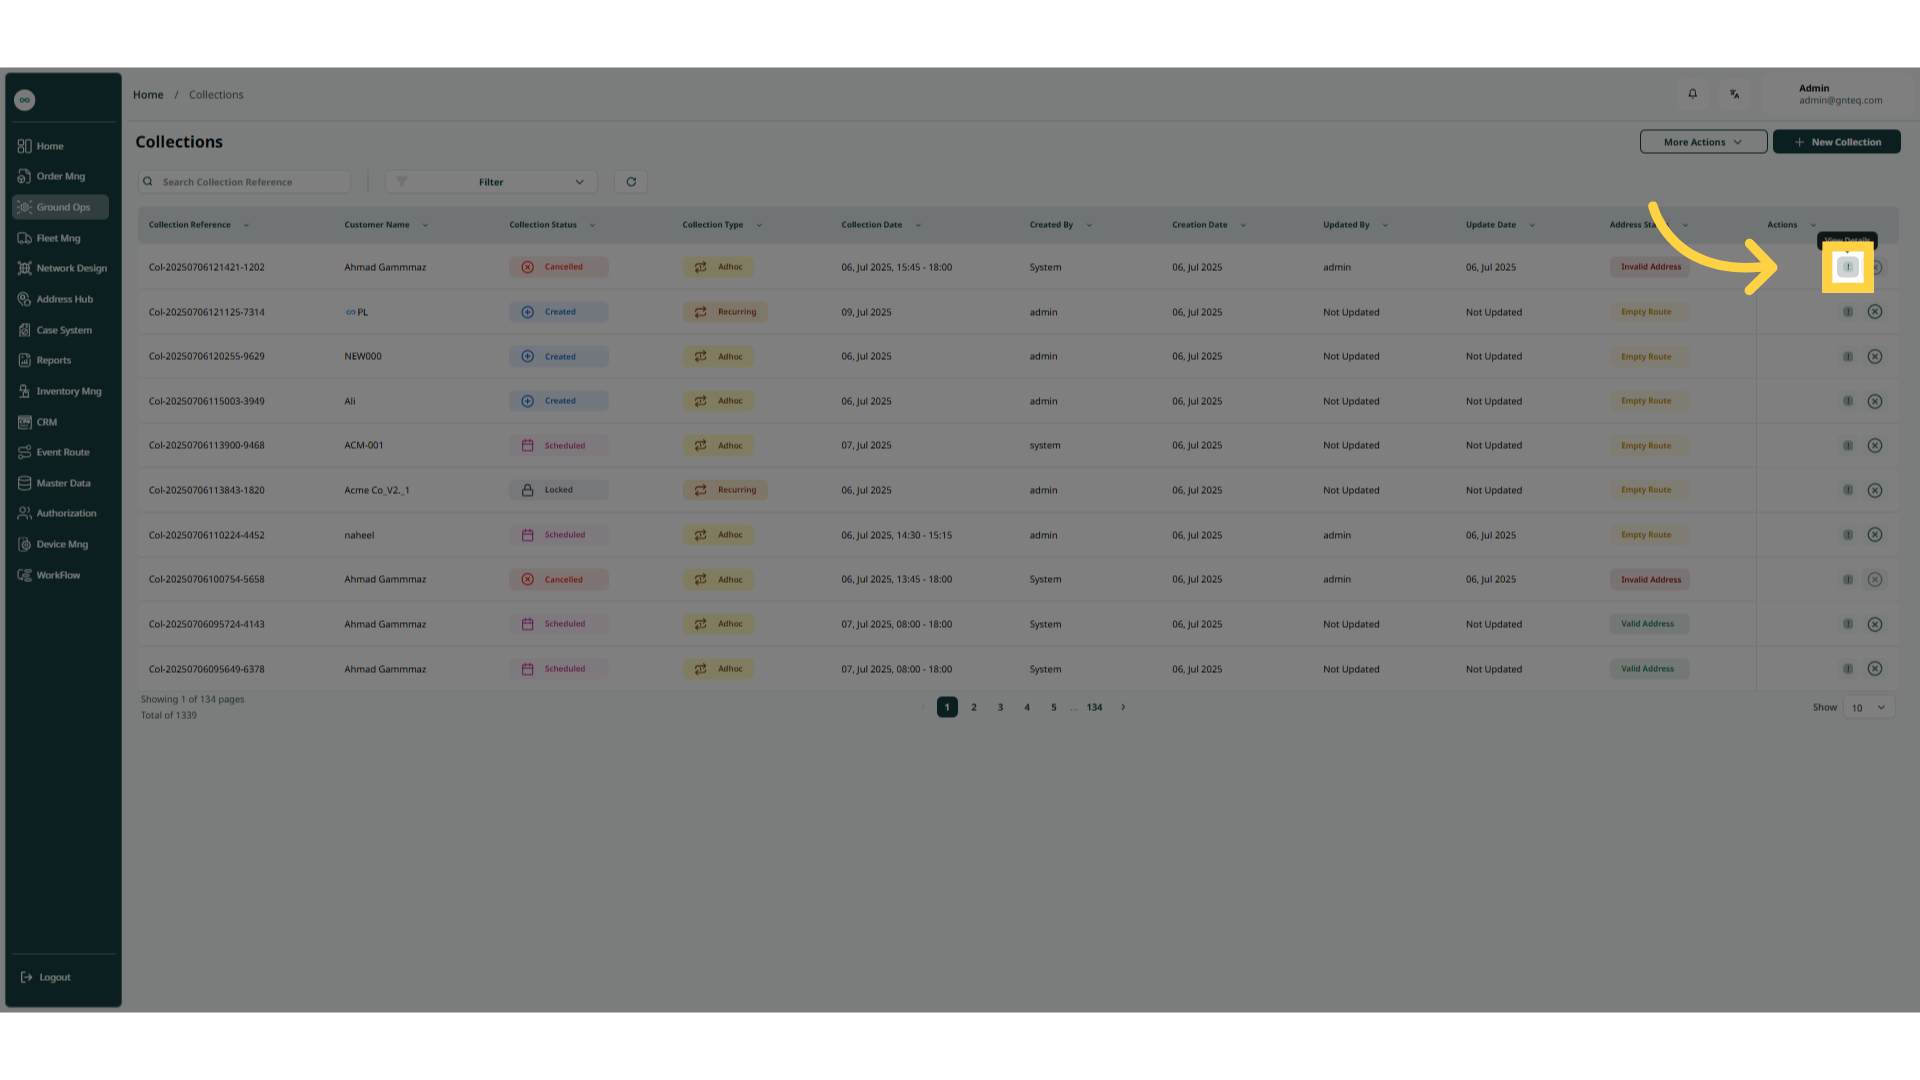
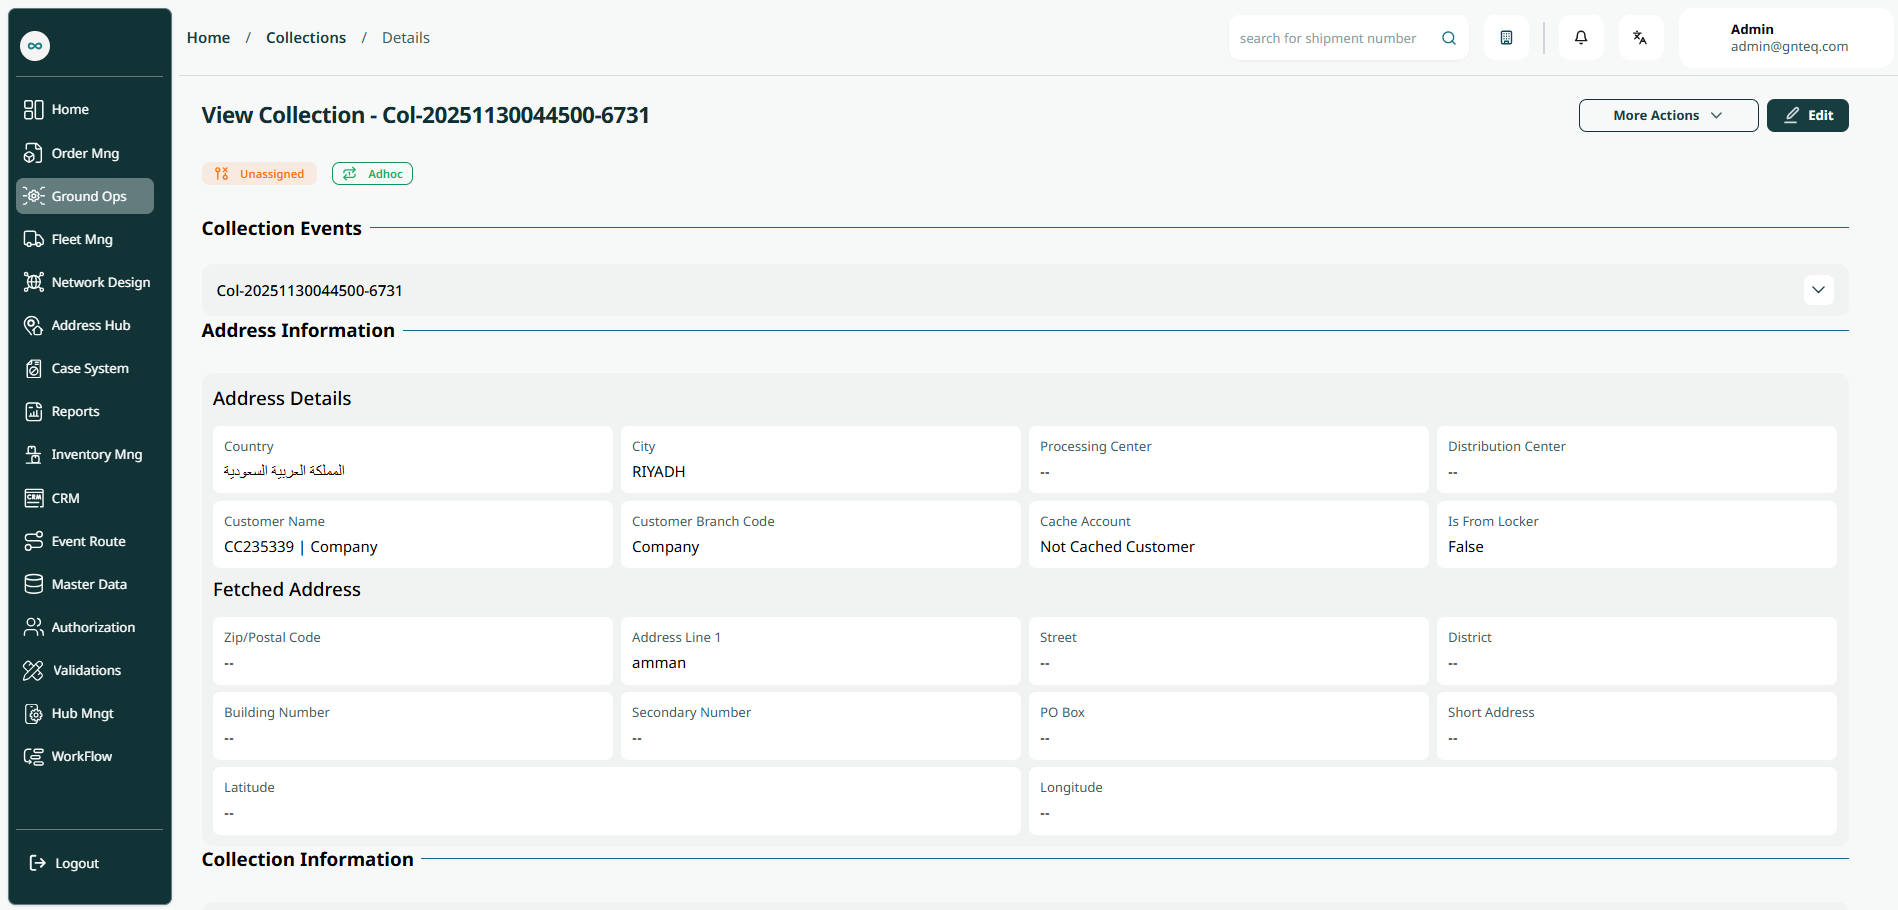
The user can view the details of collection by navigating to ‘Dashboard’ Screen via Operations module and clicking on Edit Collection from Actions as follows:
1.1.1.1 More Actions
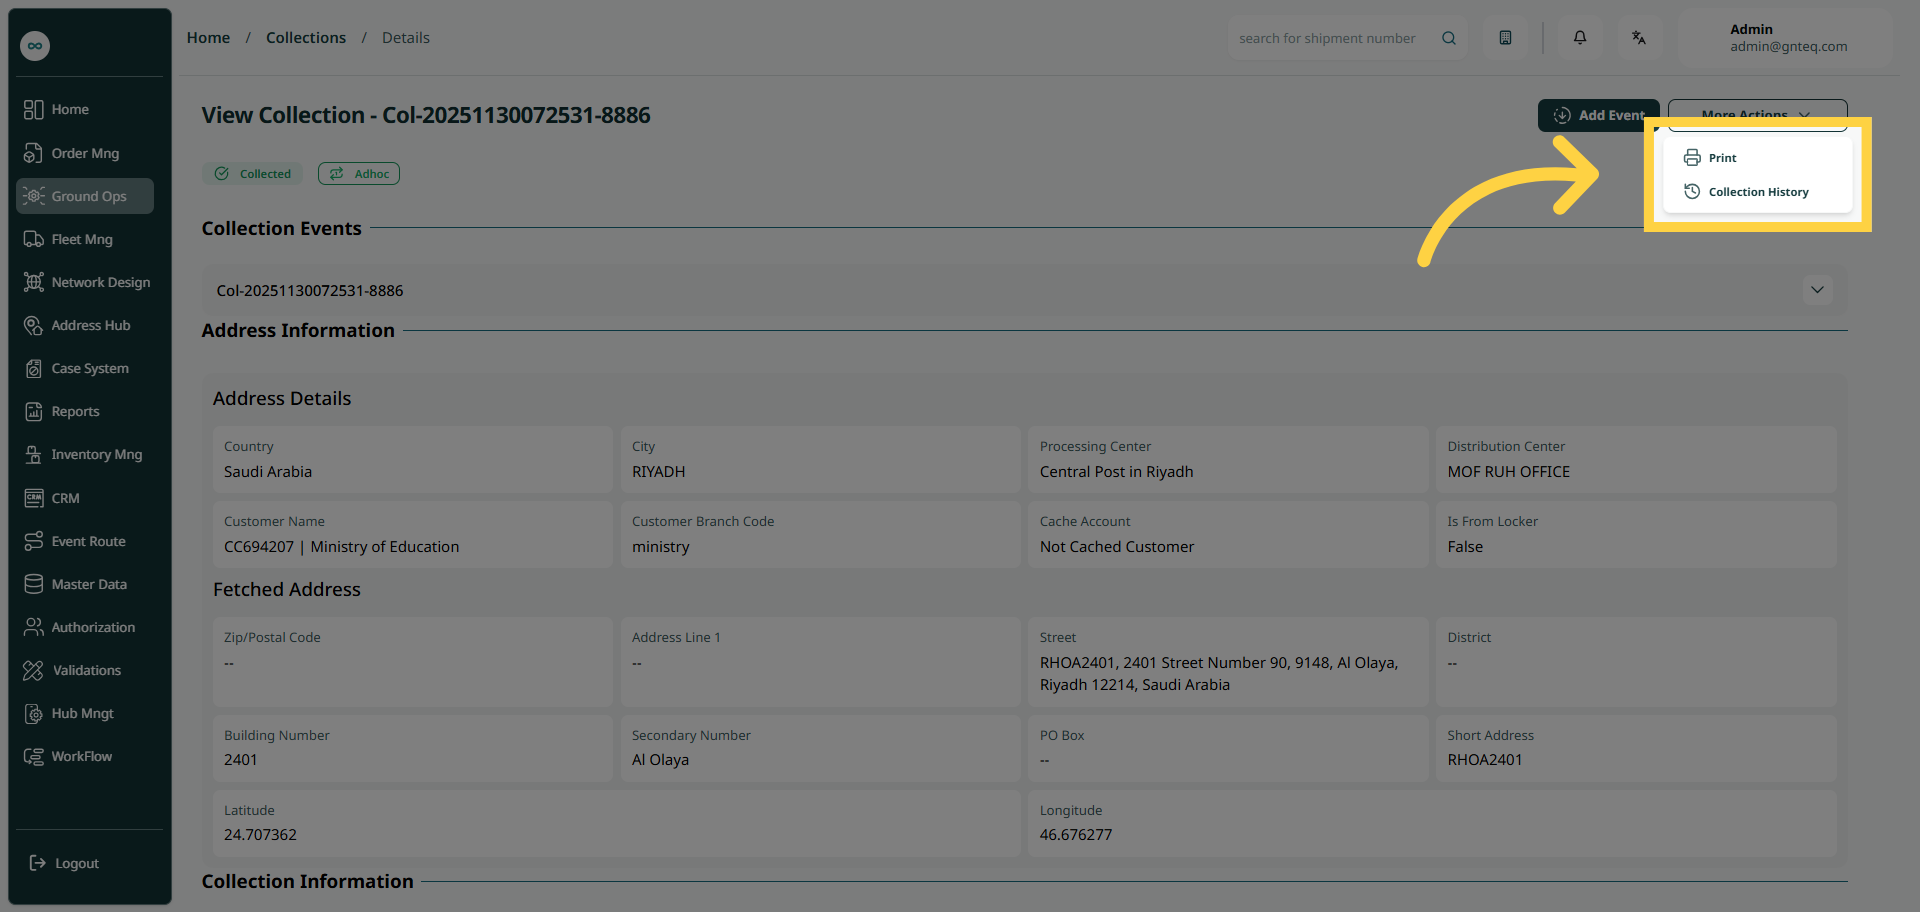
The user can print the label, collection record, and view the shipment history by going to the "Collections" screen via the Operations module, clicking on View Details of Actions, and then clicking on More Actions as follows:
1.1.2 Cancel Collection
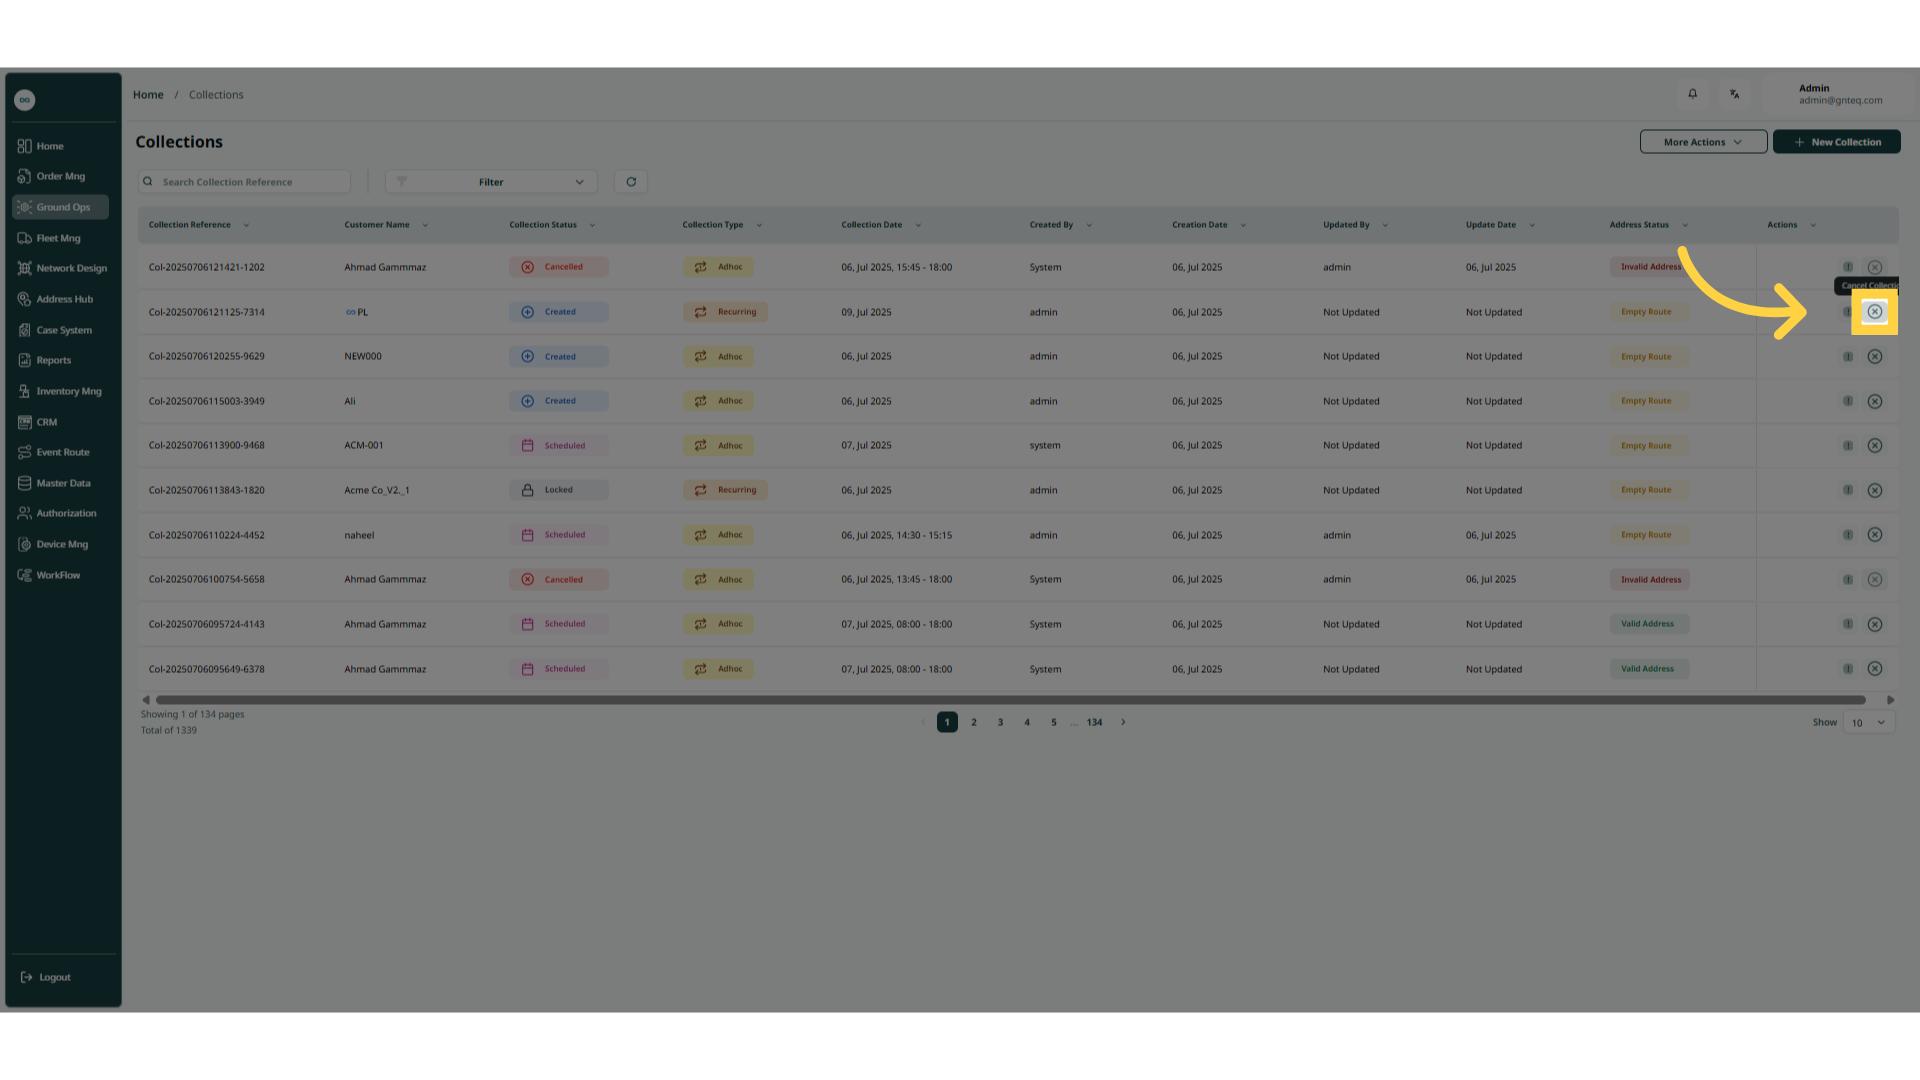
The user can cancel collection by navigating to the ‘Dashboard’ Screen via Operations module and clicking on Cancel Collections from Actions as follows:
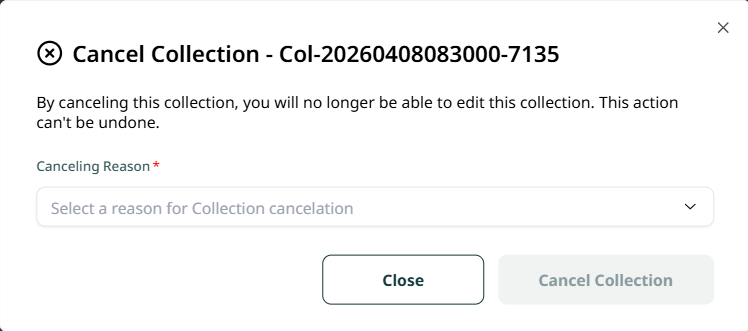
Cancellation Reason: This field represents the main reason for canceling the collection process.
By clicking on Cancel Collection, the collection process will be successfully canceled in the system.
1.1.3 Assign Route
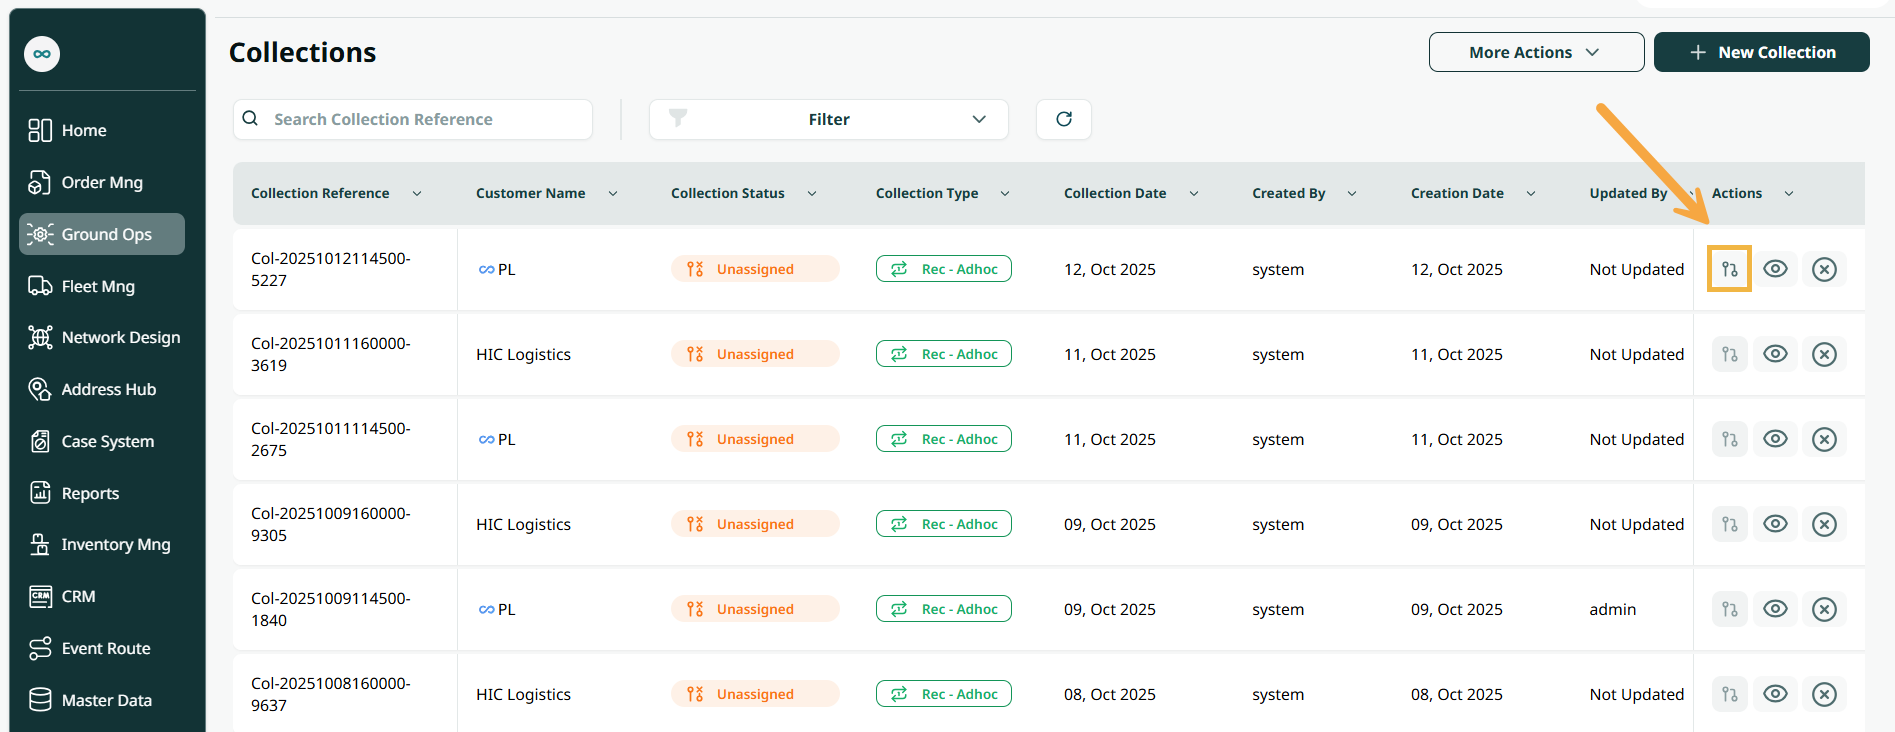
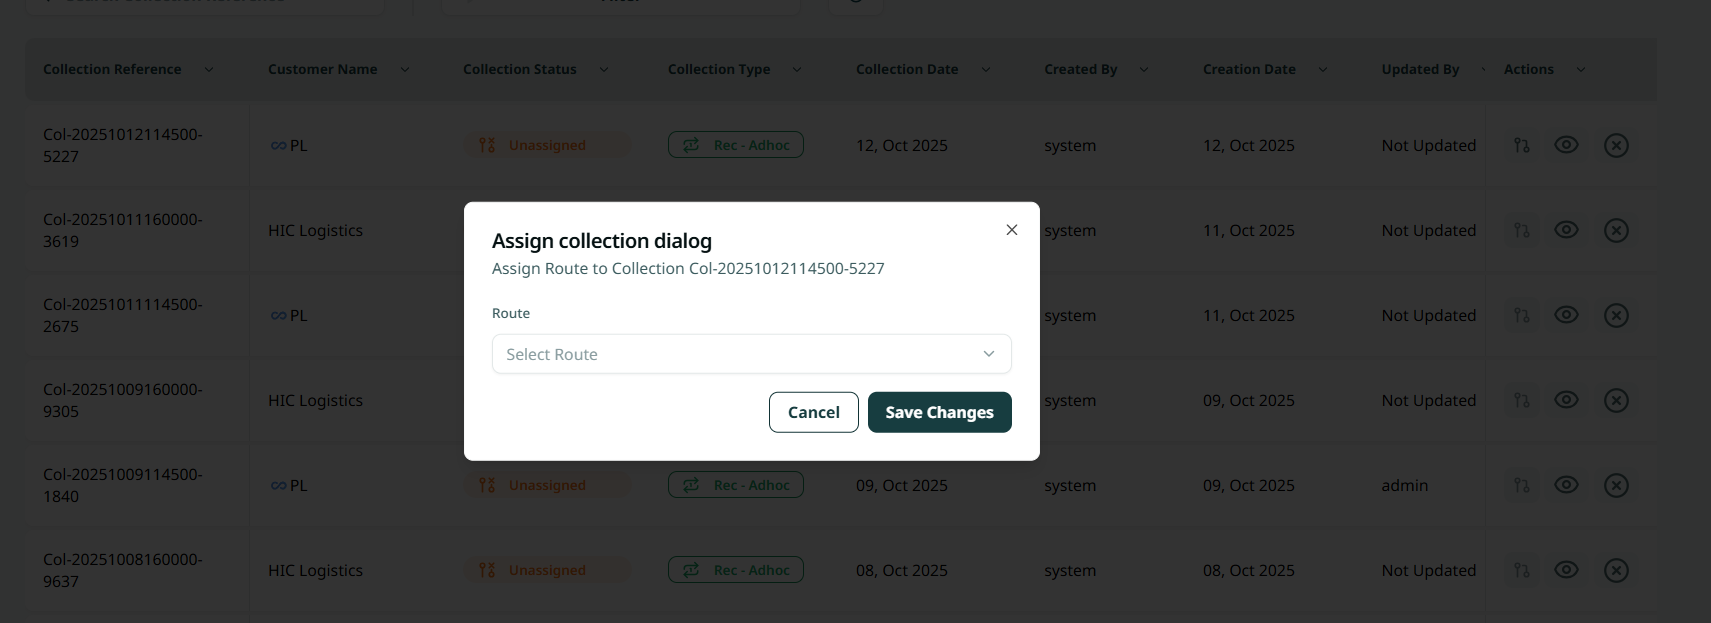
The user can assign the route by navigating to the “Collections” screen via Operations module and clicking on “Assign Route” from Actions. The collection must be in Unassigned status.
2. Add New Collection
The user can add new customer by navigating to the ‘Dashboard’ screen via the Operations module and clicking on New Collection button:
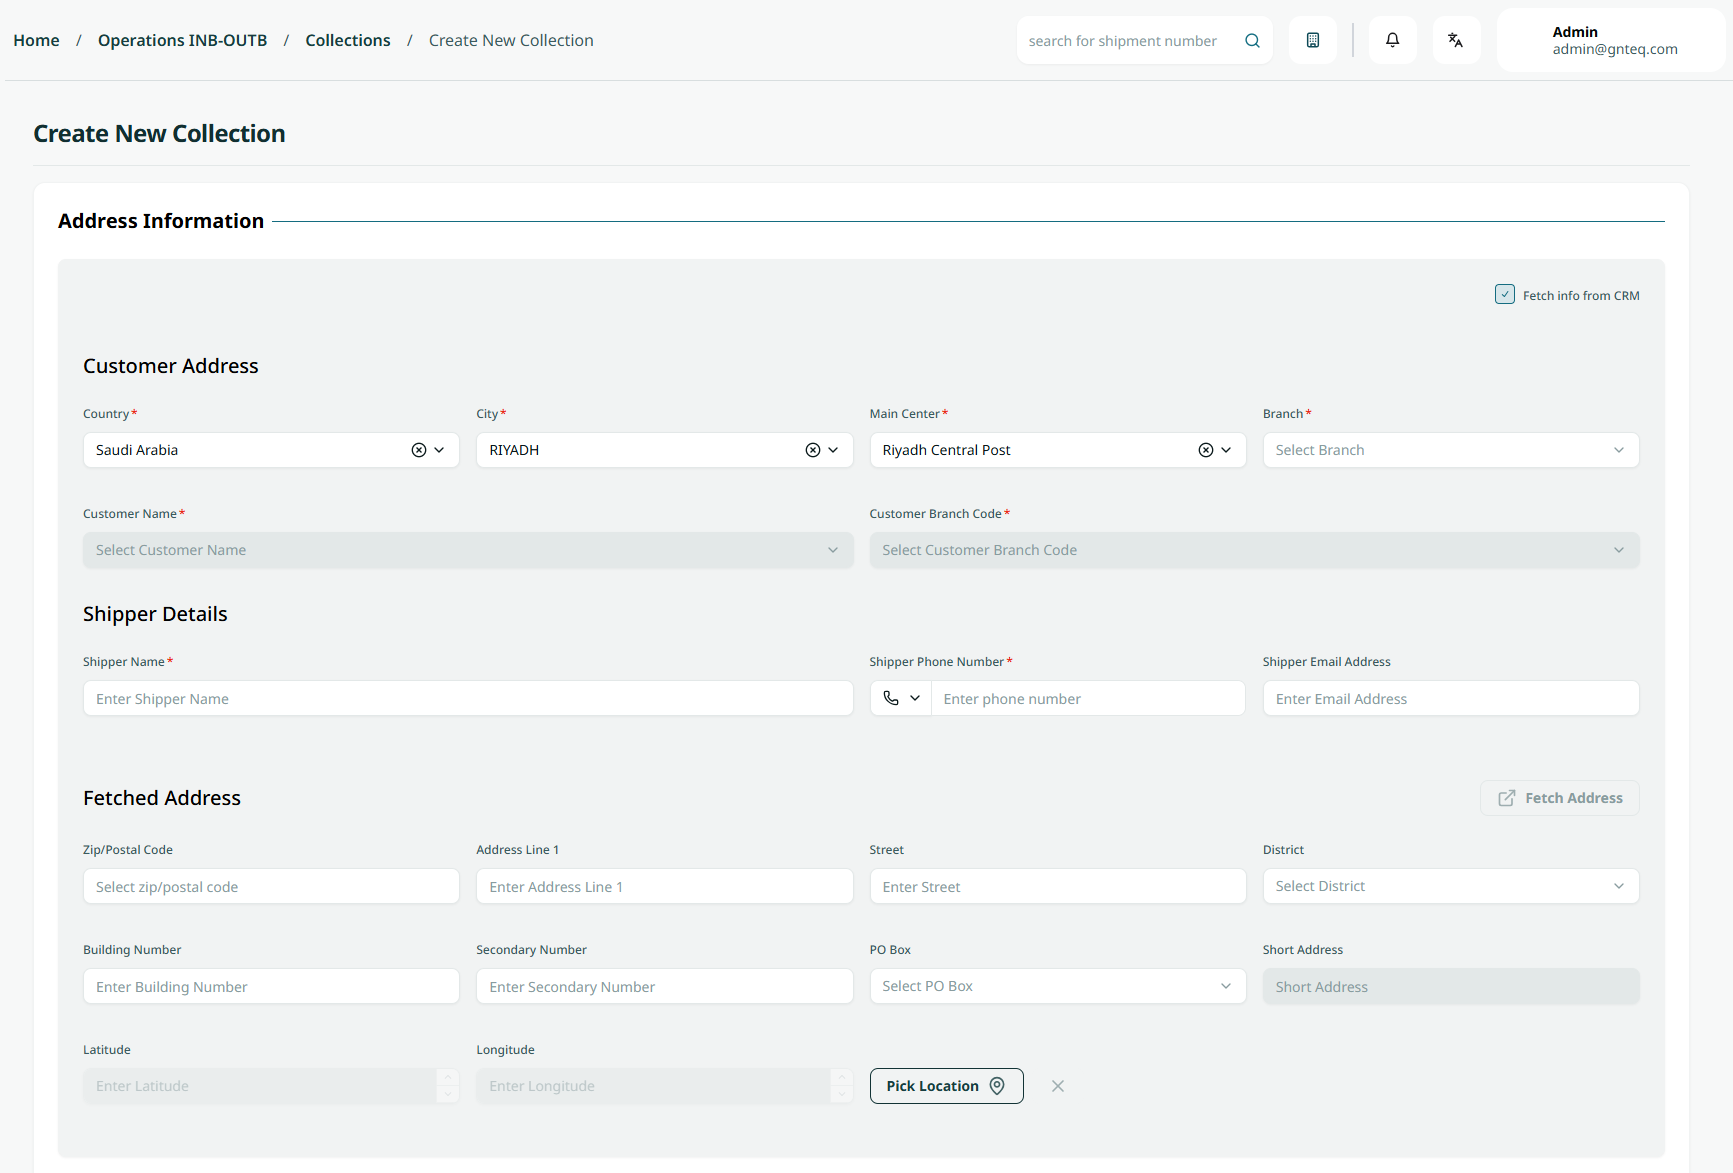
Address Information
-
Country: this field represents the customer country.
-
City: this field represents the customer’s city.
-
Main Center: this field represents the station where the collection will arrive.
-
Branch: this field represents the branch’s unique alphanumeric value.
-
Customer Name: this field represents the customer’s full name.
-
Customer Branch Code: this field represents the branch name.
-
Shipper Name: this field represents the shipper’s name.
-
Shipper Phone Number: this field represents the shipper’s primary phone number.
-
Shipper Email Address: this field represents the shipper’s email address.
-
ZIP Code this field represents the customer primary contact address or ZIP code.
-
Address Line 1 : this field represent the primary line of an address that contains the main location information needed for delivery.
-
District: this field represents a location, area, or region linked to the address provided.
-
Street: this field represents the name of the street.
-
Building Number: this field represents the building number.
-
Secondary Number: this field represents a second mobile number.
-
PO Box: this field represents the postal code.
-
Short Address: this field represents a nearby location.
-
Longitude: this field represents the longitude of the address.
-
Latitude: this field represents the latitude of the address.
-
Pick Location: the user can select a location from the map, and the latitude and longitude will be automatically filled in.
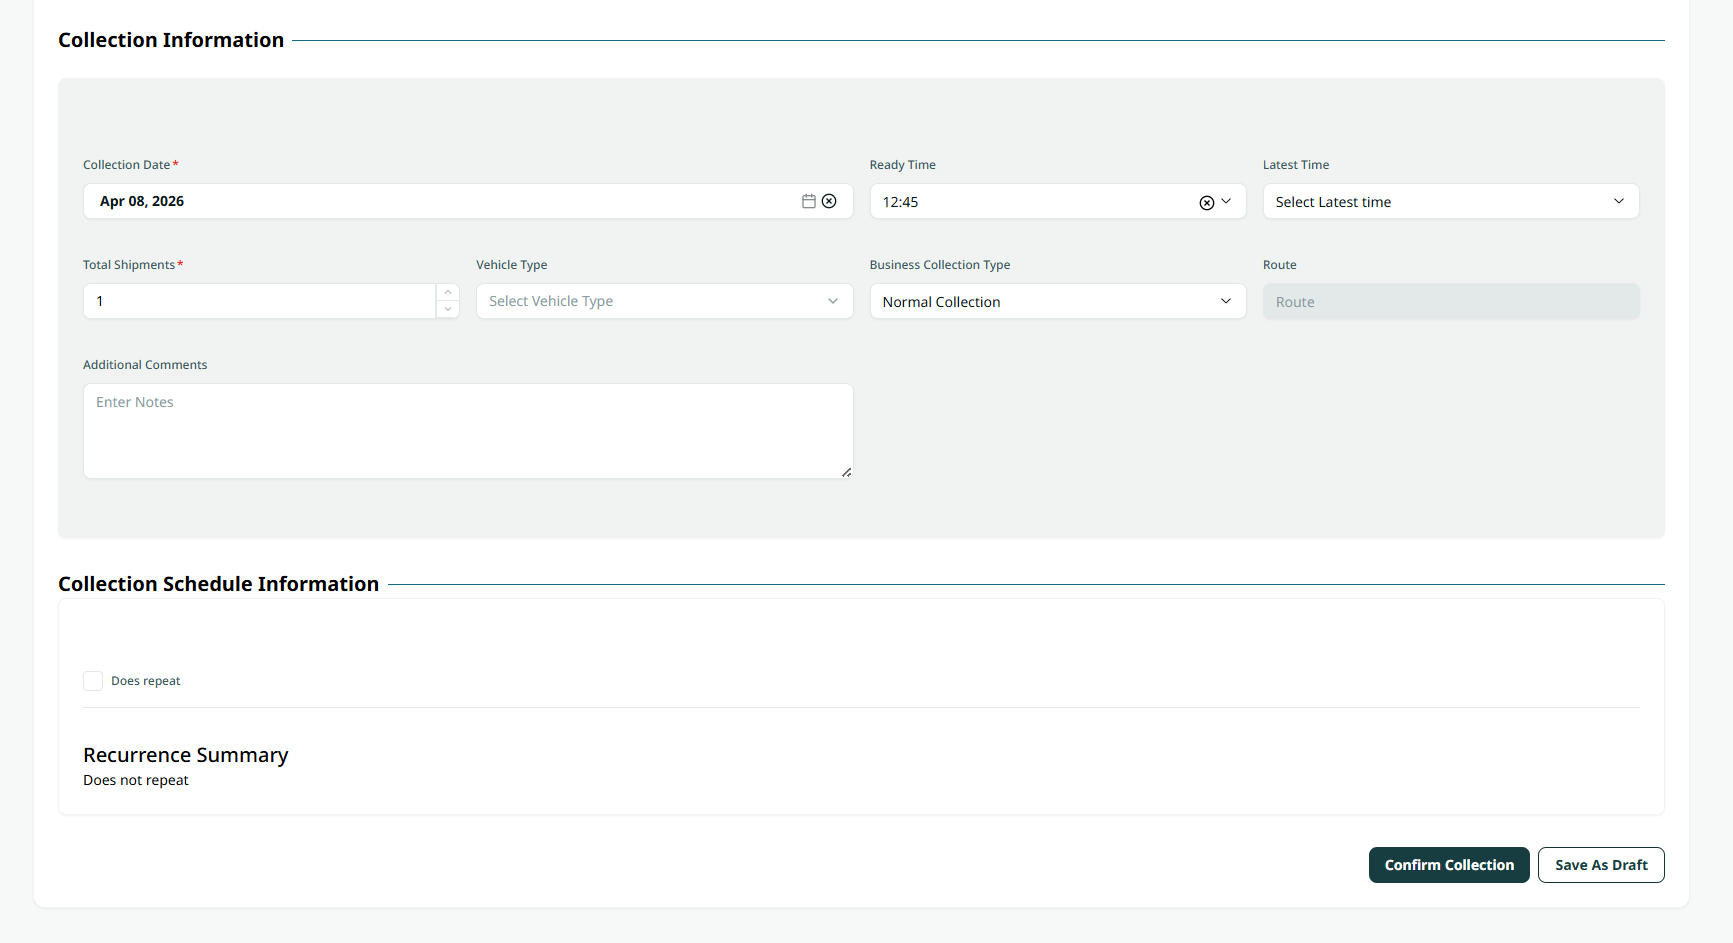
Collection Information
-
Total Shipments: this field represents the number of shipments.
-
Vehicle type: this field represents the type of vehicle (e.g., Truck, Trailer, Van, Sedan, Motorcycle, Temperature-Controlled, etc.).
-
Collection Date: this field represents the date for start of the shipment collection.
-
Ready Time: this field represents the start time for the collection.
-
Latest time: this field represents the end time for the collection.
-
Route: this field represents the destination of the collection shipment.
-
Additional Comments: this field represents additional comments related to the shipment collection.
Collection Schedule Information
-
Does Repeat checkbox: this field represents whether the collection will be repeated at any time during the year, allowing the user to select the day and month for the recurrence.
-
Repeats: This field represents the number of recurrences for the group.
-
Repeat every: This field represents the recurrence dates (day, week, month, year).
-
Recurrence End Date: This field represents the final date for the recurrence.
By clicking on “Confirm Collections” the collection will be create successfully.