.png)
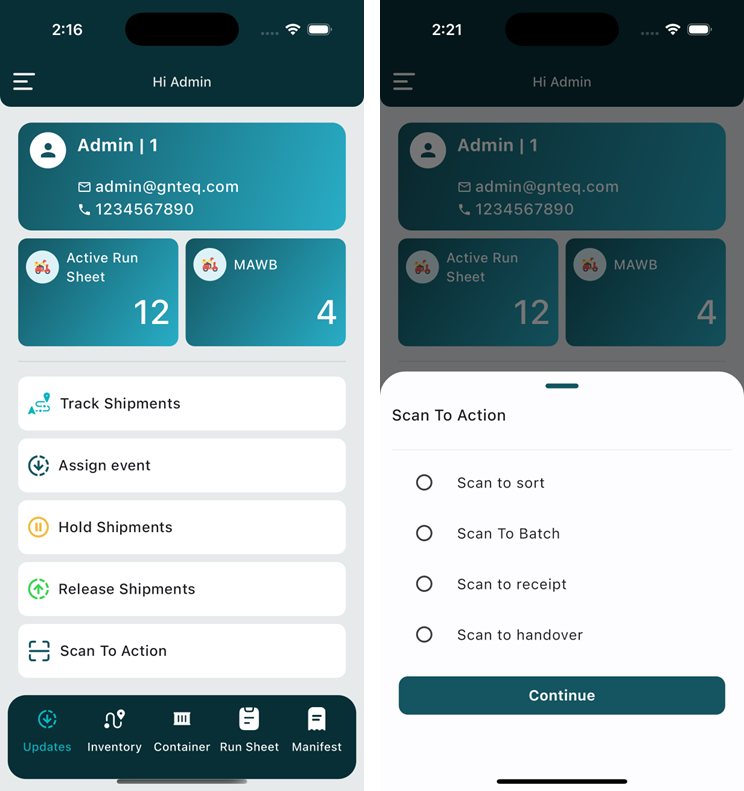
This tab allows user to view detailed information about user profiles, expected to arrive, ready to export, and perform key actions such as tracking shipments, placing shipments on hold, assigning events, and releasing shipments.
1. Dashboard
The user can view detailed information about user profiles, expected to arrive, ready to export, and perform key actions such as tracking shipments, placing shipments on hold, assigning events, and releasing shipments.
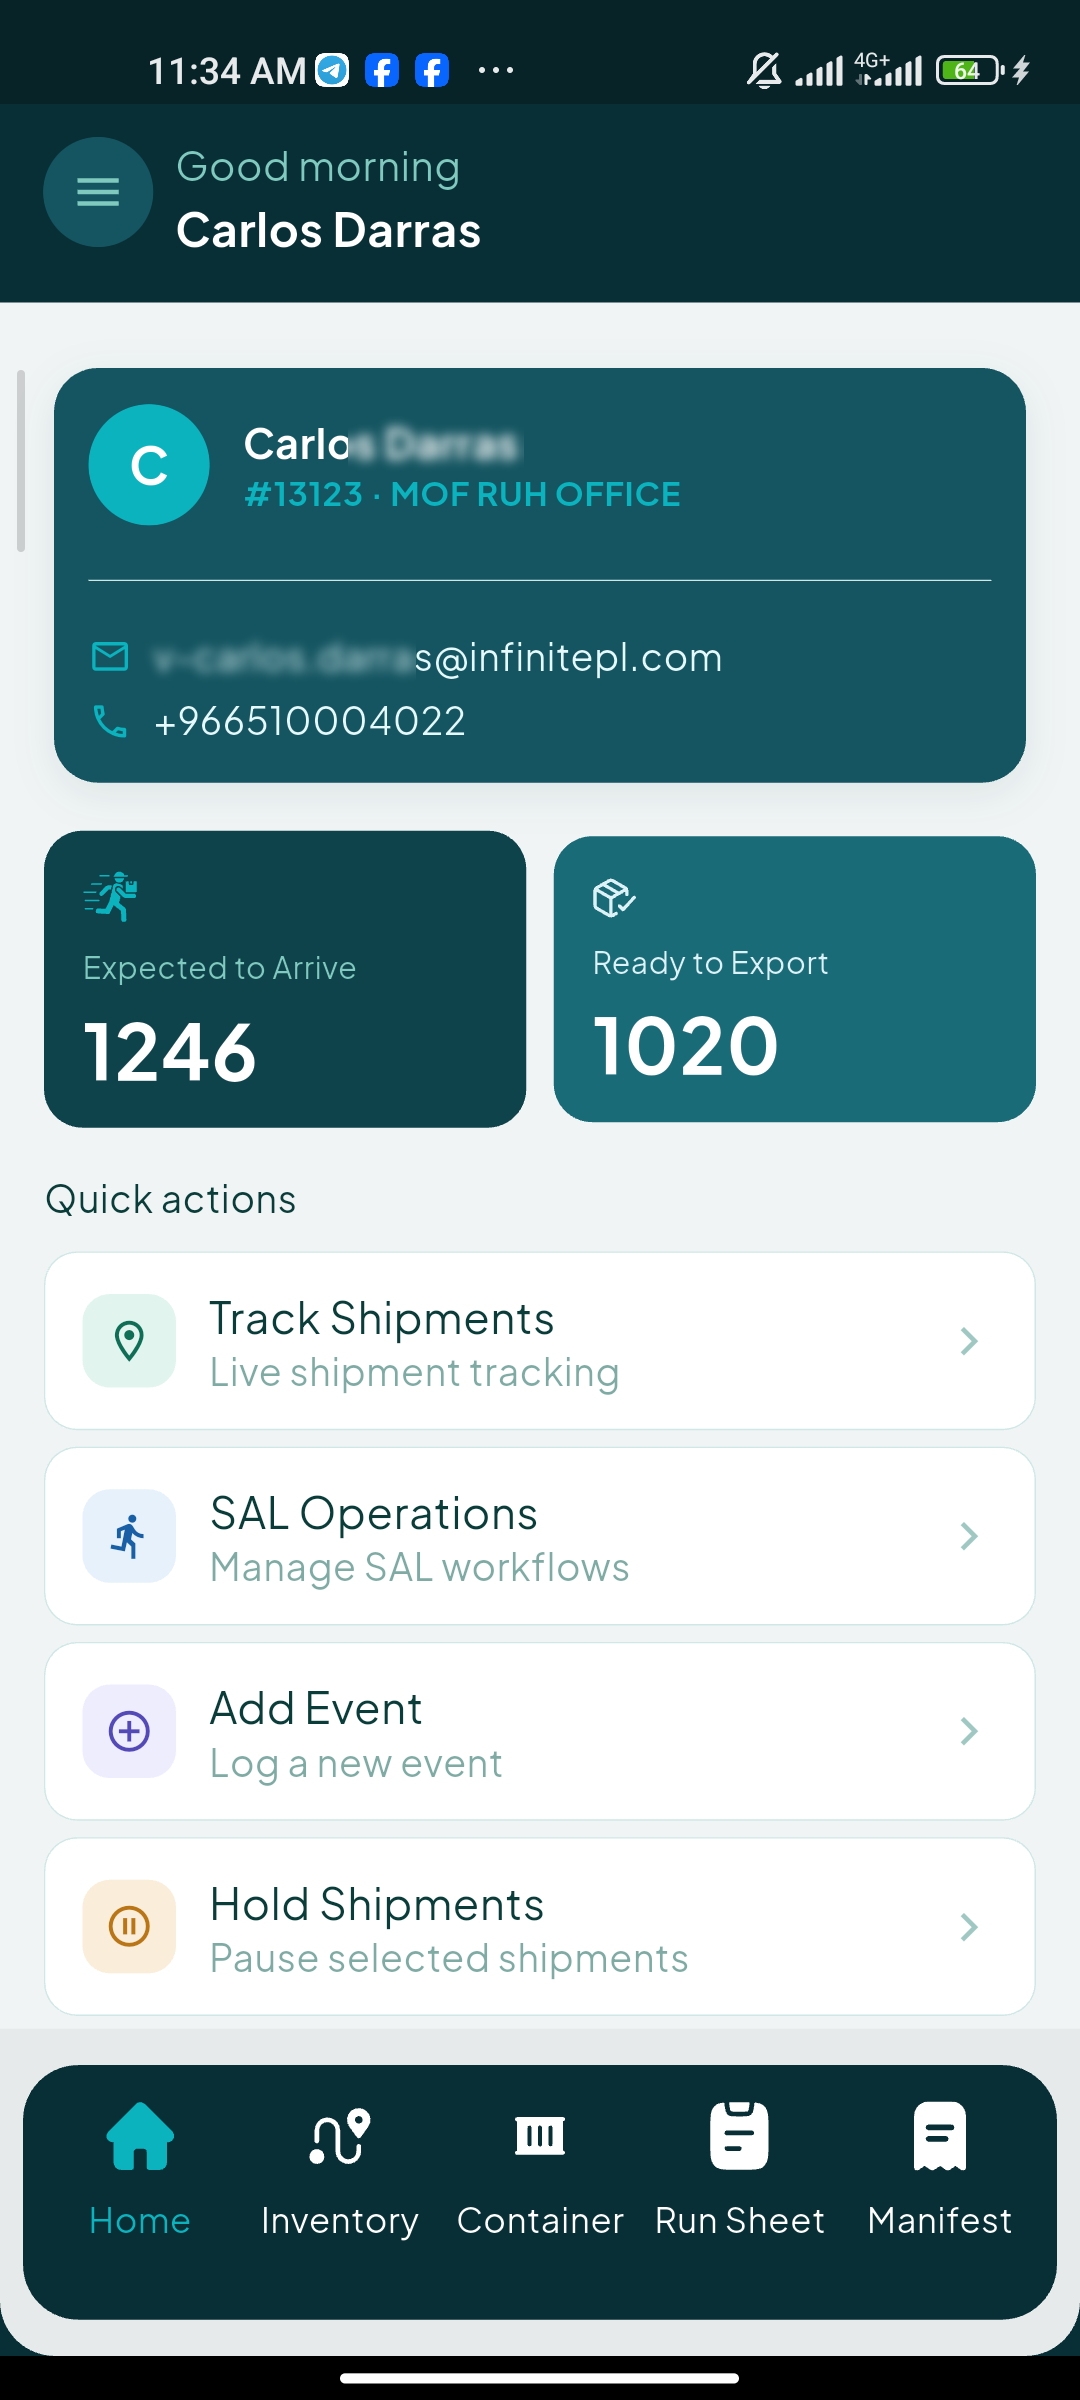
-
Personal Information: this card shows the user name, email, and phone number
-
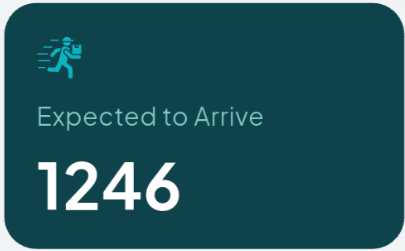
Expected to Arrive: this card shows the expected shipments to arrive.
-
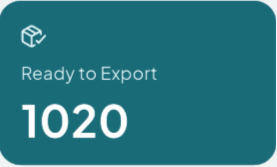
Ready to Export: this card shows the number of shipments that are ready to export.
2. Track Shipments
The user can track shipments by navigating to the ‘Home’ screen tab and clicking on Track Shipments.
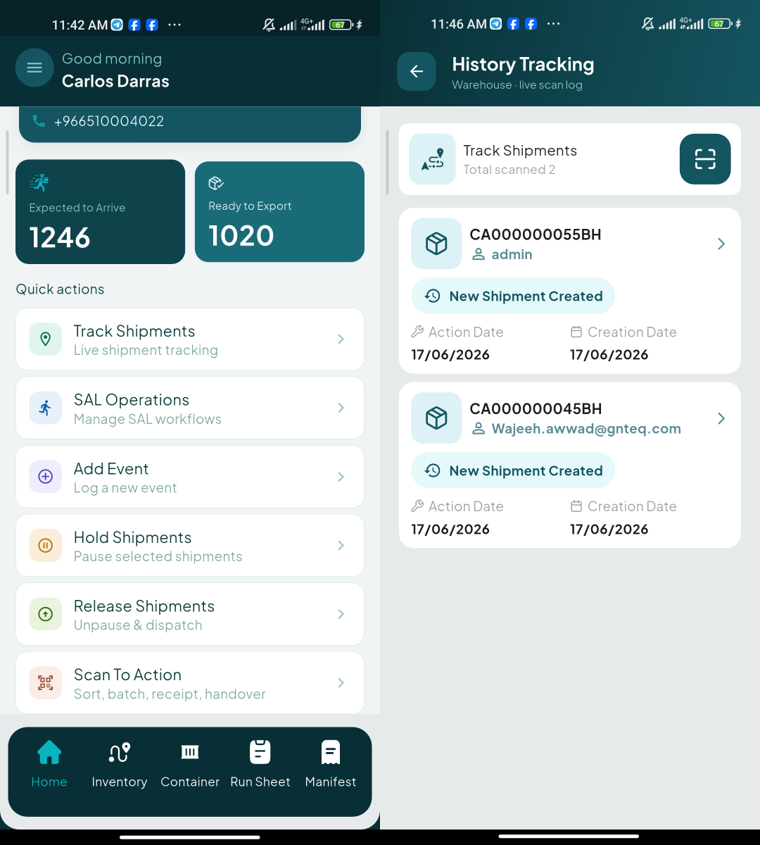
Note: The user can add the airway bill number either manually or by scanning.
3. Hold Shipments
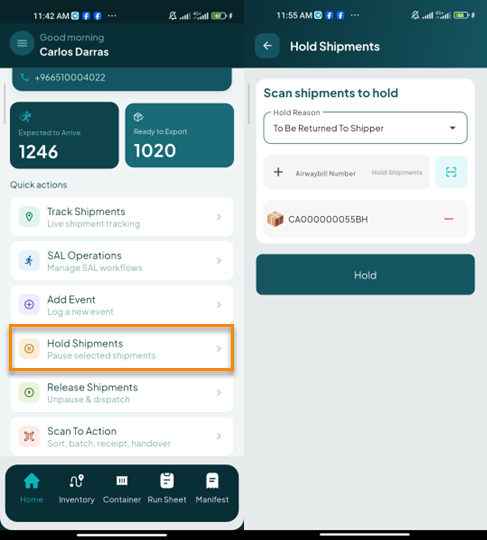
The user can hold shipments by navigating to the ‘Home’ screen tab and clicking on Hold Shipments.
-
Hold Reasons: this field represents the actual reason for holding the shipment.
Note: The user can add the airway bill number either manually or by scanning.
By clicking on Hold, the shipment will be hold successfully.
4. Assign Event
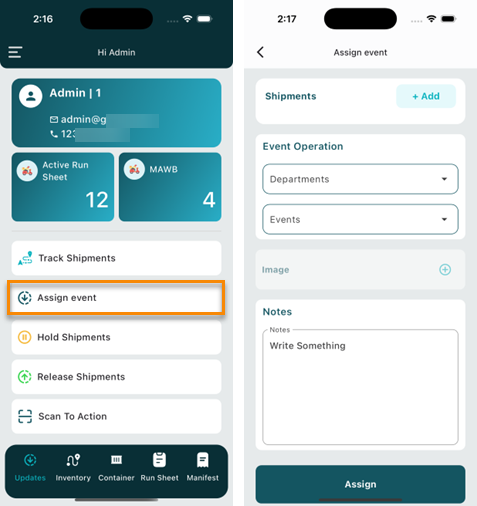
The user can assign event to shipments by navigating to the ‘Updates’ screen tab and clicking on Assign Event.
-
Shipments: the user can add shipments by clicking on Add
-
Department: this field represent the name of the department.
-
Events: this field represent the event that will be assigned to shipments.
-
Notes: this field represent the notes that describe or provide details about the event.
By clicking on Assign, the event will be added successfully to the system.
5. Release Shipments
The user can release shipments by navigating to the ‘Updates’ screen tab and clicking on Release Shipments.
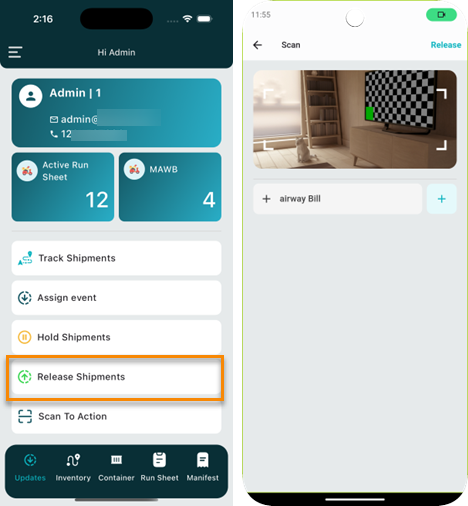
Note: The user can add the airway bill number either manually or by scanning.
By clicking on Release the shipment will be released successfully.
6. Scan To Action
The user can scan shipments to make a certain action by navigating to the ‘Updates’ screen tab and clicking on Scan To Action.
6.1 Scan To Batch
The user can scan shipments to create a batch by navigating to the ‘Updates’ tab, clicking on ‘Scan To Action', and then selecting Scan To Batch.
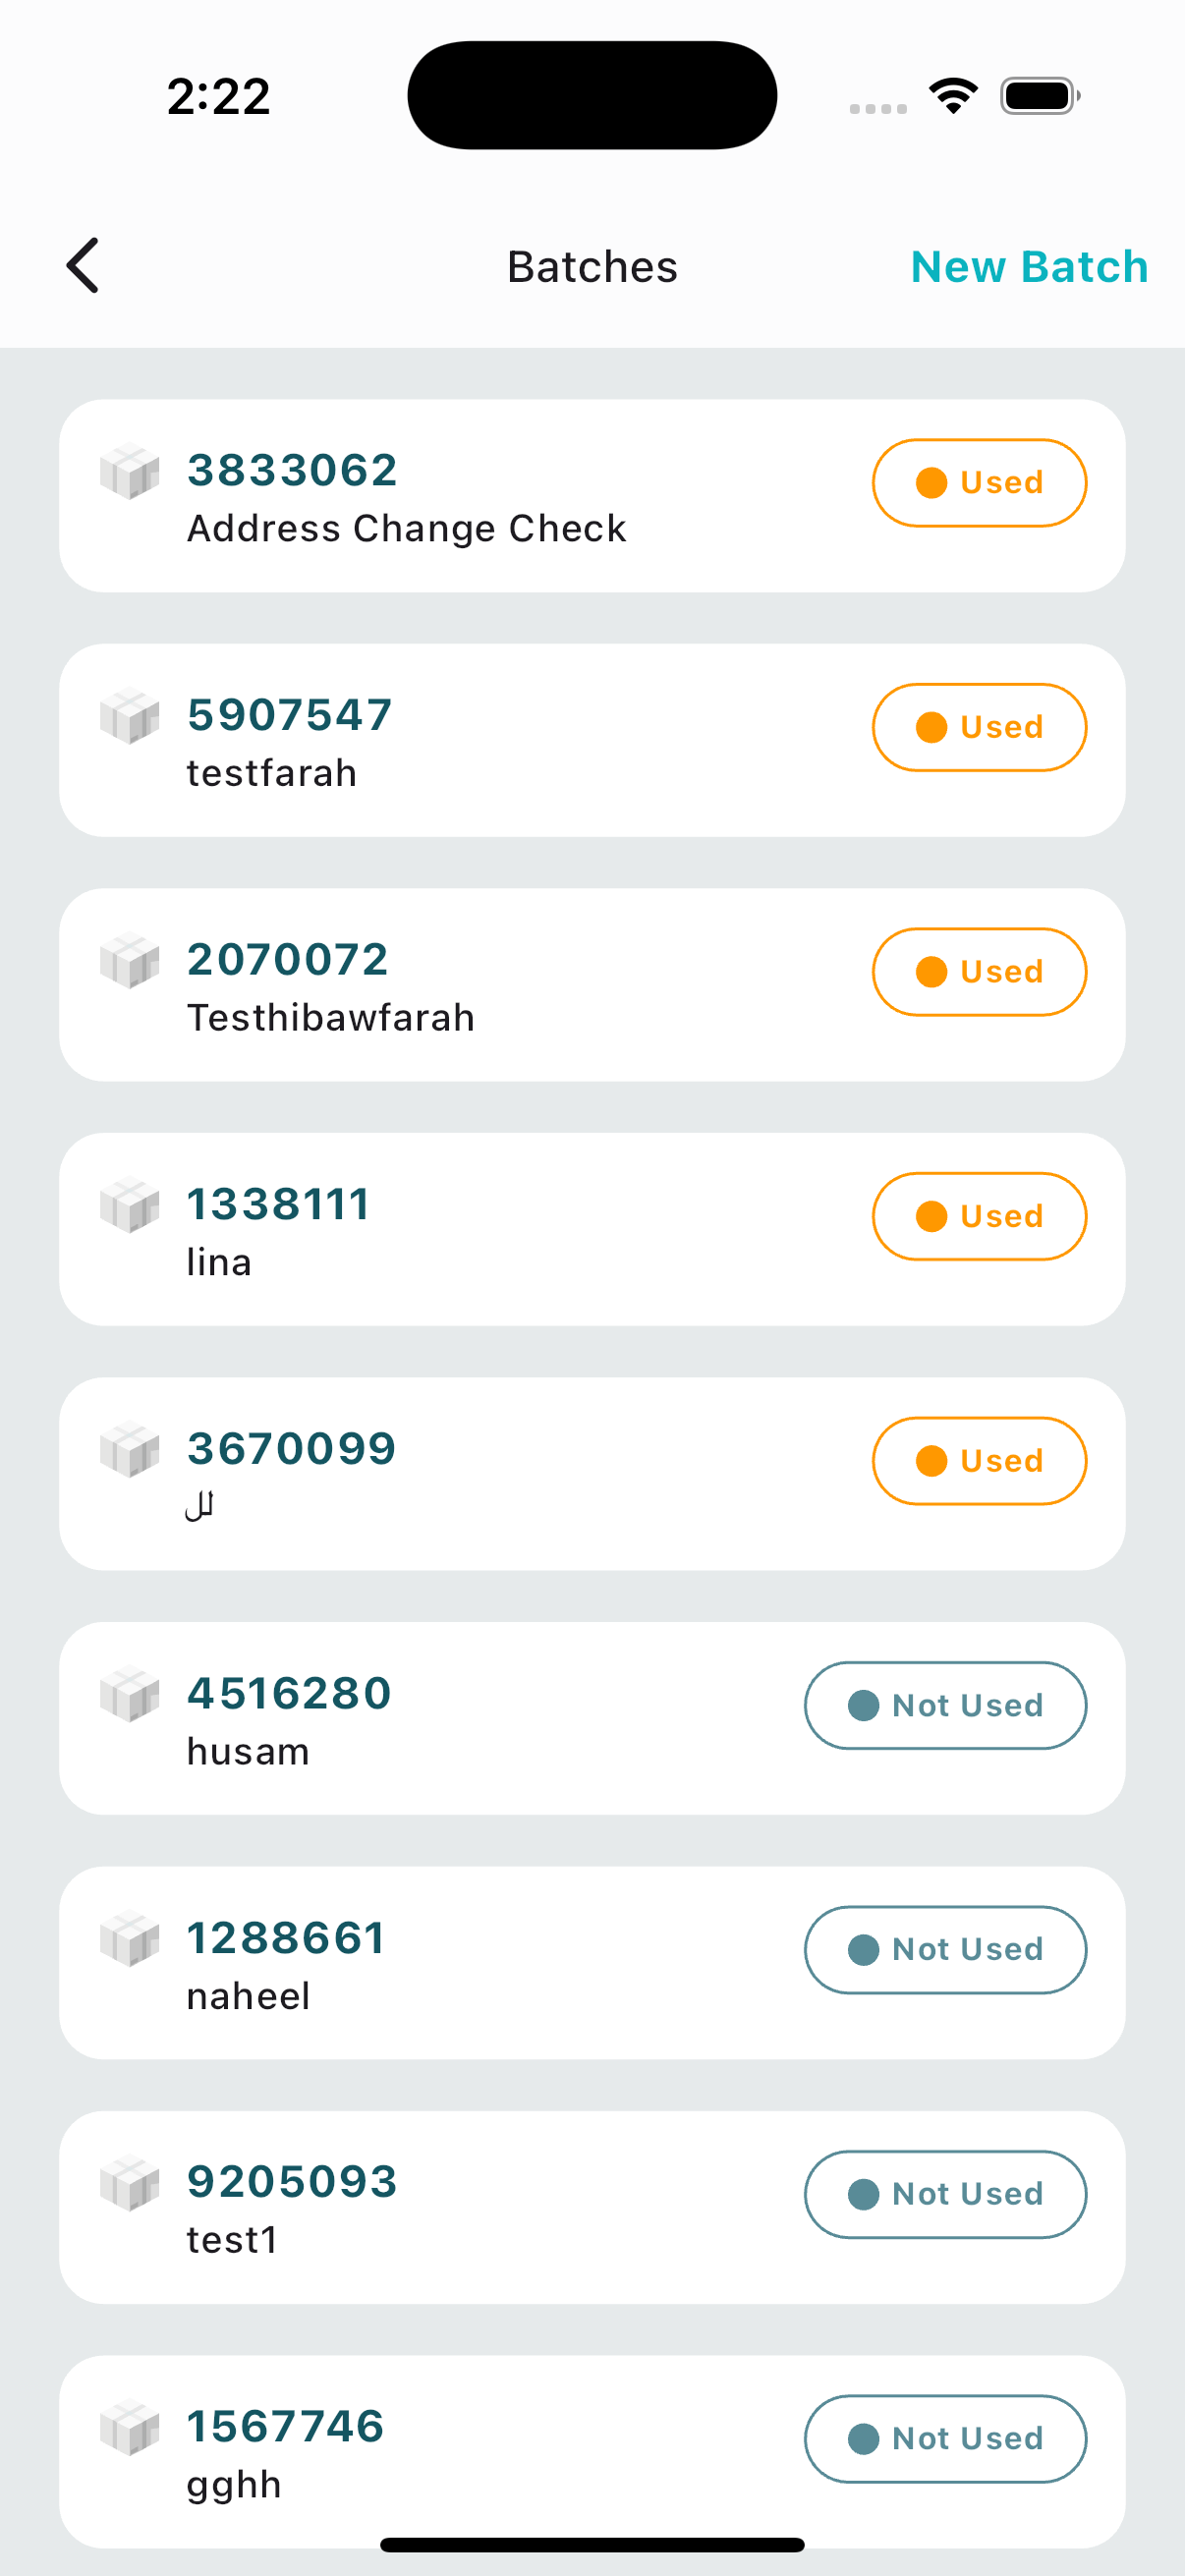
By clicking on New Batch, the user can create a new batch for a certain shipments.
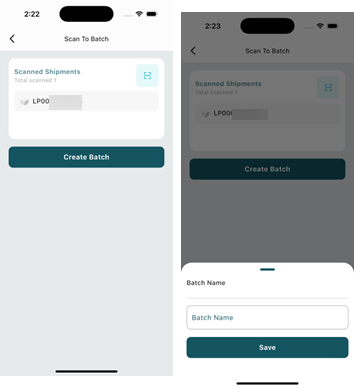
-
Batch Name: this field represent the name of the batch.
Note: The user can add the airway bill number either manually or by scanning.
By clicking on Save, the batch will be successfully added to the system.
6.2 Scan To Receipt
The user can scan shipments to create a receipt by navigating to the ‘Updates’ tab, clicking on ‘Scan To Action', and then selecting ‘Scan To Receipt.
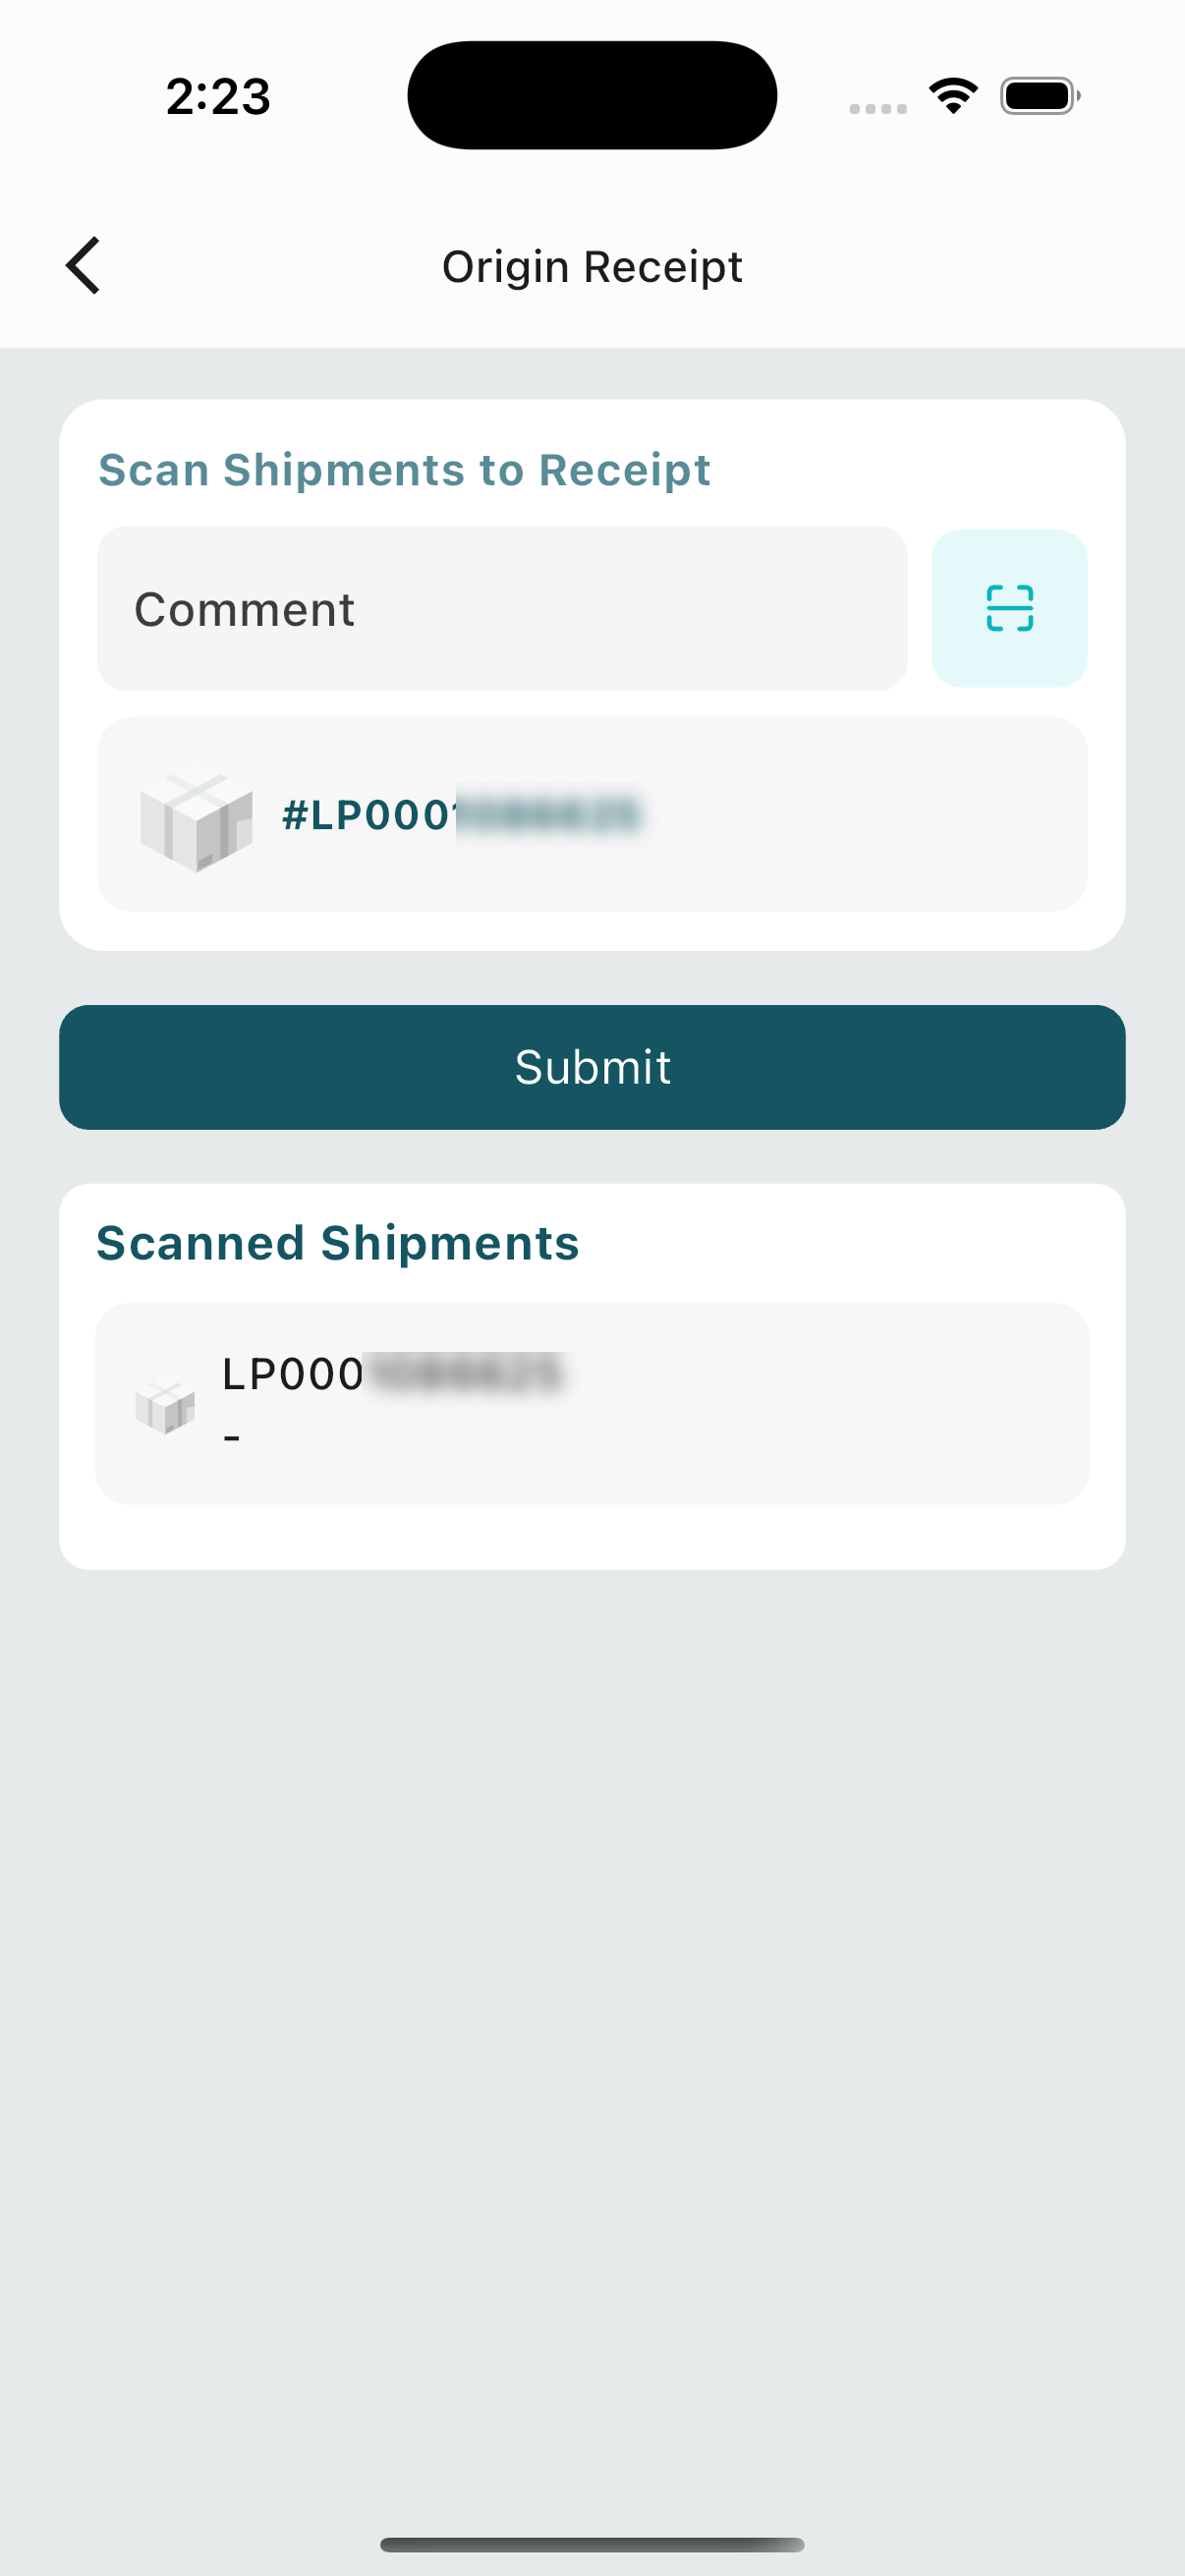
Note: The user can add the airway bill number either manually or by scanning.
By clicking on Save, the shipments will be successfully added to the system.
6.3 Scan To Handover
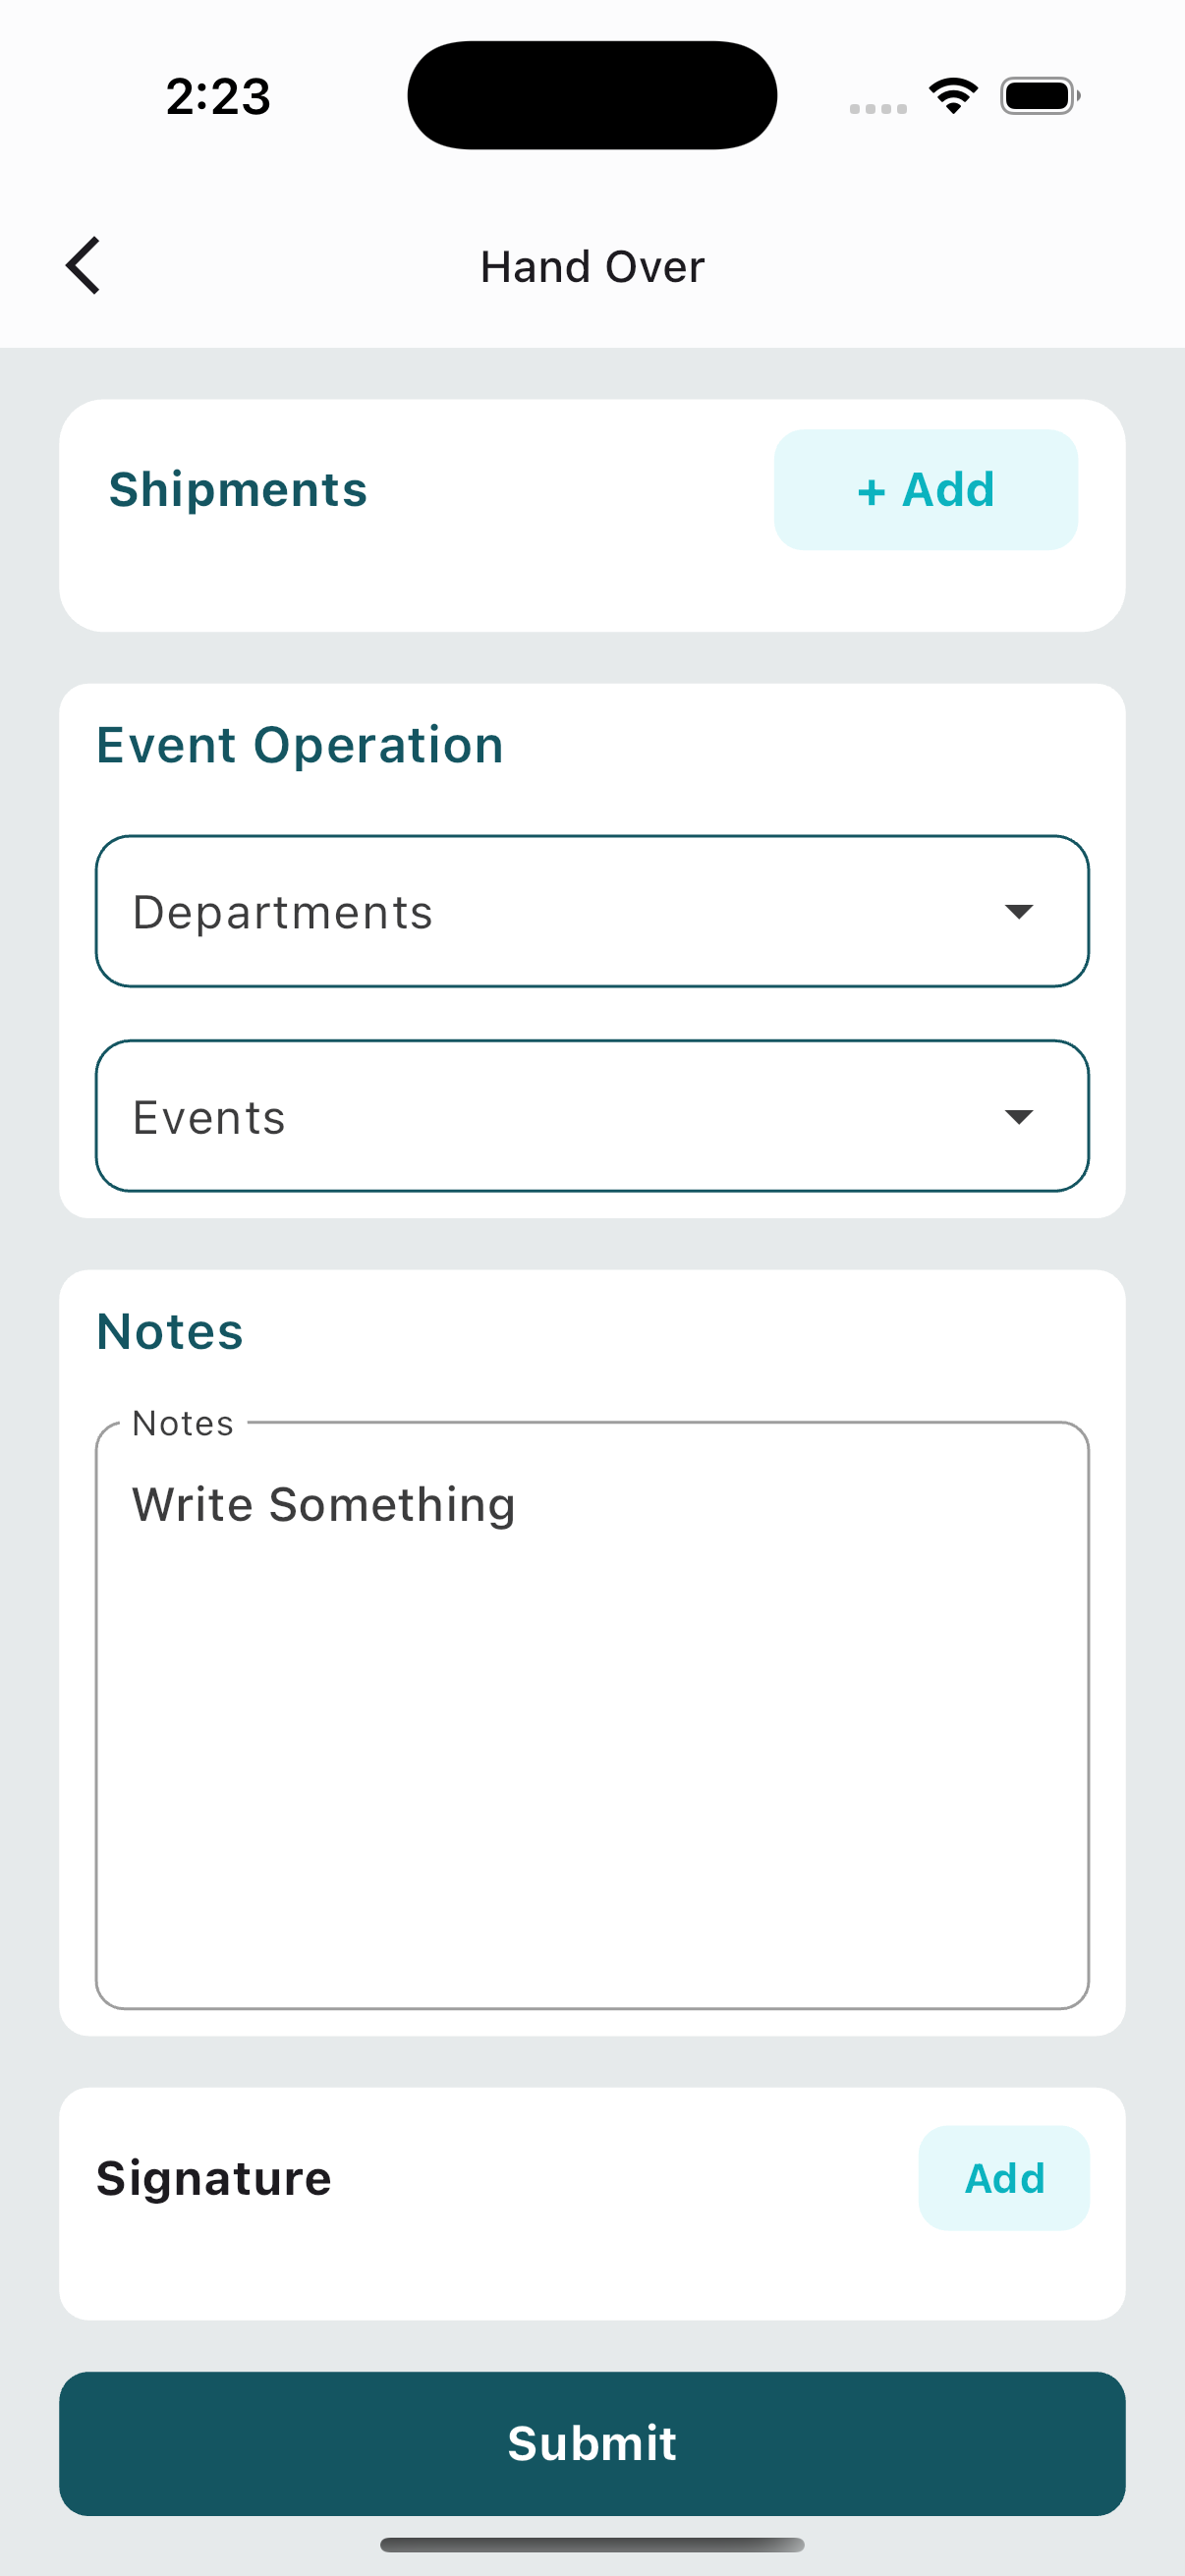
The user can scan shipments to handover the shipments by navigating to the ‘Updates’ tab, clicking on ‘Scan To Action', and then selecting Scan To Handover.
-
Shipments: the user can add shipments by clicking on Add.
-
Department: this field represent the name of the department.
-
Events: this field represent the event that will be assigned to shipments.
-
Notes: this field represent the notes that describe or provide details about the event.
-
Signature: the user can add signature by clicking on Add.
By clicking on Submit, the handover will be completed successfully.