.png)
This module provides users with the ability to add shipment and container information and efficiently manage their placement and tracking within the warehouse.
1. Add New Location
The user can add a new location for the shipments or containers in the warehouse by navigating to the inventory screen and clicking on the (+) icon as follows:
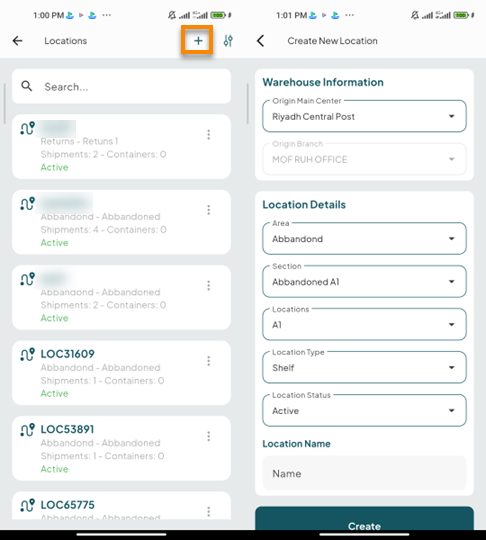
Warehouse Information
-
Origin Main Center: this field represents the city of the shipment.
-
Origin Branch: this field represents the station from which the shipment will be retrieved.
Location Details
-
Area: this field represents the area name.
-
Section: this field represents the section name.
-
Locations: this field represents the location name and place.
-
Location Type: this field represents the location type it depends on the shipment type.
-
Location Status: this field represents the location current status.
-
Location Name: this field represents the name of the Location.
By clicking on Create, the location will be added successfully and it will shows in the dashboard.
1.1 Assign To Location
The user can add a shipment and containers to a required location by navigating to the Inventory home page, clicking Actions, and then selecting Assign To Location.
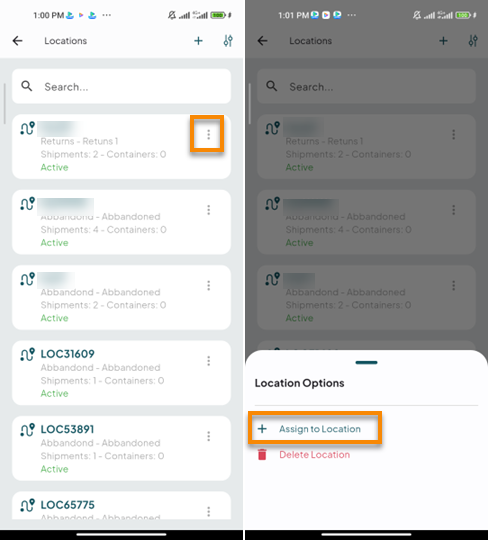
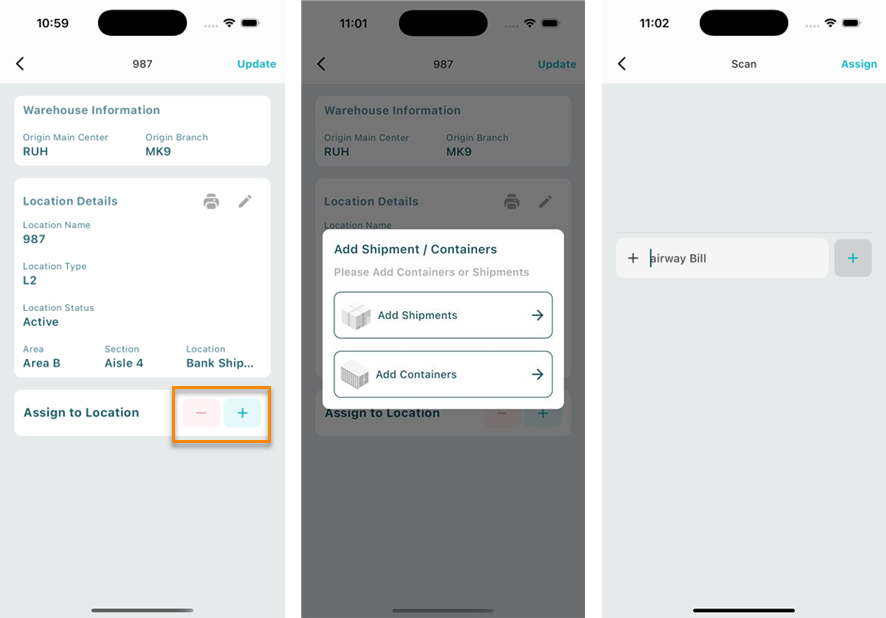
By clicking on (+), the user can add shipments and containers manually or scan the bar code.
By clicking on (-), the user can remove shipments and containers manually or scan the bar code.
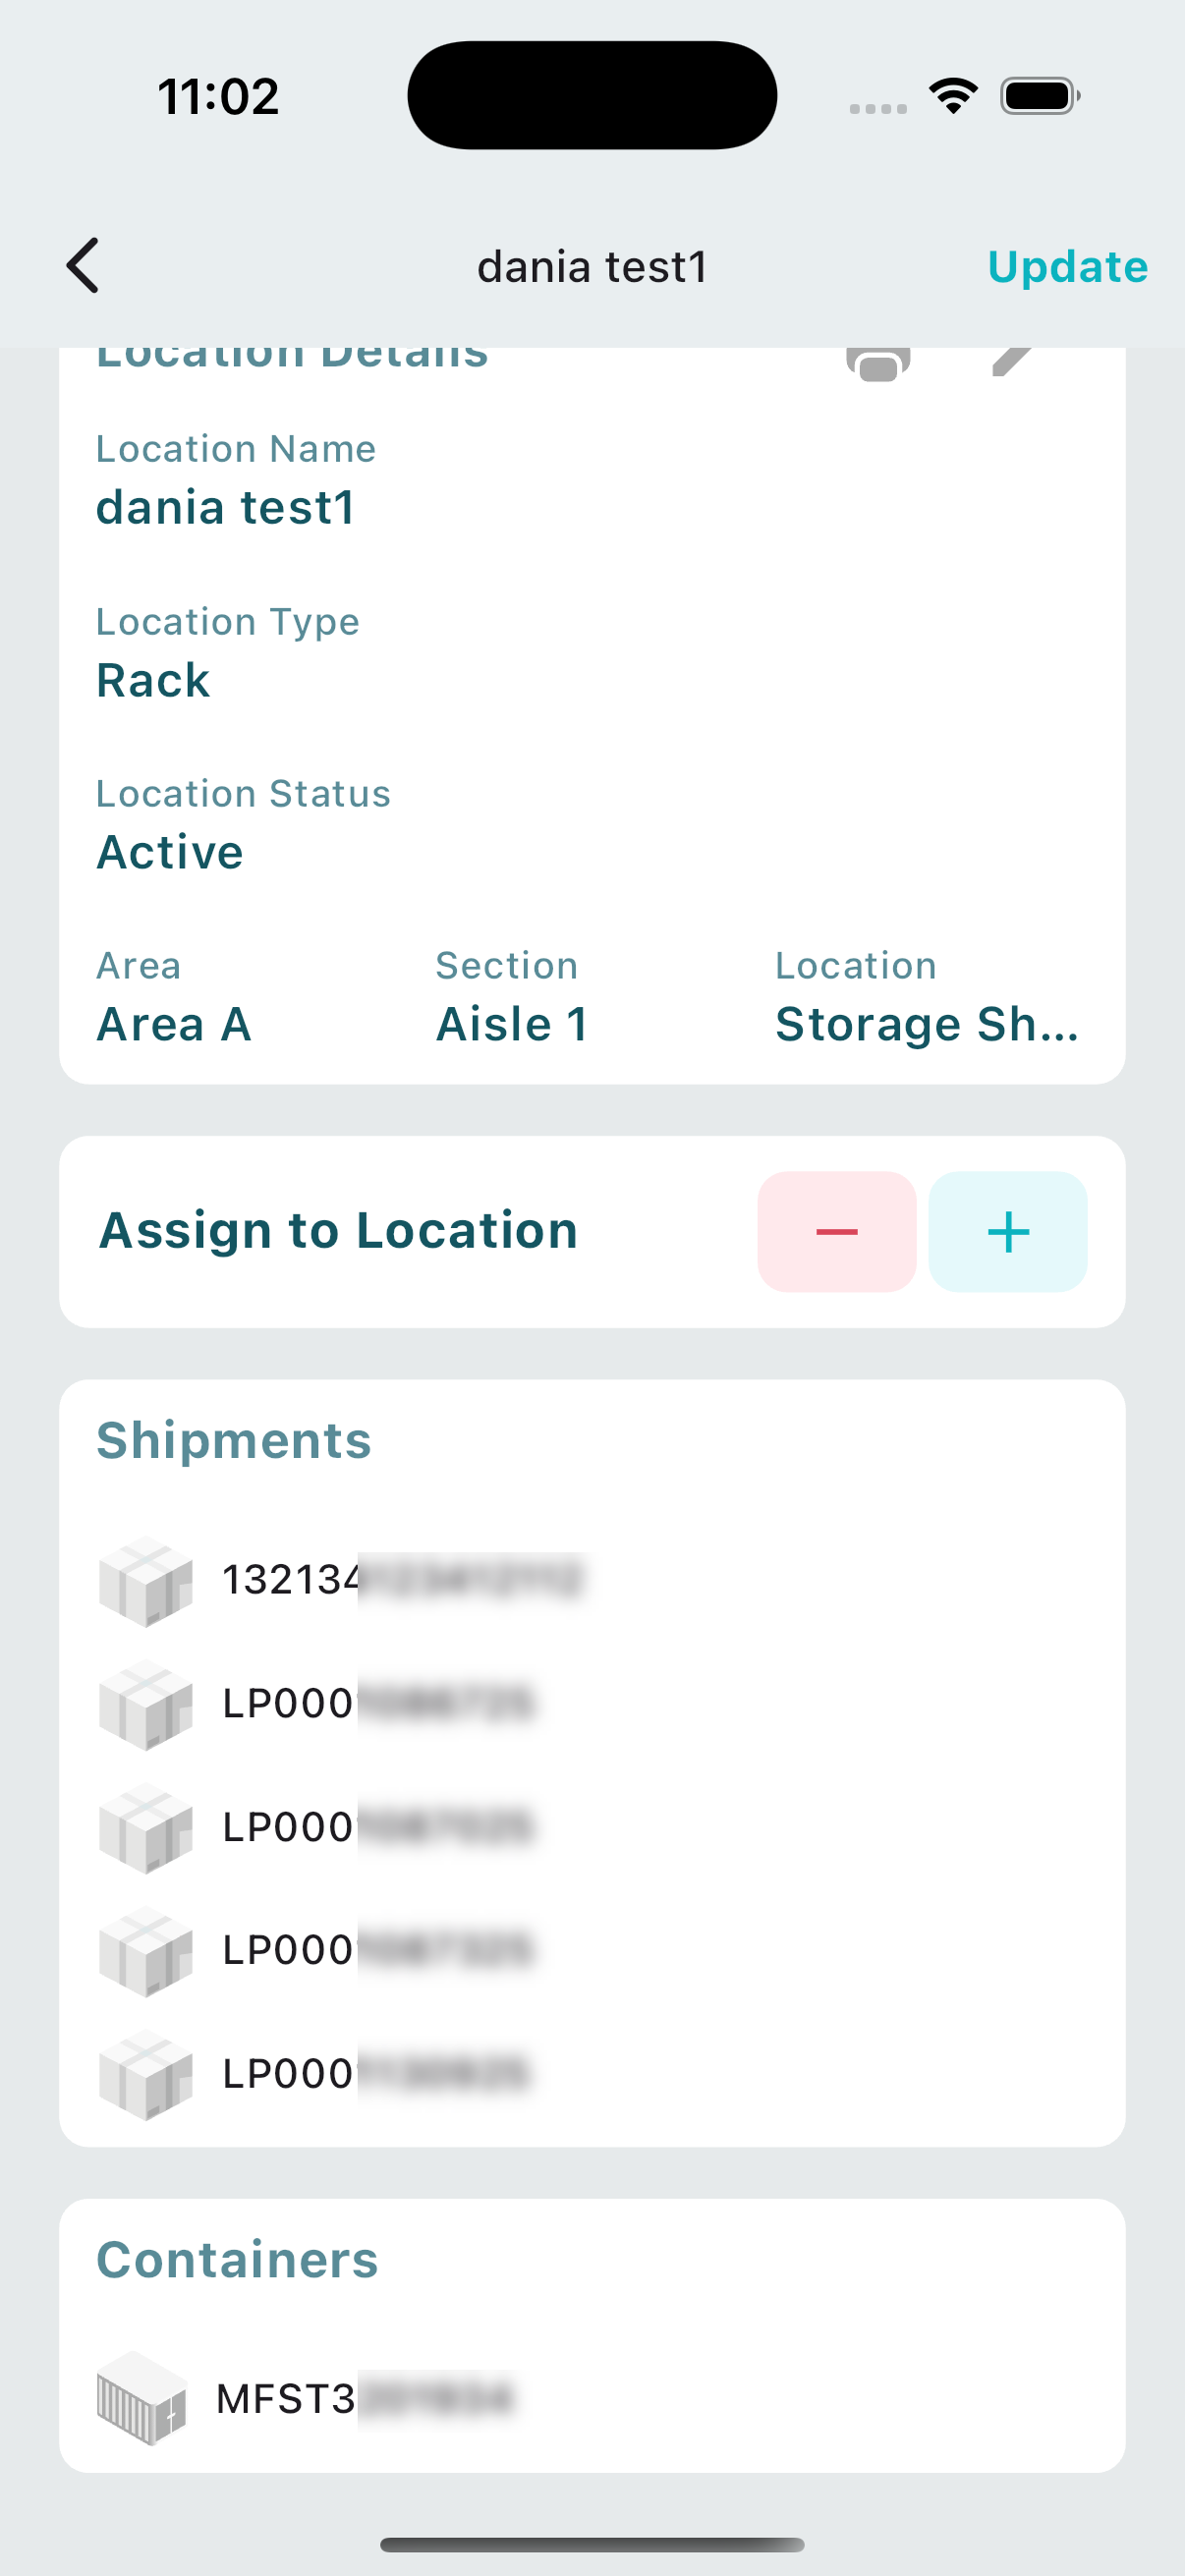

-
By clicking on this button, the user can print out the warehouse information.

-
By clicking on this button, the user can edit the warehouse information.
By clicking Update, the location will be updated to reflect the shipments and containers that have been added or removed.
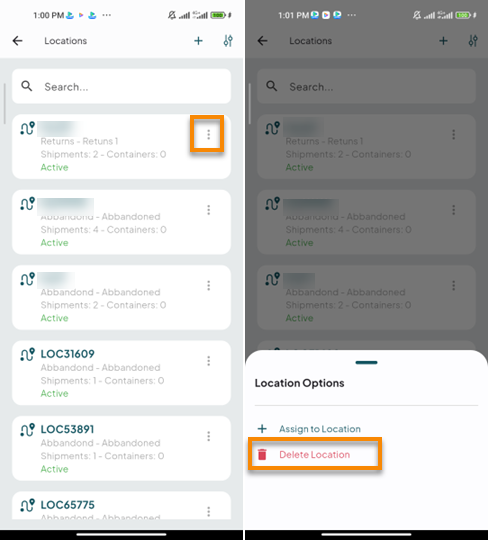
1.2 Delete location
The user can delete a location by navigating to the Inventory home page, clicking Actions, and then selecting Delete.
2. Location Filter
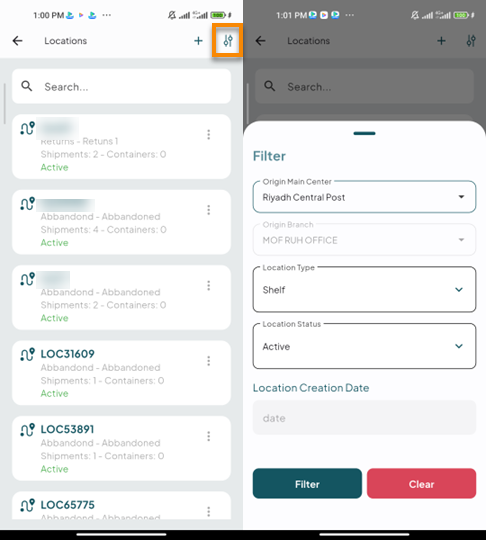
The user can search for a specific location by navigating to the inventory screen and clicking on the Filter icon as follows:
-
Origin Main Center: this field represents the city of the shipment.
-
Origin Branch: this field represents the station of the shipment.
-
Location Type: this field represents the location type it depends on the shipment type.
-
Location Status: this field represents the name of the Location.
-
Location Creation Date: this field represents the date of location creation.
-
Clear: by clicking this button, the fields will be cleared of data.
By clicking on Filter, the system will find the location successfully.
3. Picklist Management
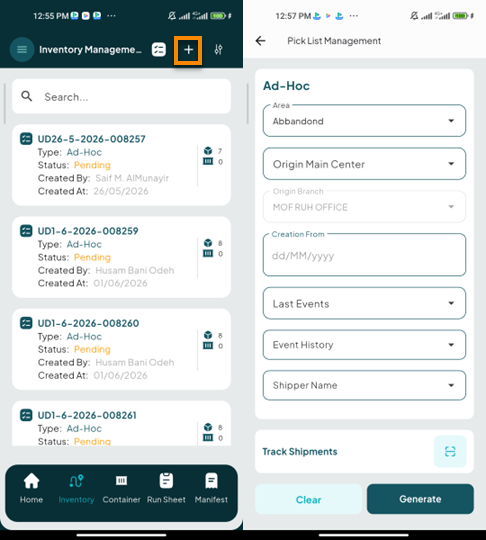
The user can add a new picklist by navigating to the Inventory Management and clicking on ( + ).
-
Area: this field represents the area name in the warehouse.
-
Origin Main Center: this field represents the city of the shipment.
-
Origin Branch: this field represents the station of the shipment.
-
Creation From: this field represents the shipment creation date.
-
Shipper Name: this field represent the shipper name.
-
Last Event: this field represents the last event on shipments or containers.
-
Event History: this field represents the event’s history.
-
Track Shipments: this field represents that the user can scan the shipments to track the location in the warehouse.
-
Clear: by clicking this button, the fields will be cleared of data.
By clicking Generate, the system will display all locations with matching data.
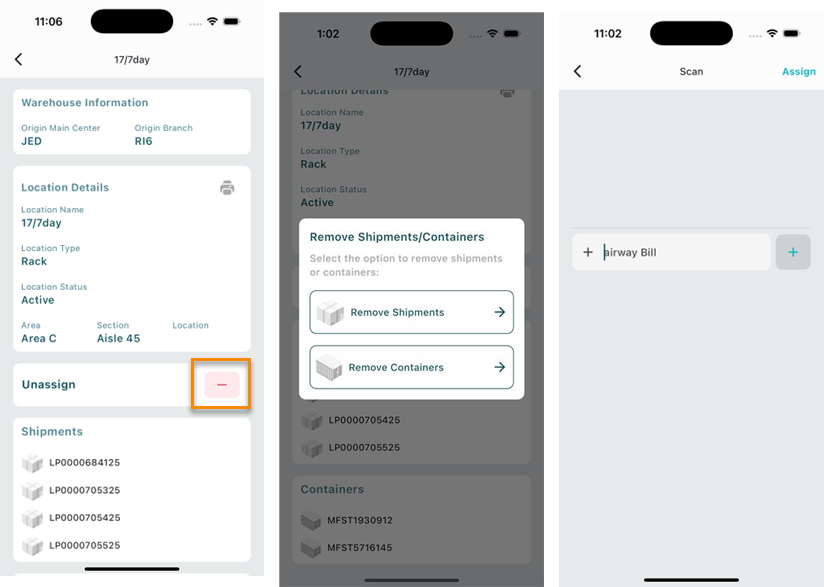
4. Picklist Filter
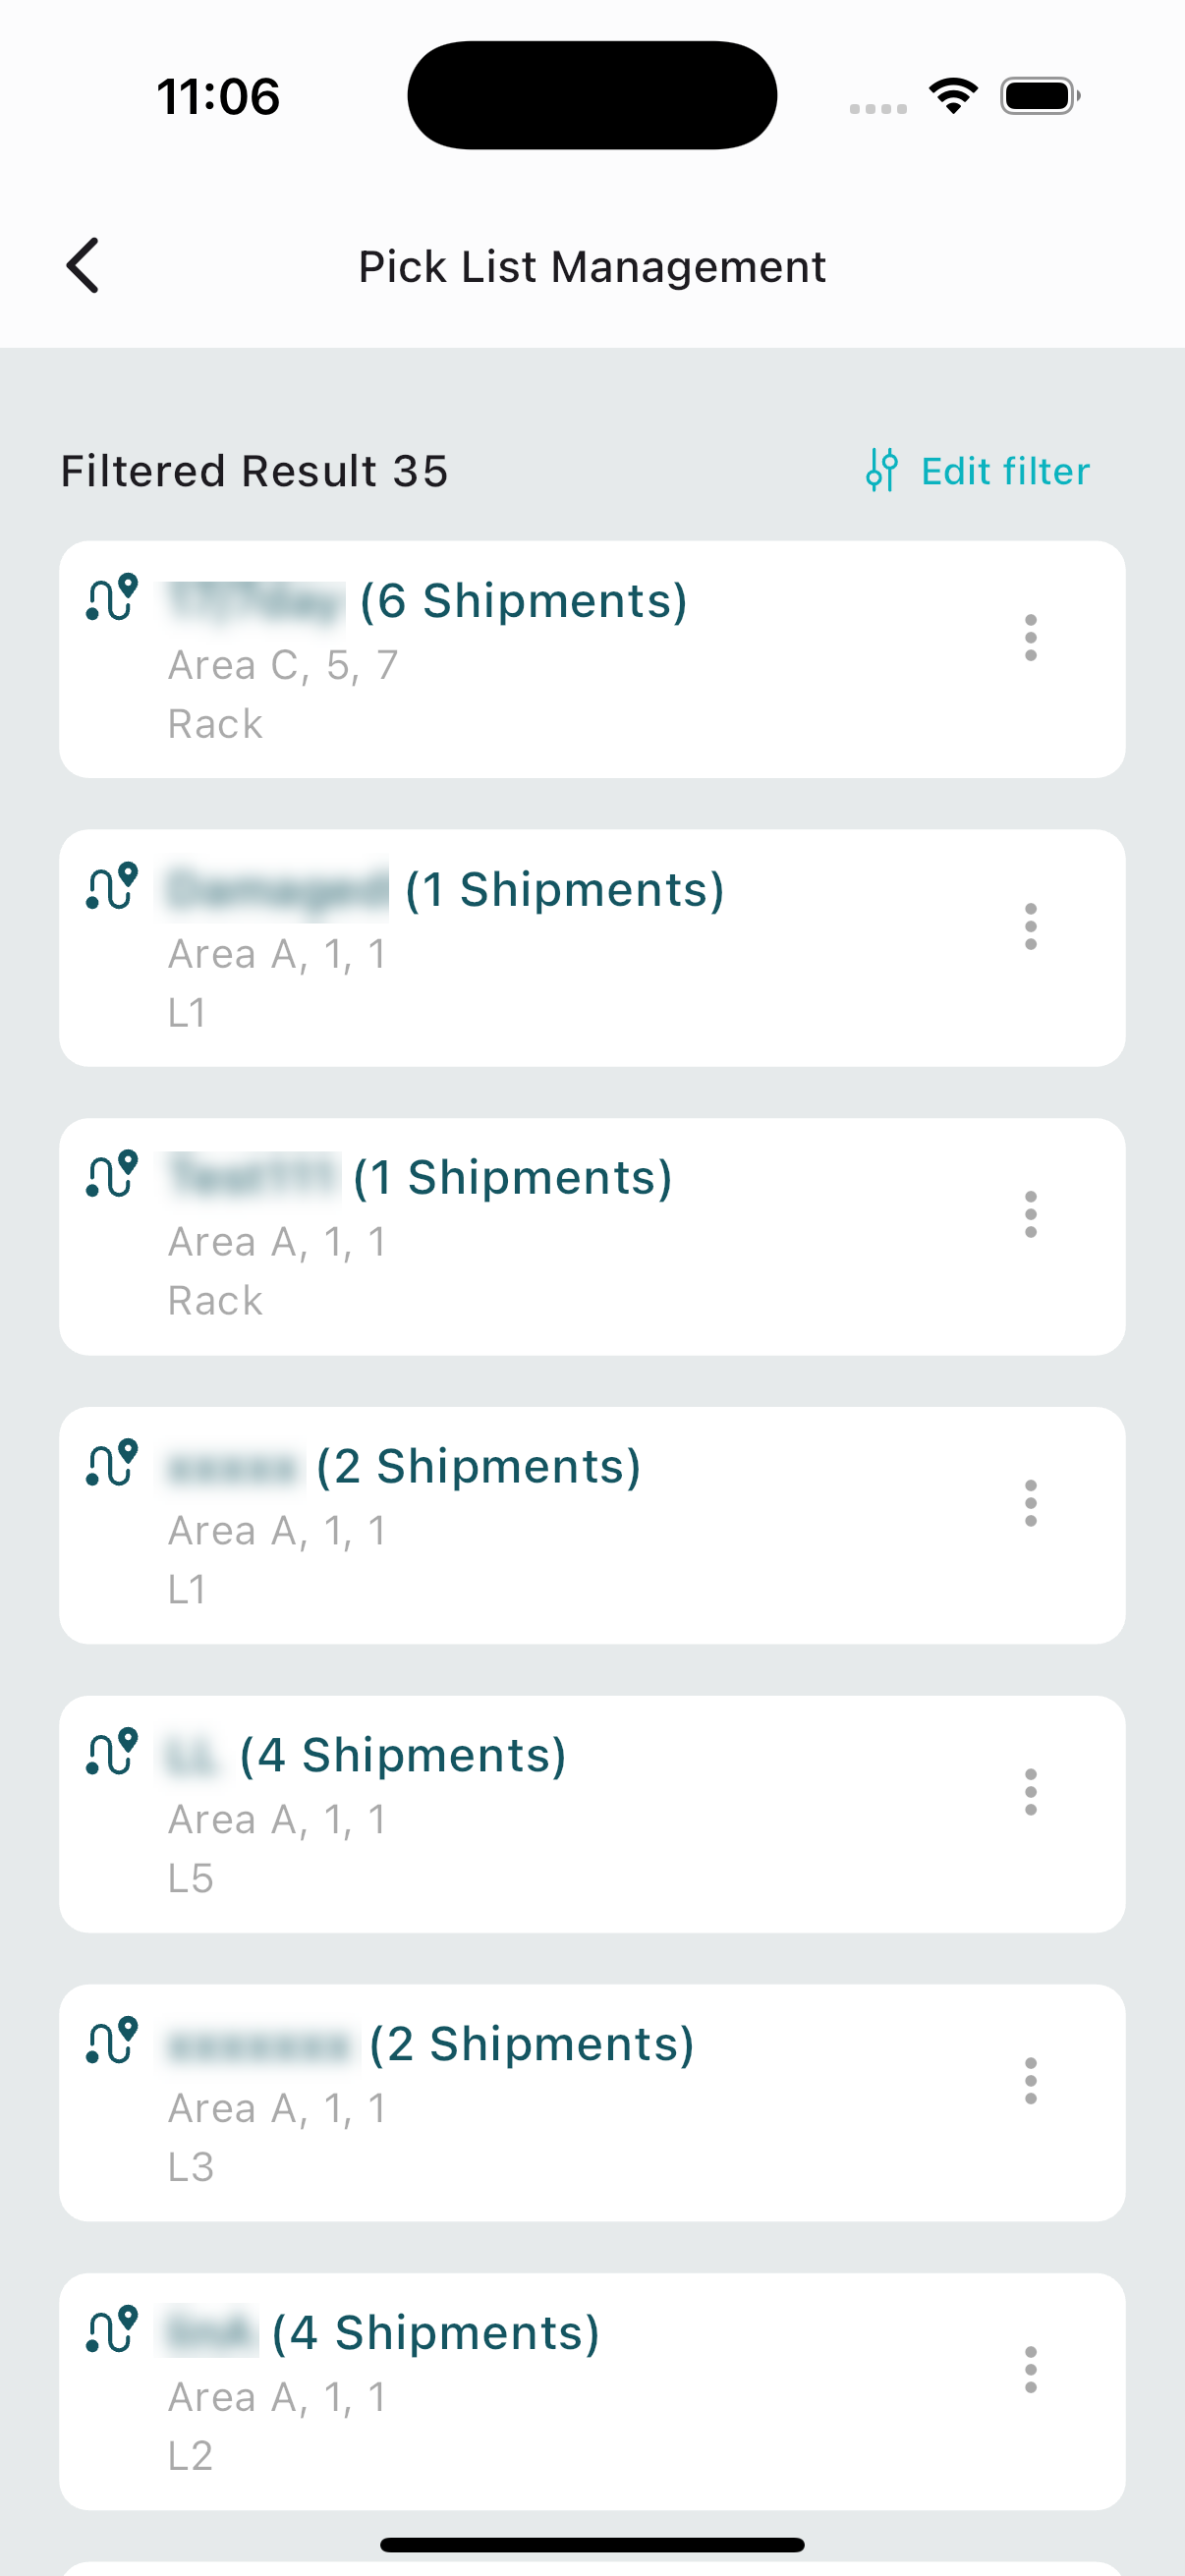
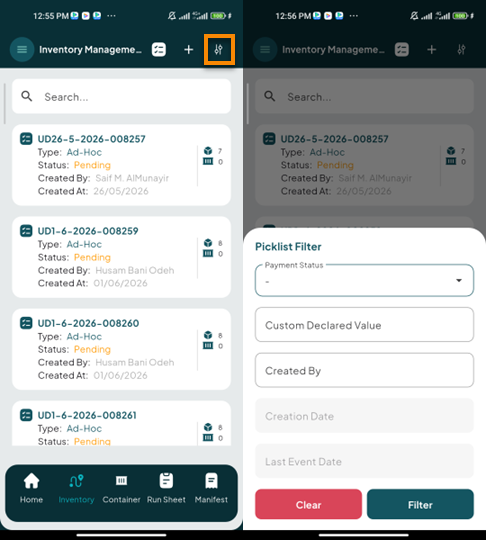
The user can search for a specific picklist by navigating to the picklist screen and clicking on the Filter icon as follows:
-
Payment Status: this field represents the status of payment for the picklist.
-
Custom Declared Value: this field represents the amount of the custom declared value for the pick list.
-
Created By: this field represents the name of whom created the pick list.
-
Creation Date: this field represents the date of picklist creation.
-
Last Event: this field represents the last event on the picklist.
-
Clear: by clicking this button, the fields will be cleared of data.
By clicking on Filter, the system will find the location successfully.