.png)
This module allows users to add shipments to containers, enhancing both transportation and storage processes and enabling actions such as managing and deleting containers.
1. Add New Container
The user can add a new container by navigating to the ‘container’ screen tab and clicking on the (+) icon as follows:
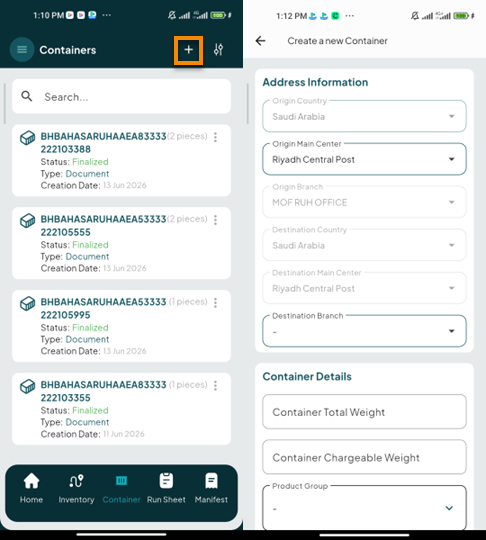
Address Information
-
Origin Country: this field represents the country of origin for the container.
-
Origin Main Center: this field represents the city of the container.
-
Origin Branch: this field represents the station from which the container will be retrieved.
-
Destination Country: this field represents the country where the container will be delivered.
-
Destination Main Center: this field represents the city where the container is delivered.
-
Destination Brnach: this field represents the station from which the container will be received.
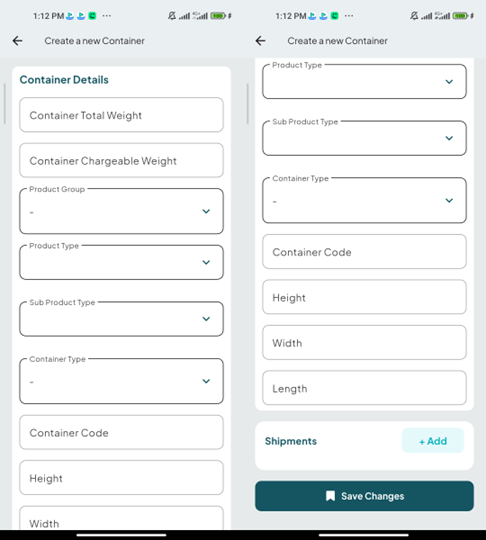
Container Details
-
Container Total Weight: this field represents the total weight of all shipments within a container.
-
Container Chargeable Weight: this field represents the weight measurement that is used by the customer to determine the value of the goods.
-
Product Group: this field represents the delivery service.
-
Product Type: this field represents the delivery service type e(express DOM, express international…..etc.)
-
Sub Product Type: this field represents the delivery service subtype (banks, government documents, …….etc).
-
Container Type: this field represents the container’s type e.g., Normal Container and Cage Container, etc.
-
Container Code: this field represents the container’s external code used for integration purposes.
-
Height: this field represents the height of the container.
-
Width: this field represents the width of the container.
-
Length: this field represents the length of the container.
-
Add: by clicking on 'Add', the user can specify shipments by either entering the shipment details manually or scanning shipments into the container, depending on the container's destination.
By clicking on Save Changes, the system adds a new container as a draft successfully.
-
Actions: by clicking on this button the user can view specific container option e.g. Mange Container, Make it Finalize, Delete Container, assign event, print label.
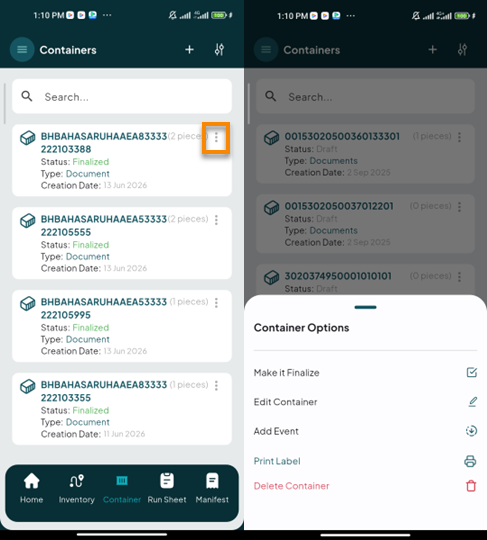
2. Edit Container
The user can view and edit an existing container by clicking on Edit Container from Actions via the ‘container’ tab as follows:
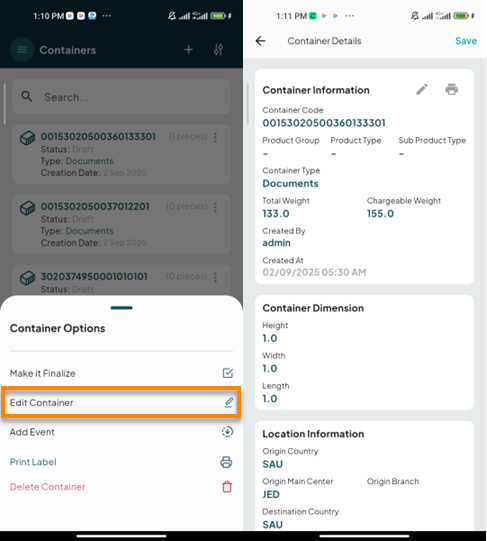
By clicking on Save, the user can save the container details successfully.
3. Finalize Container
The user can finalize the container by navigating to the ‘Container’ tab and selecting the Make it Finalize from Action.
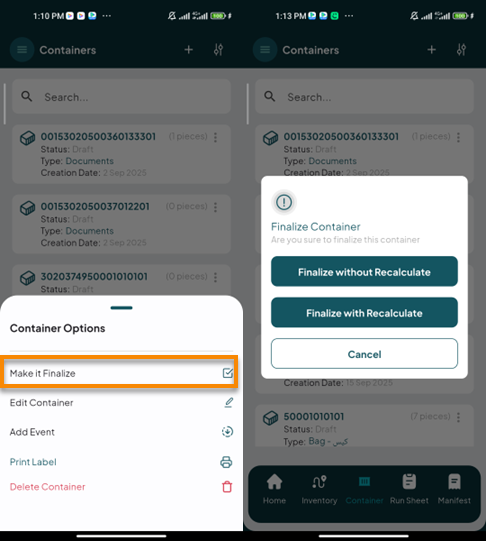
By clicking on Make it Finalize, the user can choose to finalize with recalculate or without recalculate, which will be ready for delivery and can no longer be edited.
4. Delete Container
The user can delete a draft container by clicking on Delete Container from Actions via the 'Container’ tap as follows:
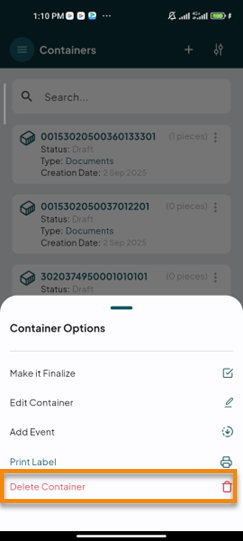
5. Add Event
The user can assign an event to a container by clicking on Add Event from Actions via the 'Container’ tap as follows:
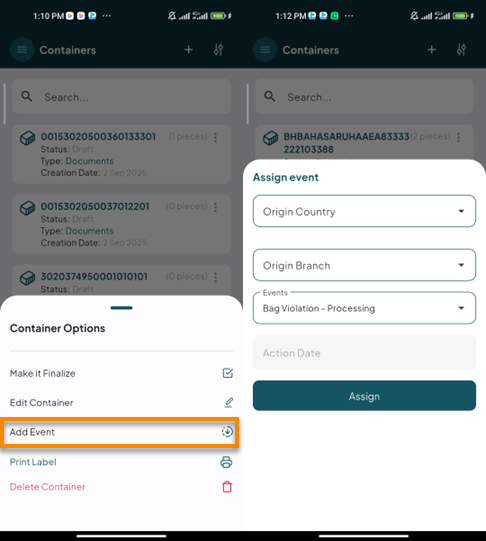
-
Origin Country: this field represents the country of origin for the container.
-
Origin Branch: this field represents the station from which the container will be retrieved.
-
Events: this field represents the event that will be assigned to shipments.
-
Action Date: this field represents the start date for the event.
By clicking on Assign, the event will be added successfully to the container.
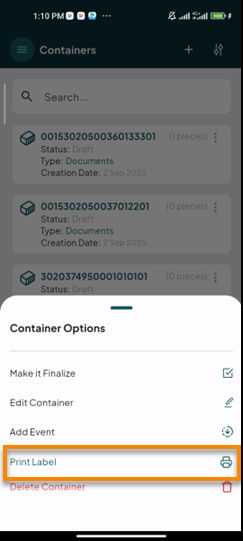
6. Print Label
The user can print the label of a container by clicking on Print Label from Actions via the 'Container’ tap as follows: