.png)
This module allows users to add containers to the MAWB and perform critical operations including Finalization, deletion to the MAWB and Recover containers, Reconcile shipments.
1. Add New Manifest
The user can add a new manifest by navigating to the ‘Manifest’ screen and clicking on the (+) icon as follows:
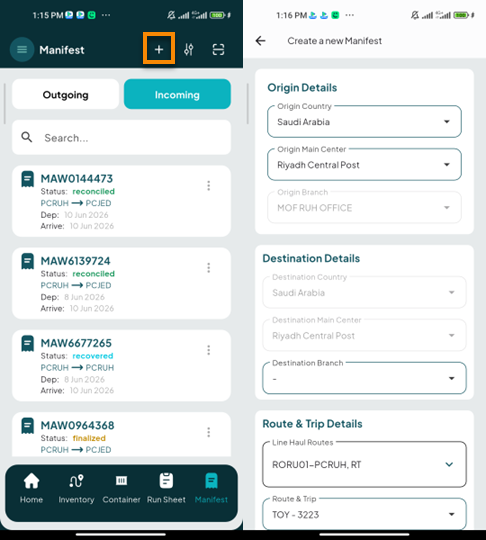
Origin Details
-
Origin Country: this field represents the master airway bill origin country.
-
Origin Main Center: this field represents the city of the master airway bill.
-
Origin Branch: this field represents the station from which the master airway bill
will be retrieved.
Destination Information
-
Destination Country: this field represents the country where the master airway bill
will be delivered.
-
Destination Main Center: this field represent to the city where the master airway bill
is delivered.
-
Destination Branch: this field represent the station from which master airway bill
will be received.
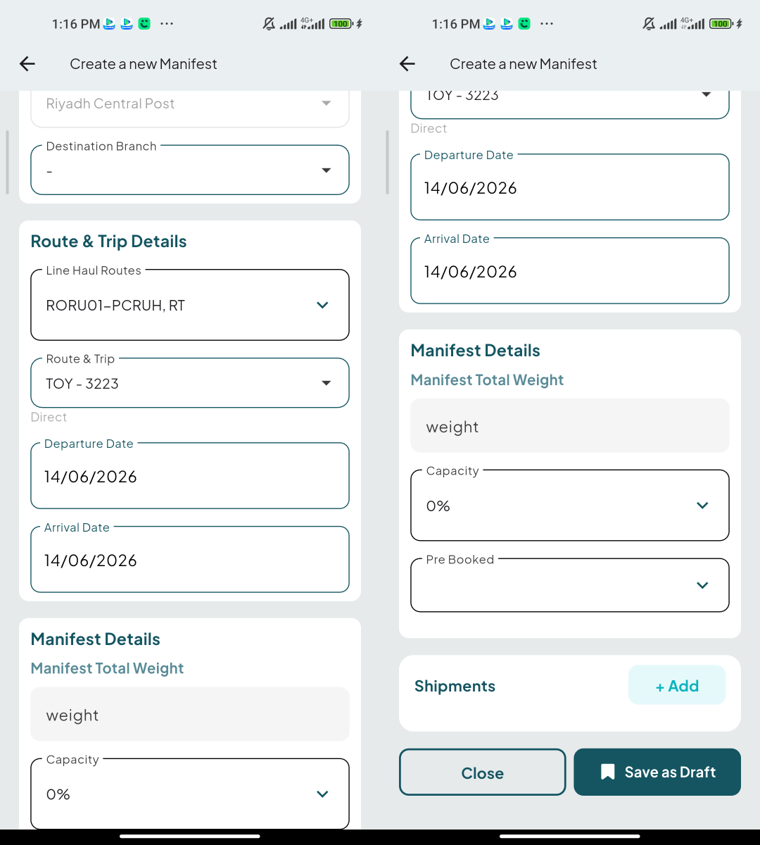
Route & Trip Details
-
Line Haul Route: this field represents the path taken by a transportation vehicle during the line haul segment of freight movement. The route is defined by predetermined stops and schedules, ensuring the efficient transport of goods over long distances between designated points.
-
Routes & Trips: this field represents the number of stops in the line haul route for the purpose of tracking.
-
Departure Date: this field represents the departure date of the MAWB from the origin port.
-
Arrival Date: this field represents the arrival date of the MAWB to the next airport stop.
MAWB Information
-
Manifest Total Weight: this field represents the total weight of all shipments within a container that is presented in the MAWB.
-
Capacity: this field represents the capability of the manifest.
-
Pre Booked: this field represents the pre-booked manifests numbers.
-
Add: by clicking on add, the user can add specific containers or shipments by either entering the details manually or scanning them into the MAWB, depending on the MAWB's destination. By clicking this option, a pop-up window will appear, allowing the selection of shipment or container types.
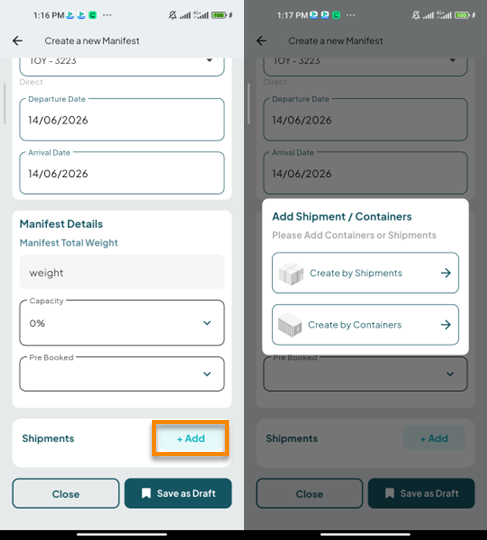
"After clicking on Add, the user can scan or manually add shipments or container to be include in the MAWB.
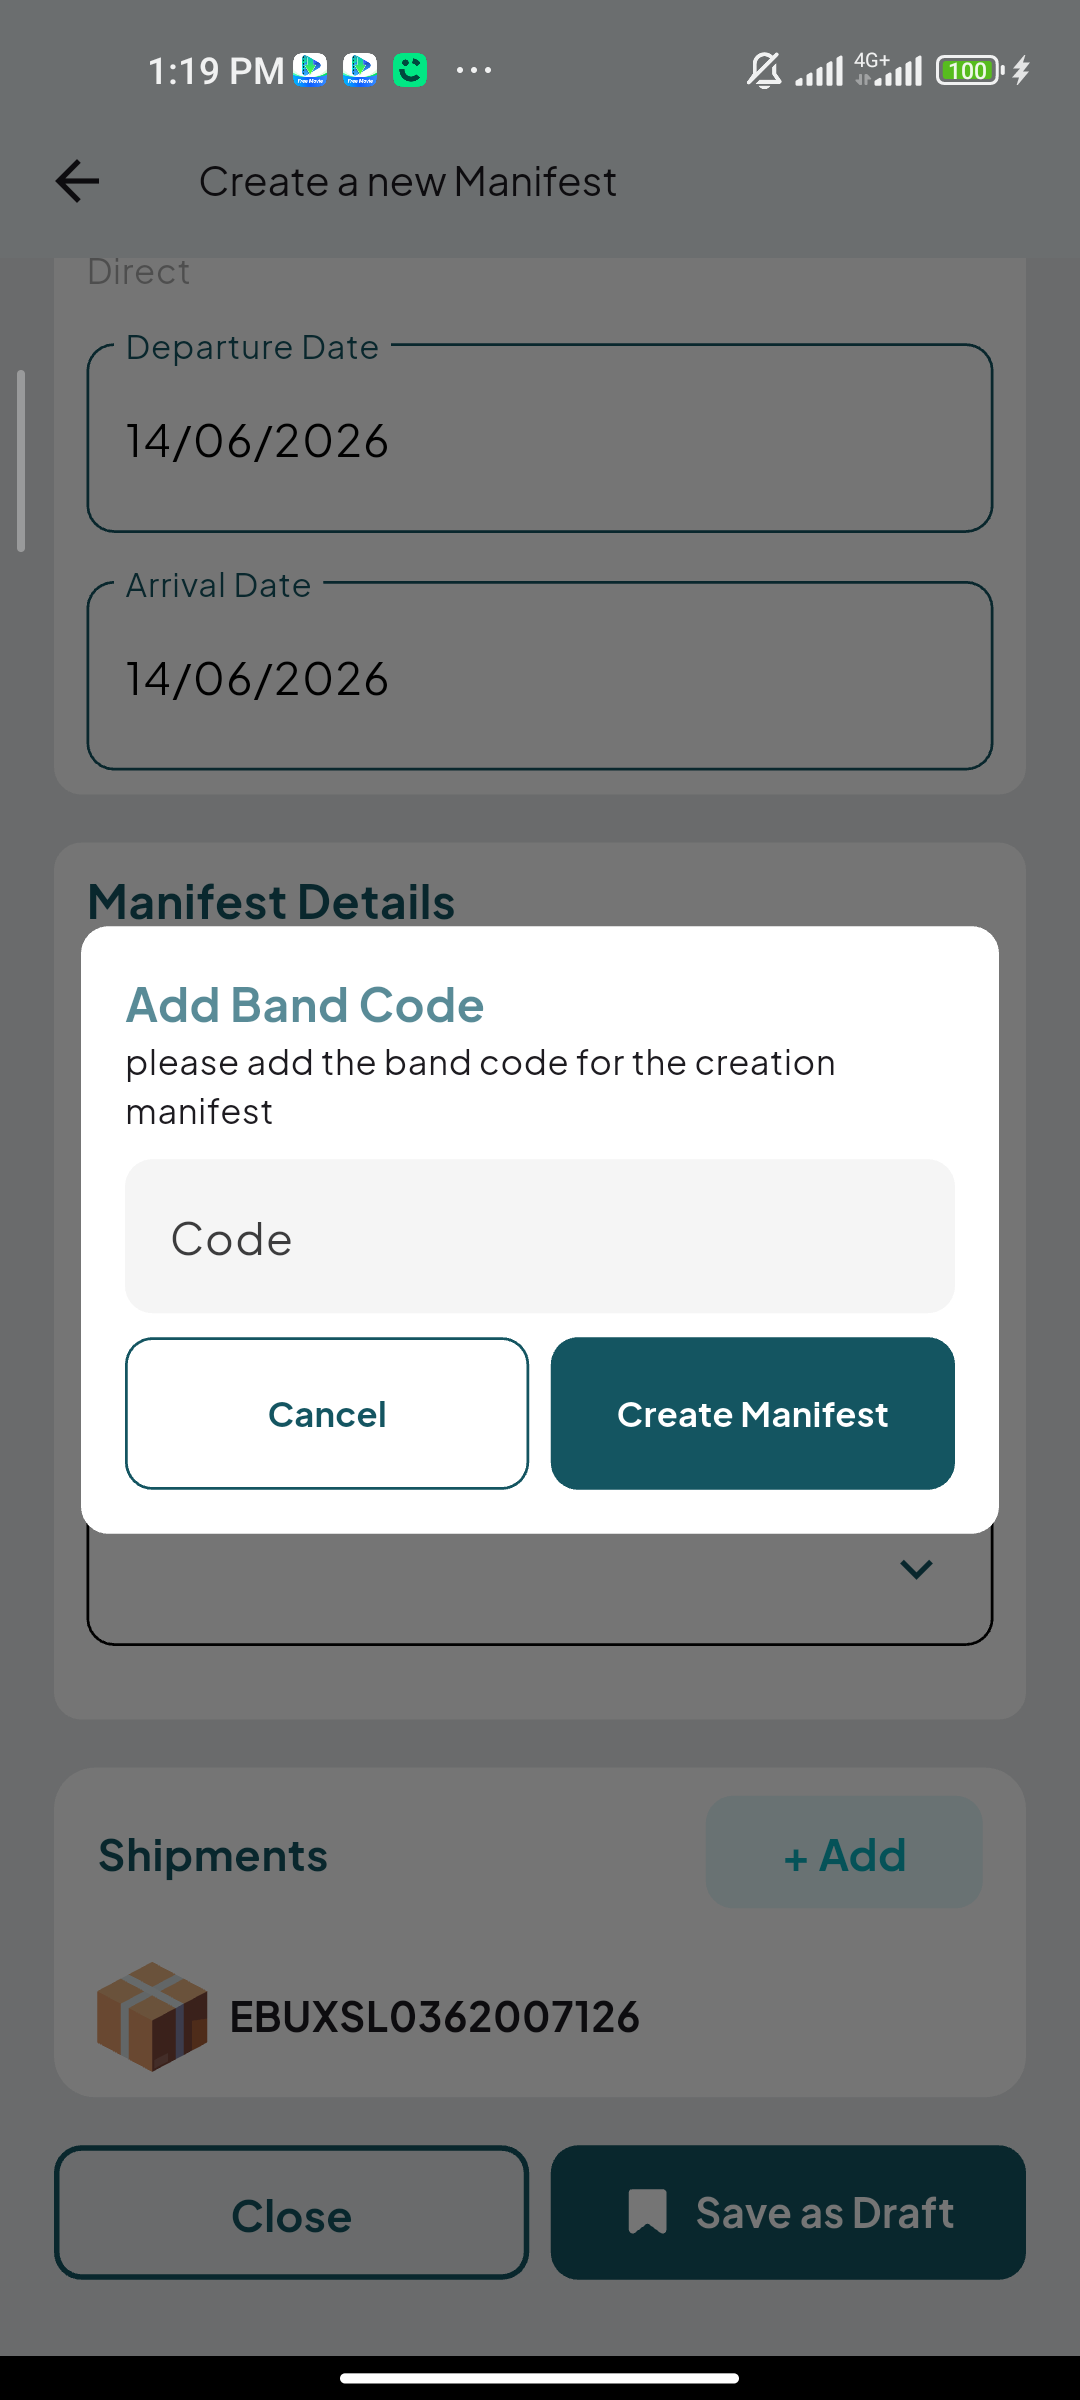
By clicking on Save as Draft, the system will ask for a band code for the manifest. After entering the band code. it will be created successfully.
-
Actions: by clicking on Actions, the user can view specific manifest options, e.g., Manage MAWB, Edit Pin Code, and Arrive manifest.
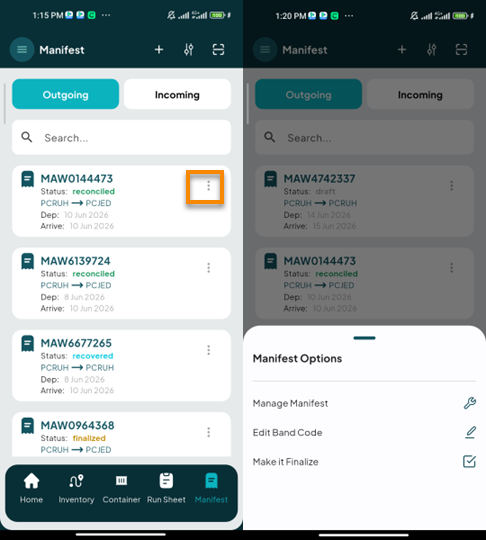
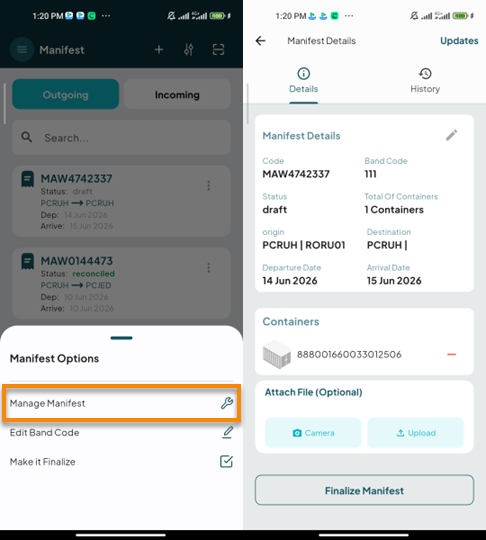
2. Manage Manifest
The user can view an existing manifest by clicking on Manage Manifest from Actions via the ‘Manifest’ tab as follows:
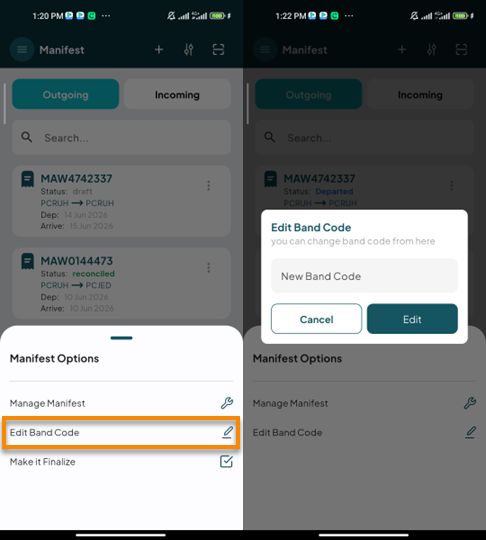
3. Edit Band Code
The user can add new pin code to the manifest by clicking on Edit Band Code from Actions as follows:
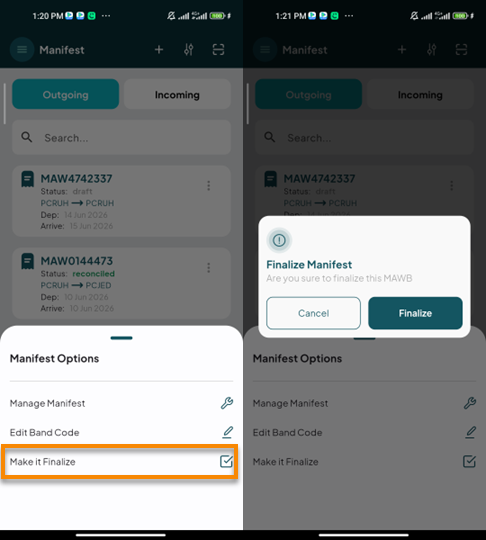
4. Make It Finalize
The user can finalize the manifest by clicking on Make it Finalize from Actions via the ‘Manifest’ tab as follows:
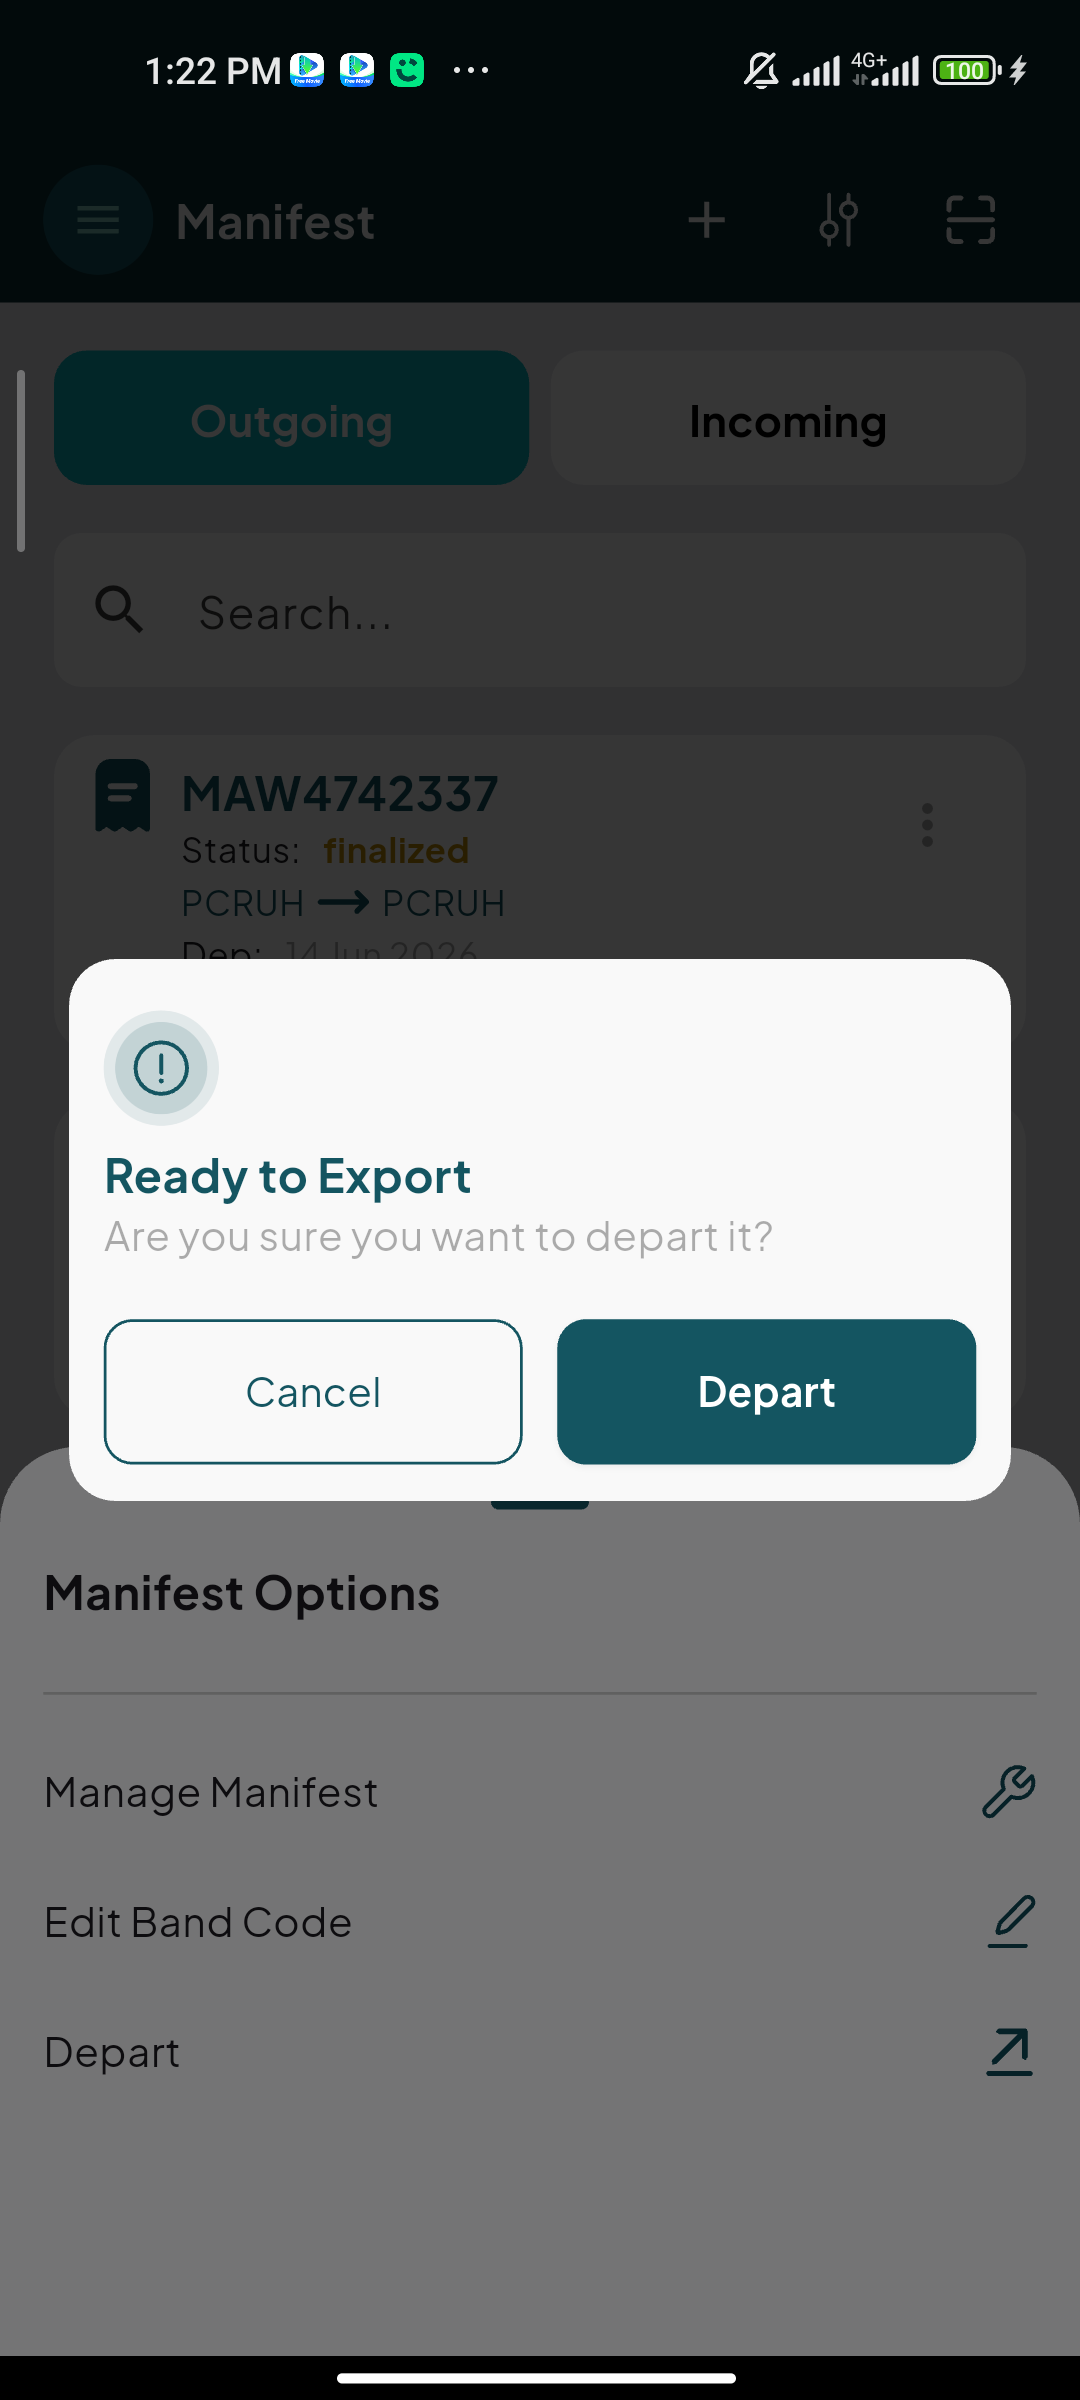
5. Depart Manifest
The user can depart the manifest, if it has left the warehouse, by selecting Depart from Actions in the ‘Manifest’ tab as follows:
6. Arrive Manifest
The user can make the manifest arrive by clicking on Arrive from Actions via the ‘Manifest’ tab as follows:
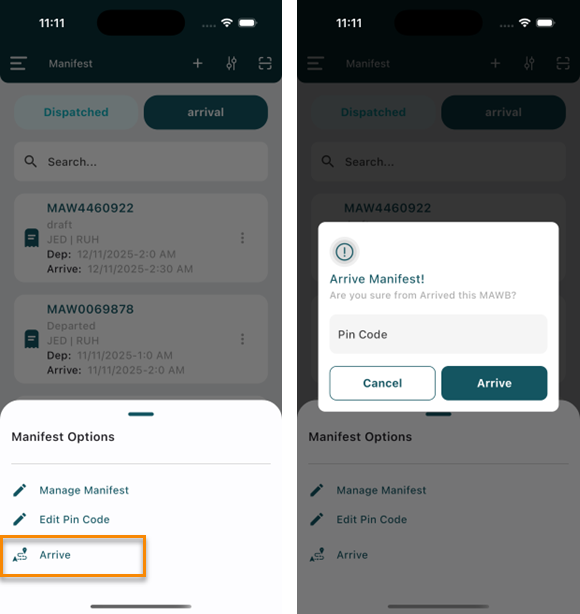
Note: The user must enter the Band Code for the manifest, if it exists, to change the manifest status to Arrived.
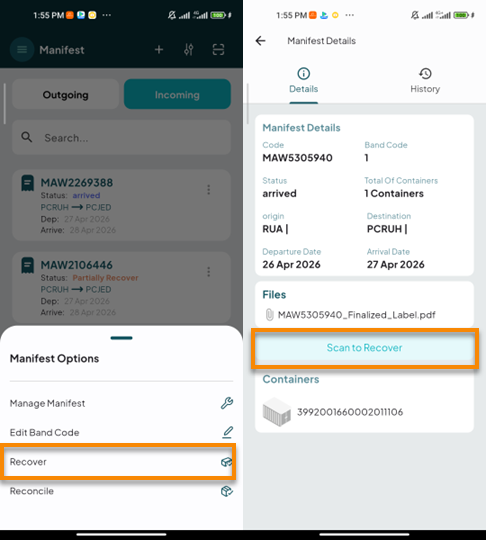
7. Recover Container
The user can recover the container by clicking on Recover from Actions via the ‘Manifest’ tab as follows:
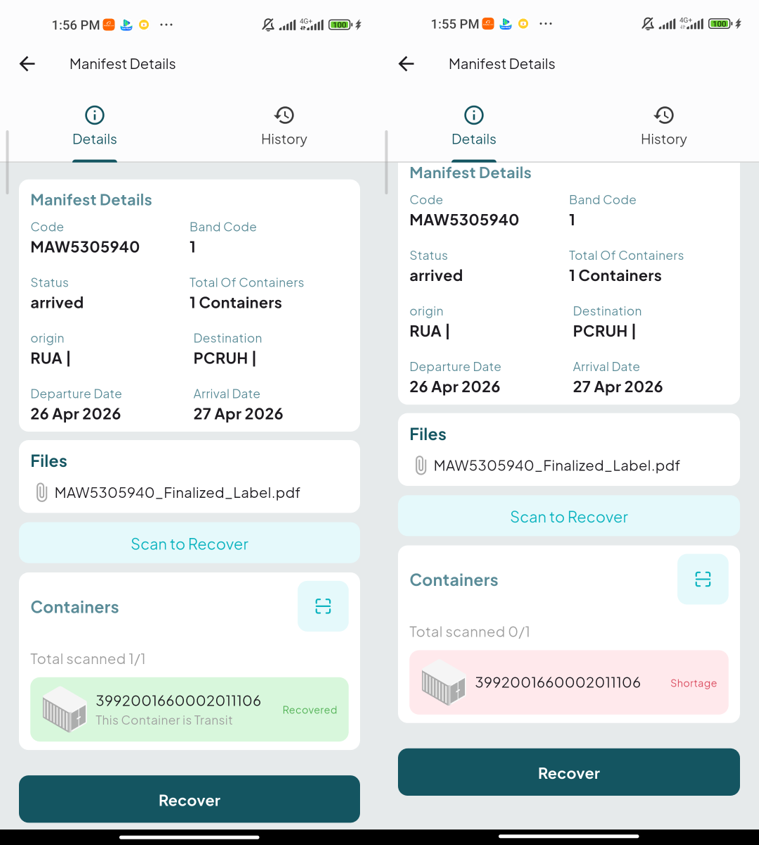
Note: when adding the containers, any shortages will be highlighted in red, while any overages will be highlighted in yellow.
By clicking on Recover, the manifest will be recovered successfully.
8. Reconcile Shipments
After completing the recovery process, the status of the MAWB will be updated to recovered. Then, click on the same MAWB to reconcile the shipments associated with the containers.
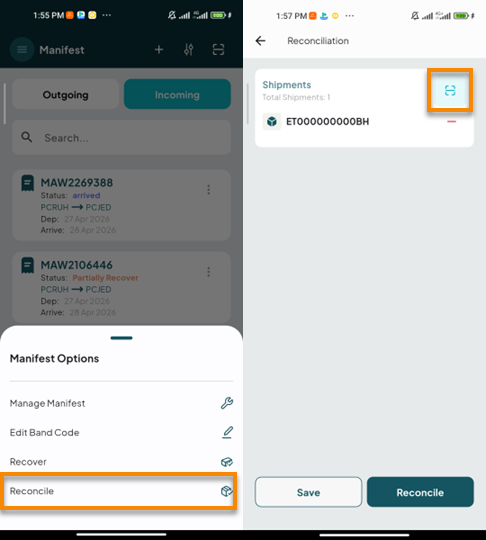
By clicking on Reconcile, the shipments will be reconciled successfully.
By clicking on Save, the reconciliation will be added successfully.
Note: when adding the shipments, any shortages will be highlighted in red, while any overages will be highlighted in yellow.