.png)
1. Carriers
1.1 Dashboard
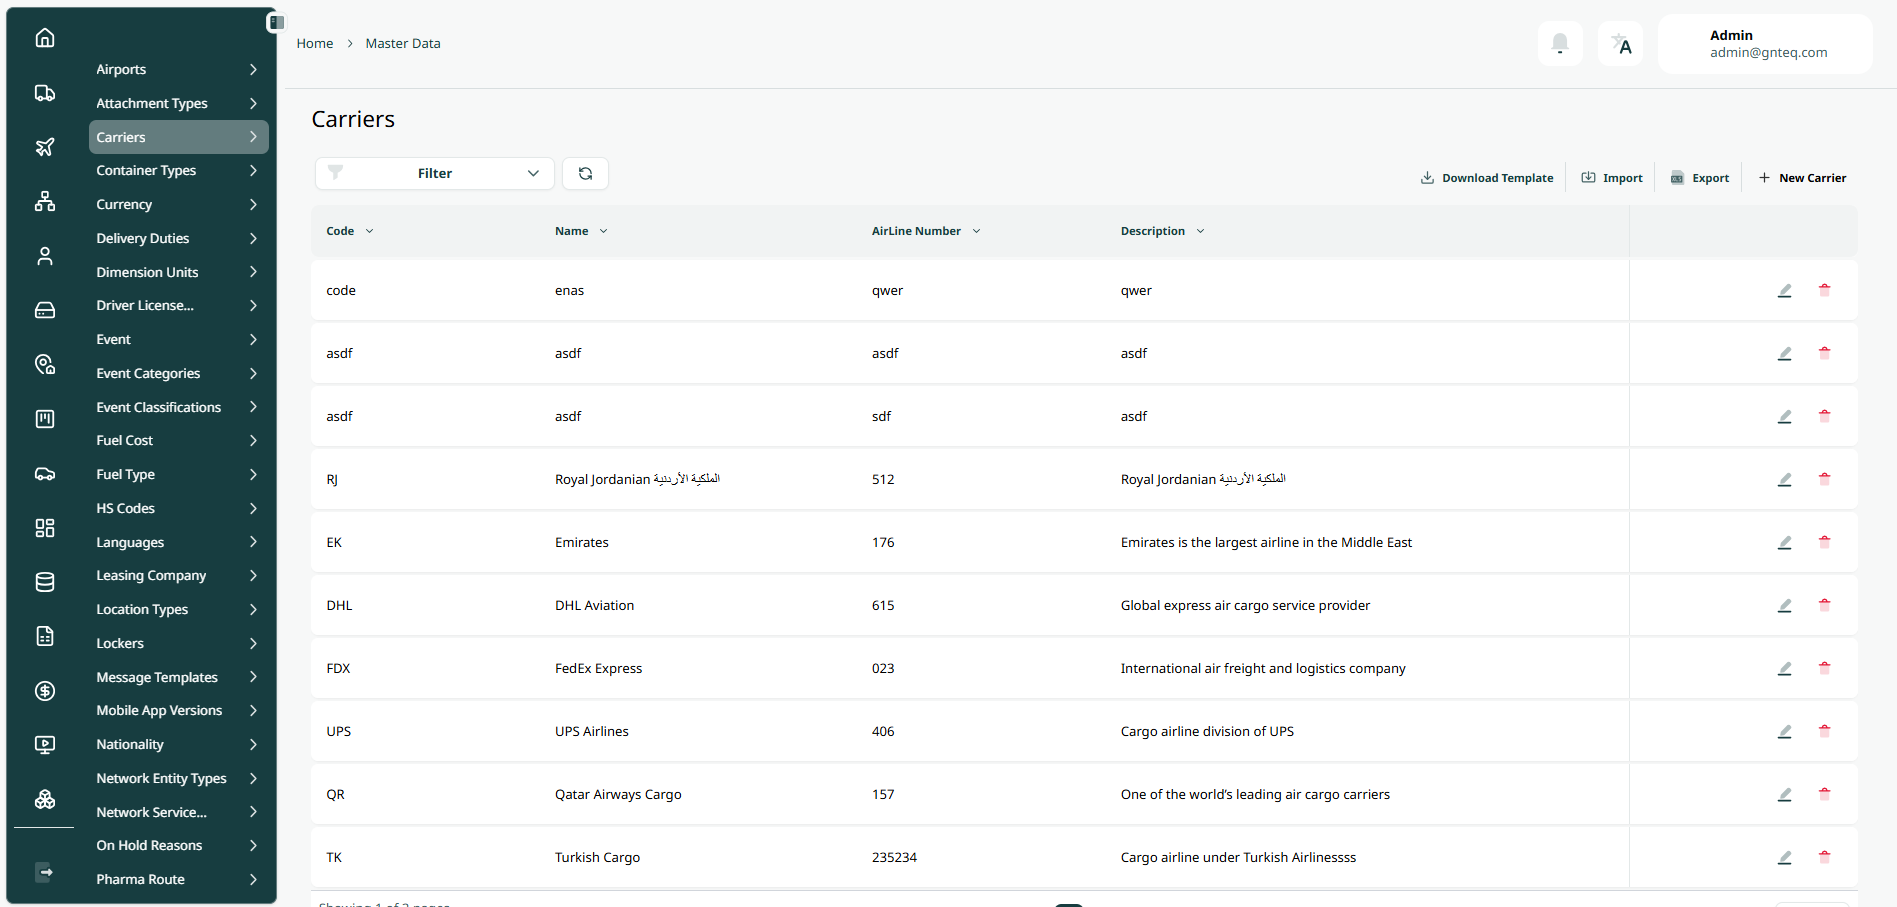
The user can view the defined carriers in the system by navigating to the ‘Carriers’ screen in the Master Data from the left navigation panel as follows:
-
New Carriers: the user can add a new carrier by clicking New Carrier button.
-
Export: the user can export the list as an Excel file by selecting export button.
-
Import: the user can upload the list as an Excel file by selecting import button.
-
Download template: the user can click on ‘Download Template’ to download a certain detail from the dashboard.
-
Filters: the user can search for the shipment by the a code, name…..etc.
-
Rows Per Page: the user can select the number of items to show on each page.
-
Action: by clicking on this button the user can edit, delete .
1.1.1 Edit Information
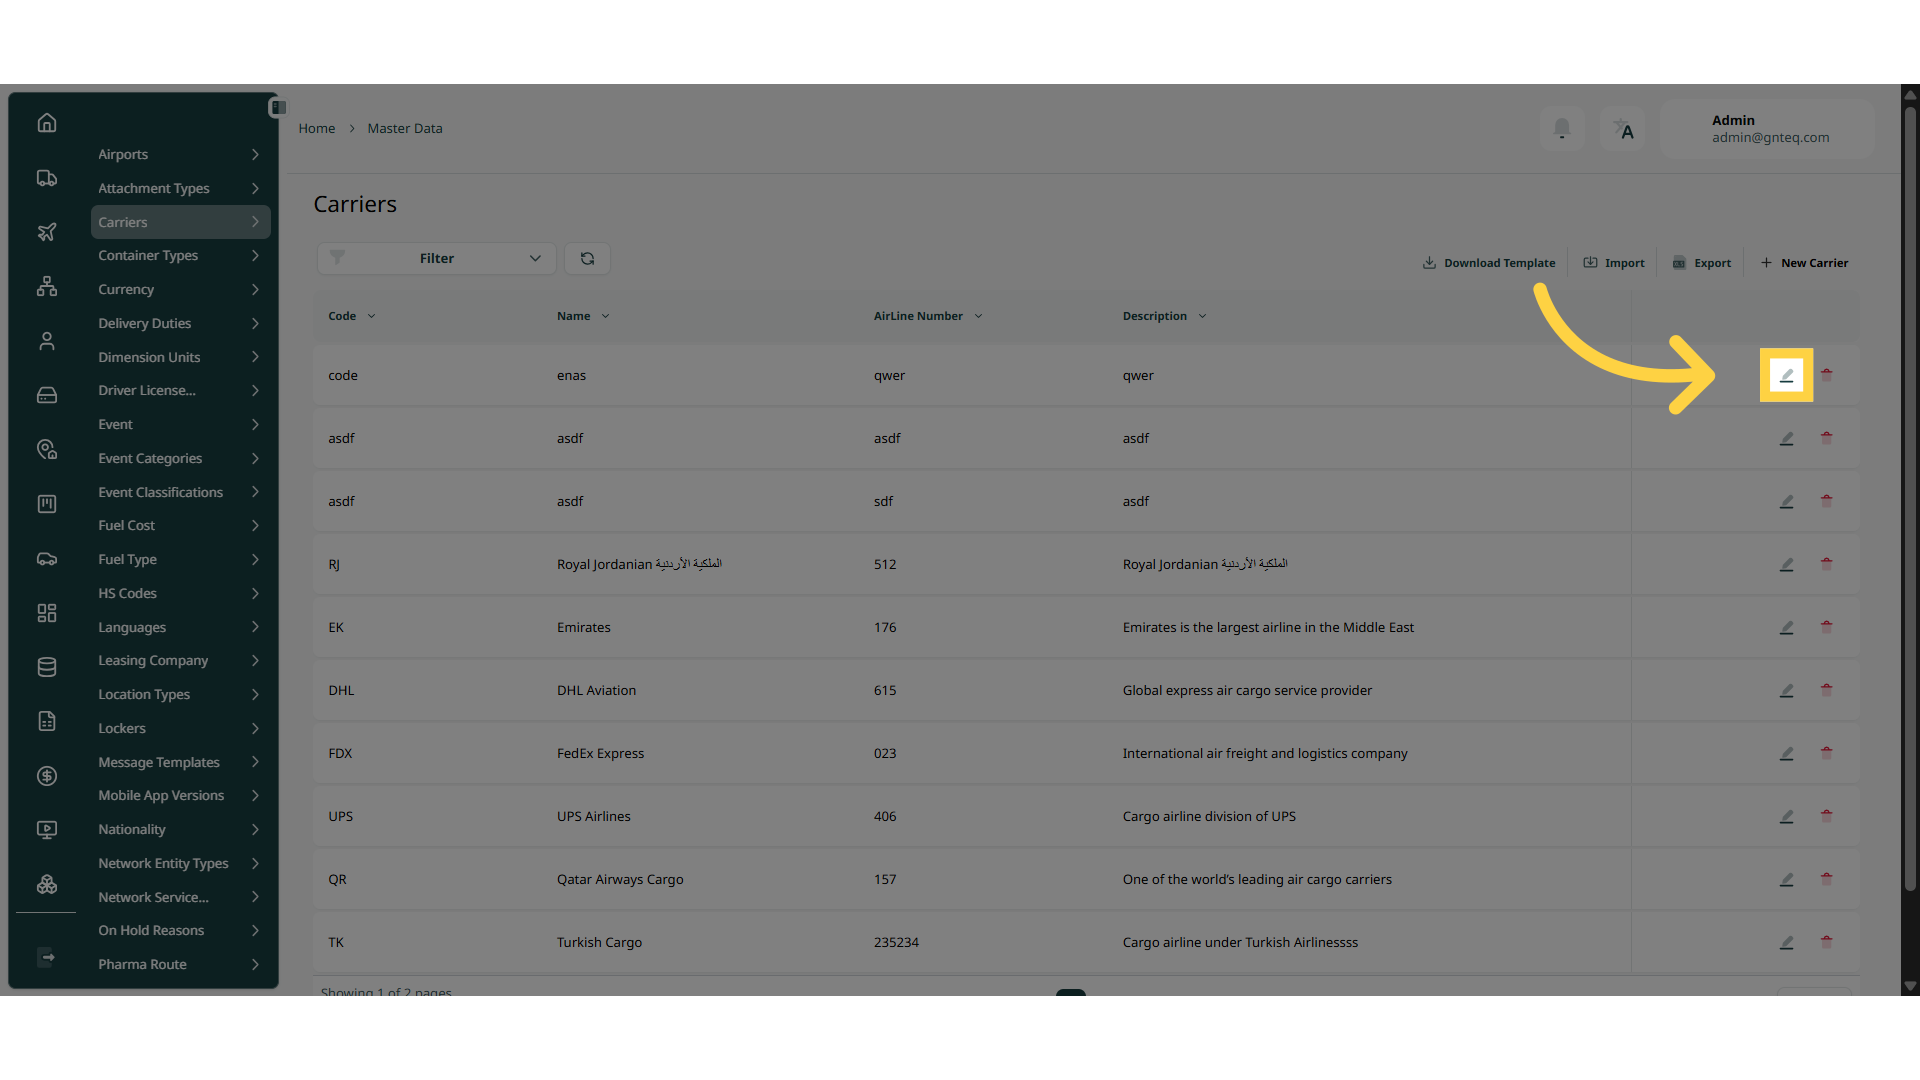
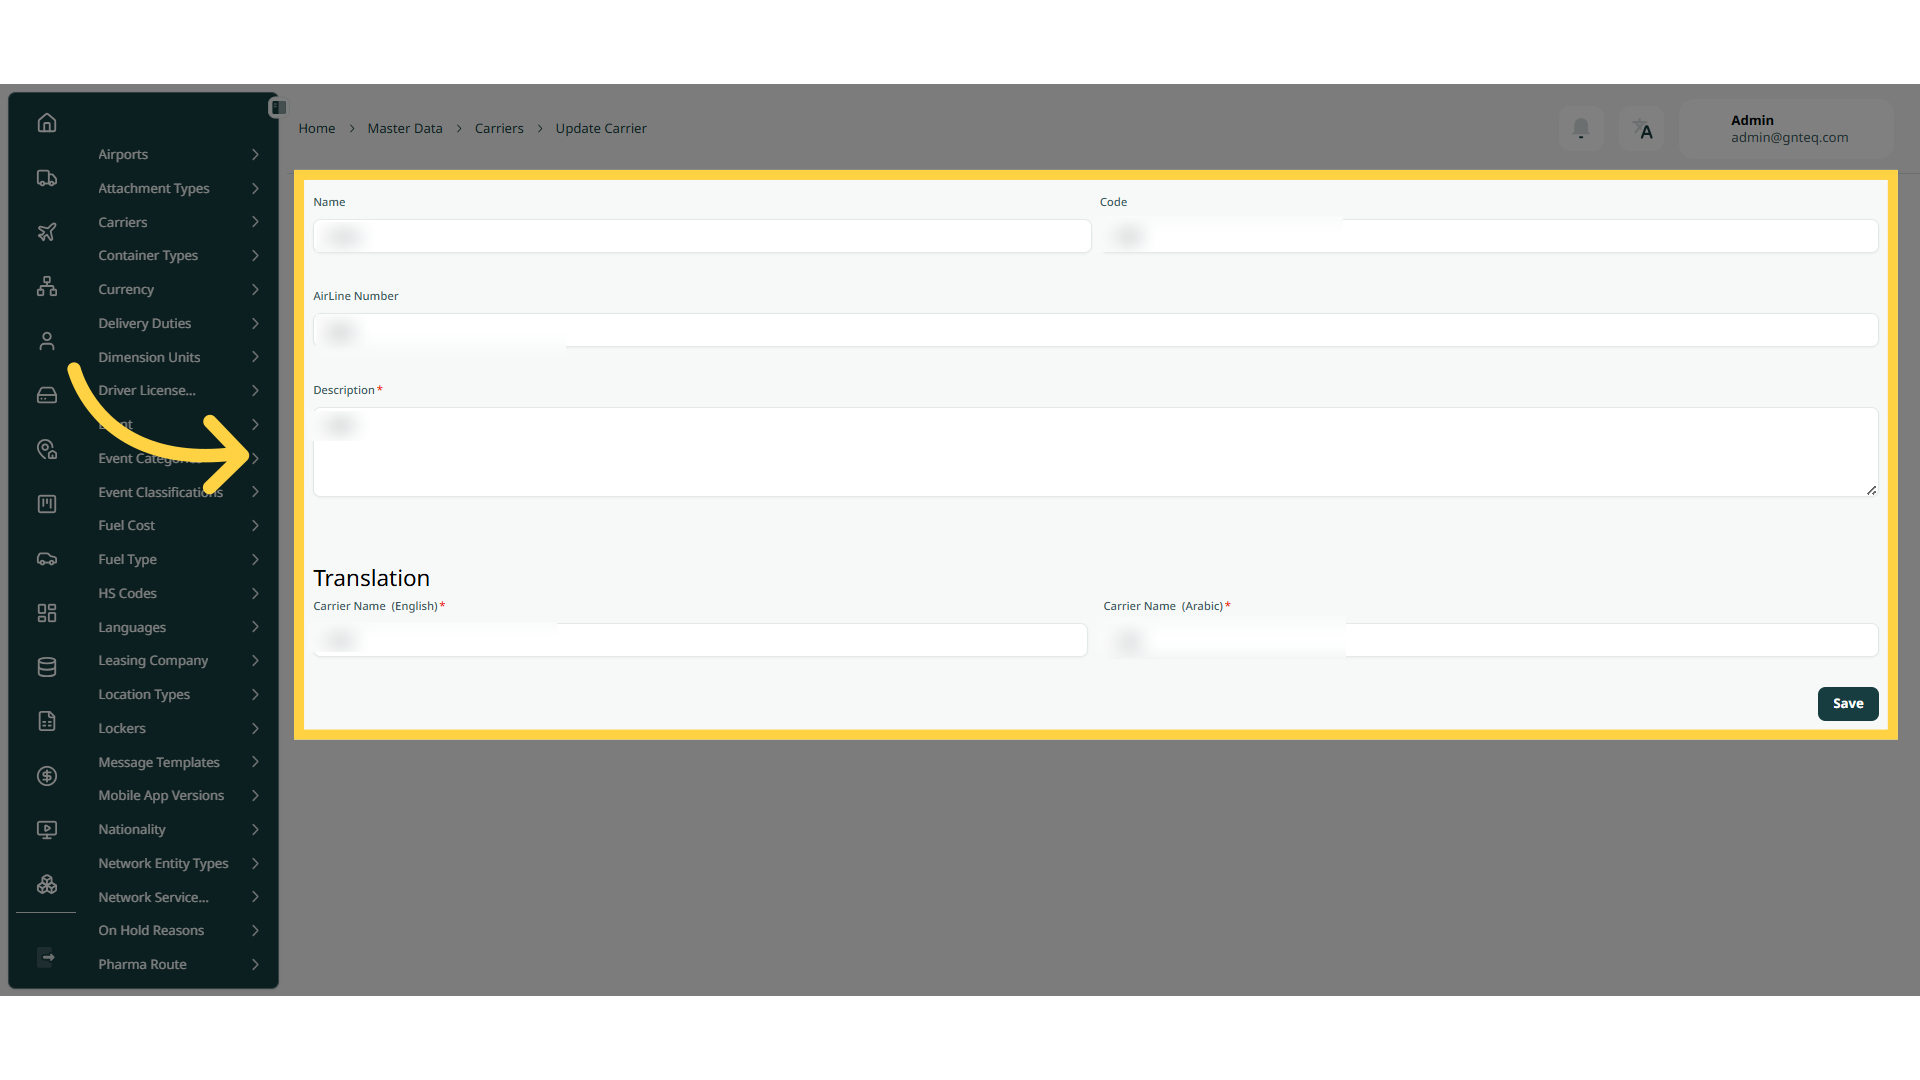
The user can edit the information of an existing carrier by clicking on Edit from Actions by navigating to the ‘Carriers’ screen via the Master Data.
1.1.2 Delete Carrier
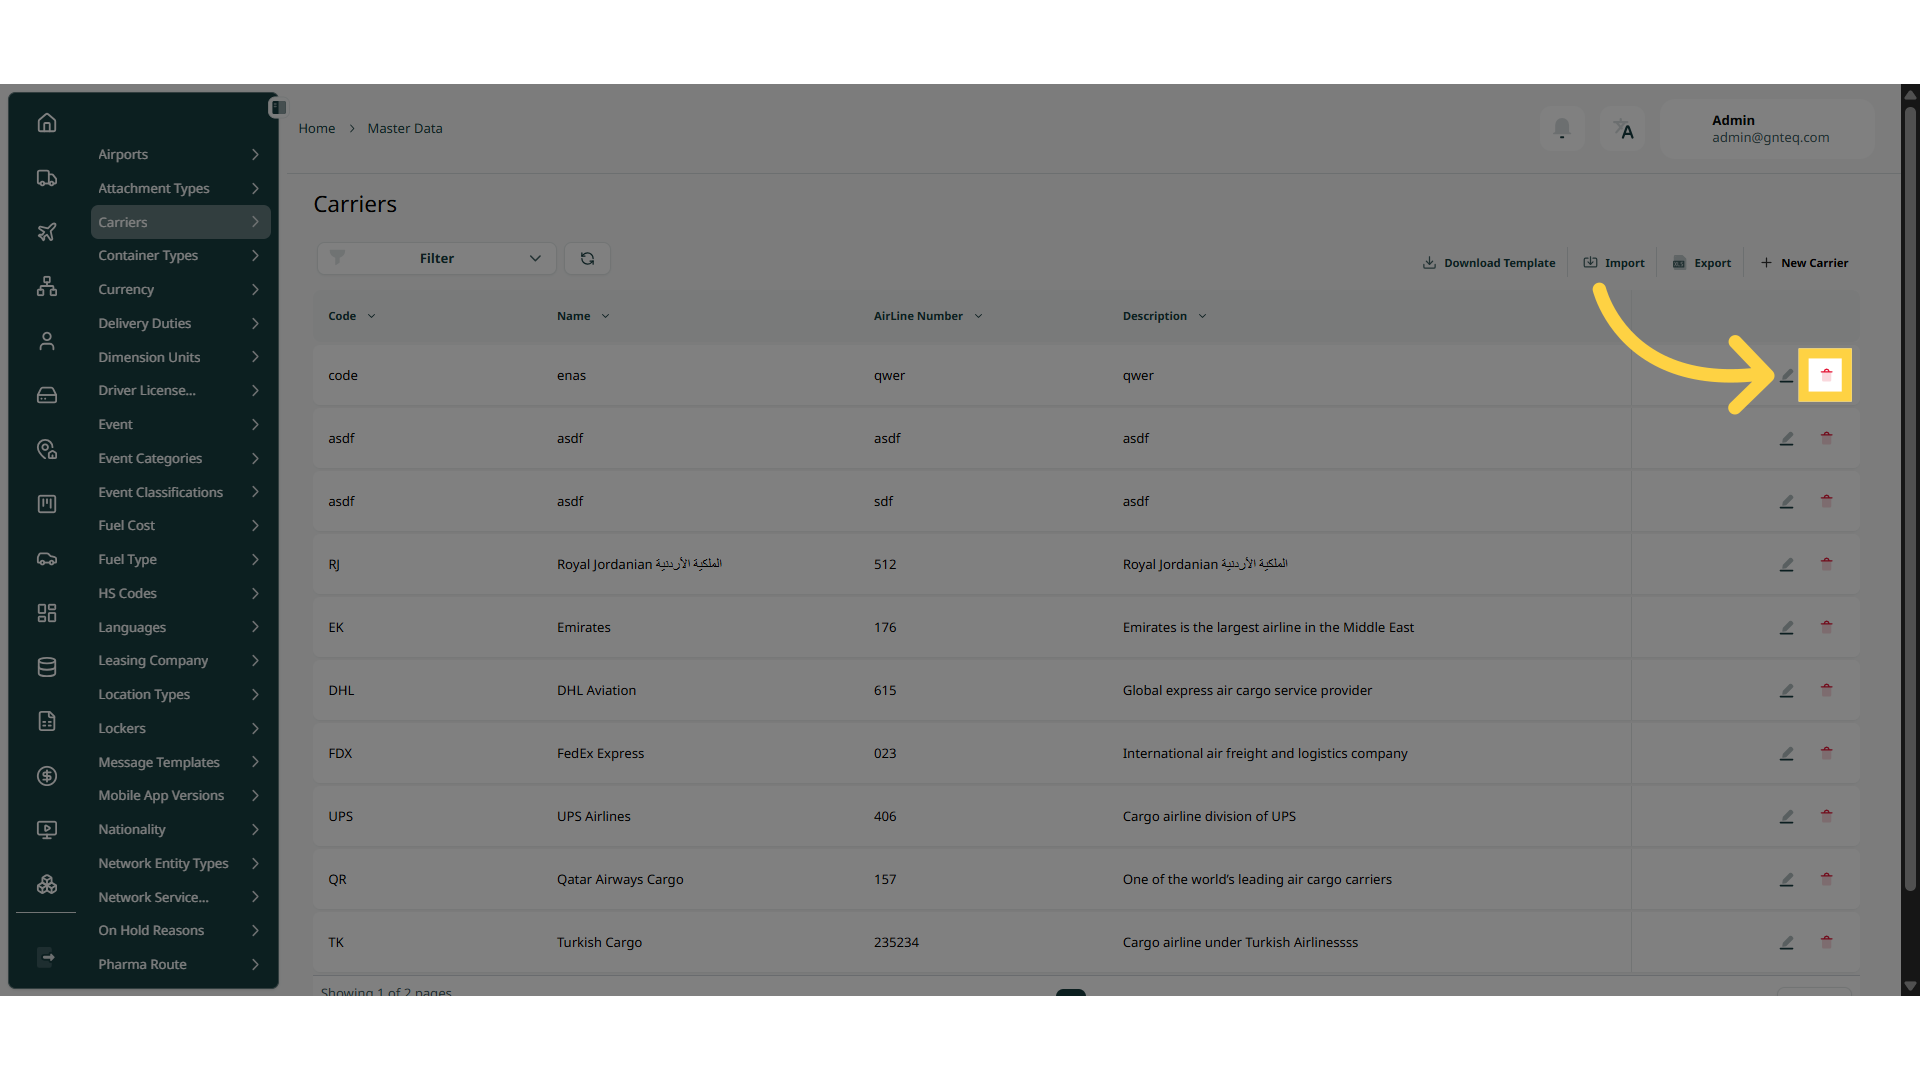
The user can delete carrier by clicking on Delete from Actions by navigating to the ‘Carriers’ screen via the Master Data.
1.2 Add New Carrier
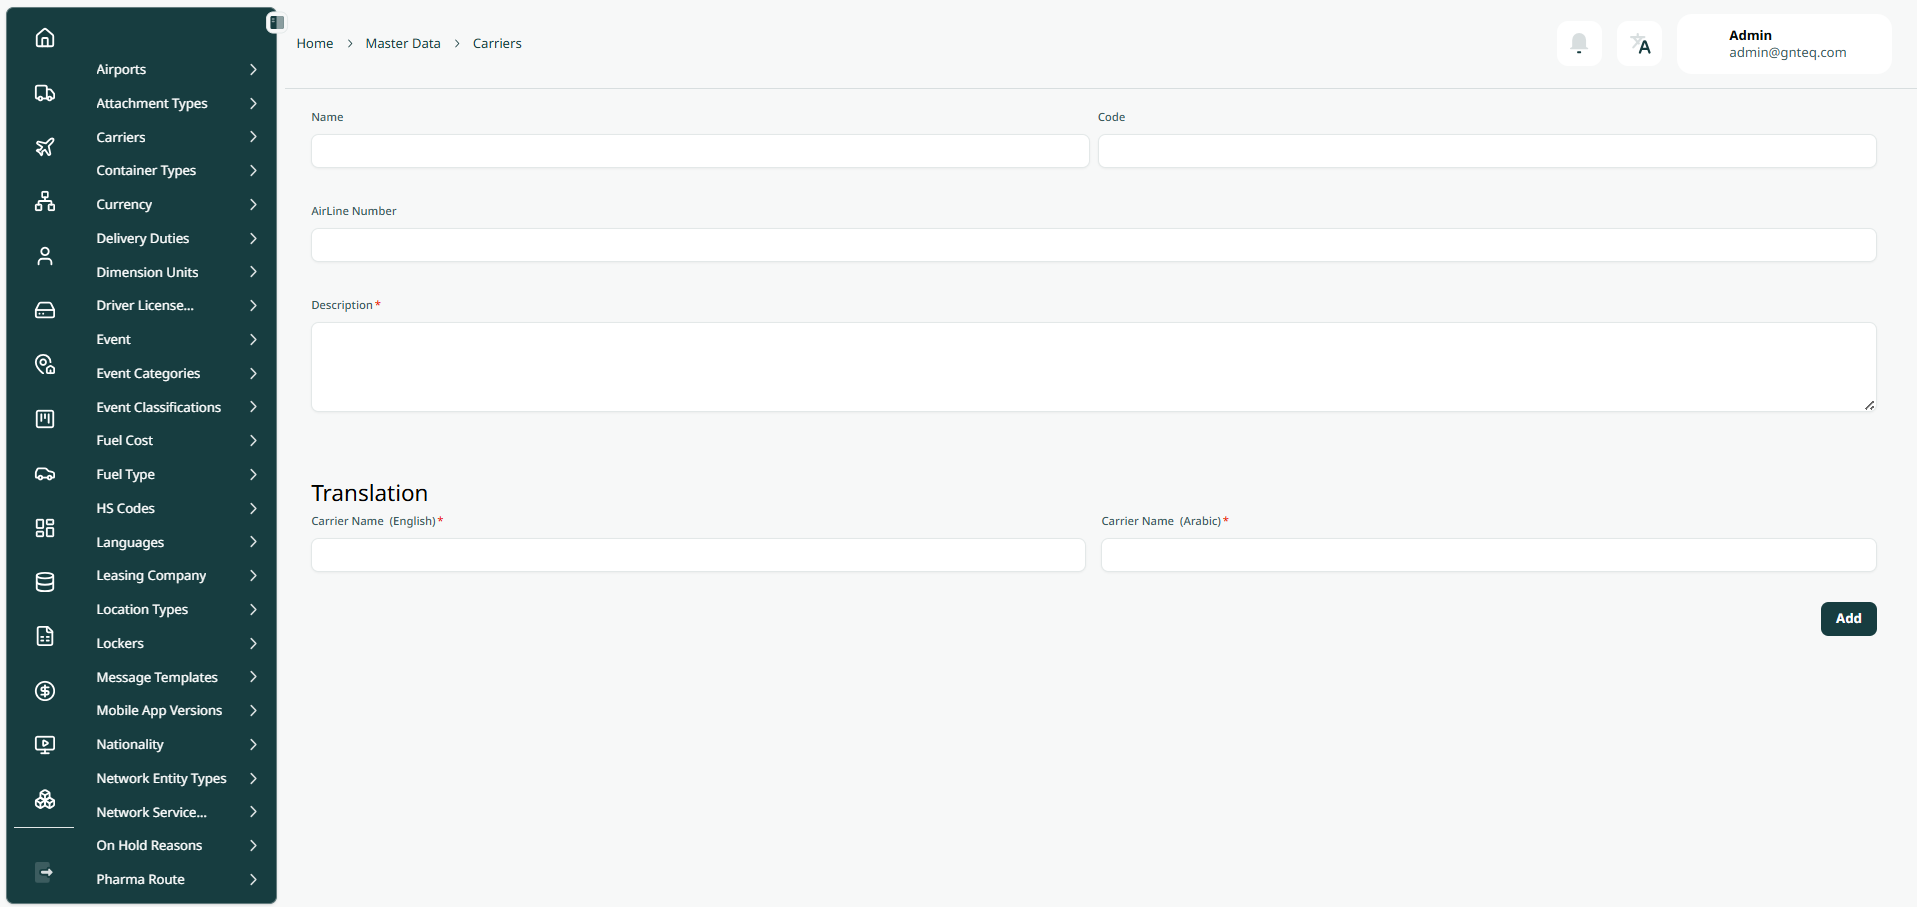
The user can create a new carrier by clicking on New Attachment by navigating to the ‘Carriers’ screen via the Master Data.
-
Code: this field represents the carrier unique alphanumeric value.
-
Name: this field represents the carrier name.
-
Airline Number: this field represents the airline number.
-
Description: this field represents a detailed description of the carriers.
-
Carriers Name (English): this field represents the carriers name in english.
-
Carriers Name (Arabic): this field represents the carriers name in arabic.
By clicking on Add the carrier will be added successfully.