.png)
1. Template Criteria
1.1 Dashboard
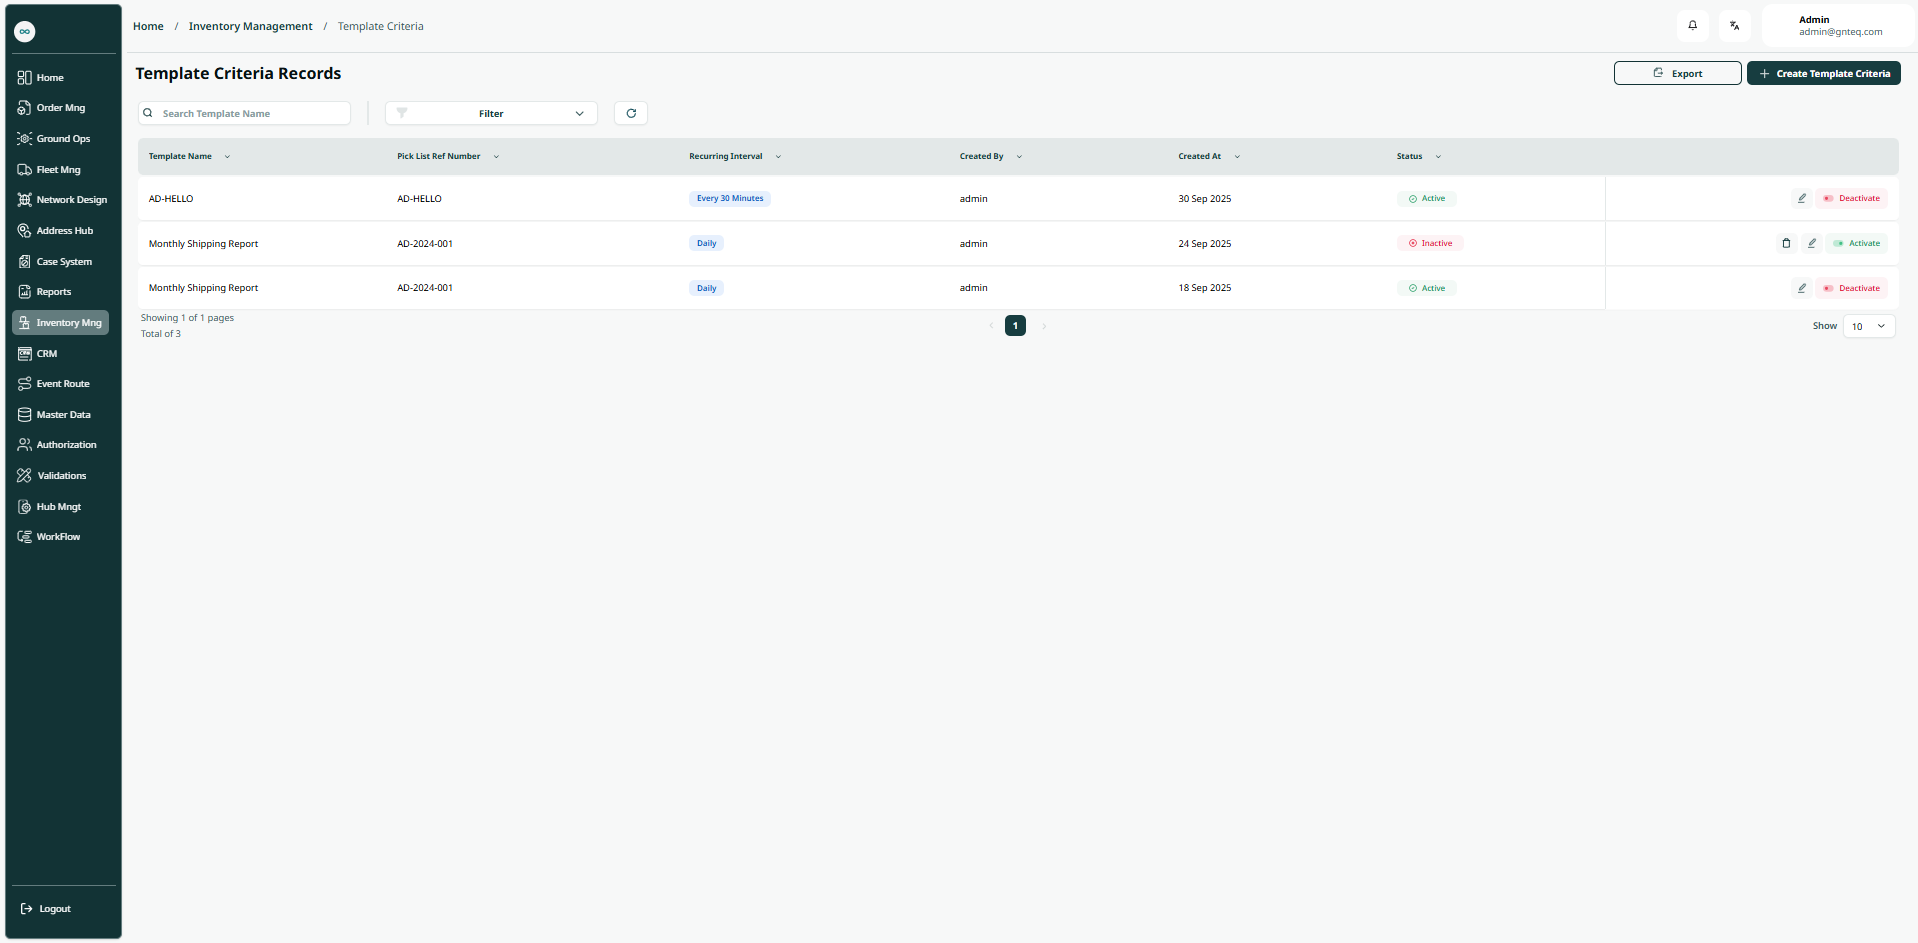
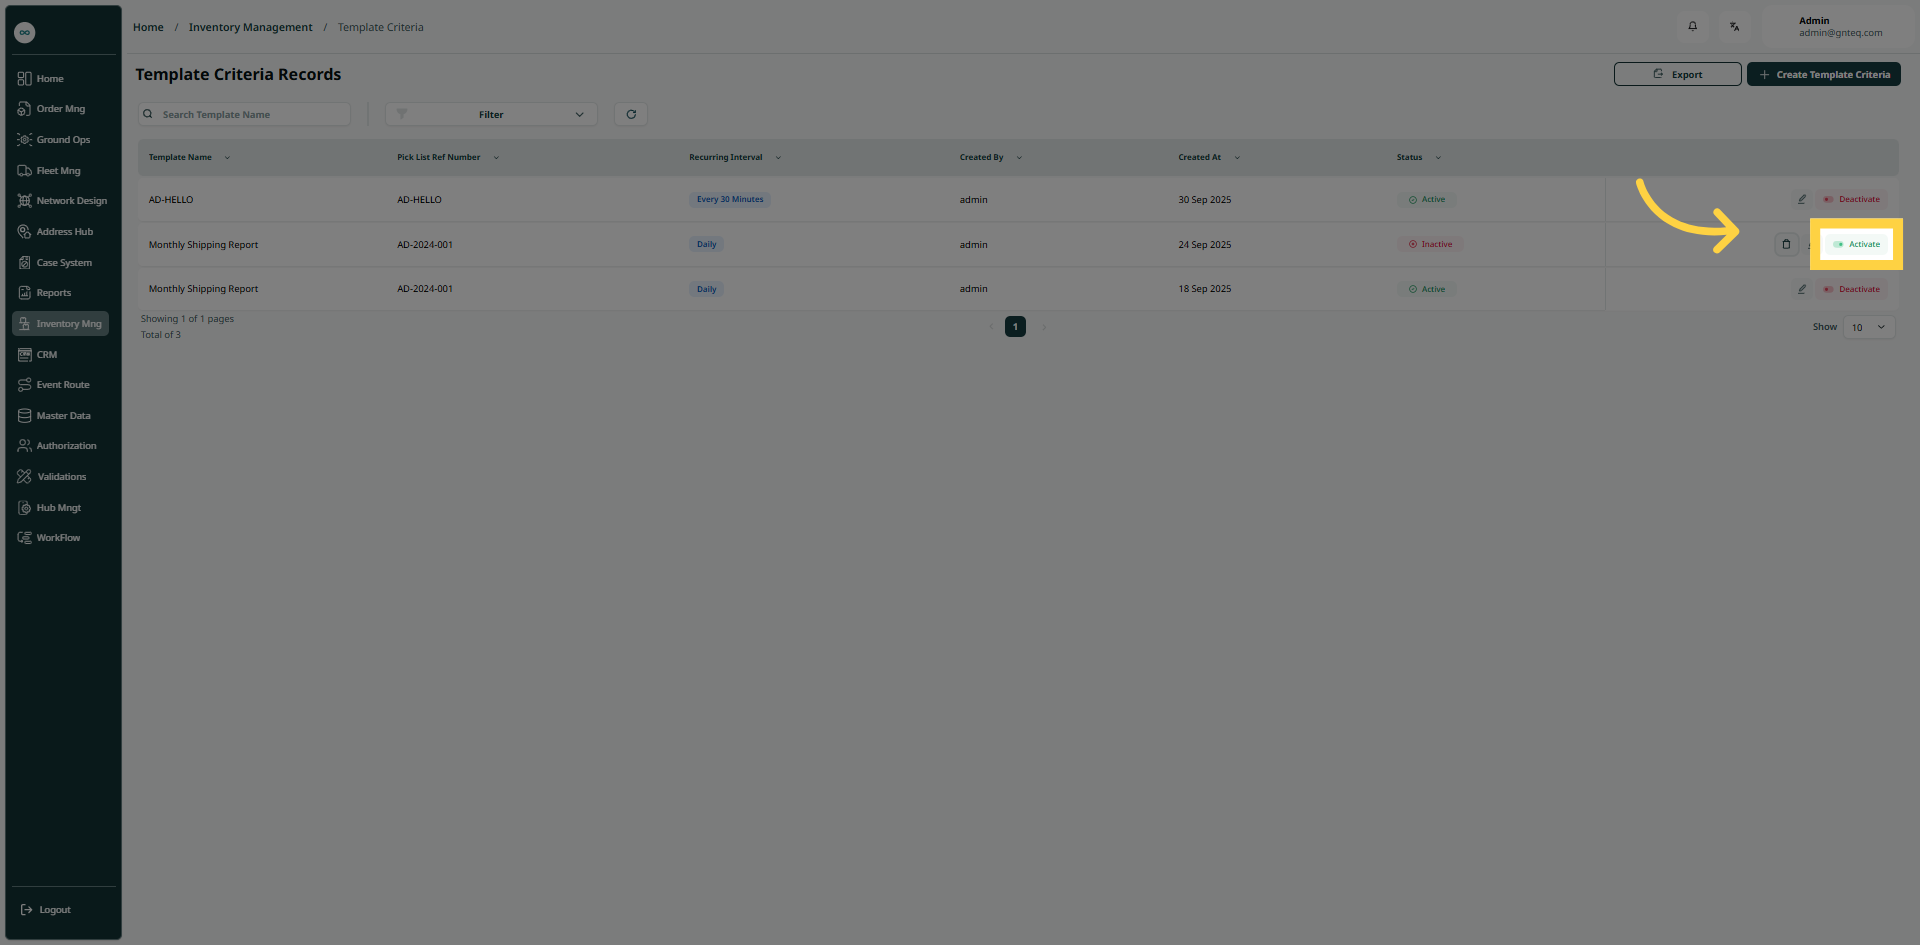
The user can view the defined auto generated picklist in the system by navigating to the ‘Template Criteria Records’ screen in the Inventory Management module from the left navigation panel as follows:
-
New Template Criteria: the user can add new template criteria by clicking on ‘Create Template Criteria'.
-
Export: The user can export the list as an Excel file by clicking the "More Actions" button.
-
Filter: the user can search for the auto generated picklist by the created at, created by……. etc.
-
Search: the user can search for the auto generated picklist by typing the template name.
-
Rows Per Page: the user can select the number of items to show on each page.
-
Actions: by clicking on Actions, the user can edit the template by going to the edit template section, delete template, active and deactivate the template.
1.1.1 Edit Information
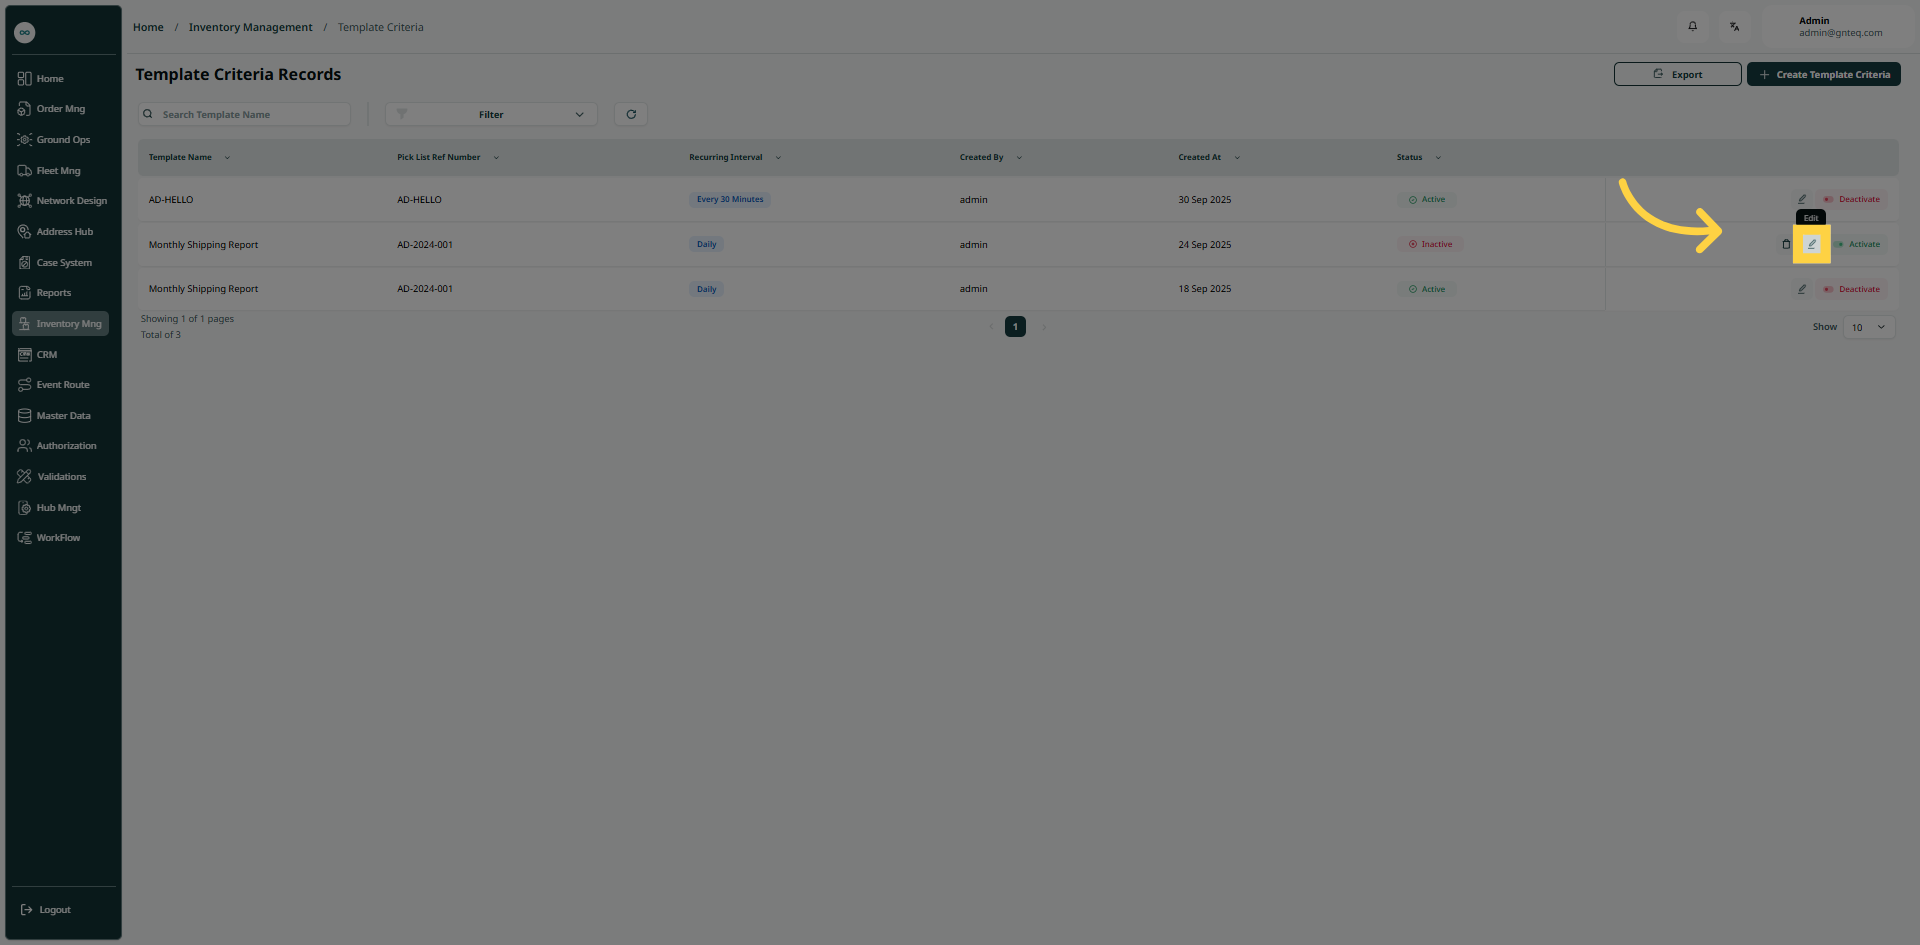
The user can edit an existing template by clicking on Edit from Actions by navigating to the ‘Template Criteria Records’ screen via the Inventory Management module.
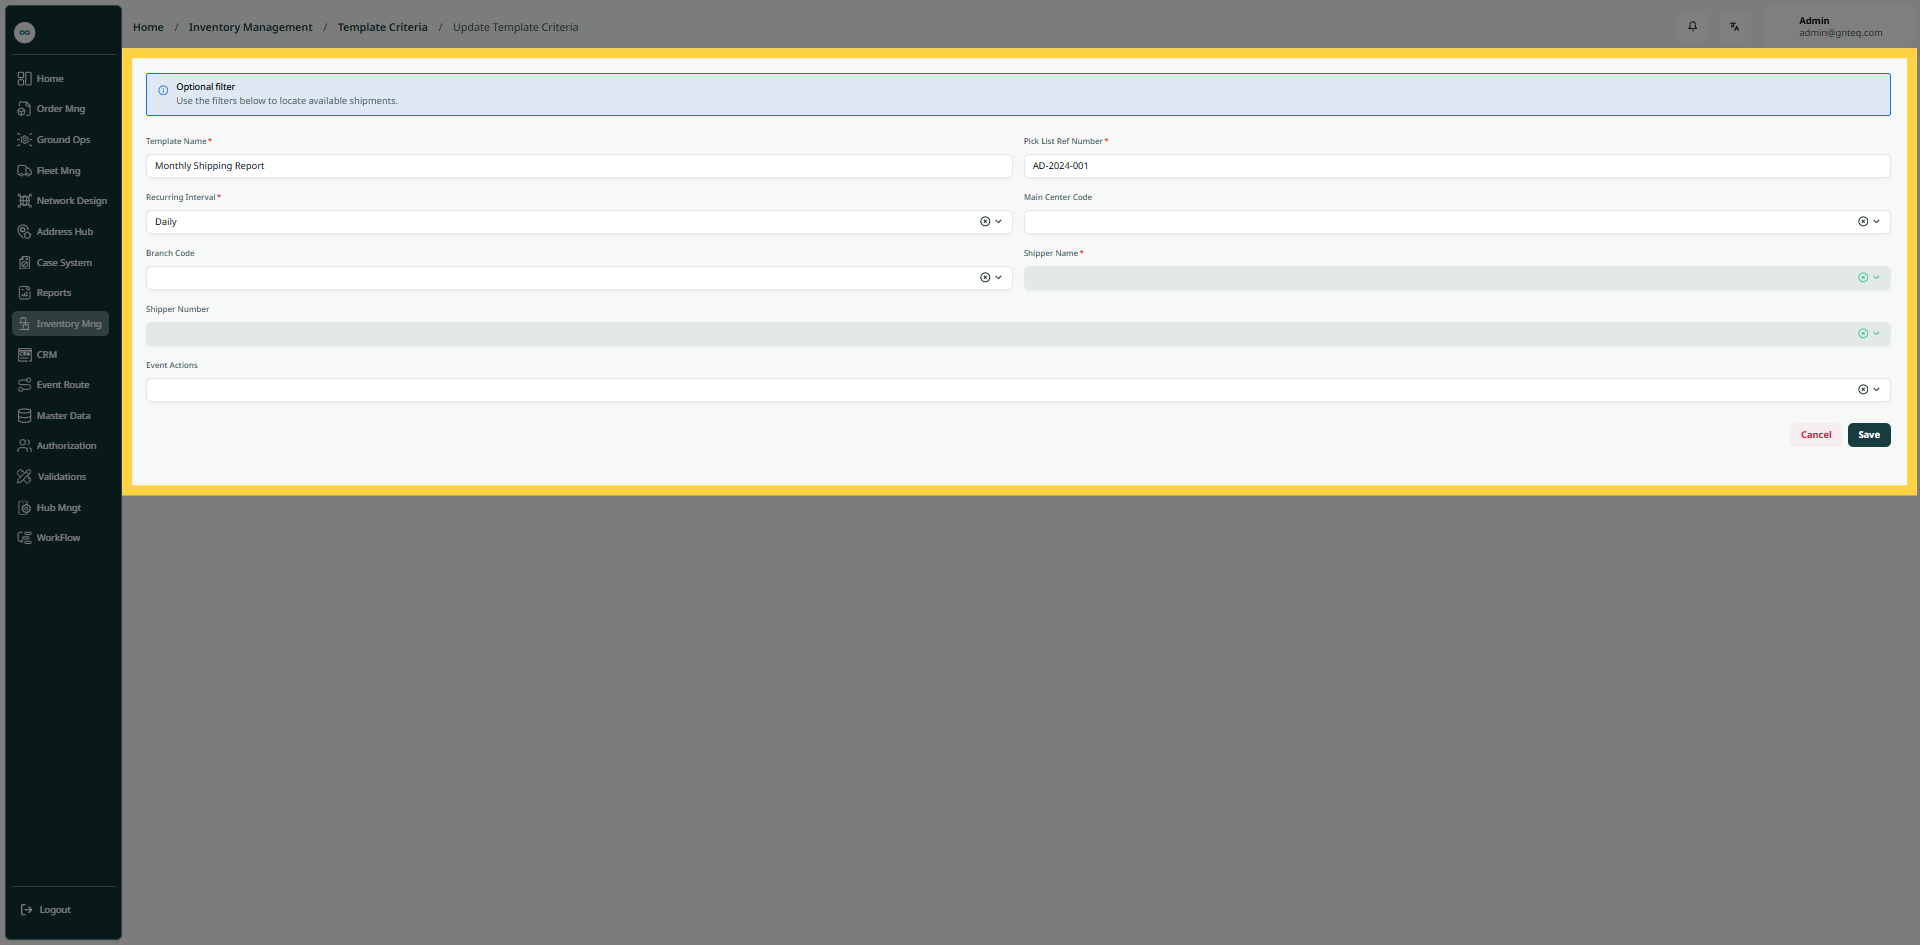
By clicking Save, the information will be successfully edited in the system.
1.1.2 Delete Template
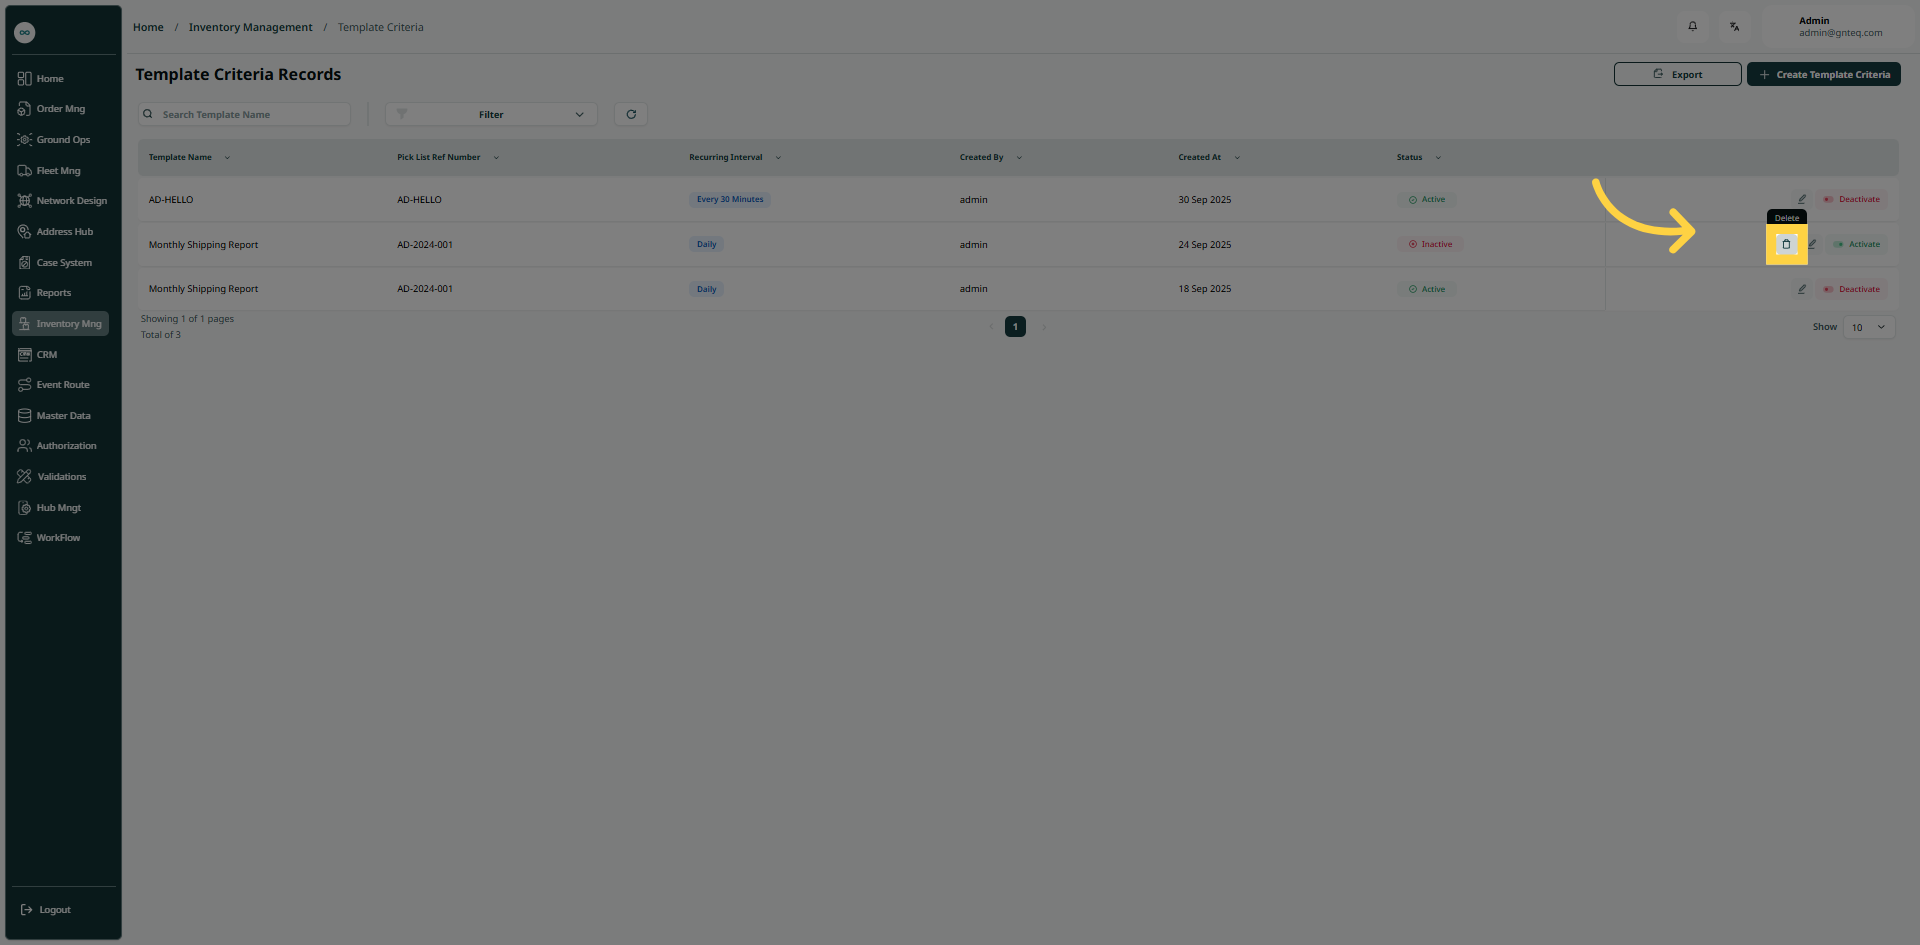
The user can delete an existing template by clicking on Delete from Actions by navigating to the ‘Template Criteria Records’ screen via the Inventory Management module. The template must be Deactivated before it can be deleted.
1.1.3 Activate & Deactivate
The user can activate and deactivate an existing template by clicking on Active from Actions by navigating to the ‘Template Criteria Records’ screen via the Inventory Management module.
1.2 Add New Template Criteria
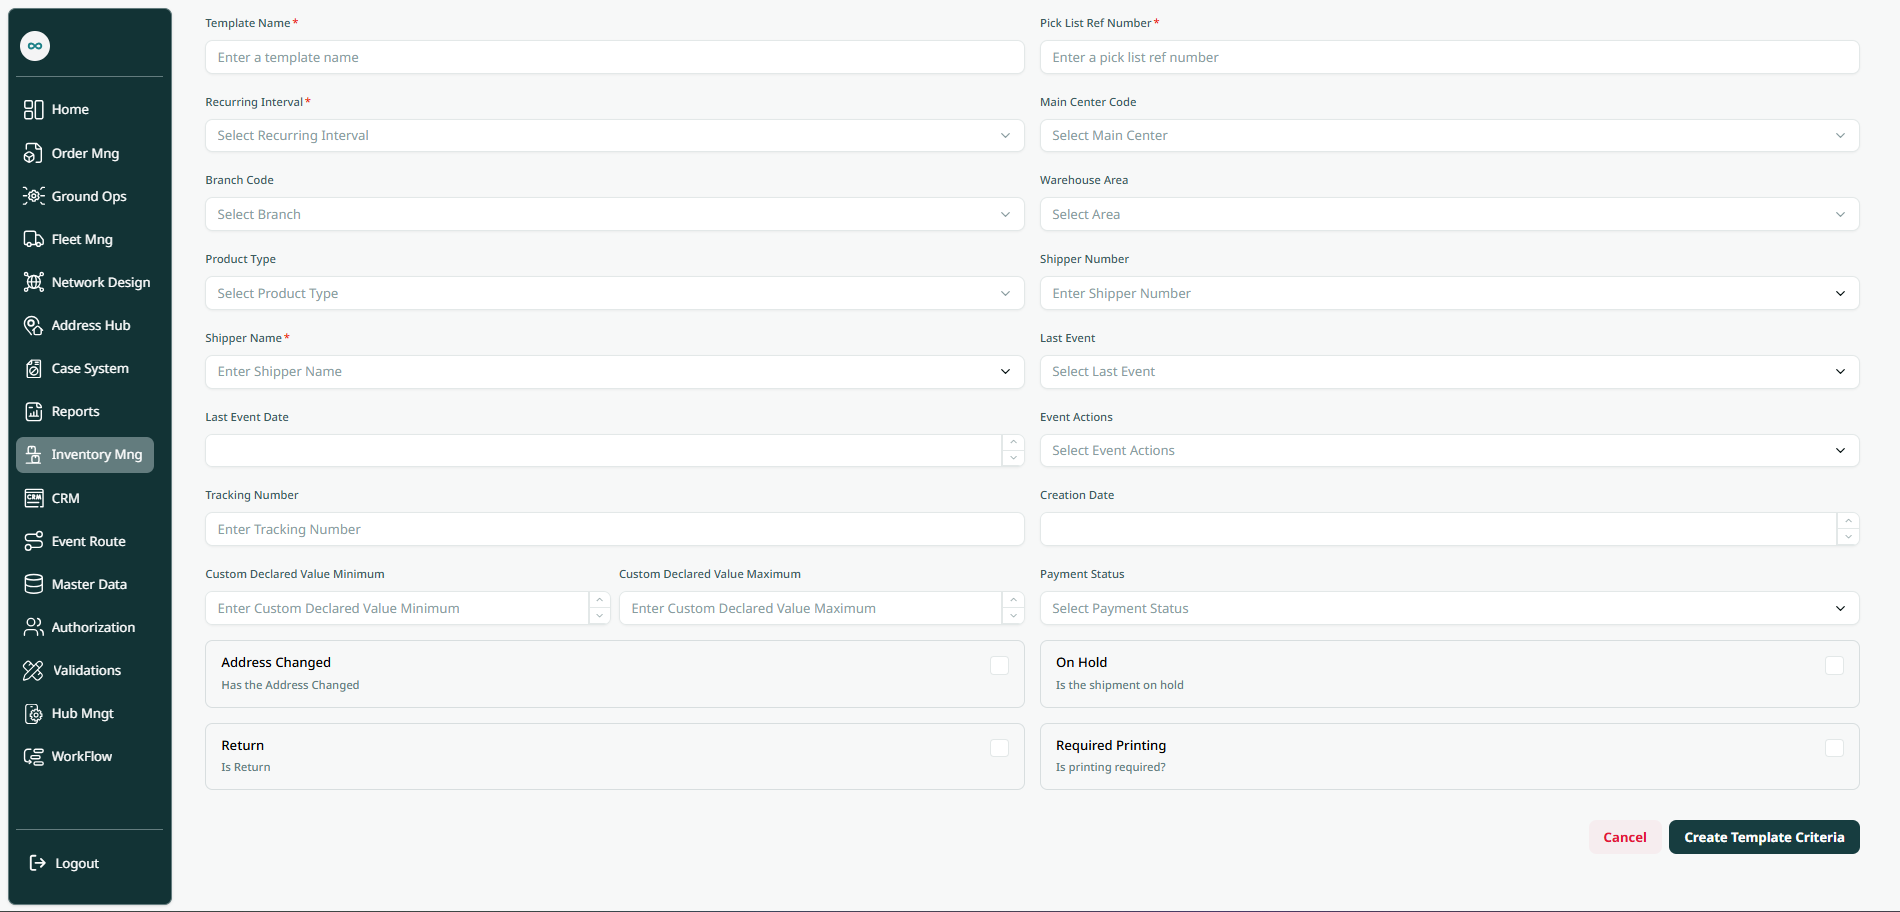
The user can create a new template criteria by navigating to the ‘Template Criteria Records’ screen via the Inventory Management module and clicking on Create Template Criteria button:
-
Template Name: this field represents the name of the template.
-
Pick List Ref Number: this field represents the picklist reference number.
-
Recurring Interval: this field represents the duration between automatic picklist generations.
-
Main center Code: this field represents the city where the picklist is registered.
-
Branch Code: this field represents the station where the picklist is registered.
-
Warehouse Area: this field represents the area where shipments are to be placed.
-
Shipper Name: this field represents the name of the shipper.
-
Shipper Number: this field represents the number of the shipper in the system.
-
Last Event: this field represents the name of the last event the shipment experienced.
-
Last Event Date: this field represents the last event date.
-
Event Actions: this field represents the action field on the picklist.
-
Tracking Number: this field represents the tracking number of the shipment.
-
Creation Date: this field represents the date the shipment was created.
-
Custom Declared Value Minimum: this field represents the minimum value for the small size.
-
Custom Declared Value Maximum: this field represents the maximum customs value.
-
Payment Status: this field represents the status of the payment (created, pending, paid, unpaid).
-
Address Changed (checkbox): if selected, the address has changed.
-
On Hold (checkbox): if selected, the shipment is pending.
-
Return (checkbox): if selected, the shipment is a return.
-
Required Printing (checkbox): if selected, the printing is required.
By clicking Create Template Criteria, the template will be added successfully.