.png)
1. Location Creation Overview
2. Dashboard
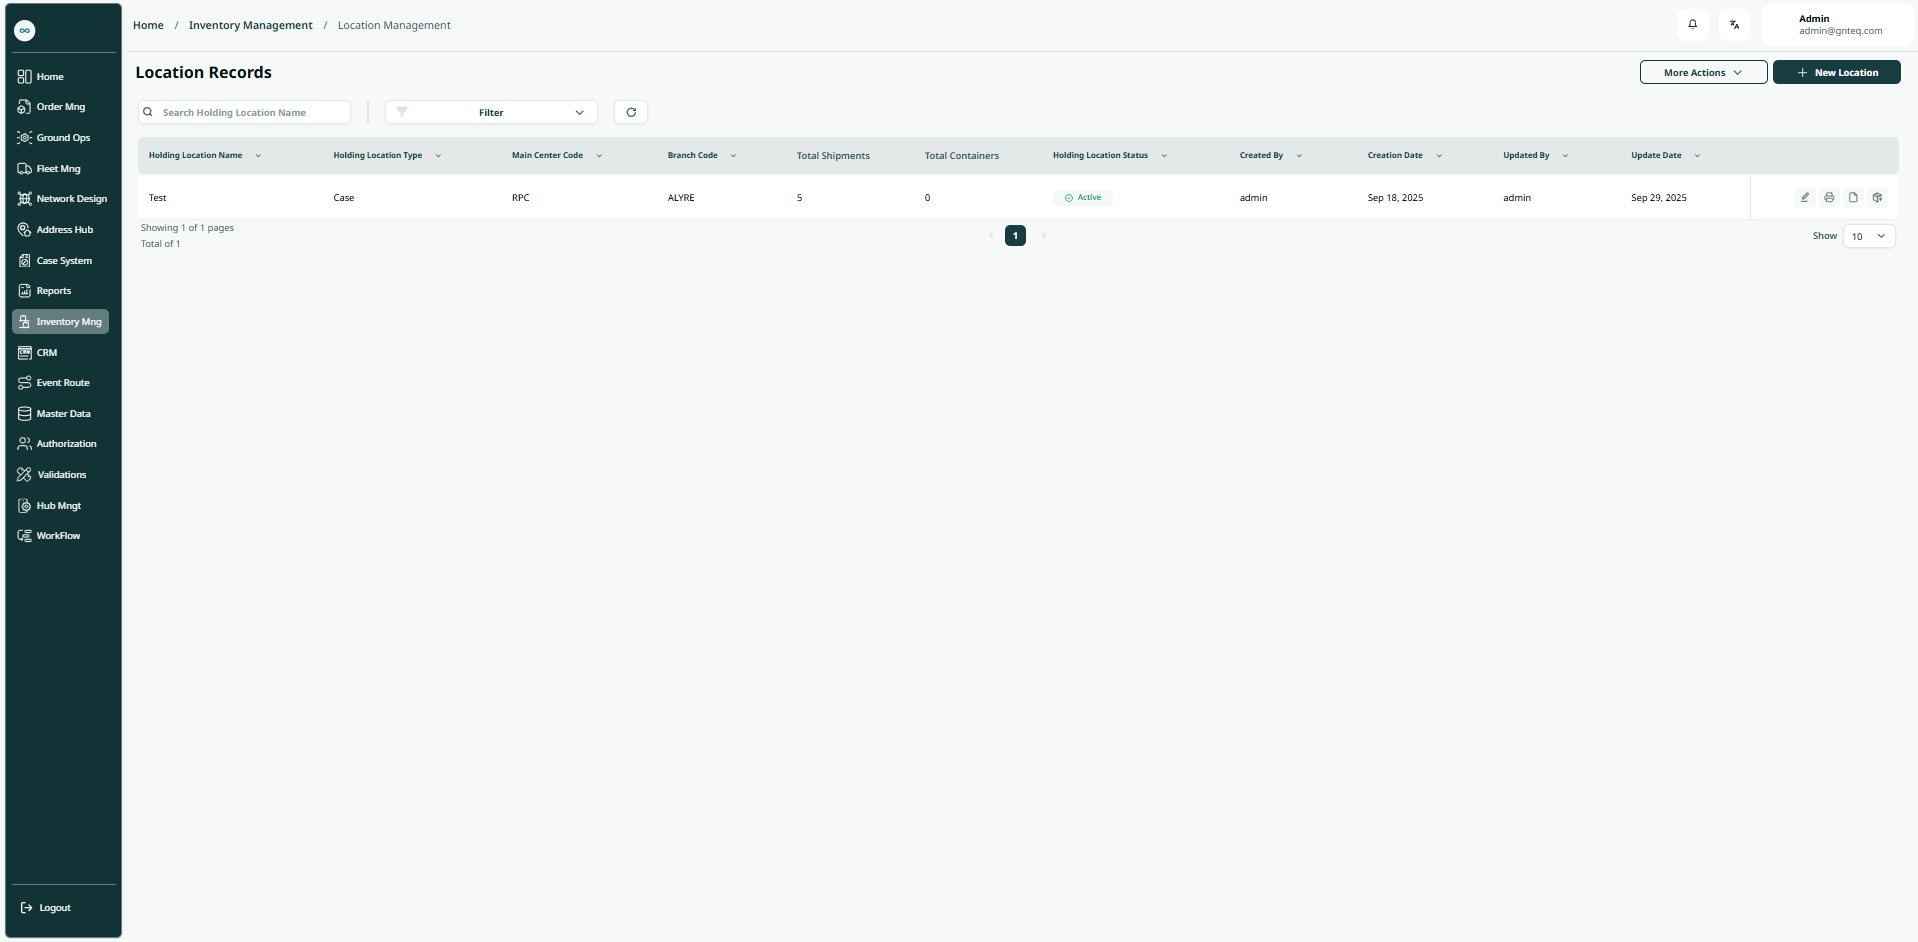
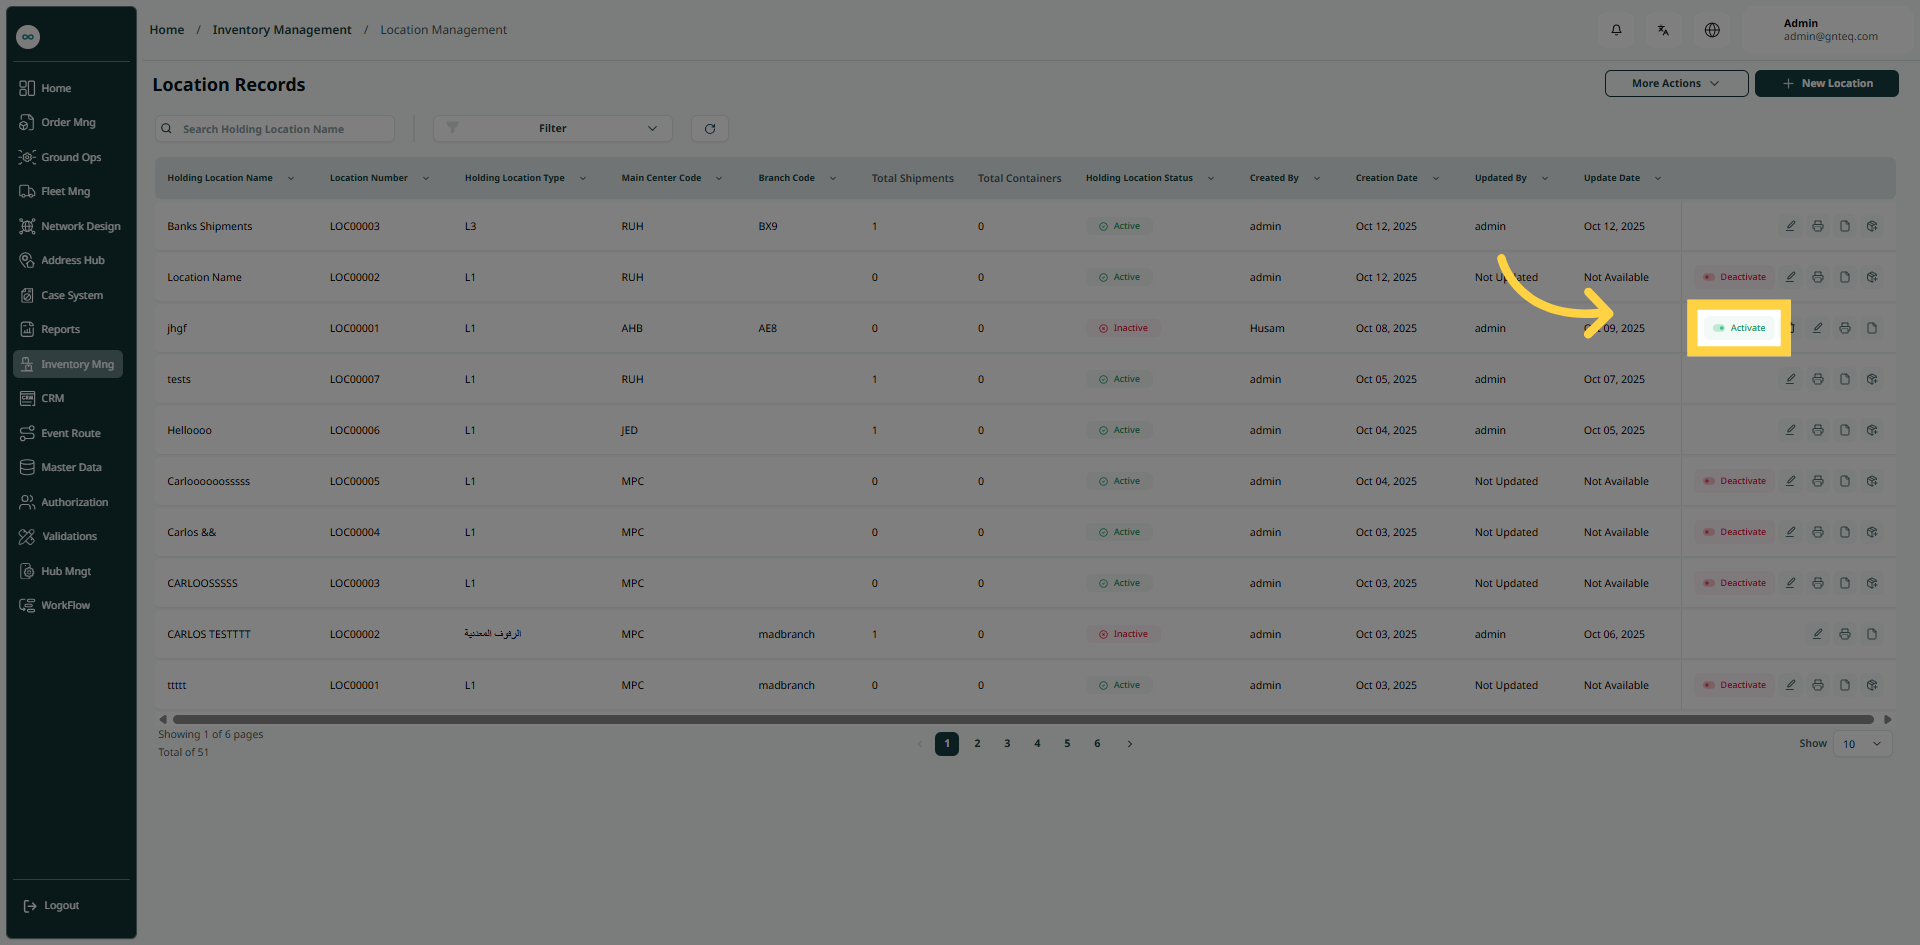
The users can view the defined locations in the system by navigating to the ‘Location Records’ screen in the Inventory Management Module from the left navigation panel as follows:
-
New Location: the user can add new location by clicking on ‘New Location'.
-
Export: The user can export the list as an Excel file by clicking the "More Actions" button.
-
Import: The user can download the list as an Excel file by clicking the "More Actions" button.
-
Download Template: The user can download a blank Excel template by clicking the "More Actions" button..
-
Filter: the user can search for the location by typing the main center, branch, Holding location type ……. etc.
-
Filters: the user can search for the location by the holding location name.
-
Rows Per Page: the user can select the number of items to show on each page.
-
Actions: by clicking on Actions, the user can edit the location by going to the edit location section, print label, print report, assign shipment to location.
2.1 Edit Location
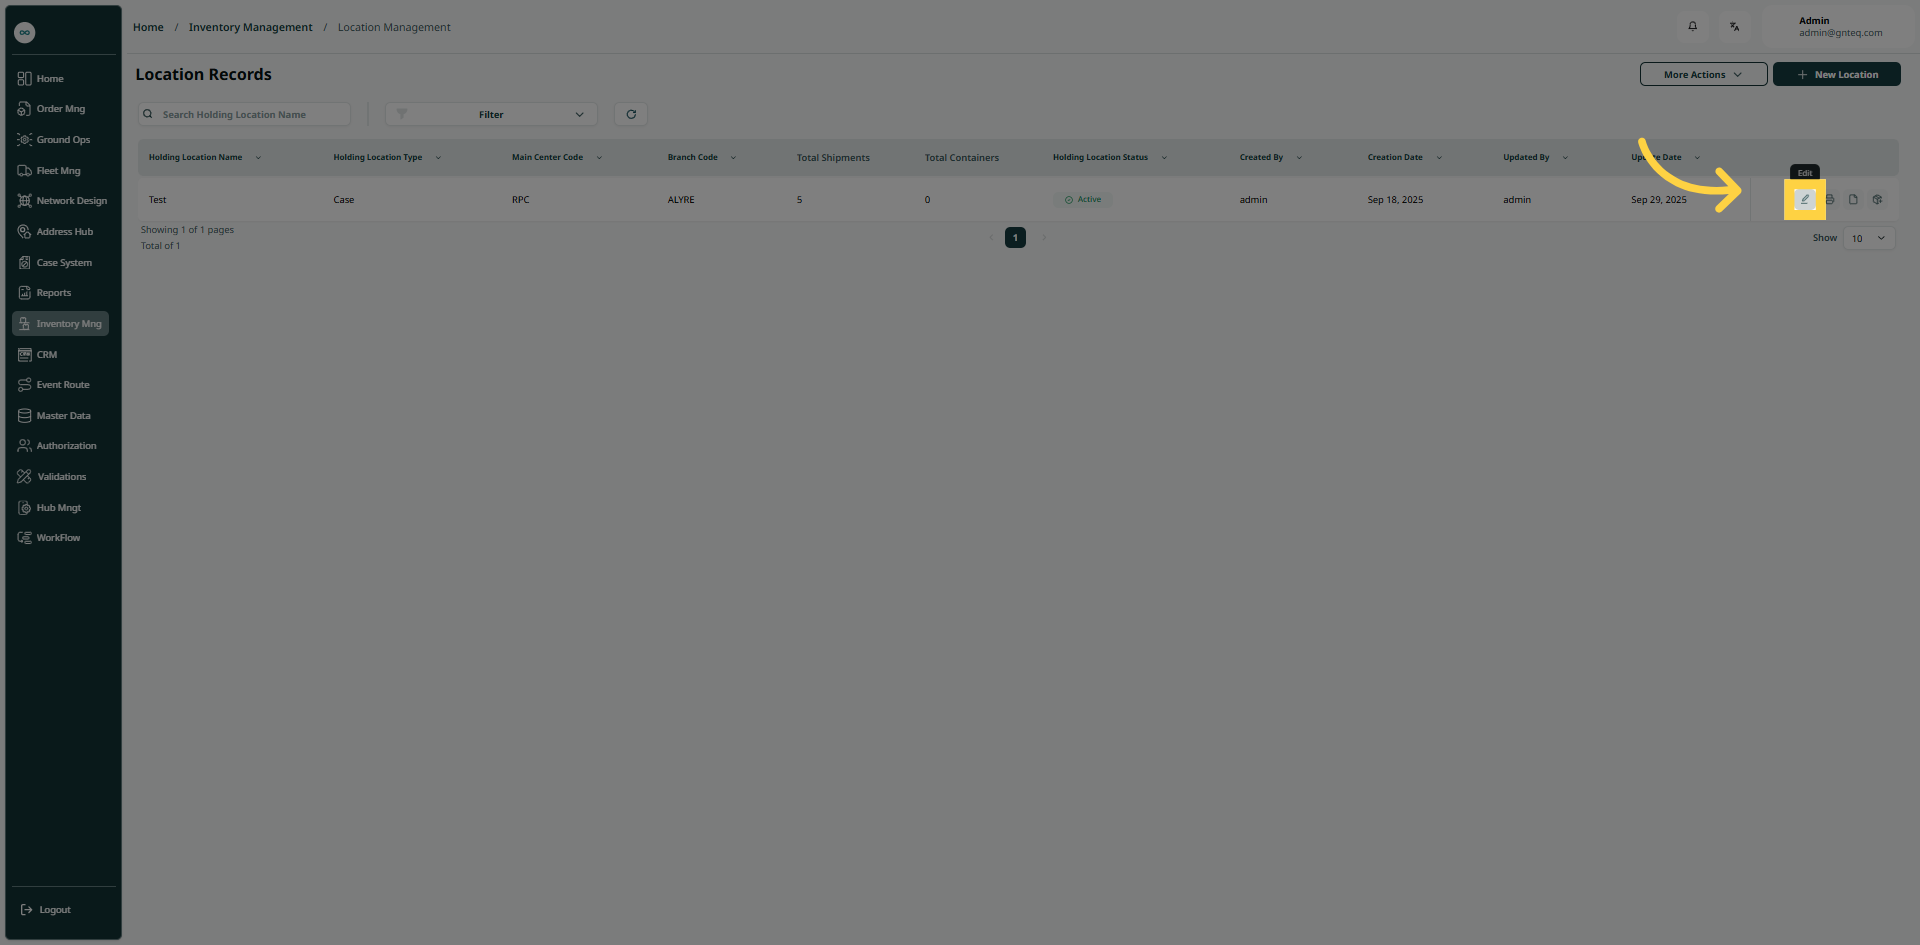
The user can edit an existing location by clicking on Edit from Actions by navigating to the ‘Locations Records’ screen via the Inventory Management Module.
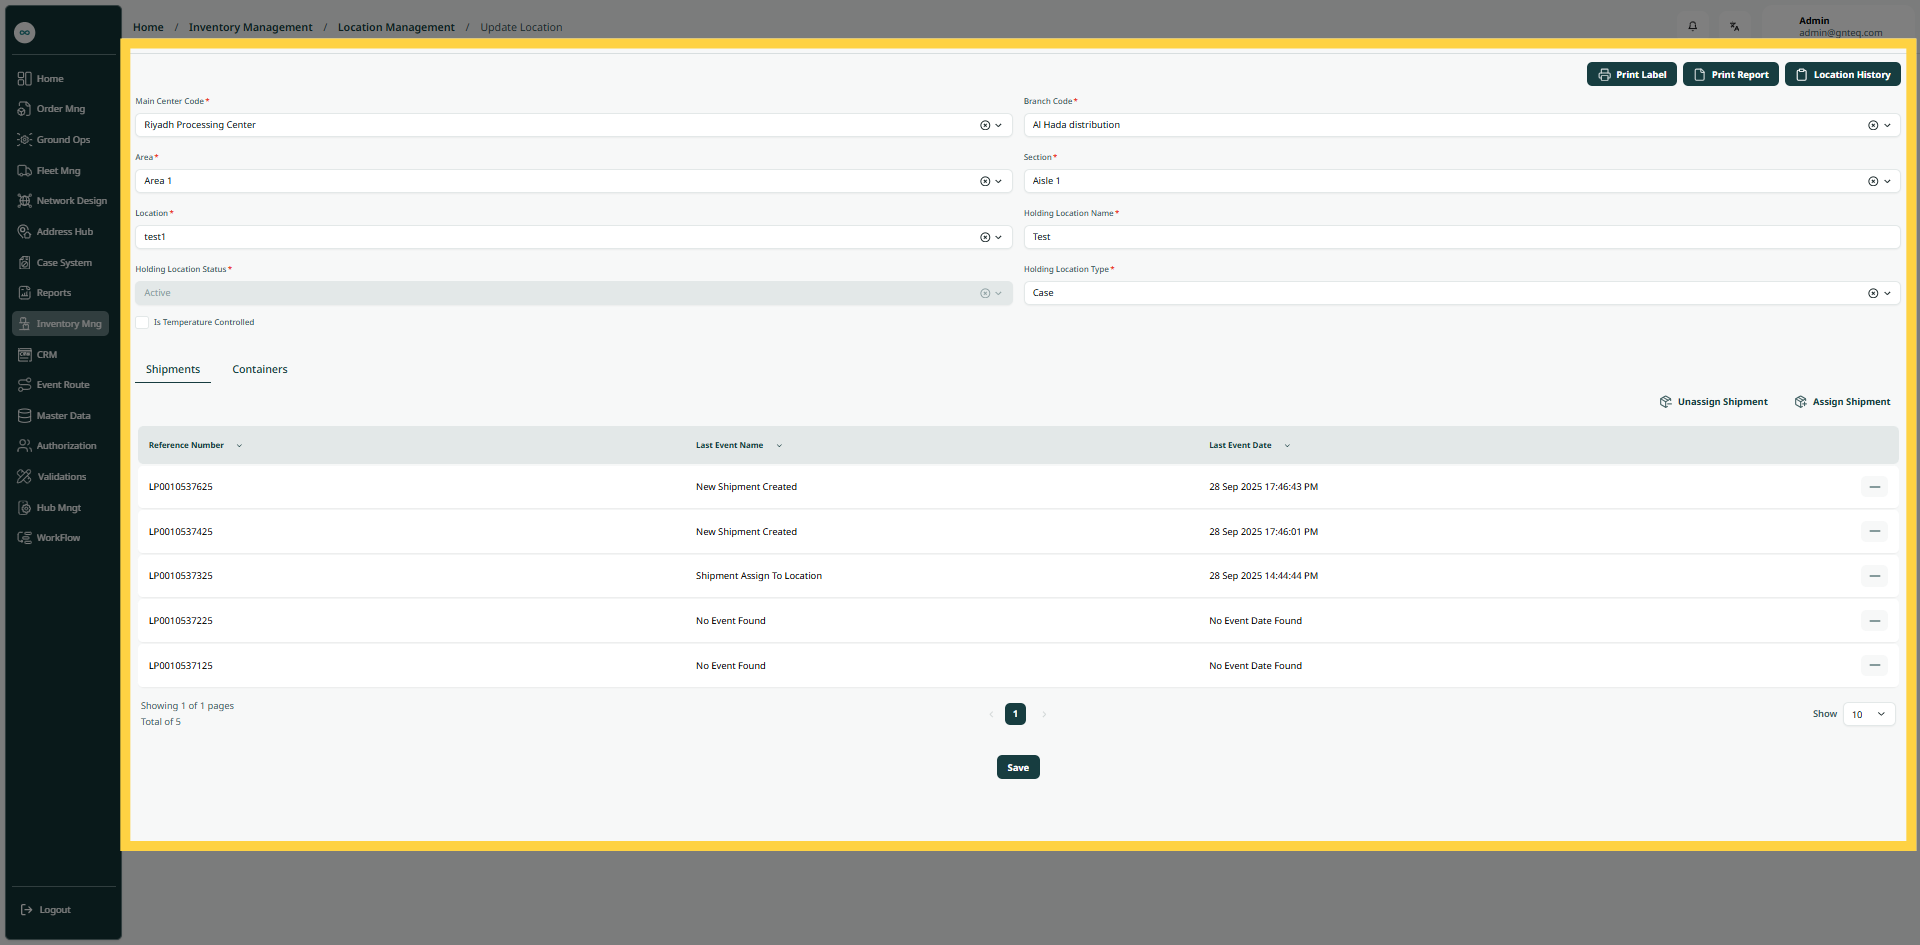
By clicking on Save, the information will be edited successfully.
2.1.1 Print Label
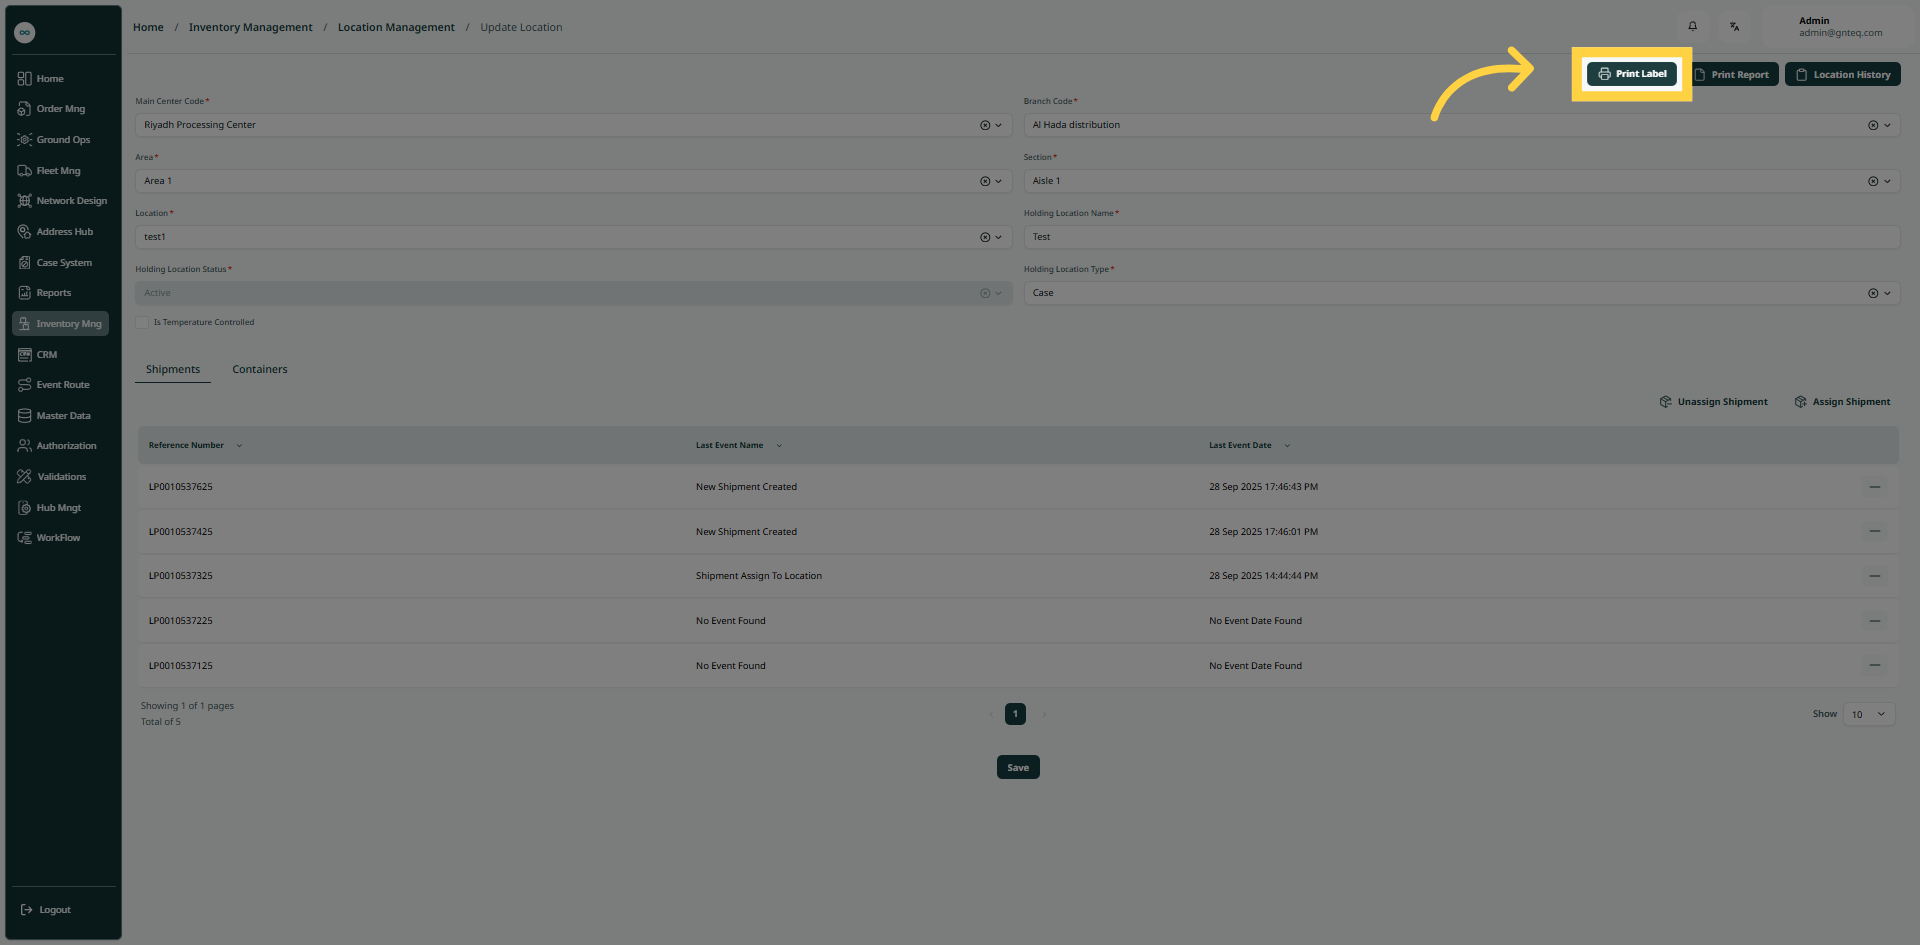
The user can print label of an existing location by clicking on Edit from Actions and click on Print Label by navigating to the ‘Location Records’ screen via the Inventory Management Module.
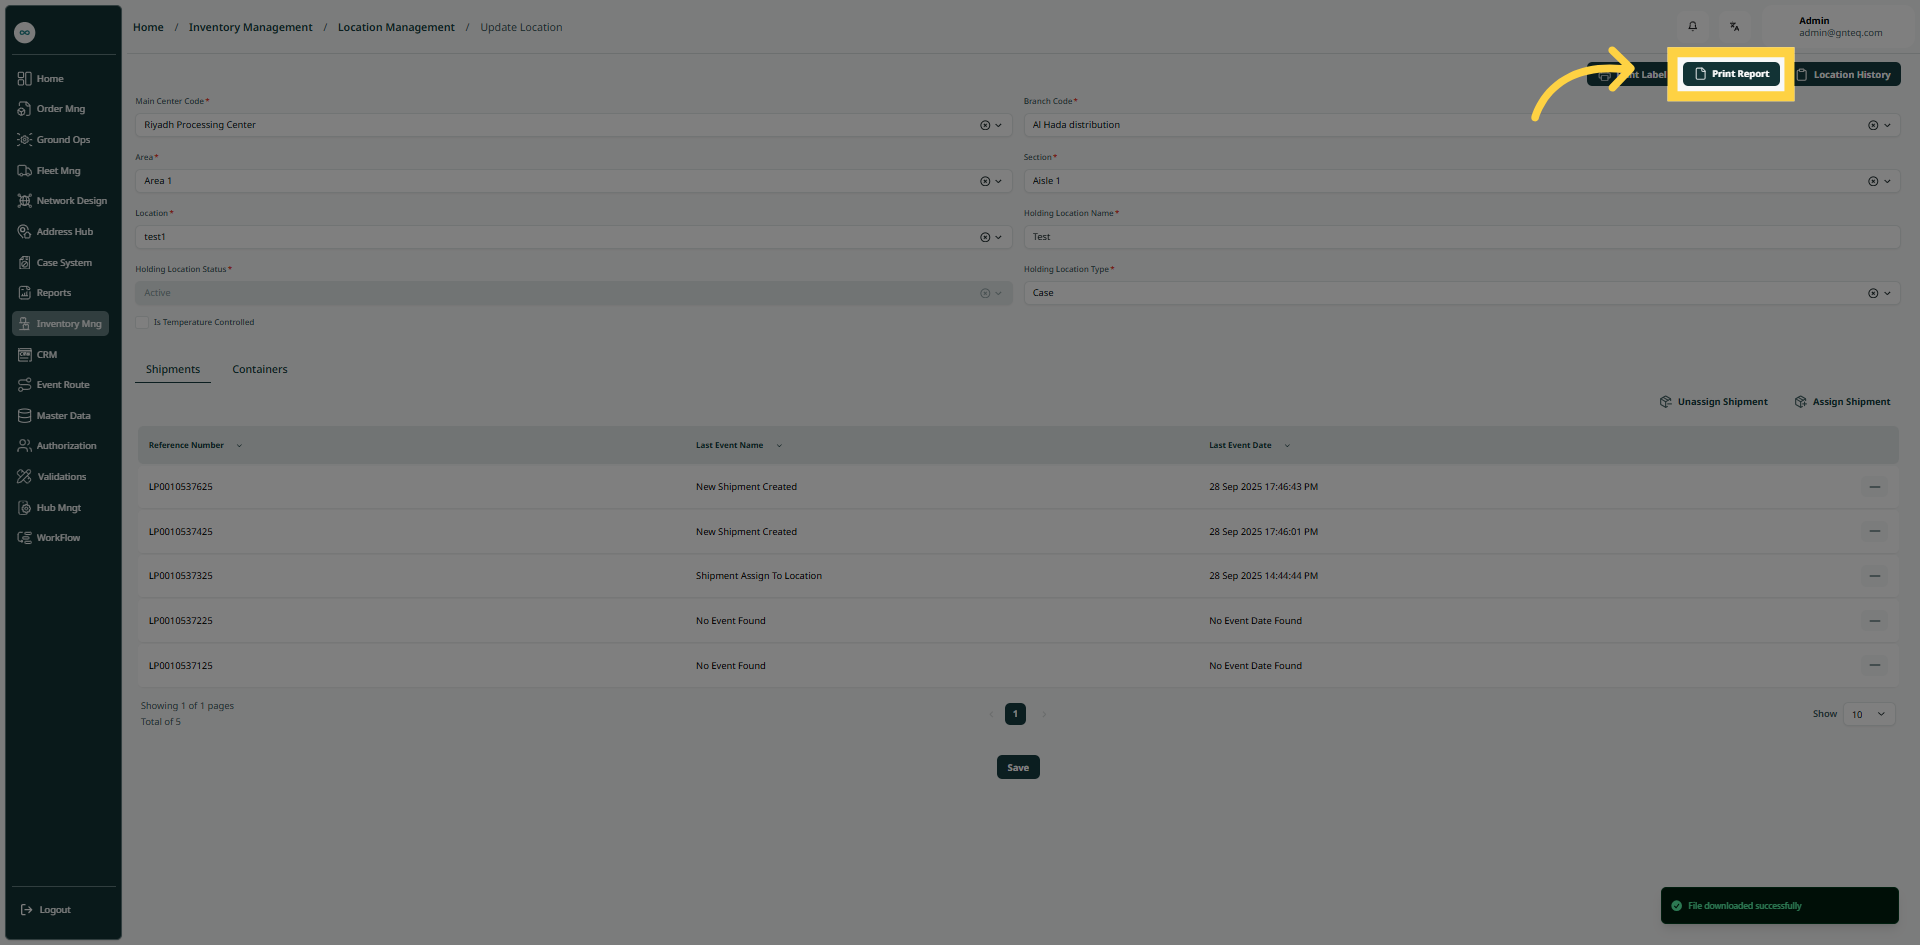
2.1.2 Print Report
The user can print report of an existing location by clicking on Edit from Actions and click on Print Report by navigating to the ‘Location Records’ screen via the Inventory Management Module.
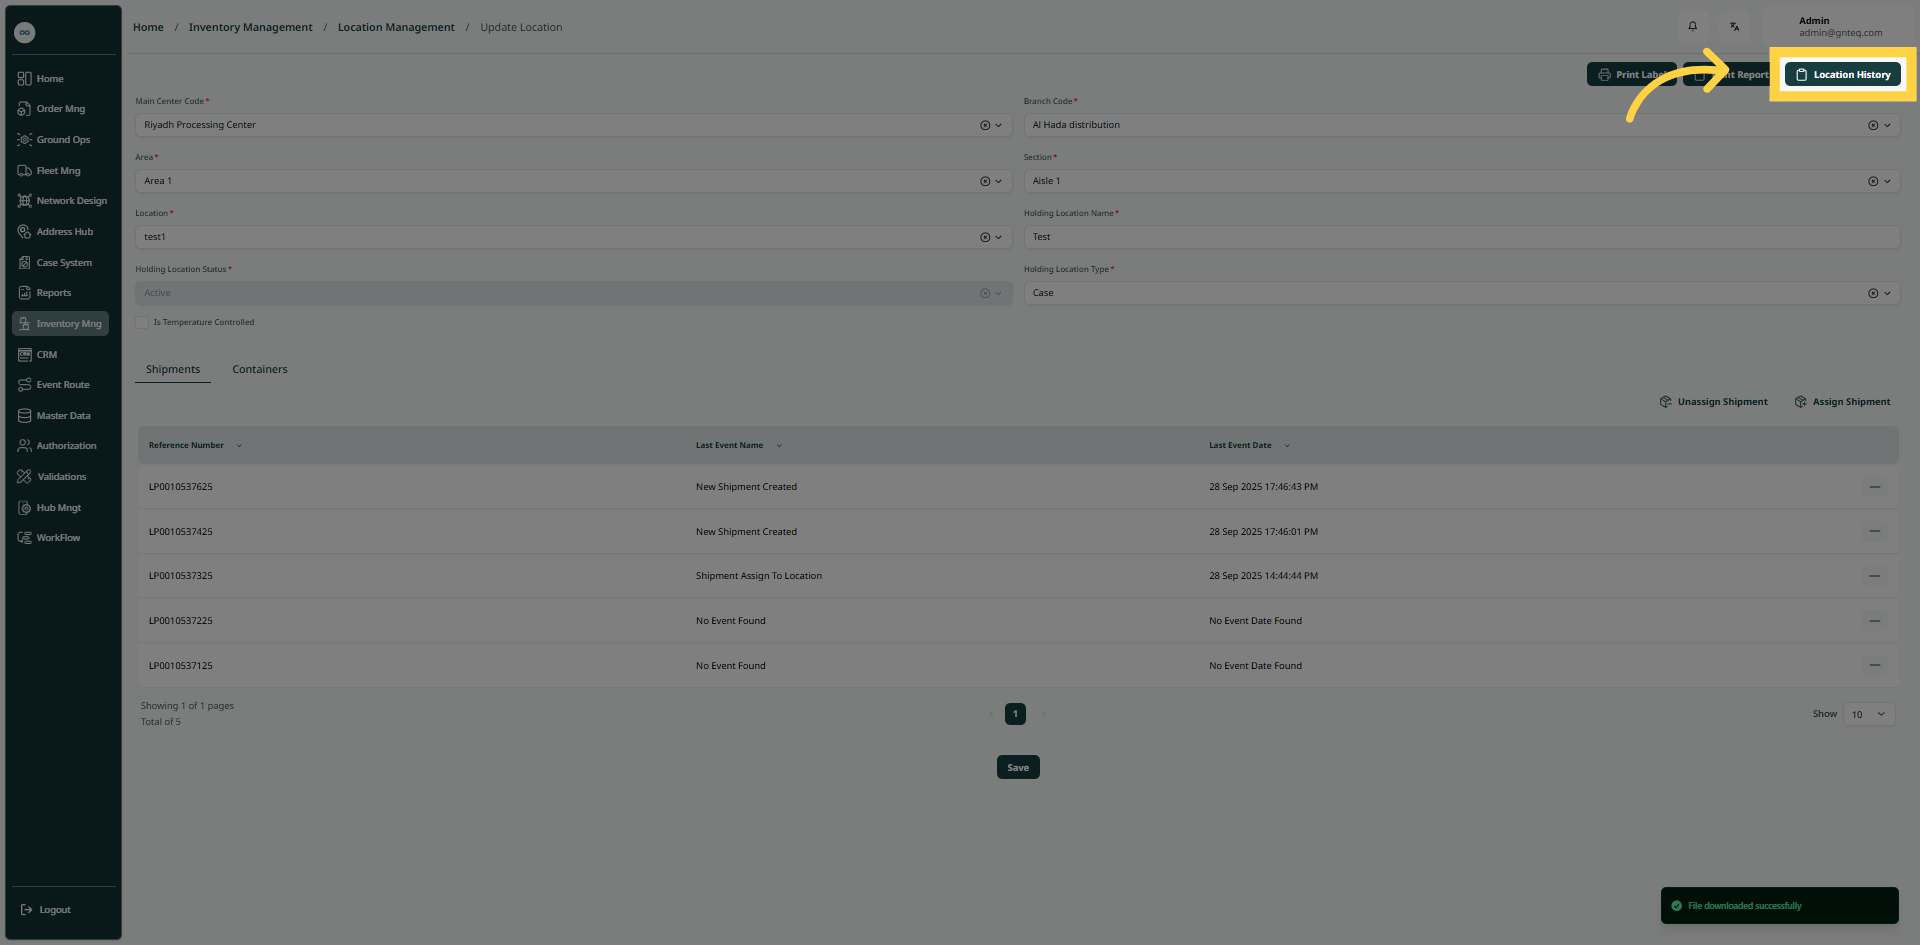
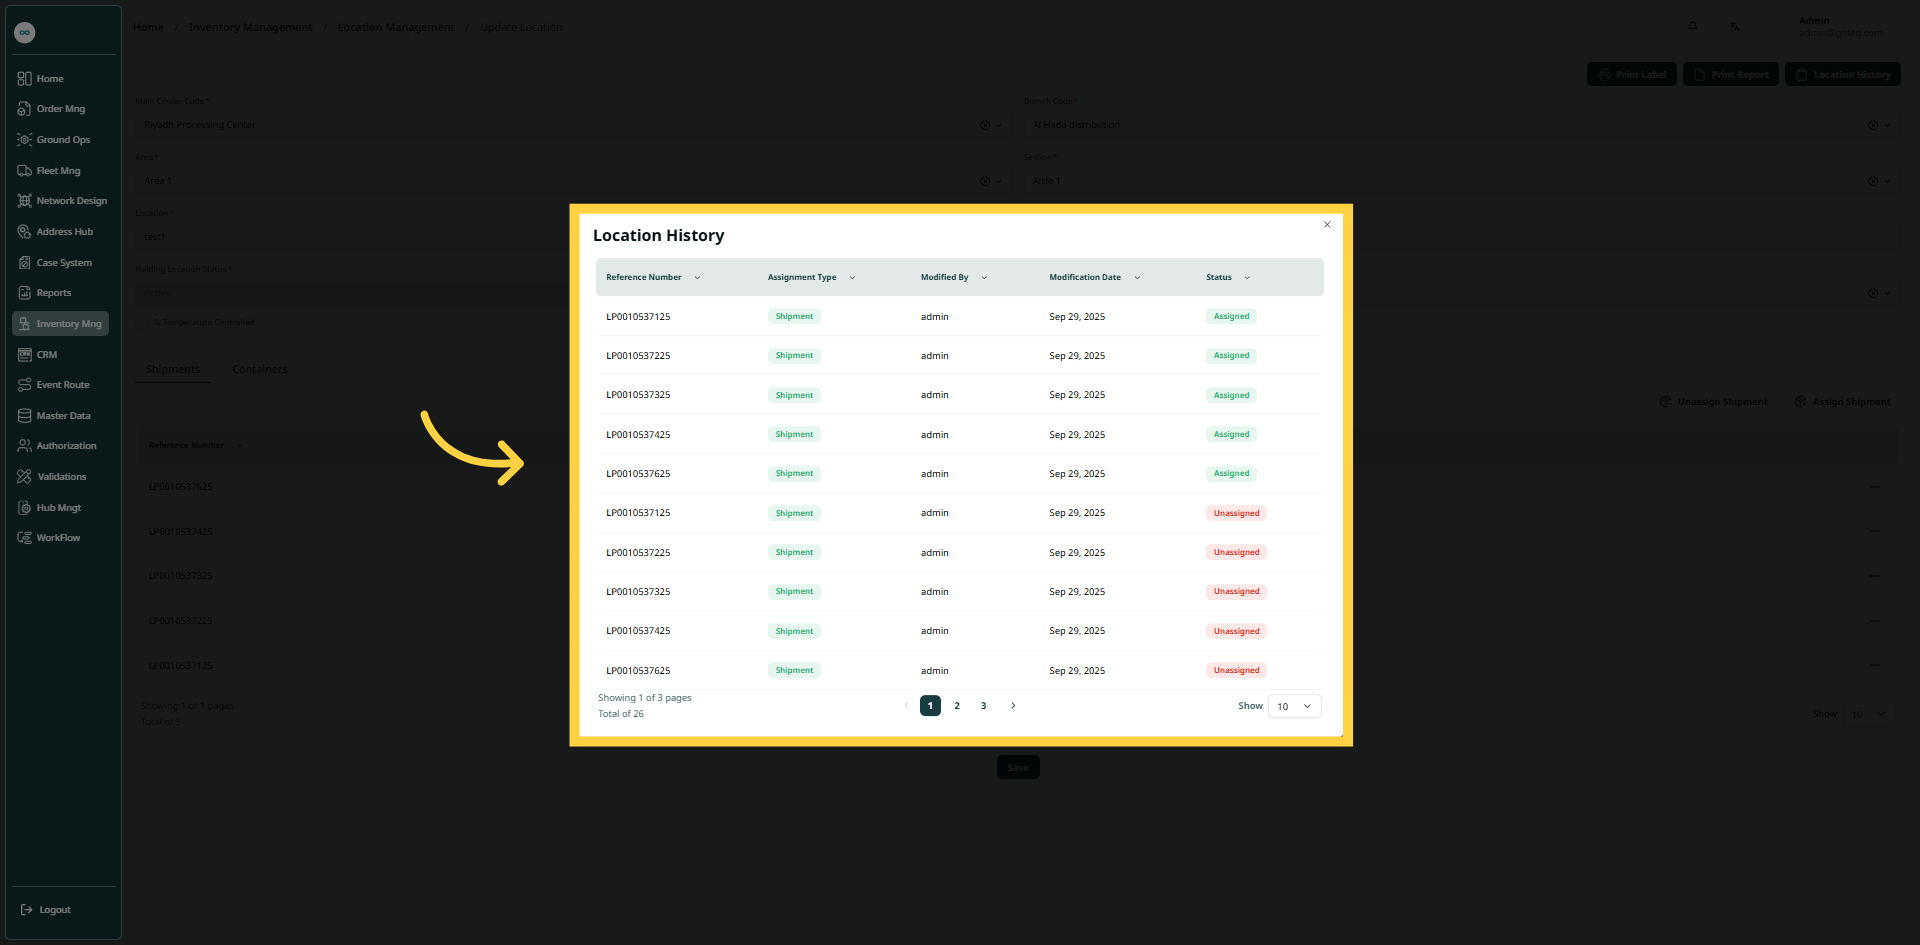
2.1.3 Location History
The user can view location history of an existing location by clicking on Edit from Actions and click on Location History by navigating to the ‘Location Records’ screen via the Inventory Management Module.
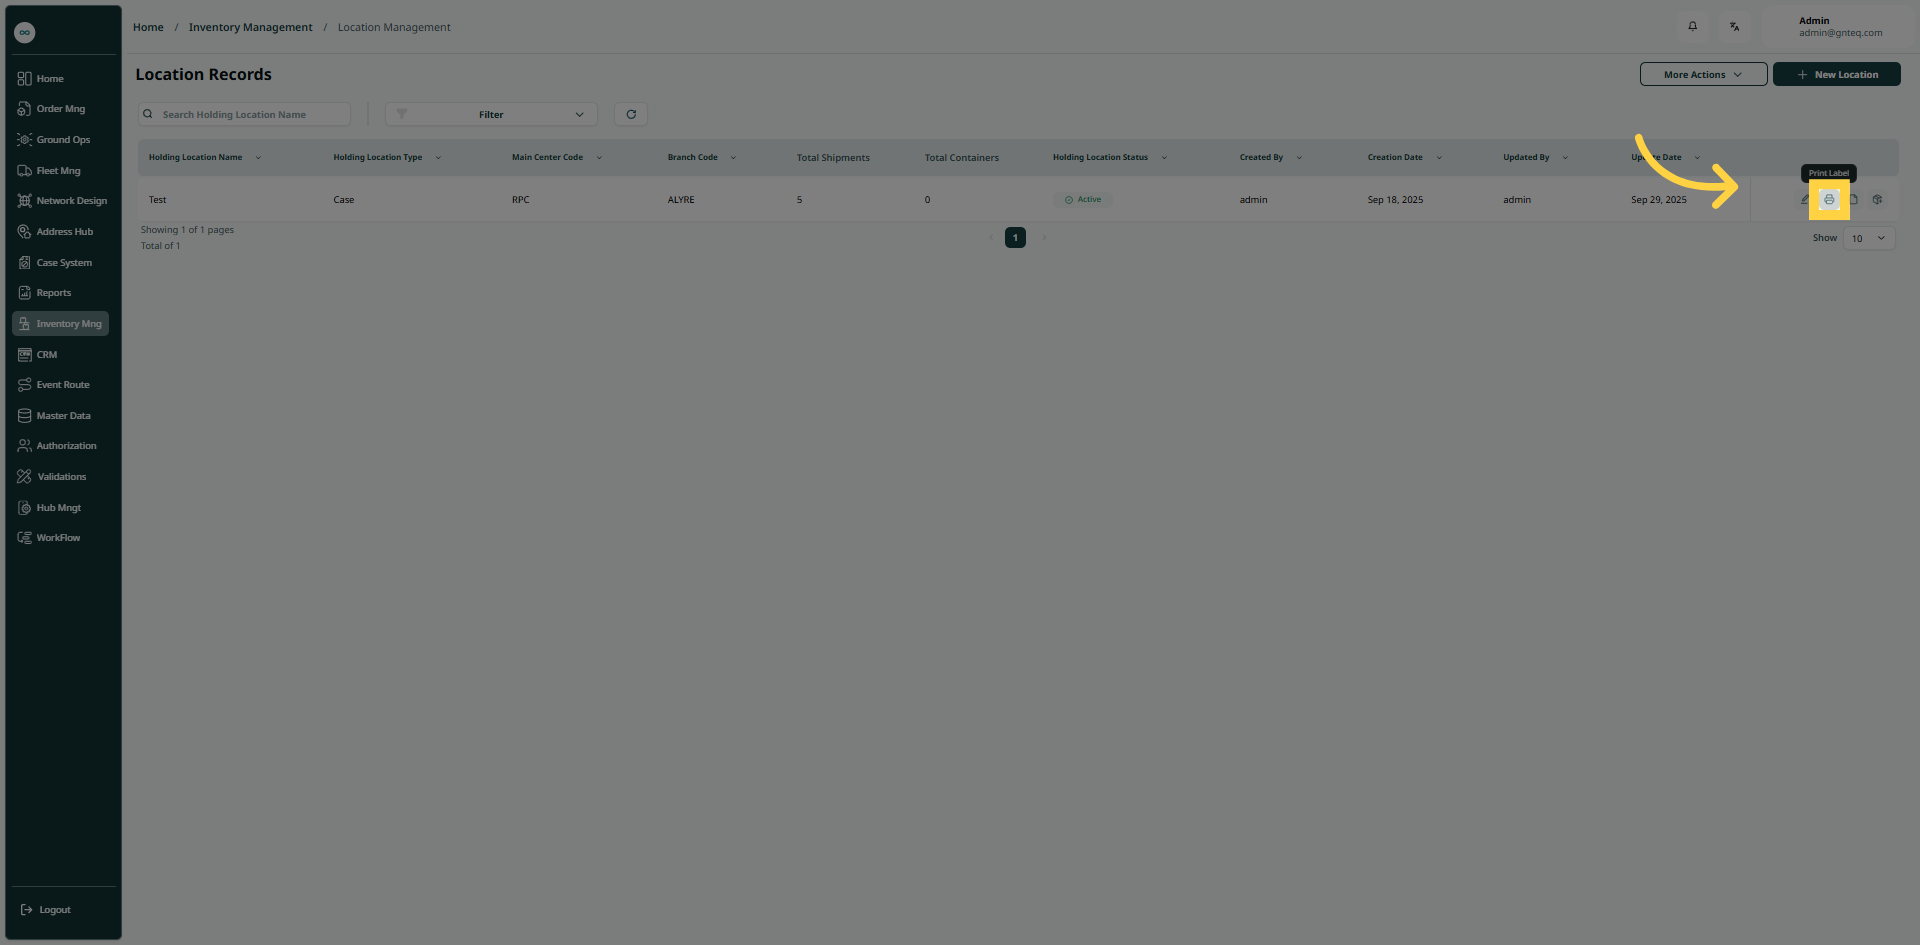
2.2 Print Label
The user can print label of an existing location by clicking on Print Label from Actions by navigating to the ‘Location Records’ screen via the Inventory Management Module.
2.3 Print Report
The user can print report of an existing location by clicking on Print Report from Actions by navigating to the ‘Location Records’ screen via the Inventory Management Module.
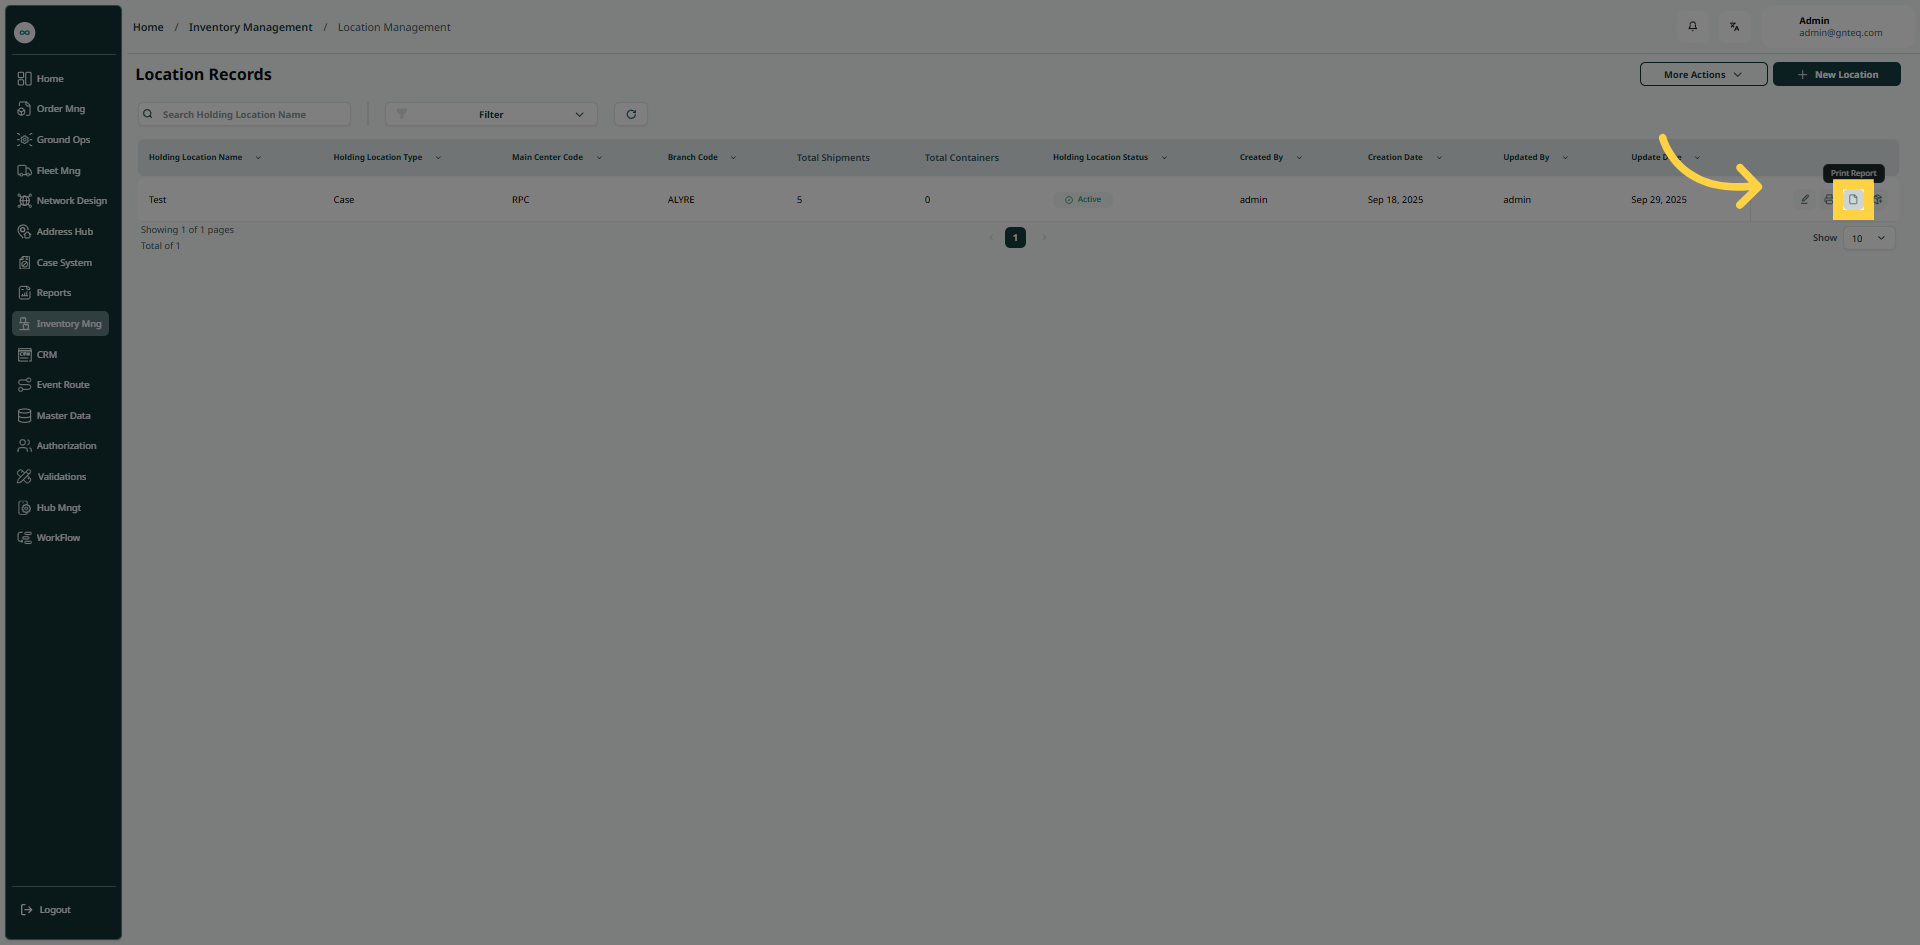
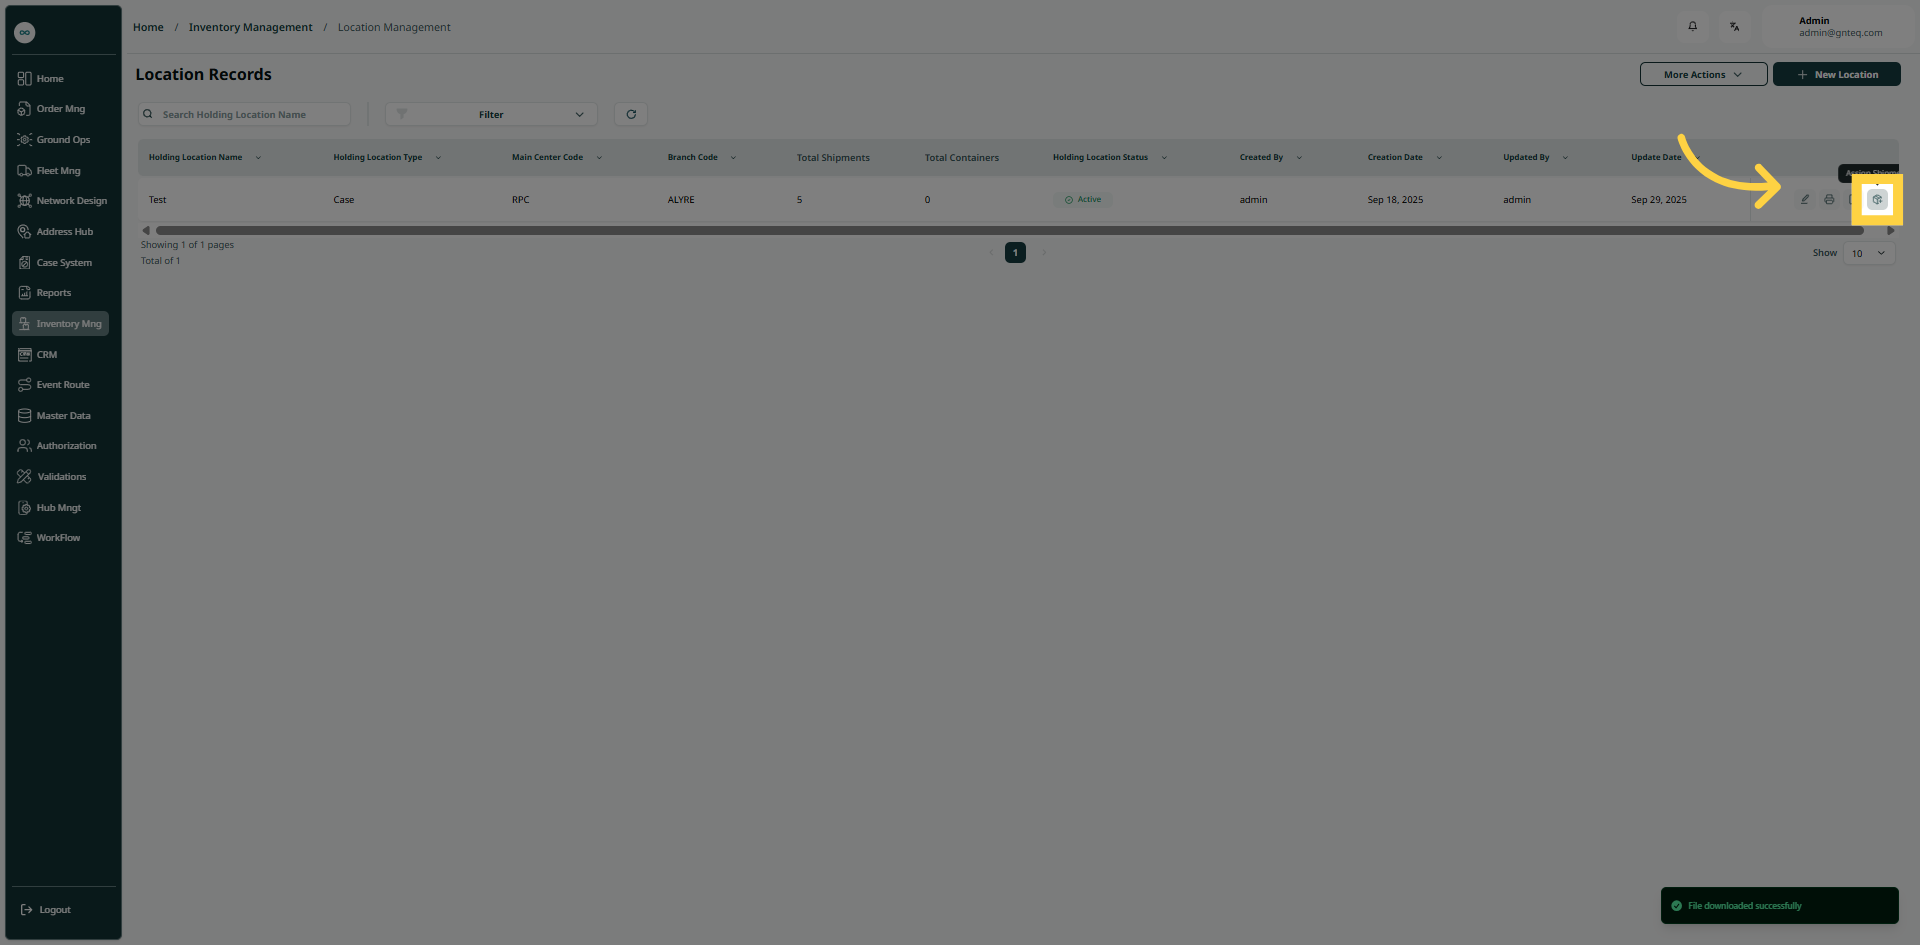
2.4 Add Shipments
The user can add shipments to an existing location by clicking on Add Shipments from Actions by navigating to the ‘Location Records’ screen via the Inventory Management Module.
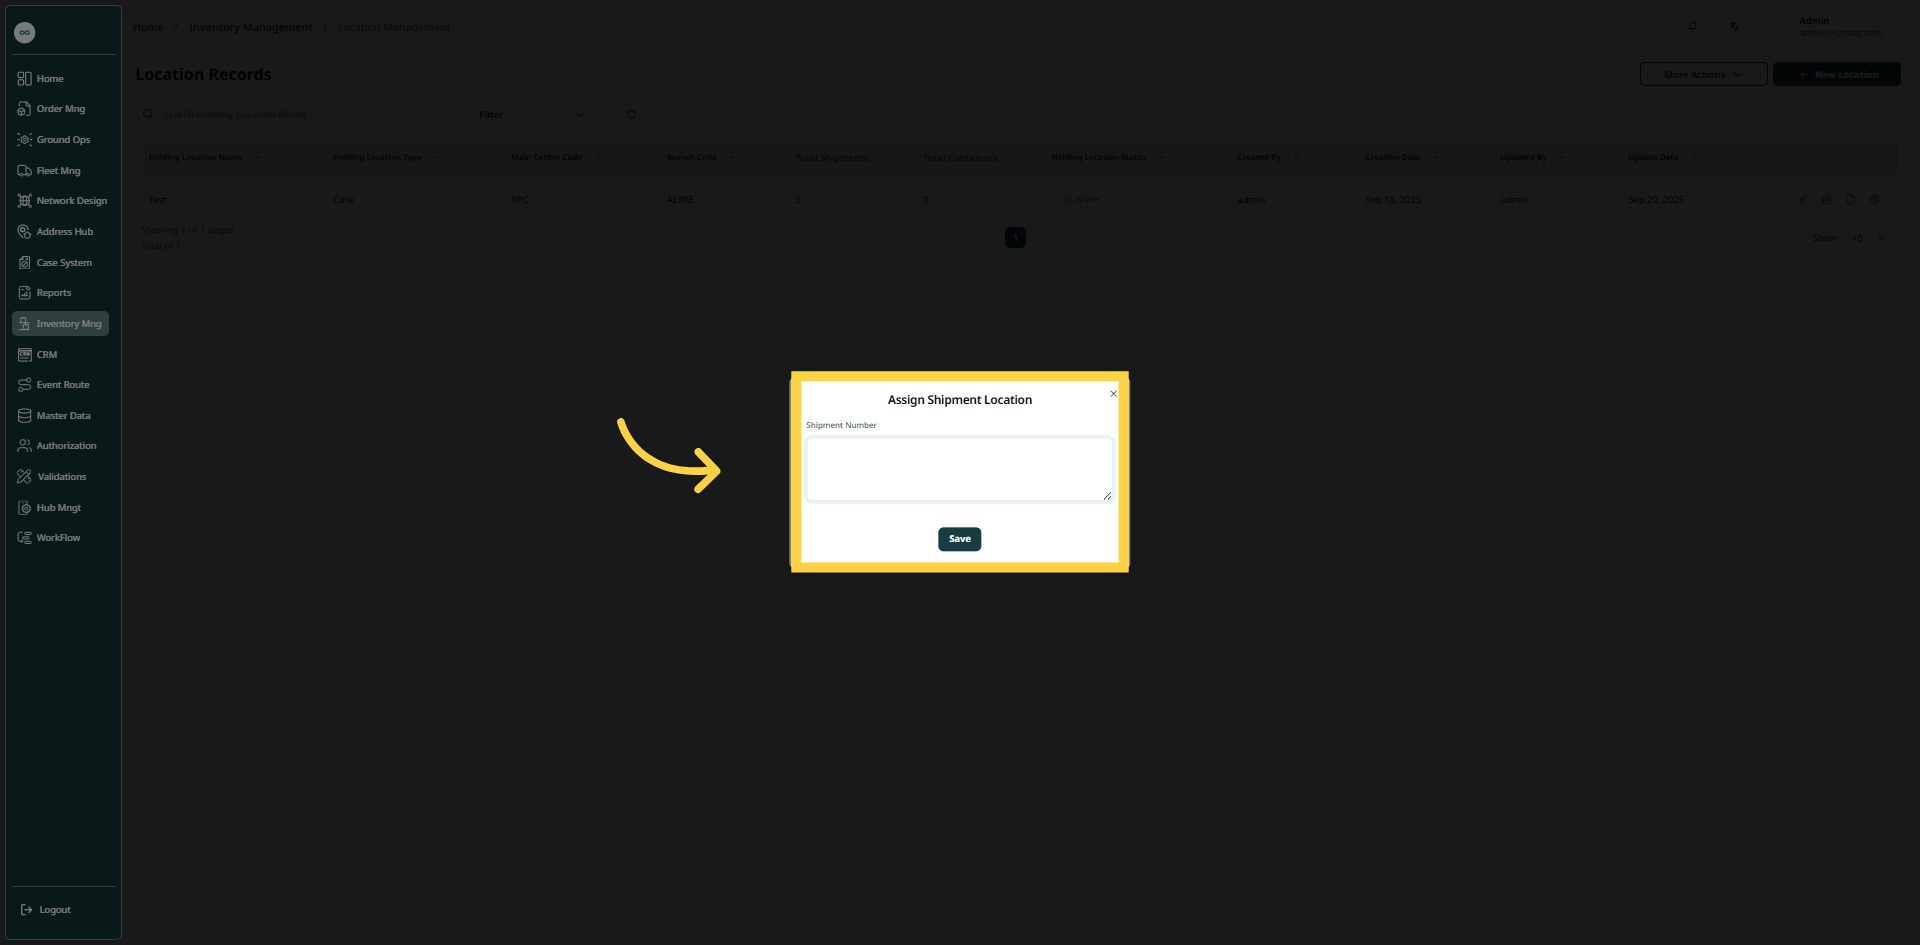
-
Shipments Number: this field represents the number of shipments that will be added to the location.
By clicking Save, the shipments will be added successfully to the location.
2.5 Delete Location
The user can delete an existing location by clicking on Delete from Actions by navigating to the ‘Locations Records’ screen via the Inventory Management Module.
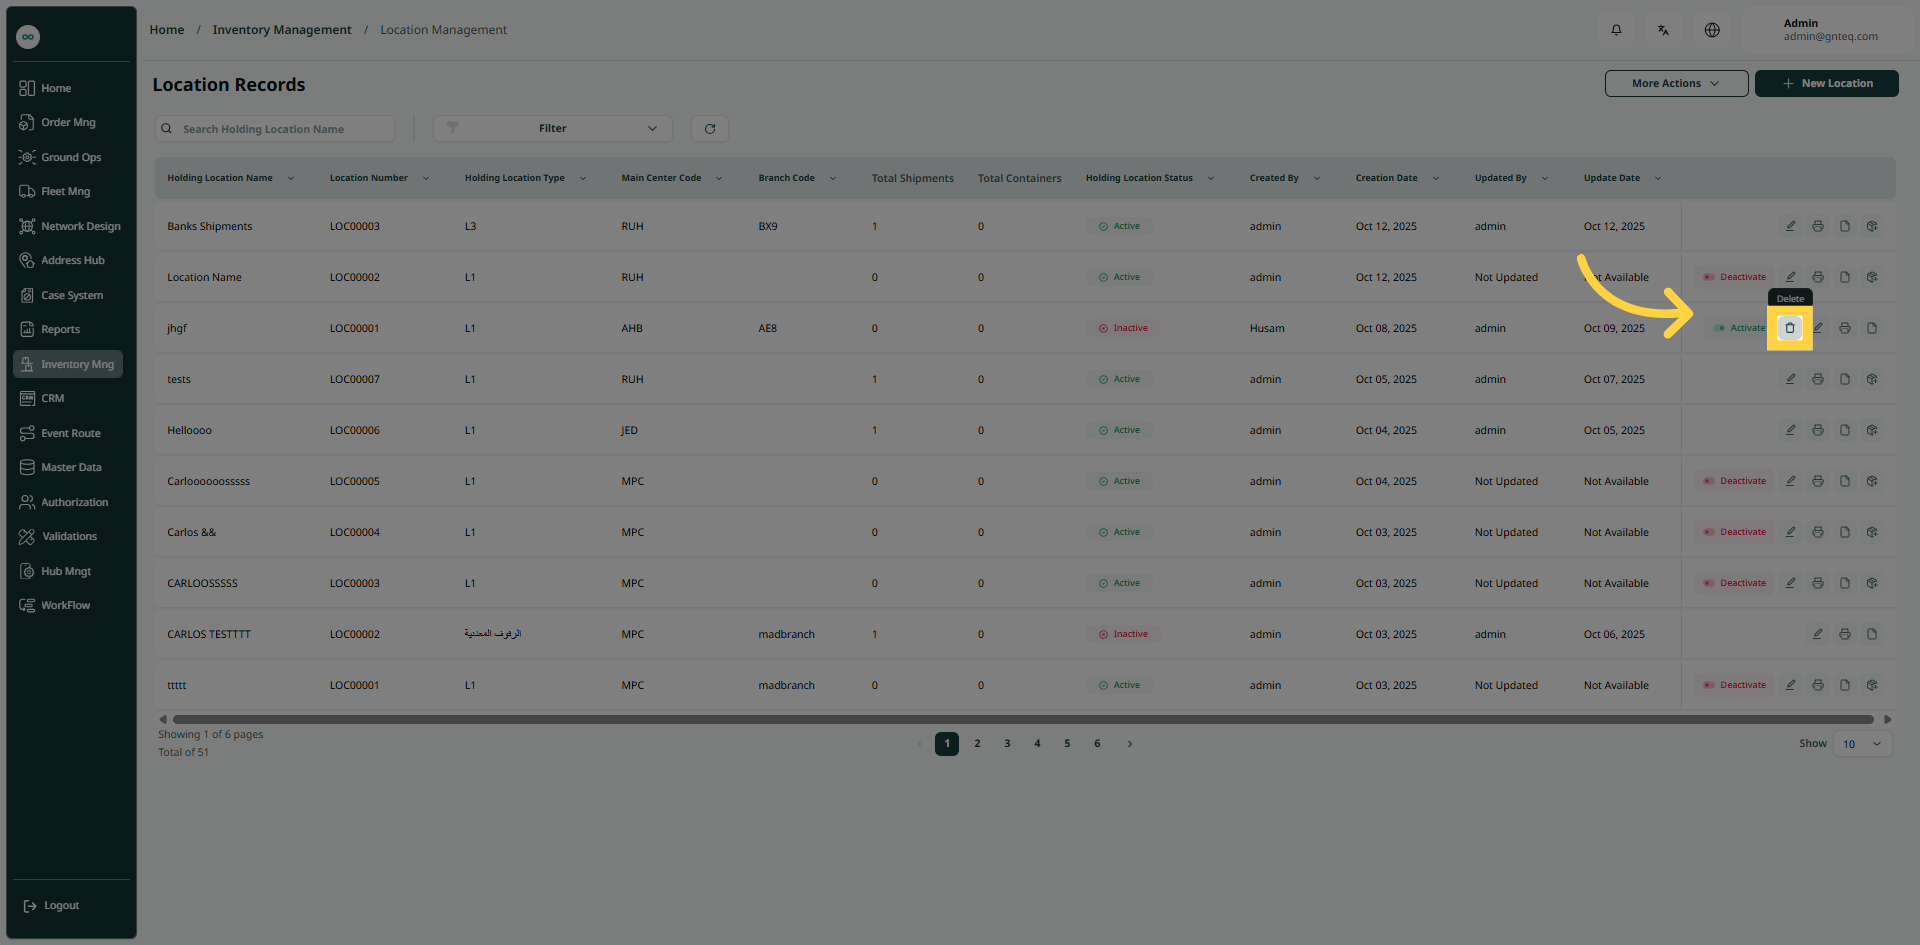
2.6 Activate & Deactivate
The user can activate and deactivate an existing location by clicking on Activate & Deactivate from Actions by navigating to the ‘Locations Records’ screen via the Inventory Management Module.
3. Add New Location
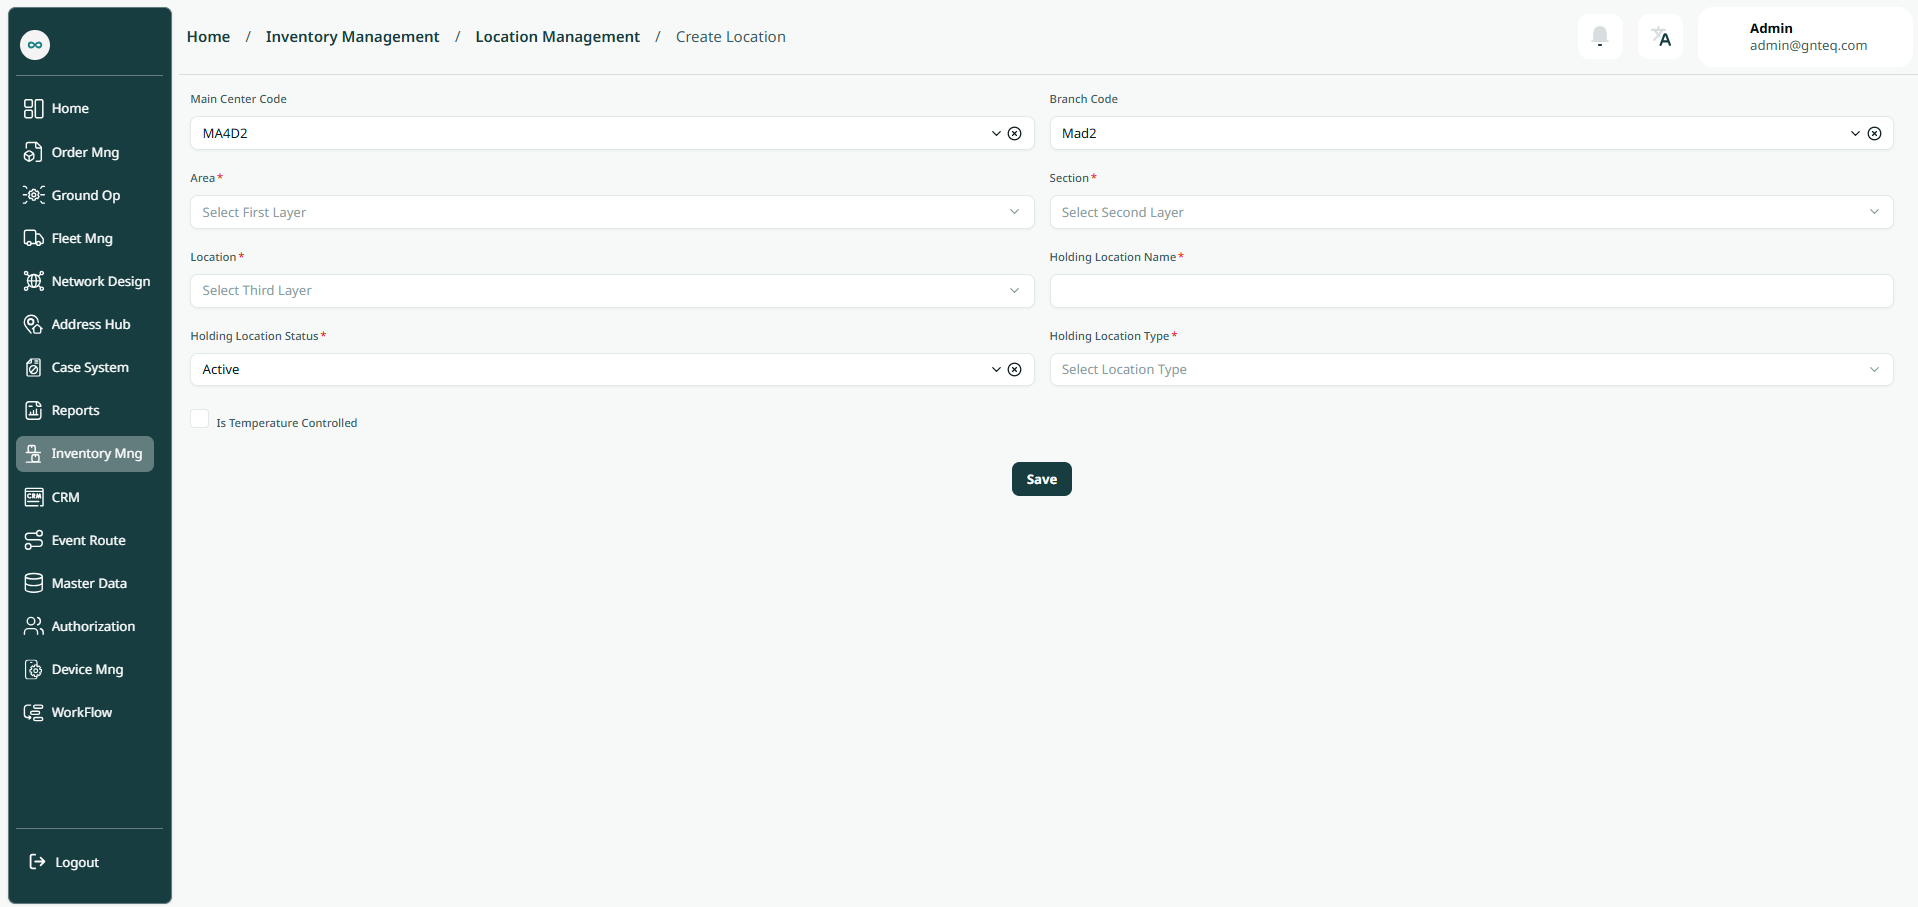
The user can create a new location by navigating to the ‘Location Management Dashboard’ screen via the Inventory Management Module and clicking on the New Location button:
-
Main center Code: this field represents the city where the entity is registered or primarily operates.
-
Branch Code: this field represents the station where the entity is registered or primarily operates.
-
Area: this field represents the area in the warehouse.
-
Section: this field represents the section in the warehouse.
-
Location: this field represents the the specific layer in the warehouse.
-
Holding Location Name: this field represents the name of the location in the warehouse.
-
Holding Location status: this field represents the status of the holding (active, inactive).
-
Holding Location Type: this field represents the type of the holding (Cage, Bin, Pallet, Rack, Bag).
-
Is Temperature Controlled: this field represents if the location is under temperature control.
By clicking on ’Save’ the system will add the location successfully.