.png)
1. Vehicle Creation Overview
2. Dashboard
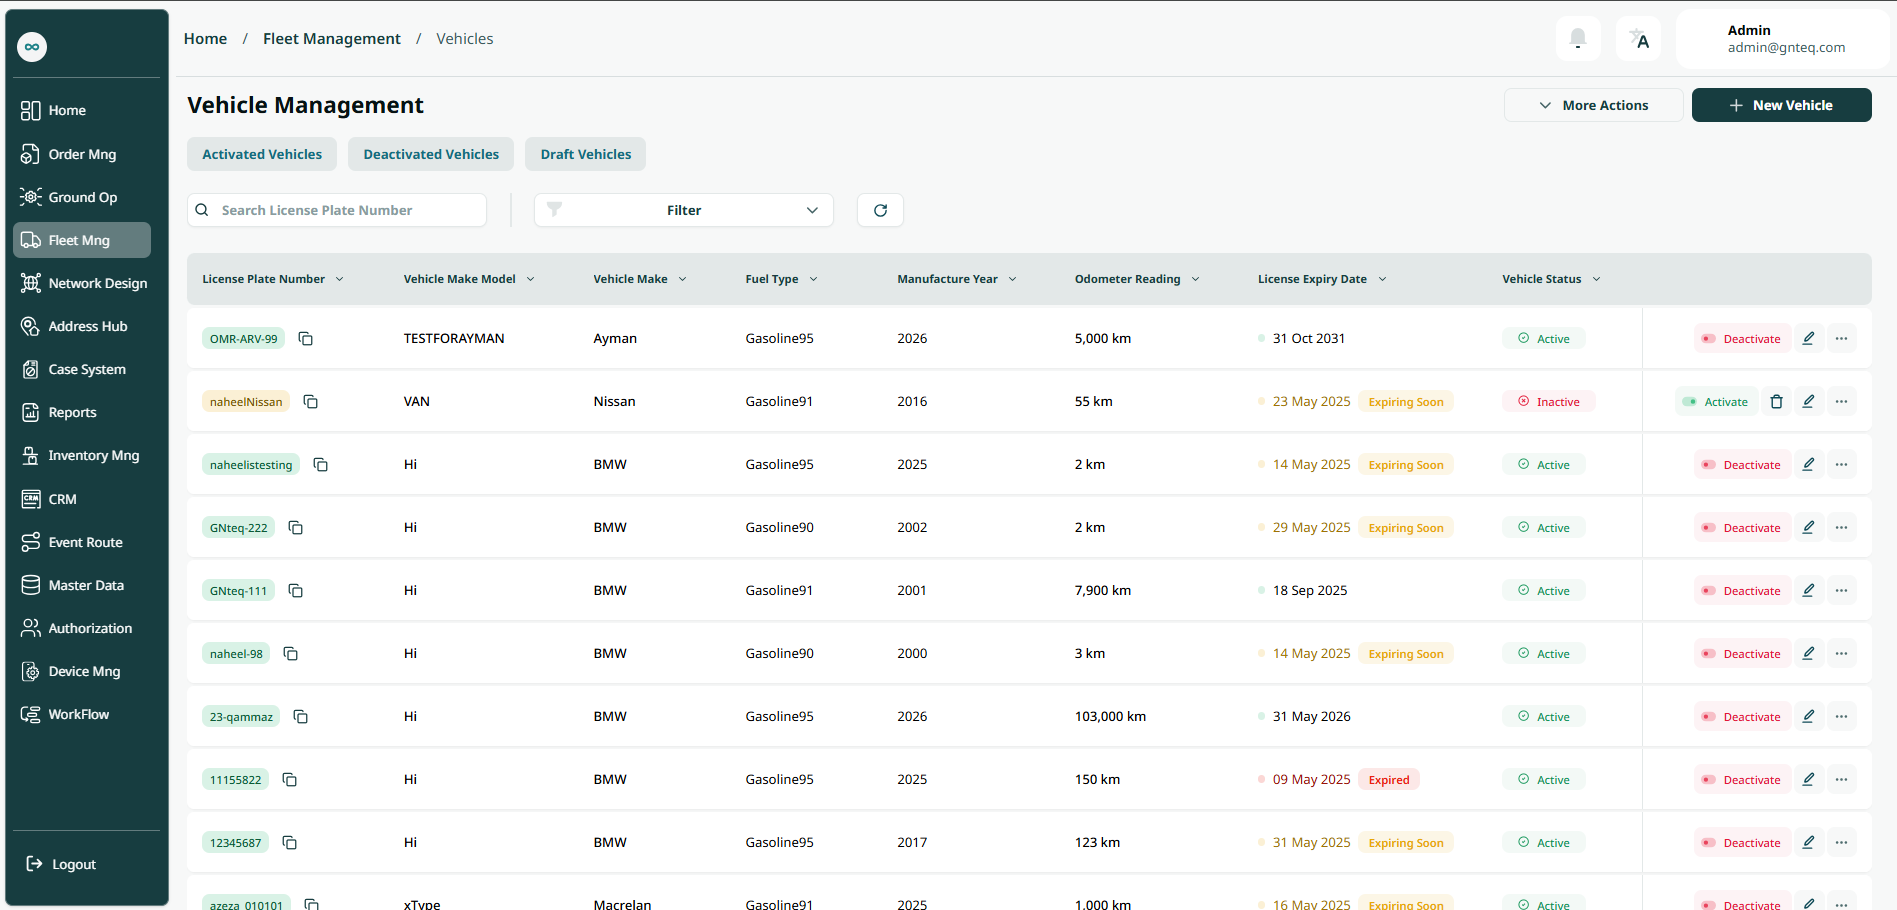
The user can view the defined vehicles in the system by navigating to the ‘Vehicle Management’ screen in the Fleet Management Module from the left navigation panel as follows:
-
New Vehicle: the user can add new vehicle by clicking on ‘New Vehicle’, referring to Add New Vehicle section.
-
Export : the user can export the list as an Excel file by clicking the "More Actions" button.
-
Import : the user can download the list as an Excel file by clicking the "More Actions" button.
-
Download Template: the user can download a blank Excel template by clicking the "More Actions" button.
-
Search: The user can search for vehicles by entering the license plate number.
-
Filter: the user can search for the vehicle by typing the vehicle type code, vehicle fuel type code, licensed plate number……. etc.
-
Rows Per Page: the user can select the number of items to show on each page.
-
Actions: by clicking on Actions, the user can scheduled maintenance, incidence maintenance, fuel records, edit vehicle, deactivate vehicle, active vehicle, or delete vehicle.
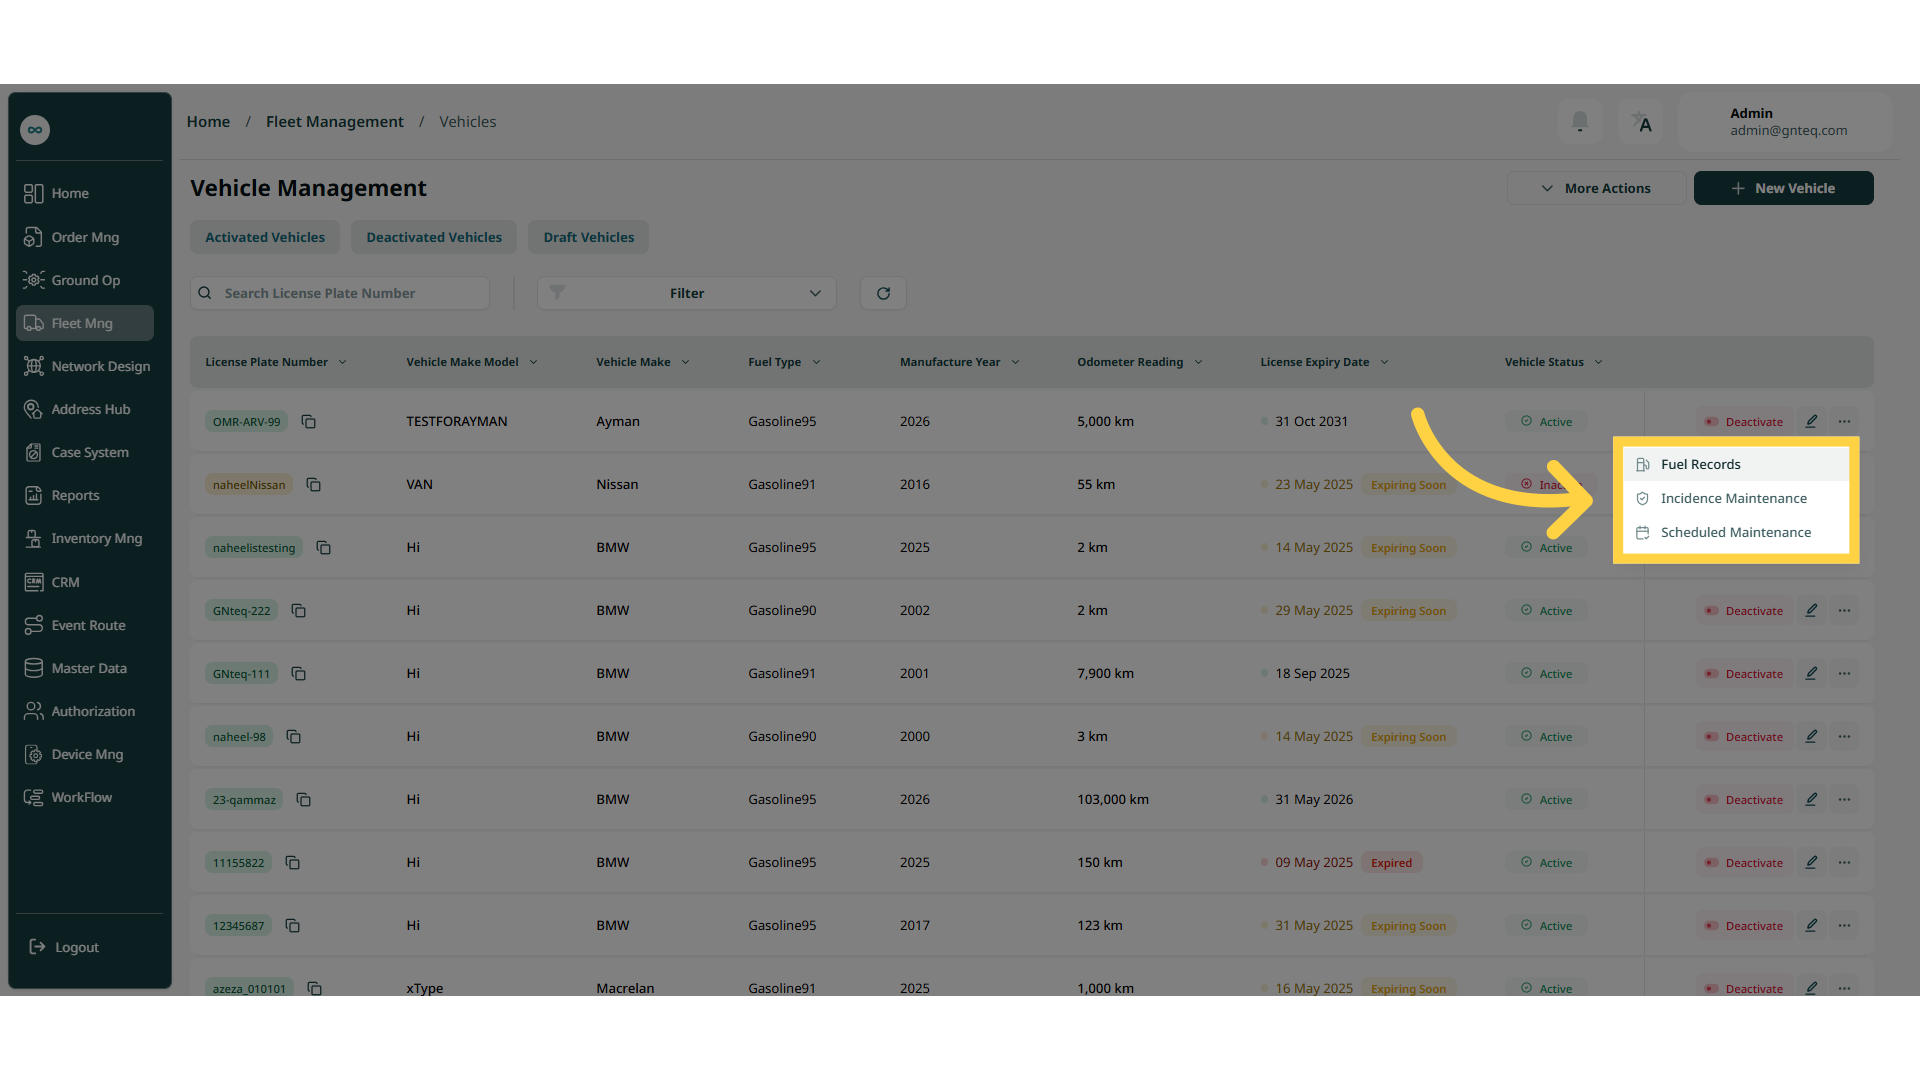
2.1 Scheduled Maintenance
The user can check on car care, which involves adhering to a set schedule for inspections and services as recommended by the manufacturer.
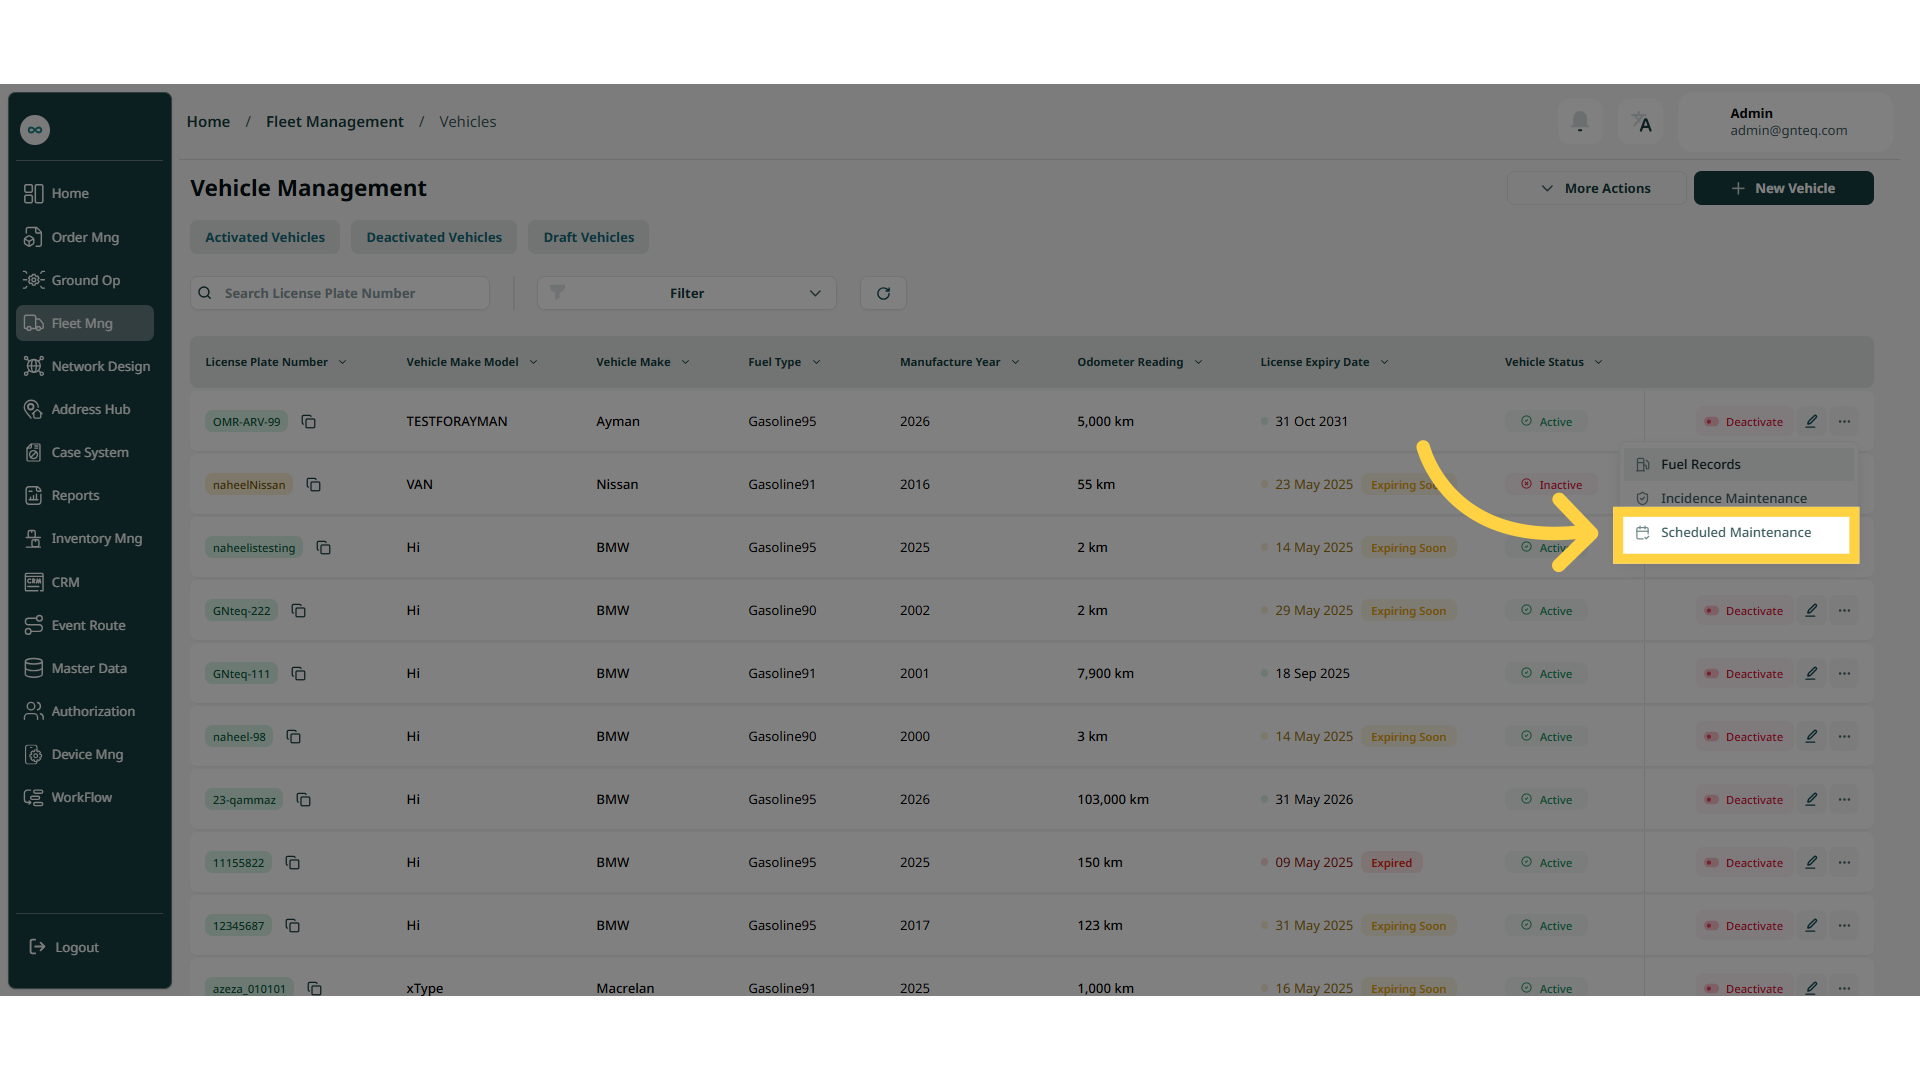
2.1.1 Scheduled Maintenance Dashboard
-
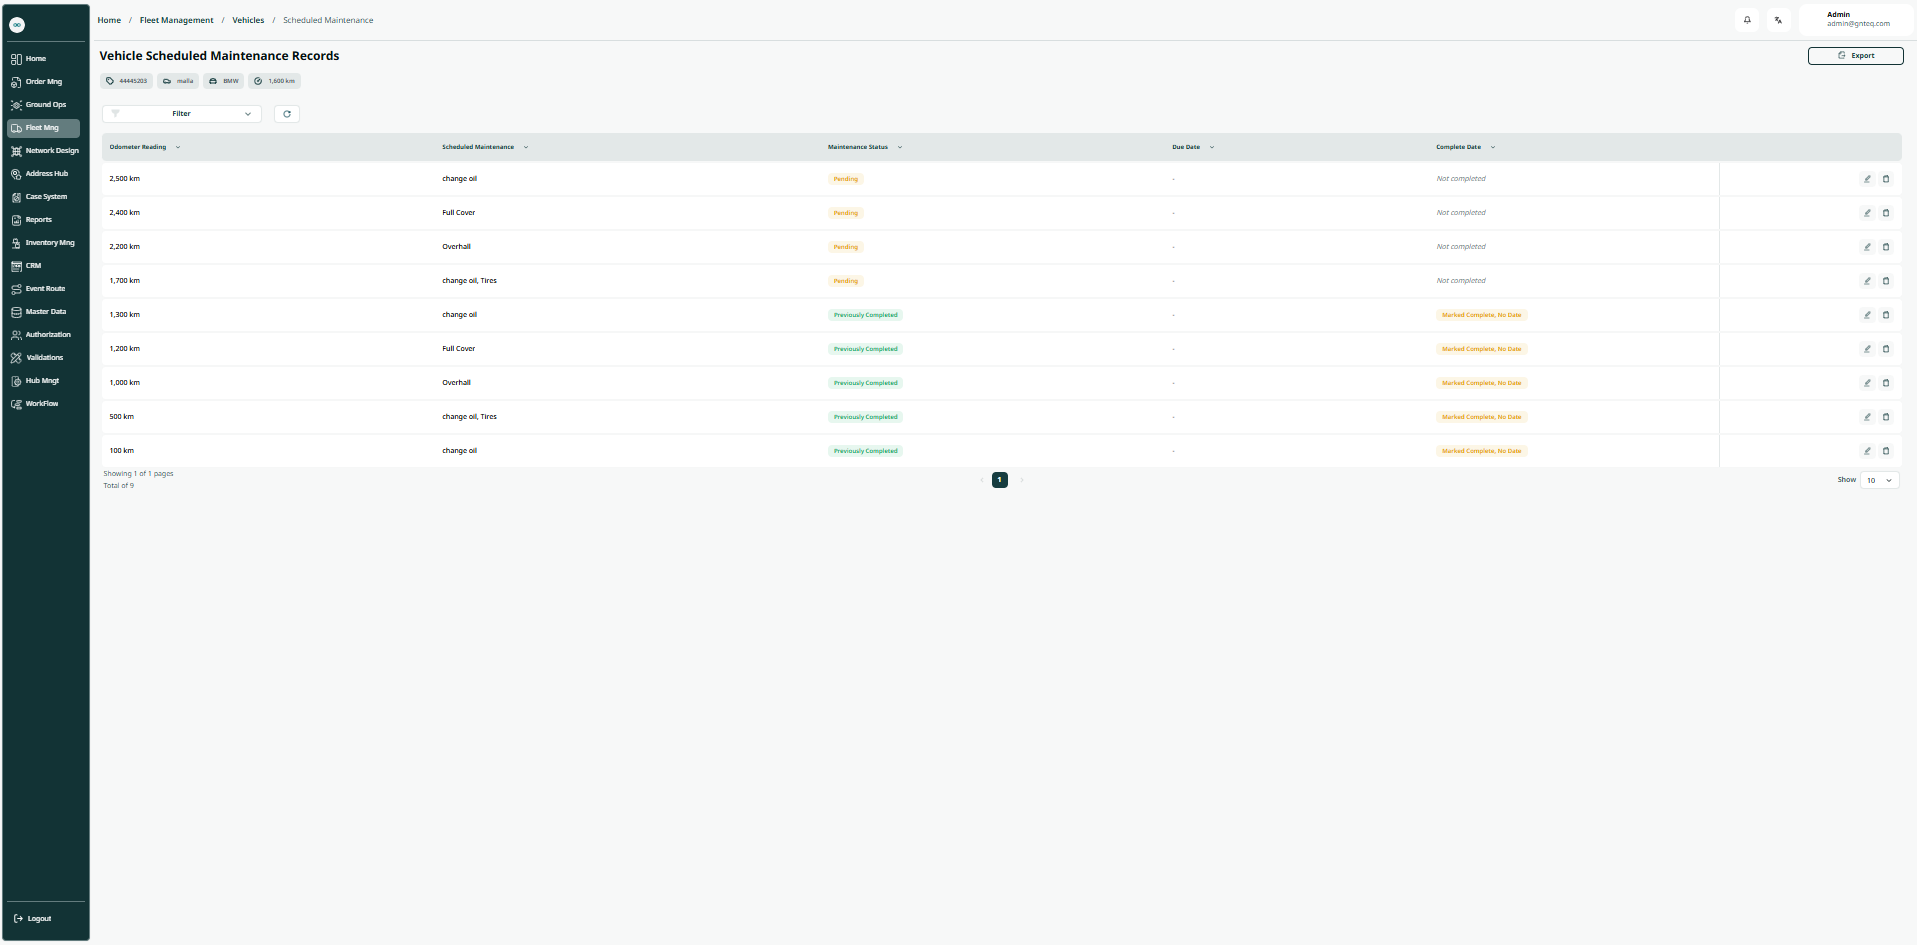
Export: the user can export the vehicle scheduled maintenance records list an Excel file by selecting export button.
-
Filter: the user can search for the customer by due date, complete date……etc.
-
Rows Per Page: the user can select the number of items to show on each page.
-
Actions: by clicking on Actions, the user can edit the record by going to the edit record section, or delete the record.
2.1.1.1 Edit Scheduled Maintenance
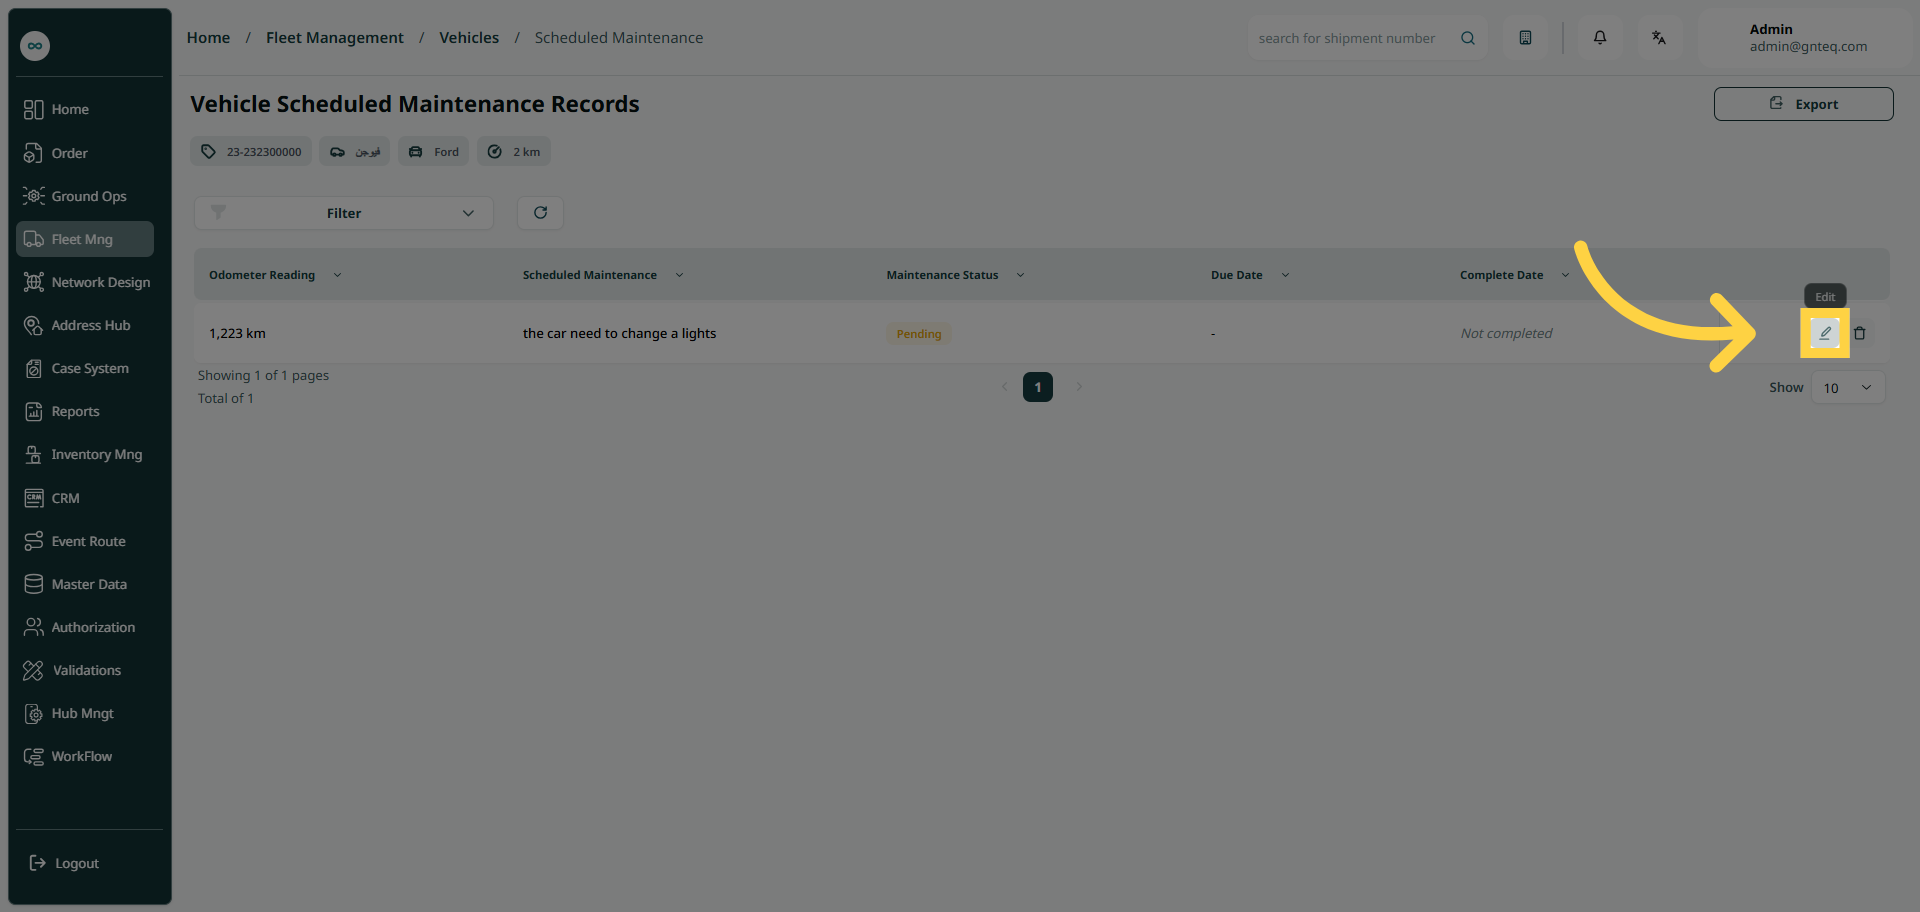
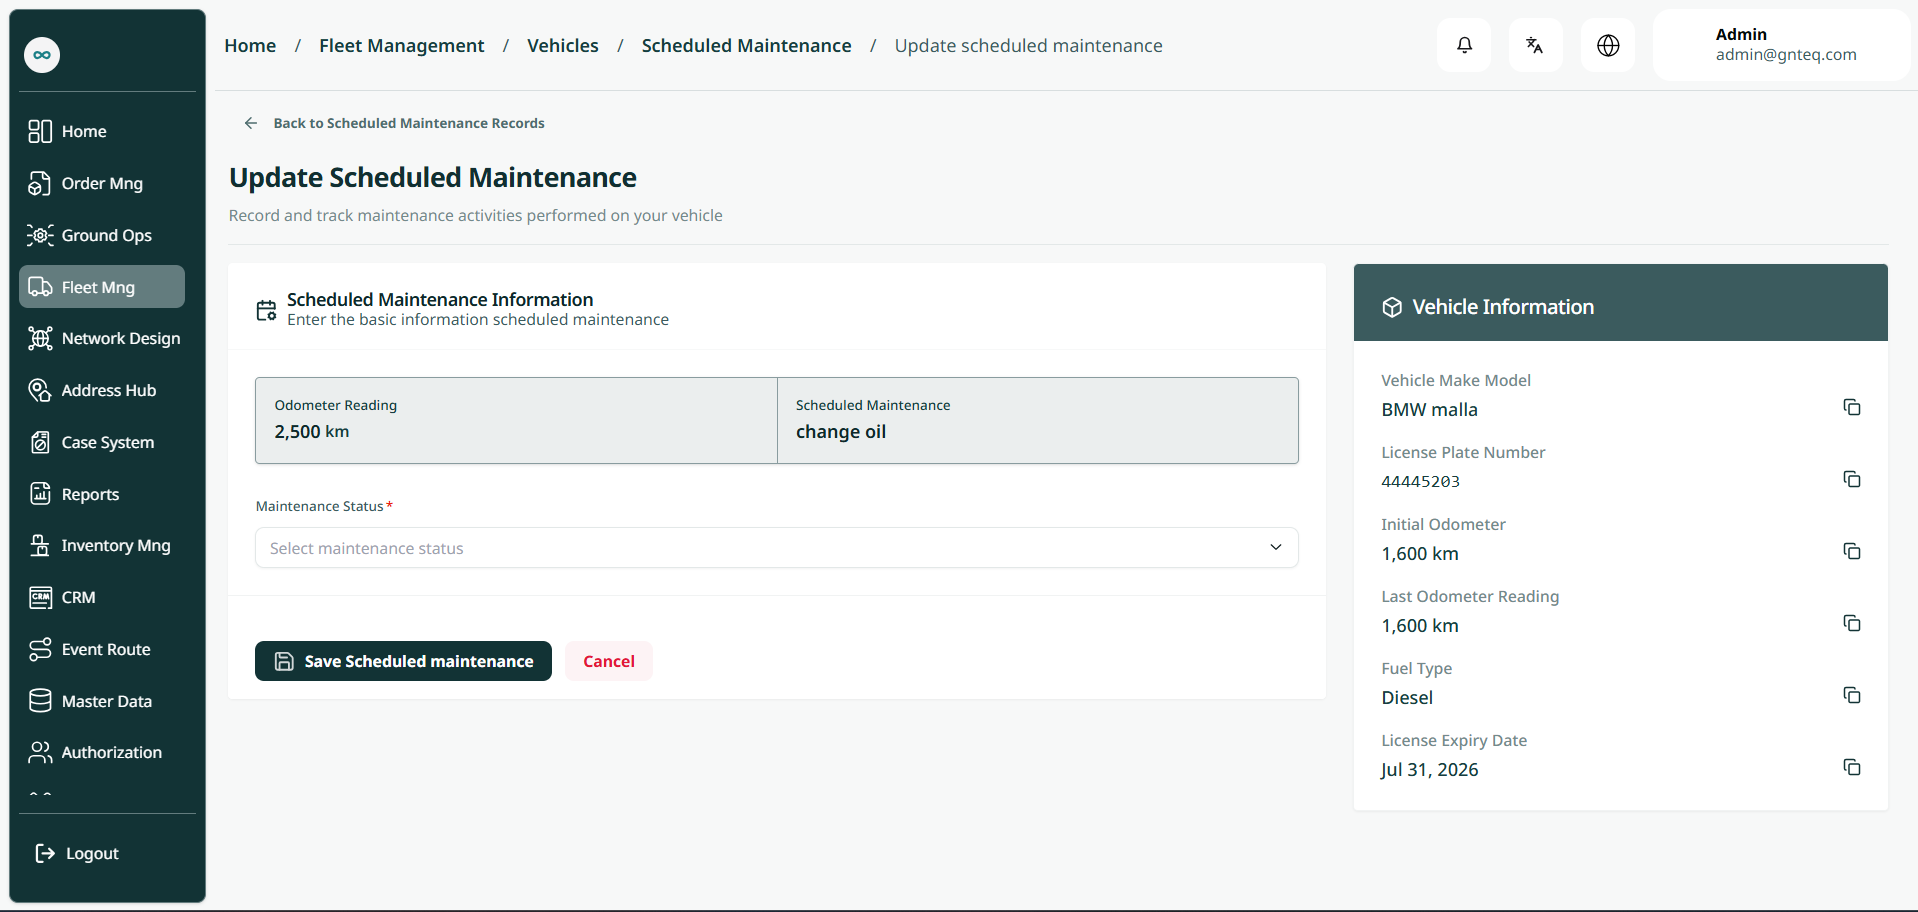
The user can edit an existing scheduled maintenance information by navigating to the “Vehicle Scheduled Maintenance Records” screen via the Fleet Management module and clicking on Edit from Actions.
2.1.1.2 Delete Scheduled Maintenance
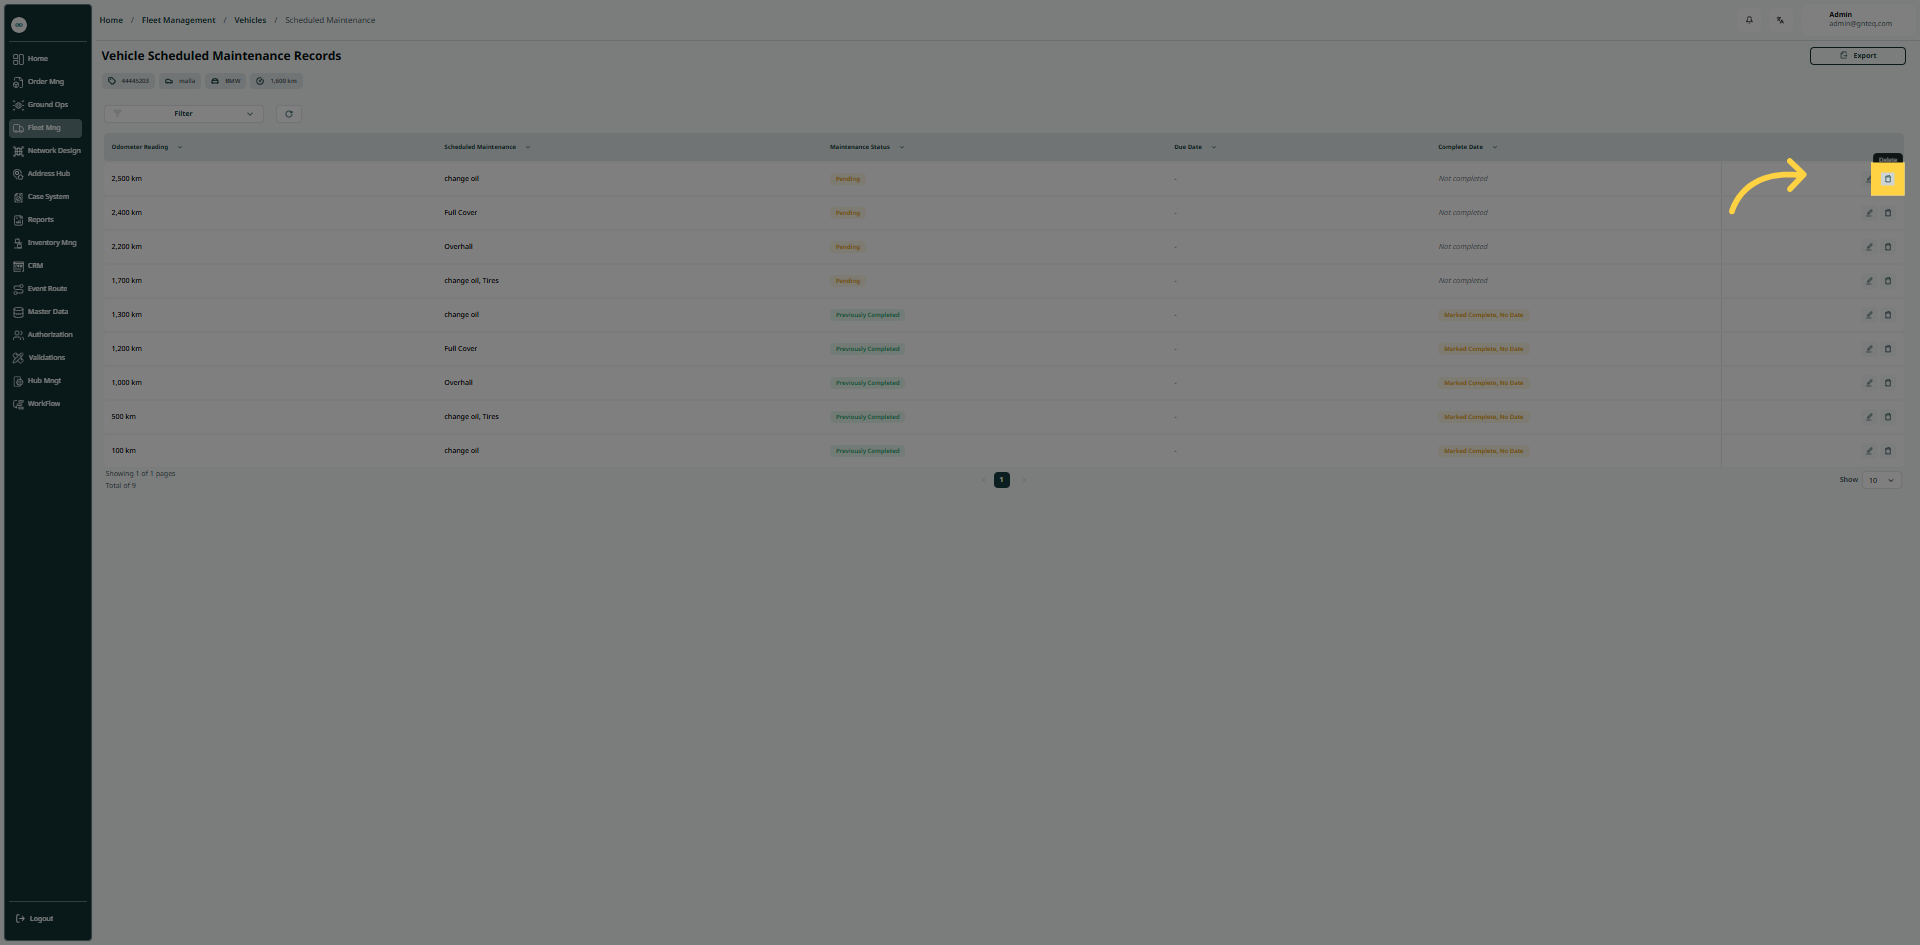
The user can delete an existing scheduled maintenance information by navigating to the “Vehicle Scheduled Maintenance Records” screen via the Fleet Management module and clicking on Delete from Actions.
2.2 Incidence Maintenance
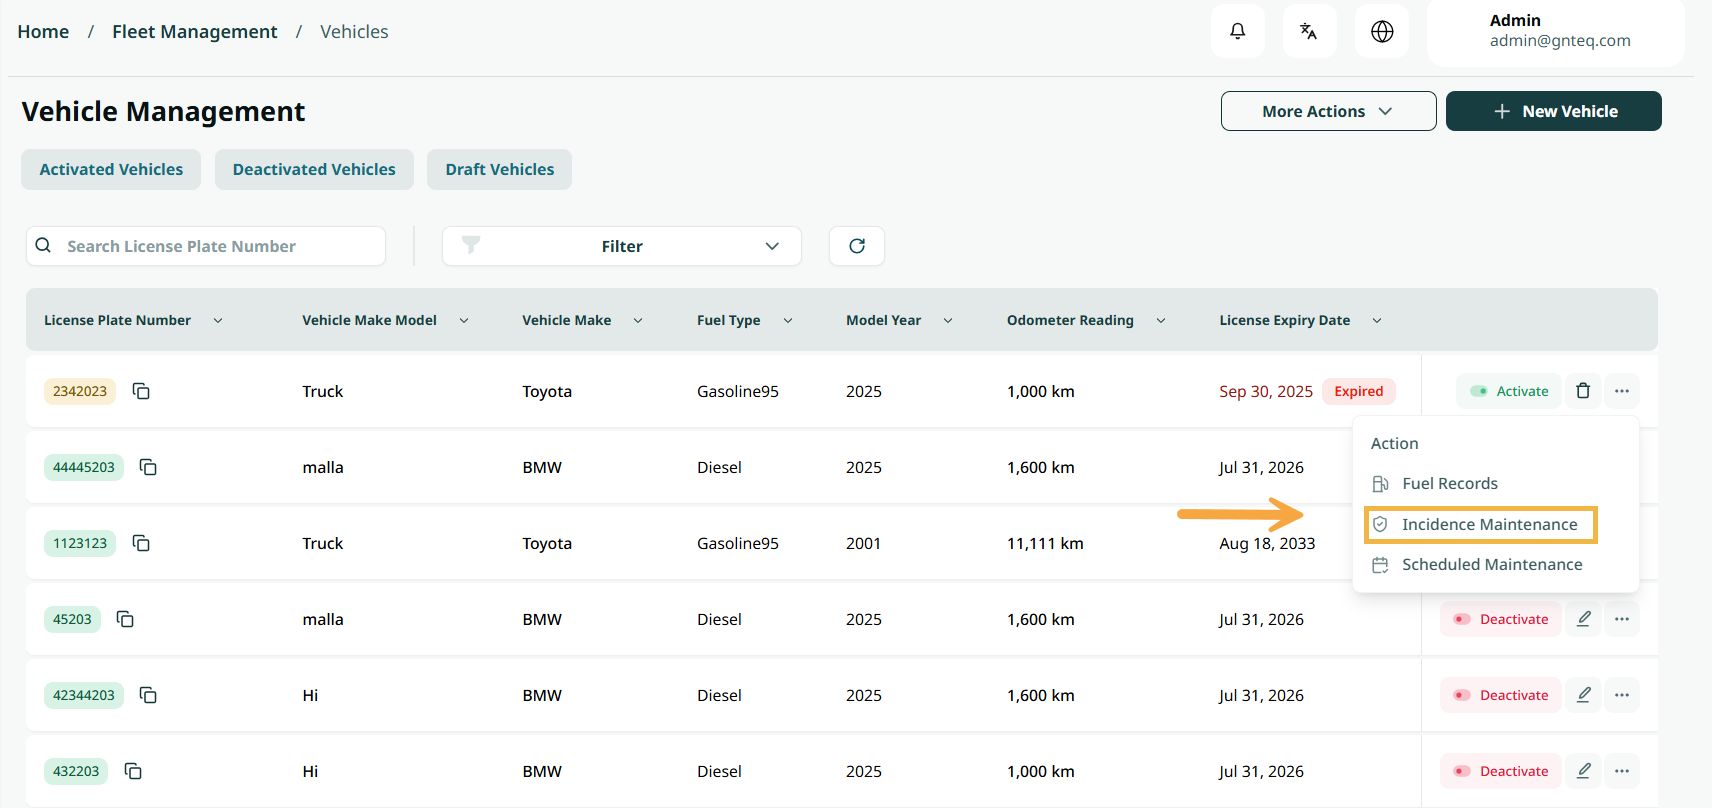
The user can manage and maintain vehicles in order to prevent incidents, enhance safety, and ensure operational efficiency.
2.2.1 Vehicle Incidence Maintenance Dashboard
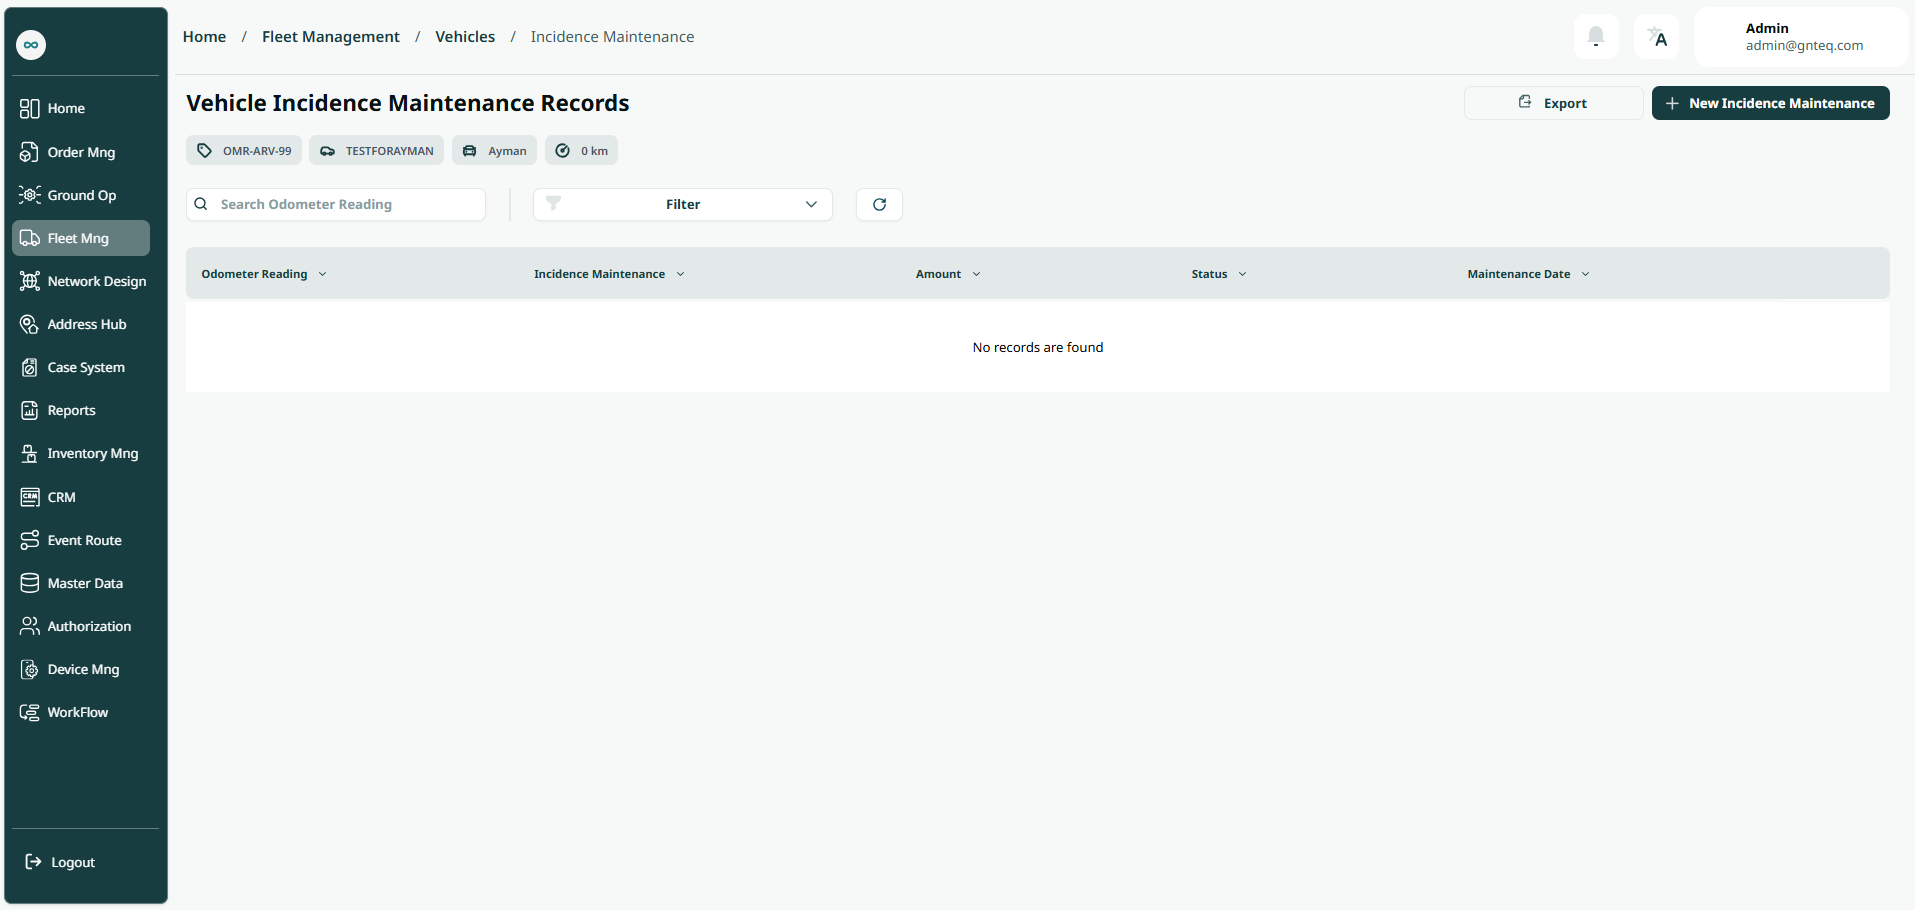
-
Export: the user can export the vehicle incidence maintenance records list an Excel file by selecting export button.
-
Filters: the user can search for the incidence maintenance by the amount, status……etc.
-
Rows Per Page: the user can select the number of items to show on each page
-
Actions: by clicking on Actions, the user can edit the record by going to the edit record section, or delete the record.
2.2.2 Add New Record
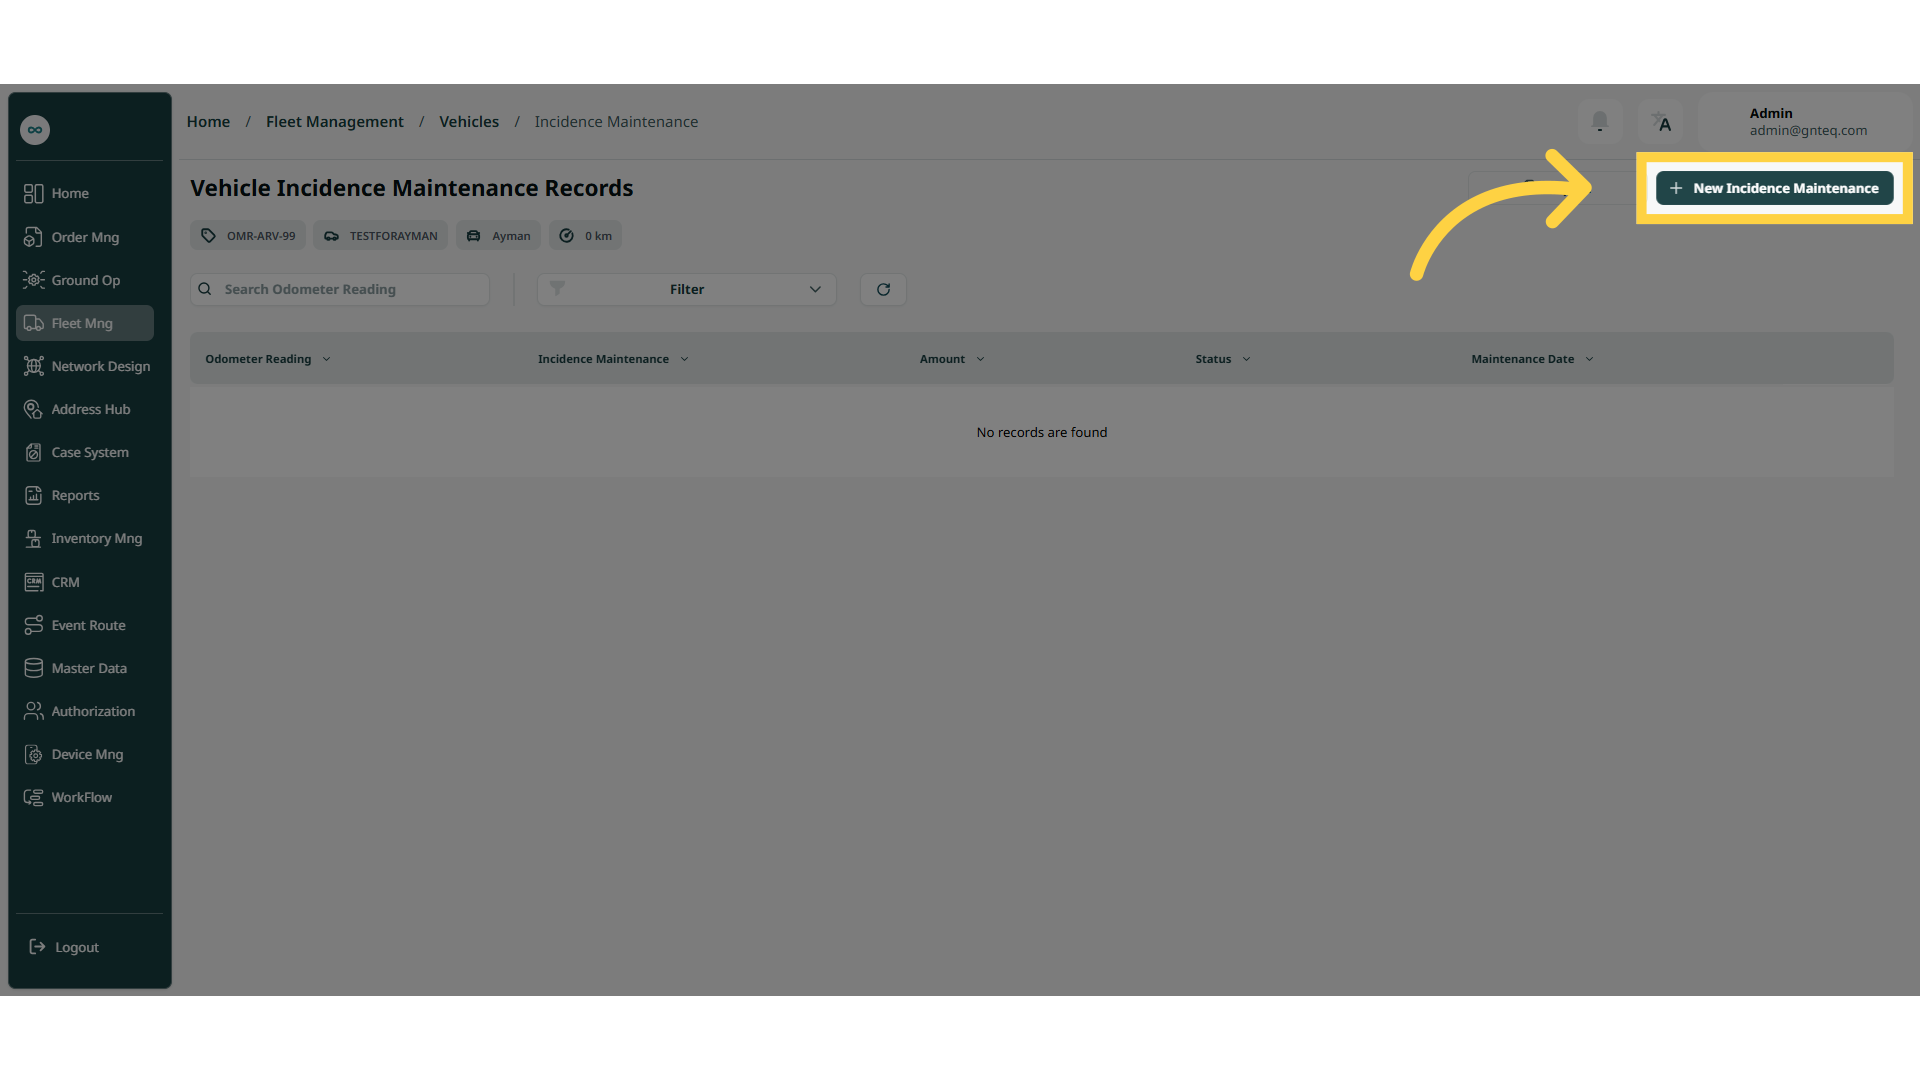
The user can create a new record by navigating to the ‘Vehicle Incidence Maintenance Records’ screen via the Fleet Management Module and clicking on New Record button:
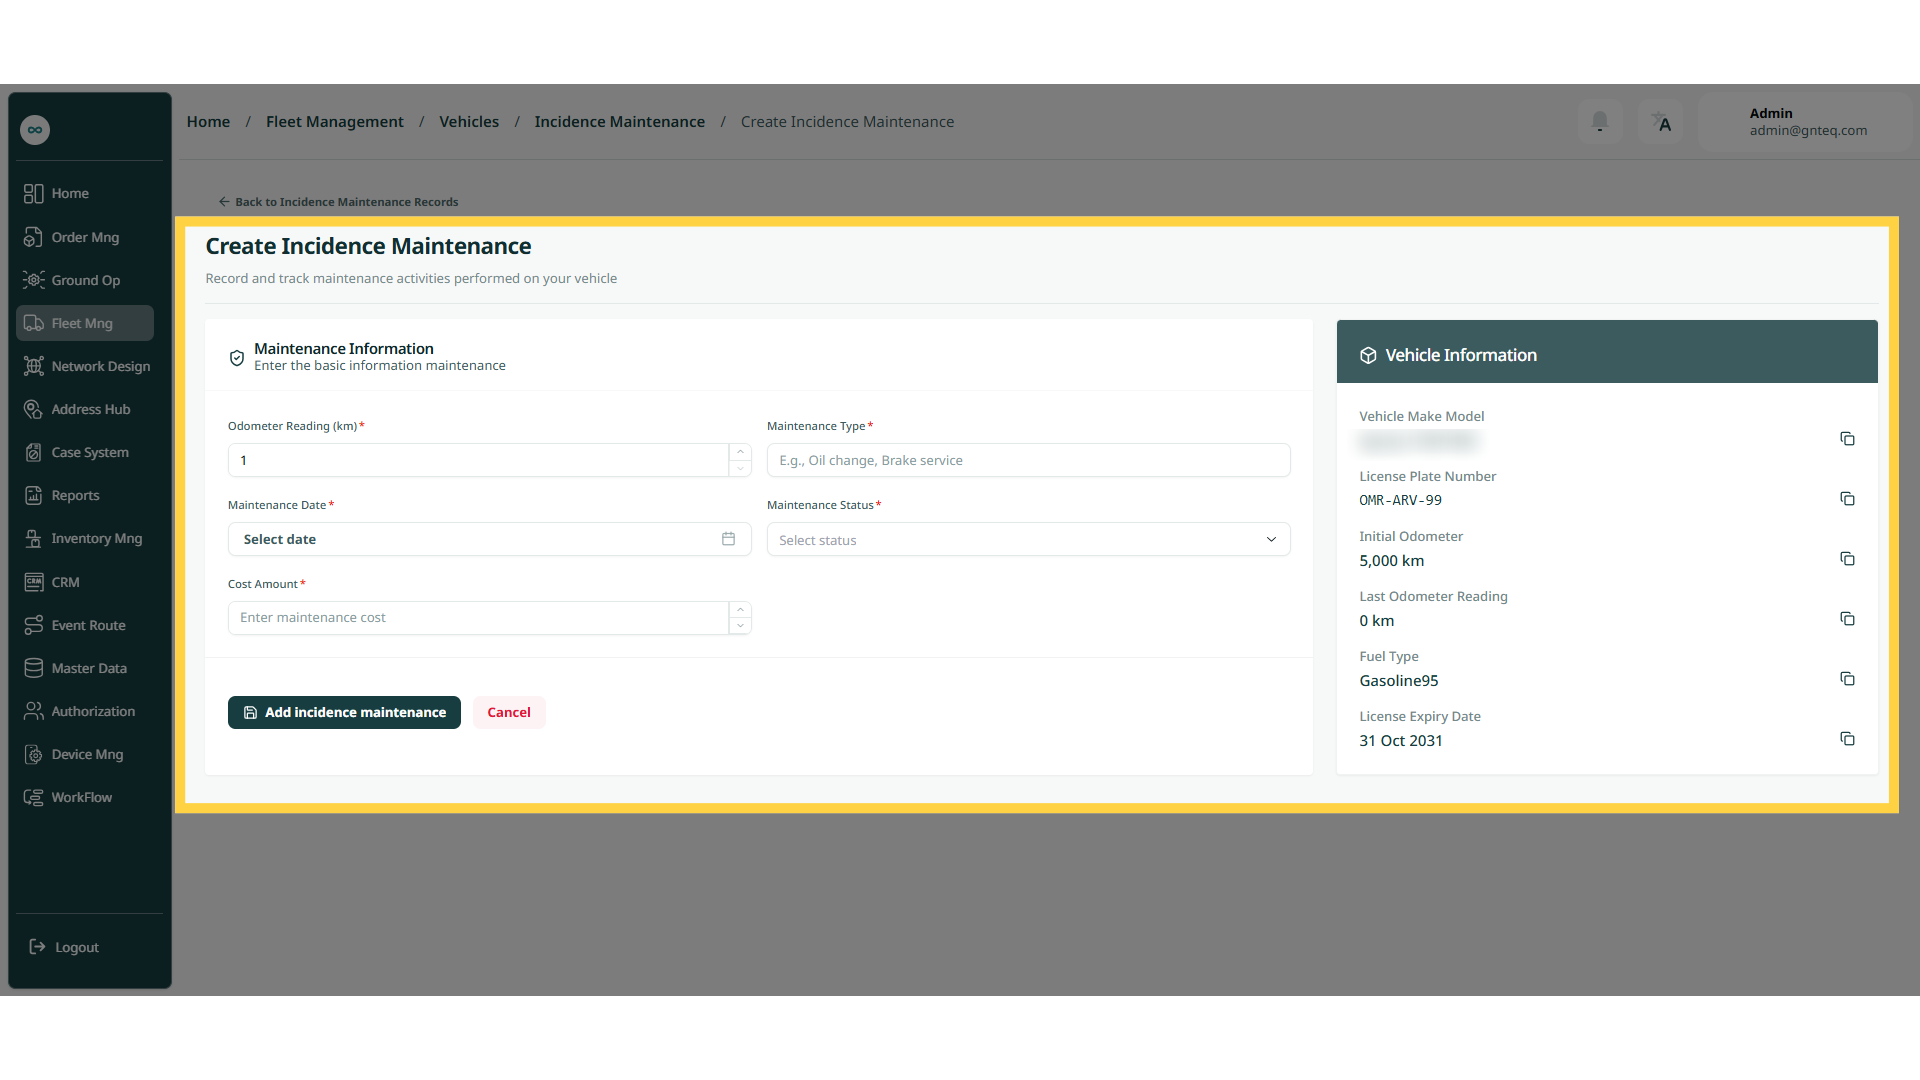
-
Odometer Reading: this field represents the reading refers to the total distance a vehicle has traveled, as recorded by its odometer
-
Maintenance Type: this field represents the type of services that will be provide to the vehicle.
-
Maintenance Date: this field represents the date of completing the maintenance services.
-
Maintenance Status: this field represents the status of the maintenance for the vehicle.
-
Cost Amount: this field represents the value of the maintenance services.
By clicking on ‘Add Incidence Maintenance’ the incidence will be save successfully.
2.3 Fuel Records
The user can manage fuel consumption within a fleet by maintaining detailed records of fuel purchases, usage, and related transactions.
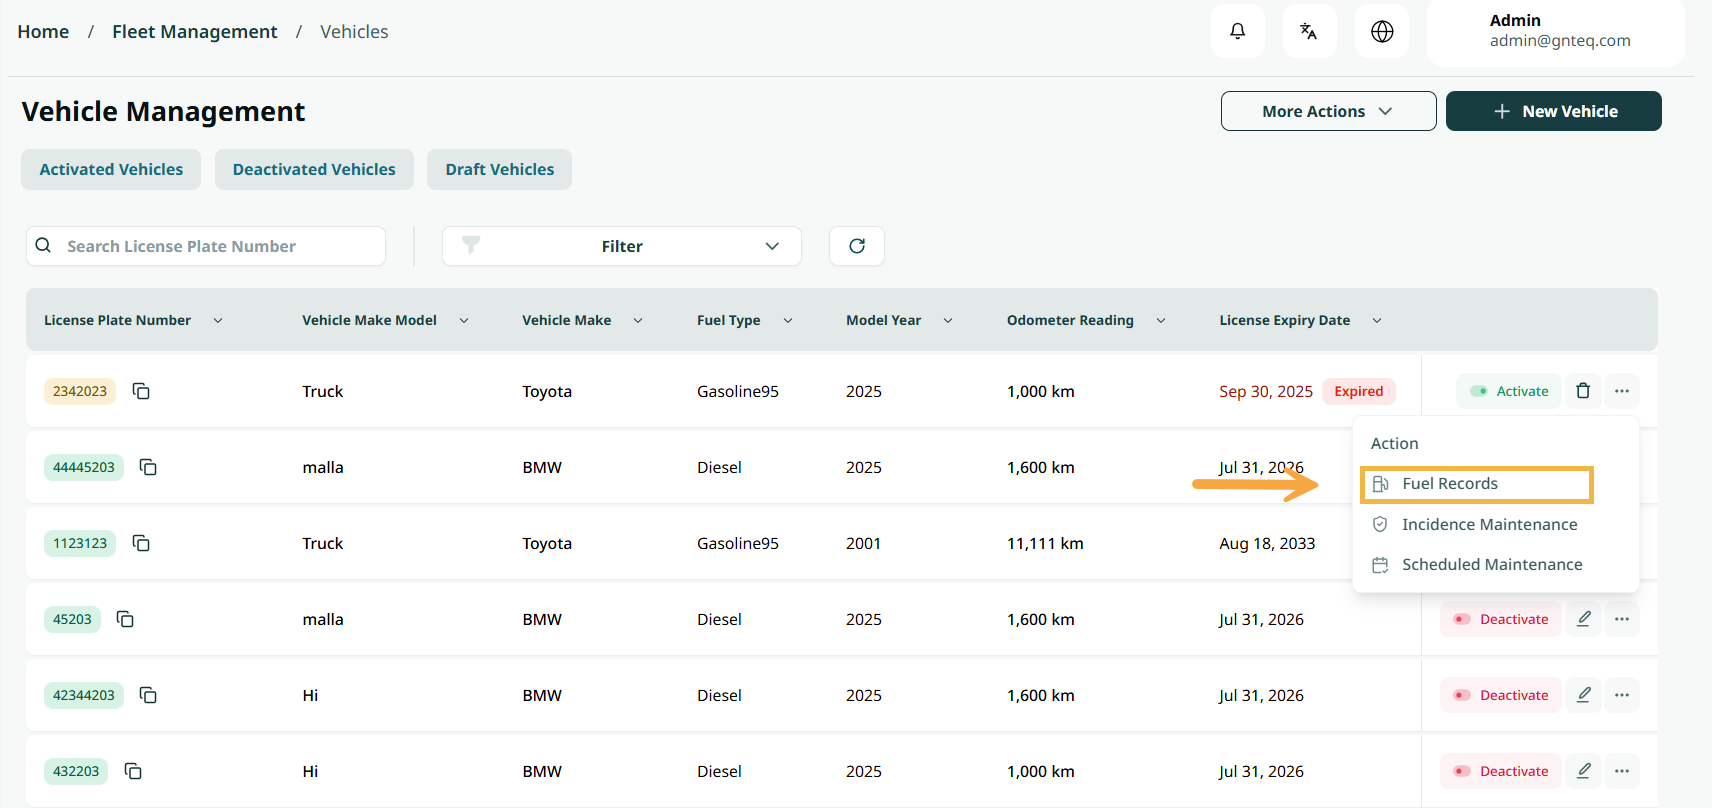
2.3.1 Fuel Records Dashboard
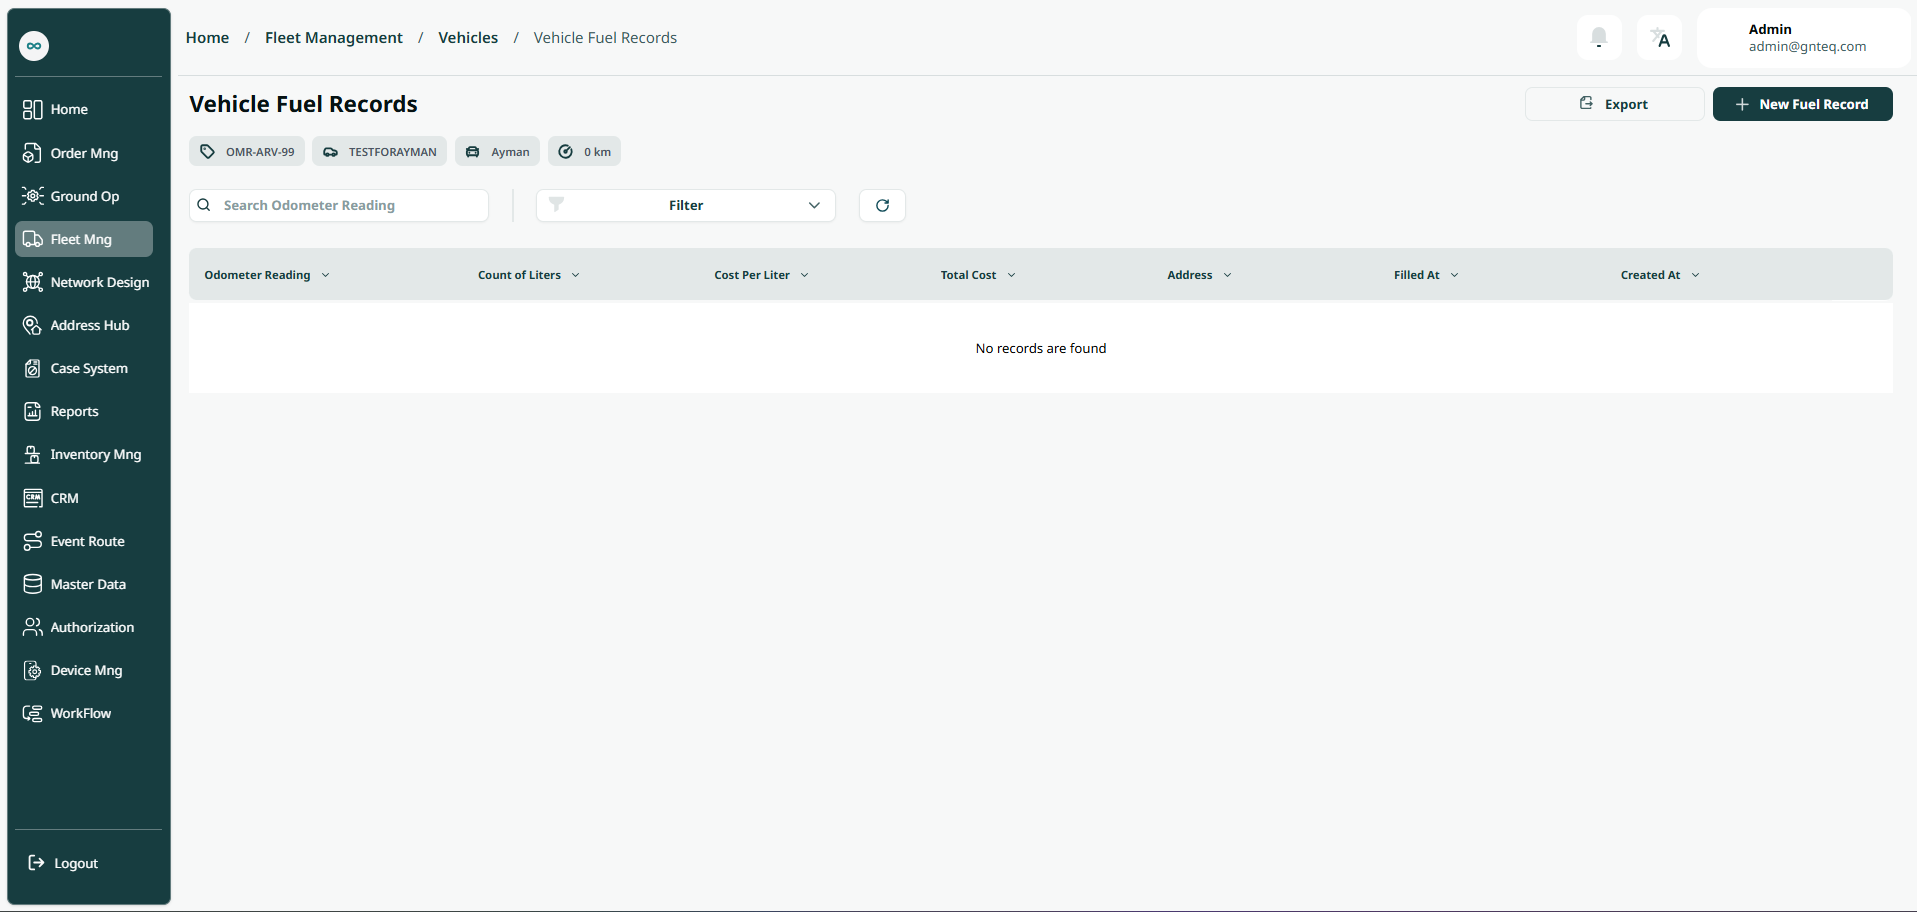
-
Export: the user can export the fuel records list an Excel file by selecting export button.
-
Filters: the user can search for the fuel record by the total cost, currency, address……etc.
-
Rows Per Page: the user can select the number of items to show on each page.
-
Actions: by clicking on Actions, the user can edit the record by going to the edit record section, or delete the record.
2.3.2 Add New Fuel Record
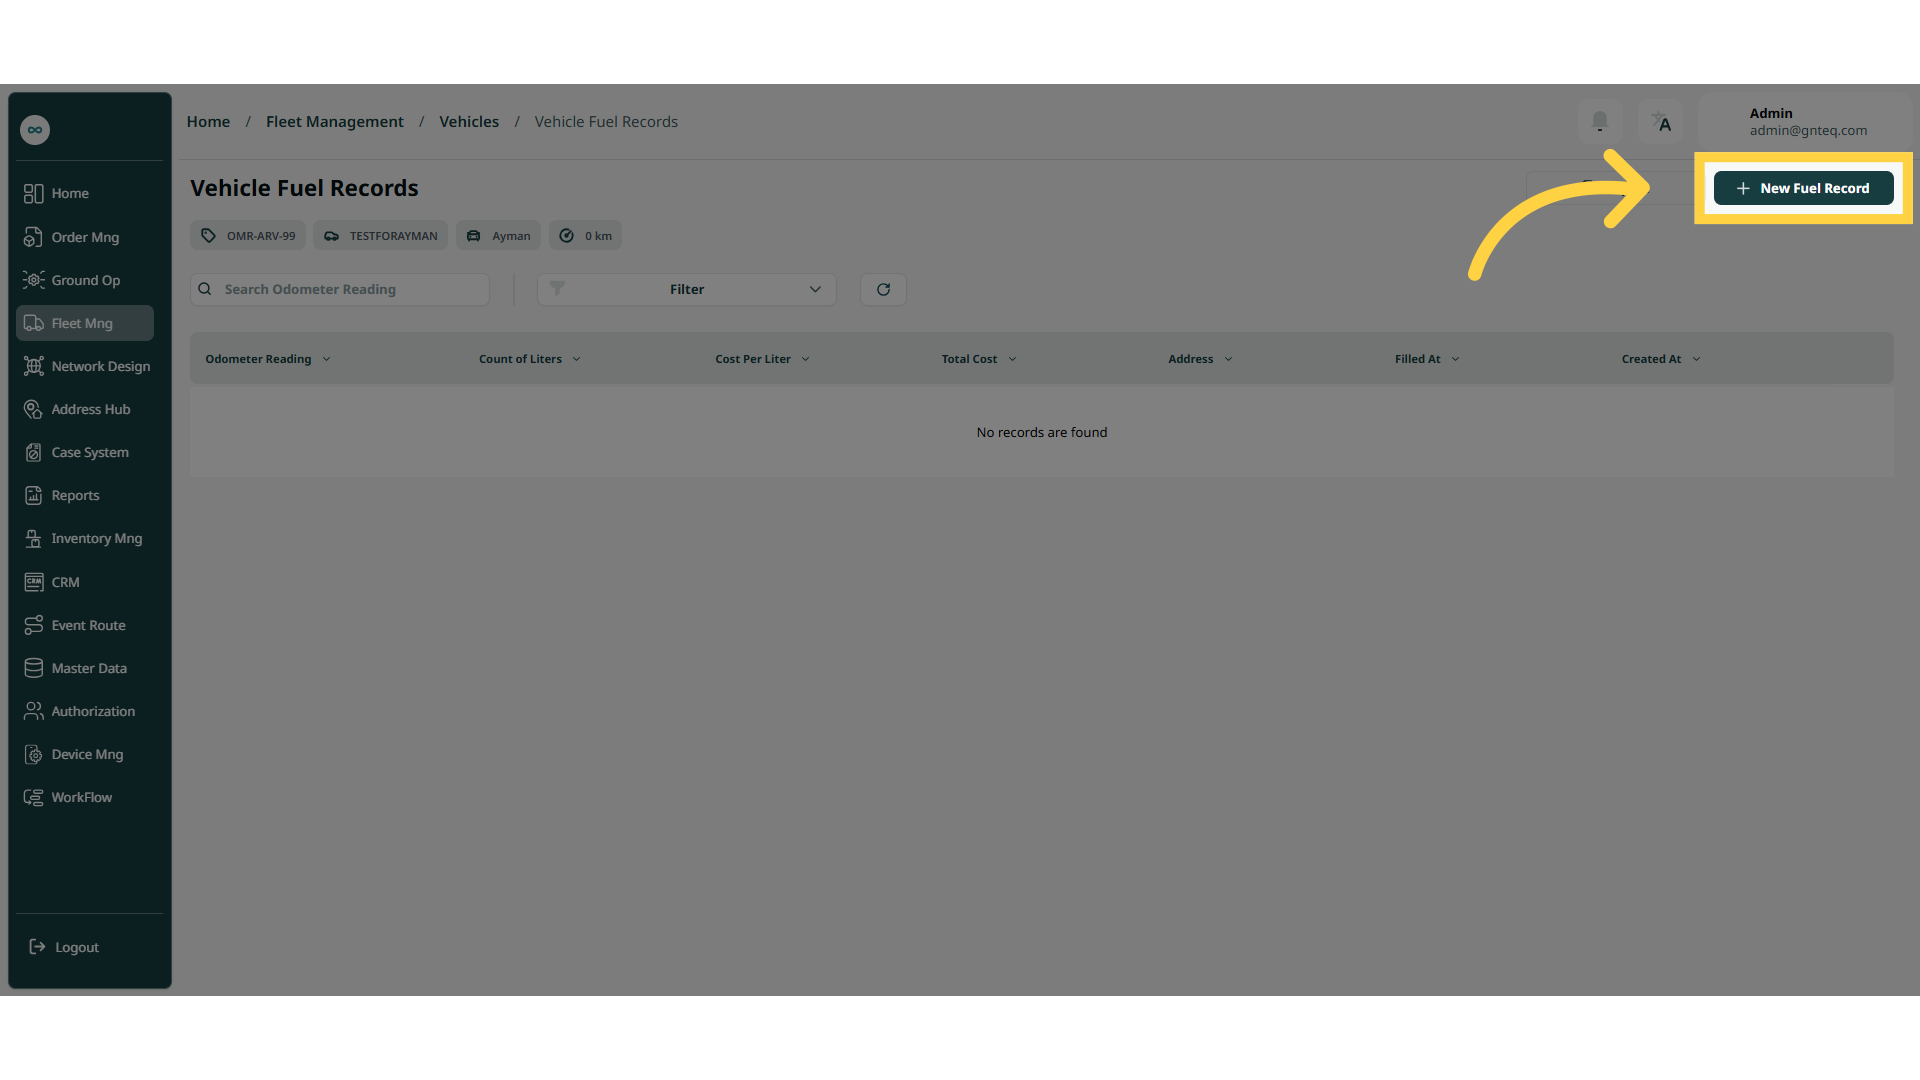
The user can create a new fuel record by navigating to the ‘Vehicle Fuel Records’ screen via the Fleet Management Module and clicking on New Fuel Record button:
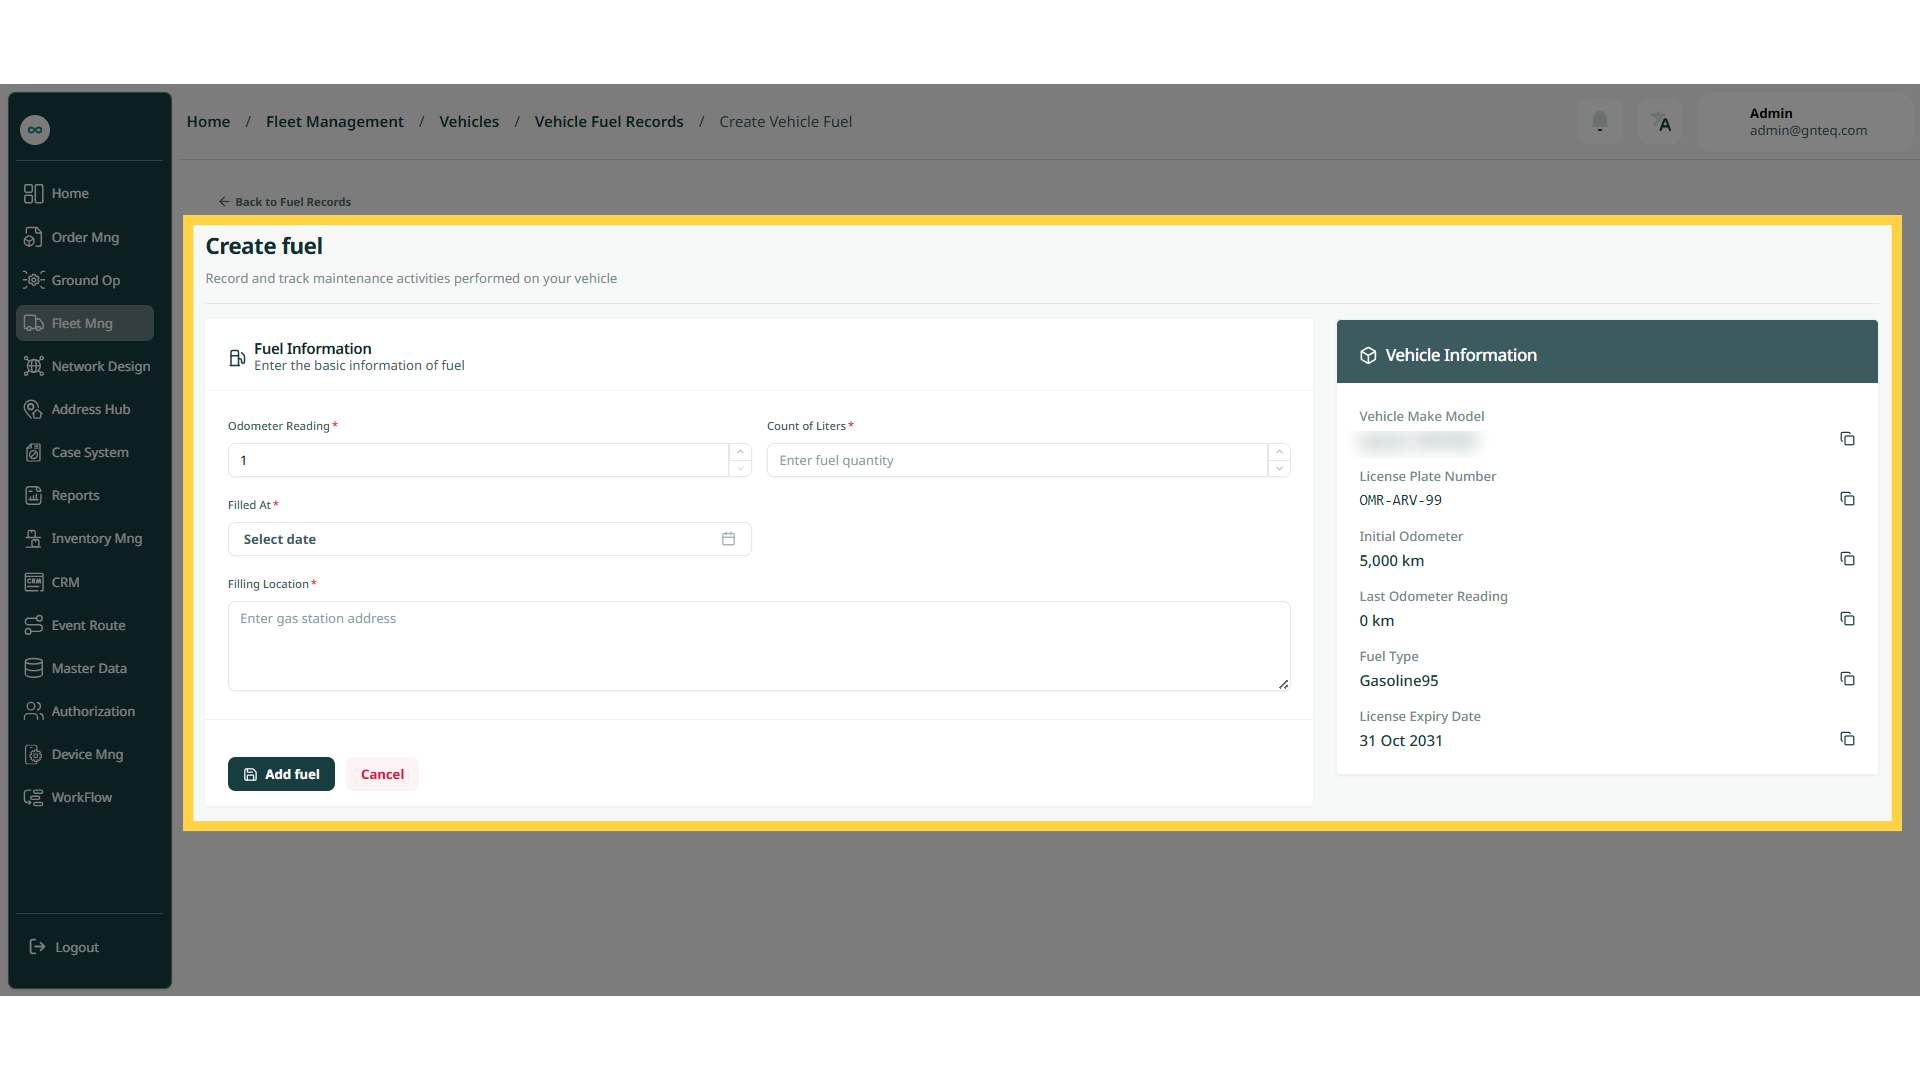
-
Odometer Reading: this field represents the reading refers to the total distance a vehicle has traveled, as recorded by its odometer.
-
Count of Liters: this field represents the amount of fuel the vehicle requires.
-
Filling Location: this field represents the station address.
-
Filled At: this field represents the date of the fuel filling.
By clicking on ‘Add Fuel’ the fuel record will be save successfully.
2.4 Edit Vehicle
The user can edit an existing vehicle by navigating to the ‘Vehicle Management’ screen via the Fleet Management Module and clicking on Edit Vehicle button:
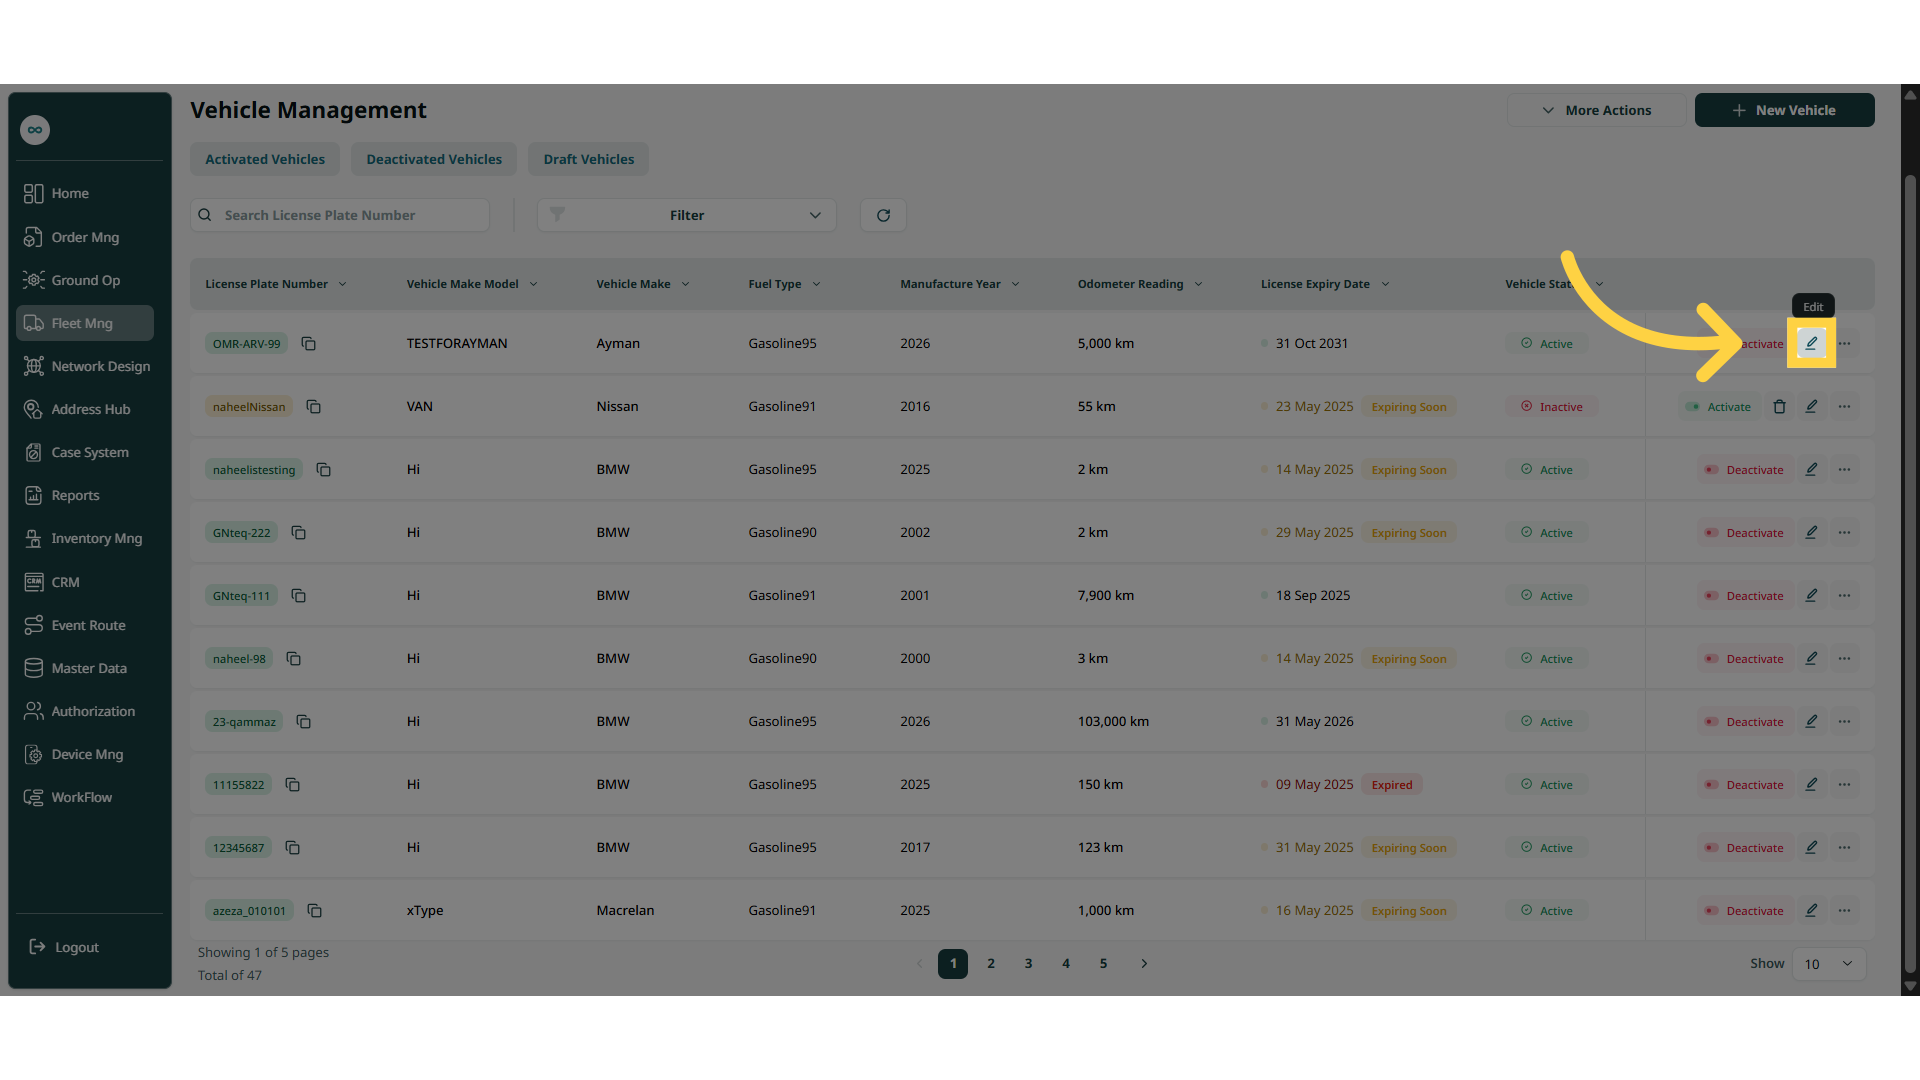
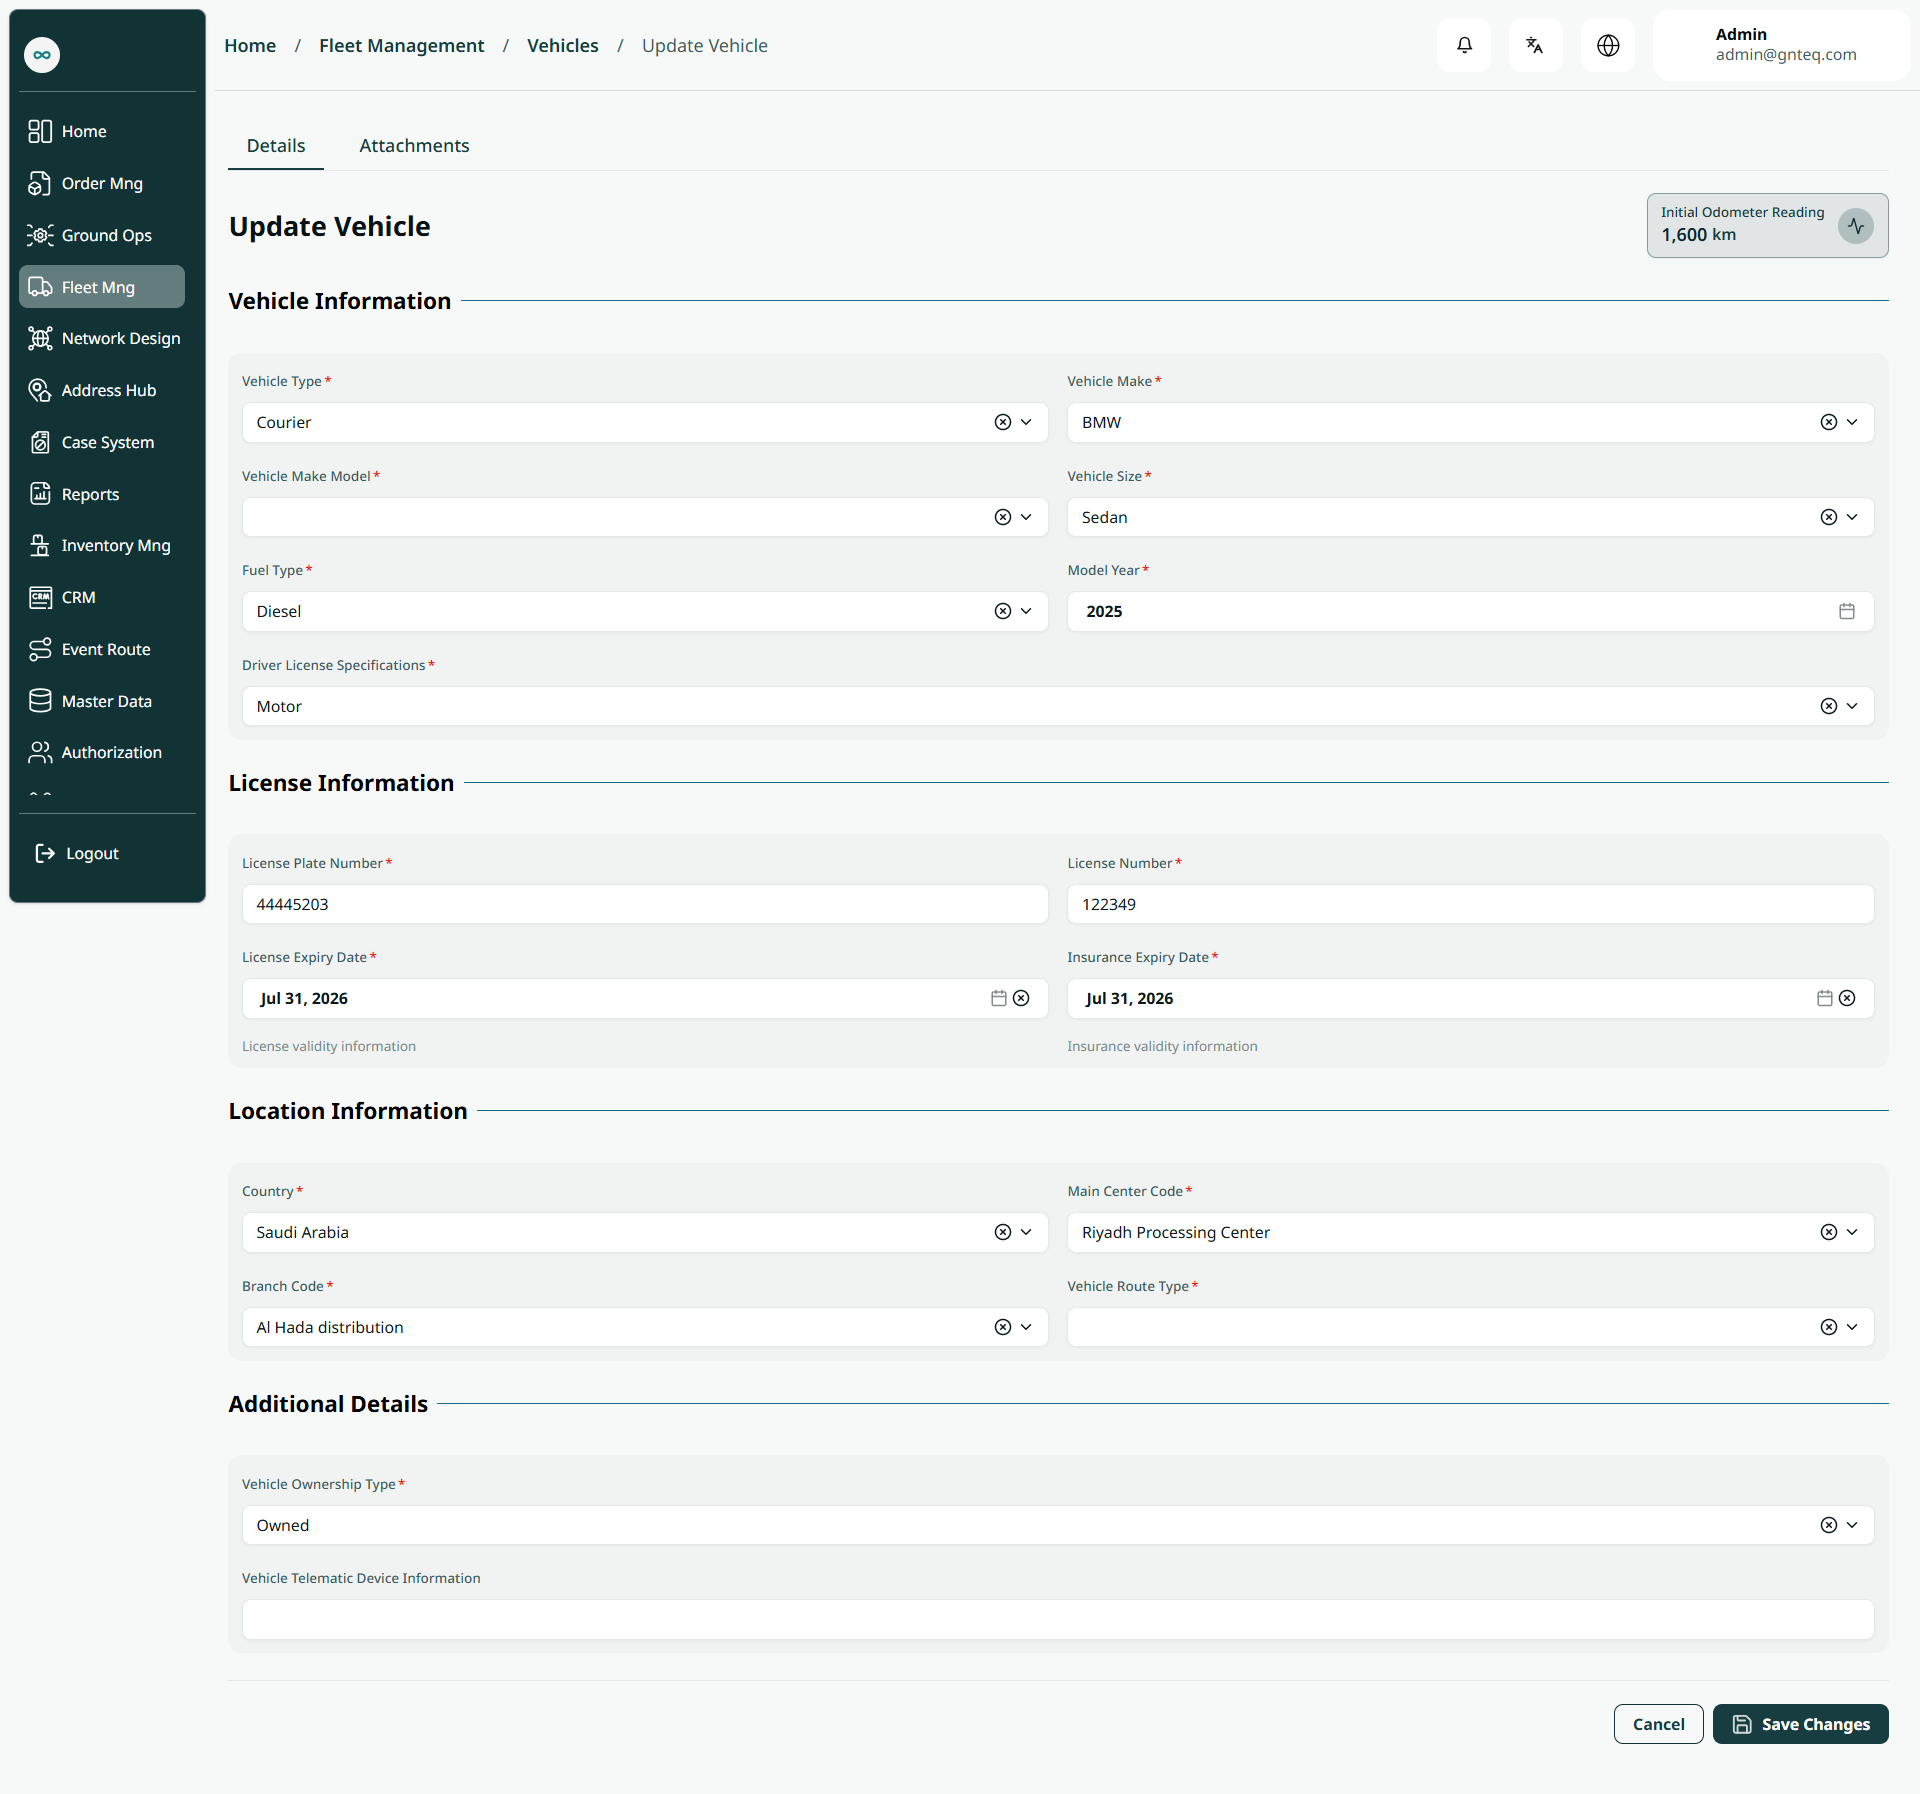
By clicking on Save, the system updates the information successfully.
2.5 Active & Deactivate Vehicle
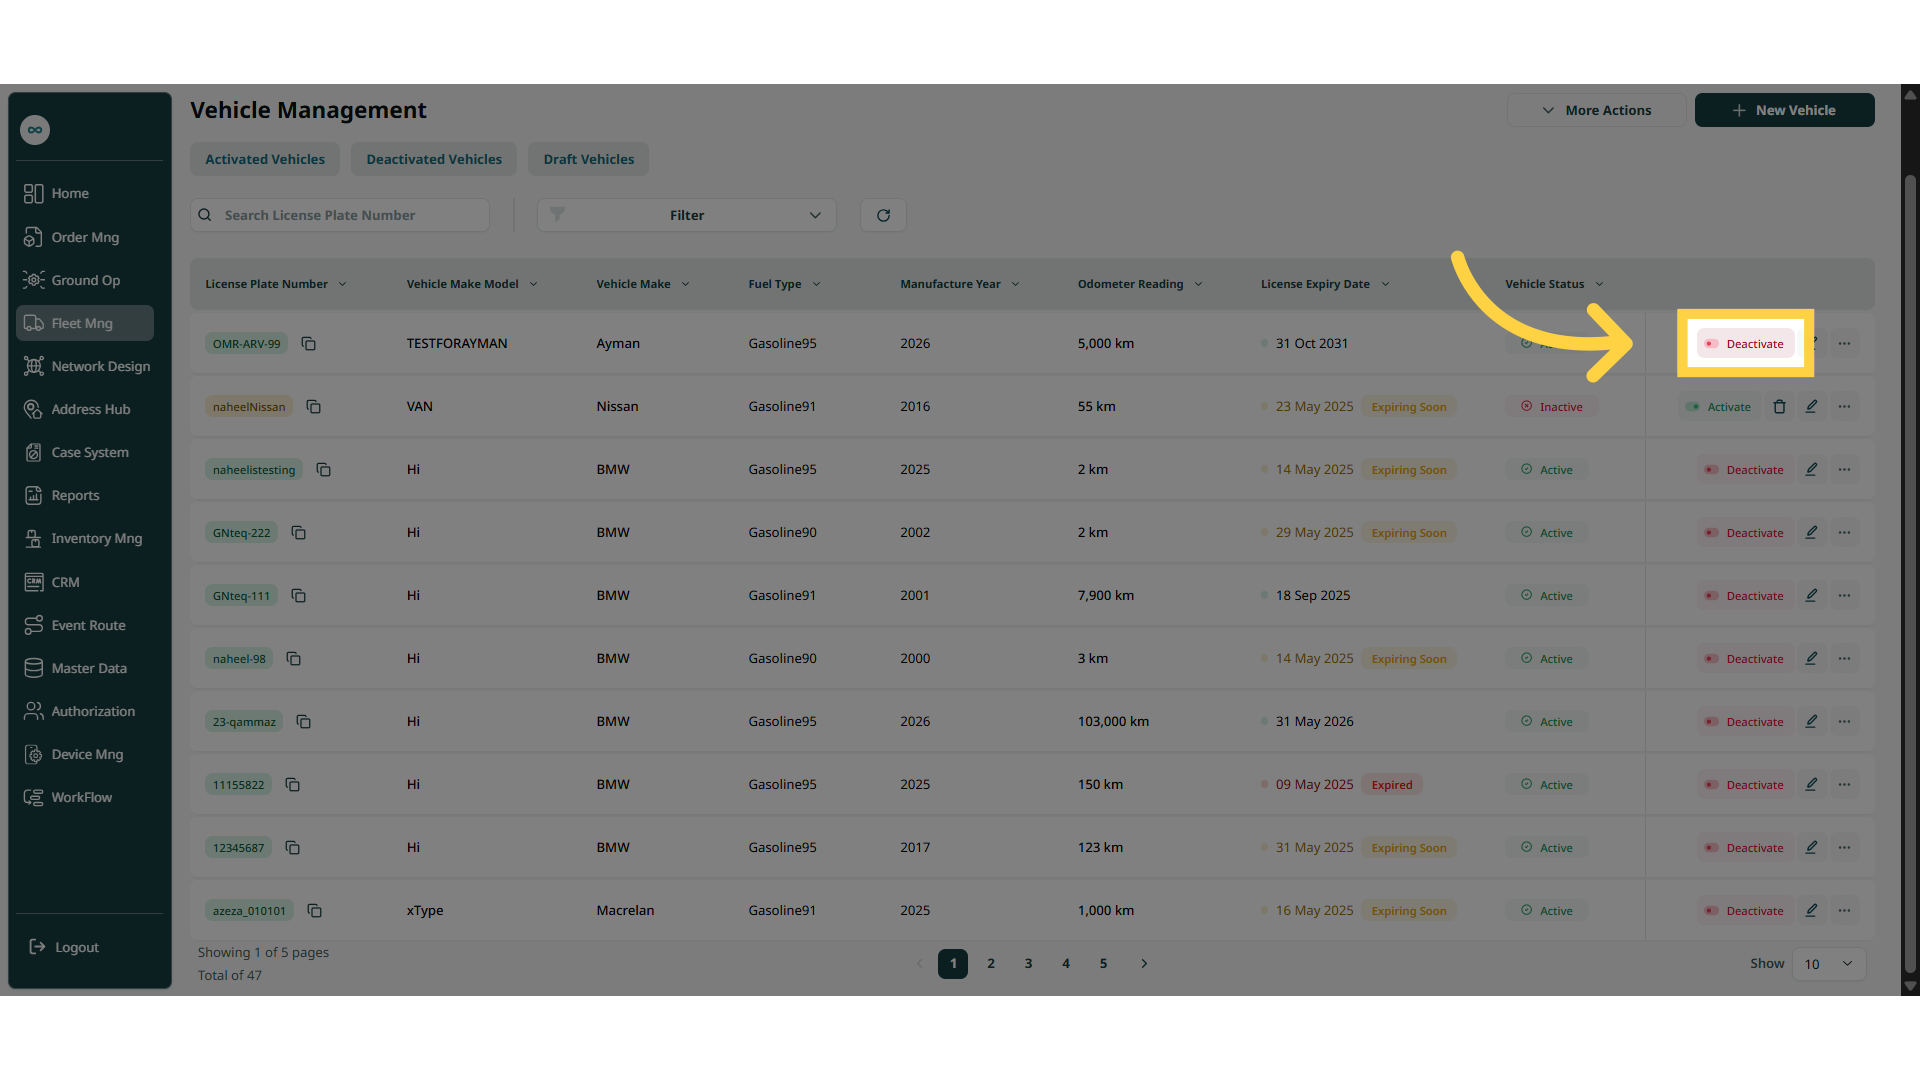
The user can active and deactivate vehicle by navigating to the ‘Vehicle Management’ screen via the Fleet Management Module and clicking on Deactivate Vehicle button:
2.6 Delete Vehicle
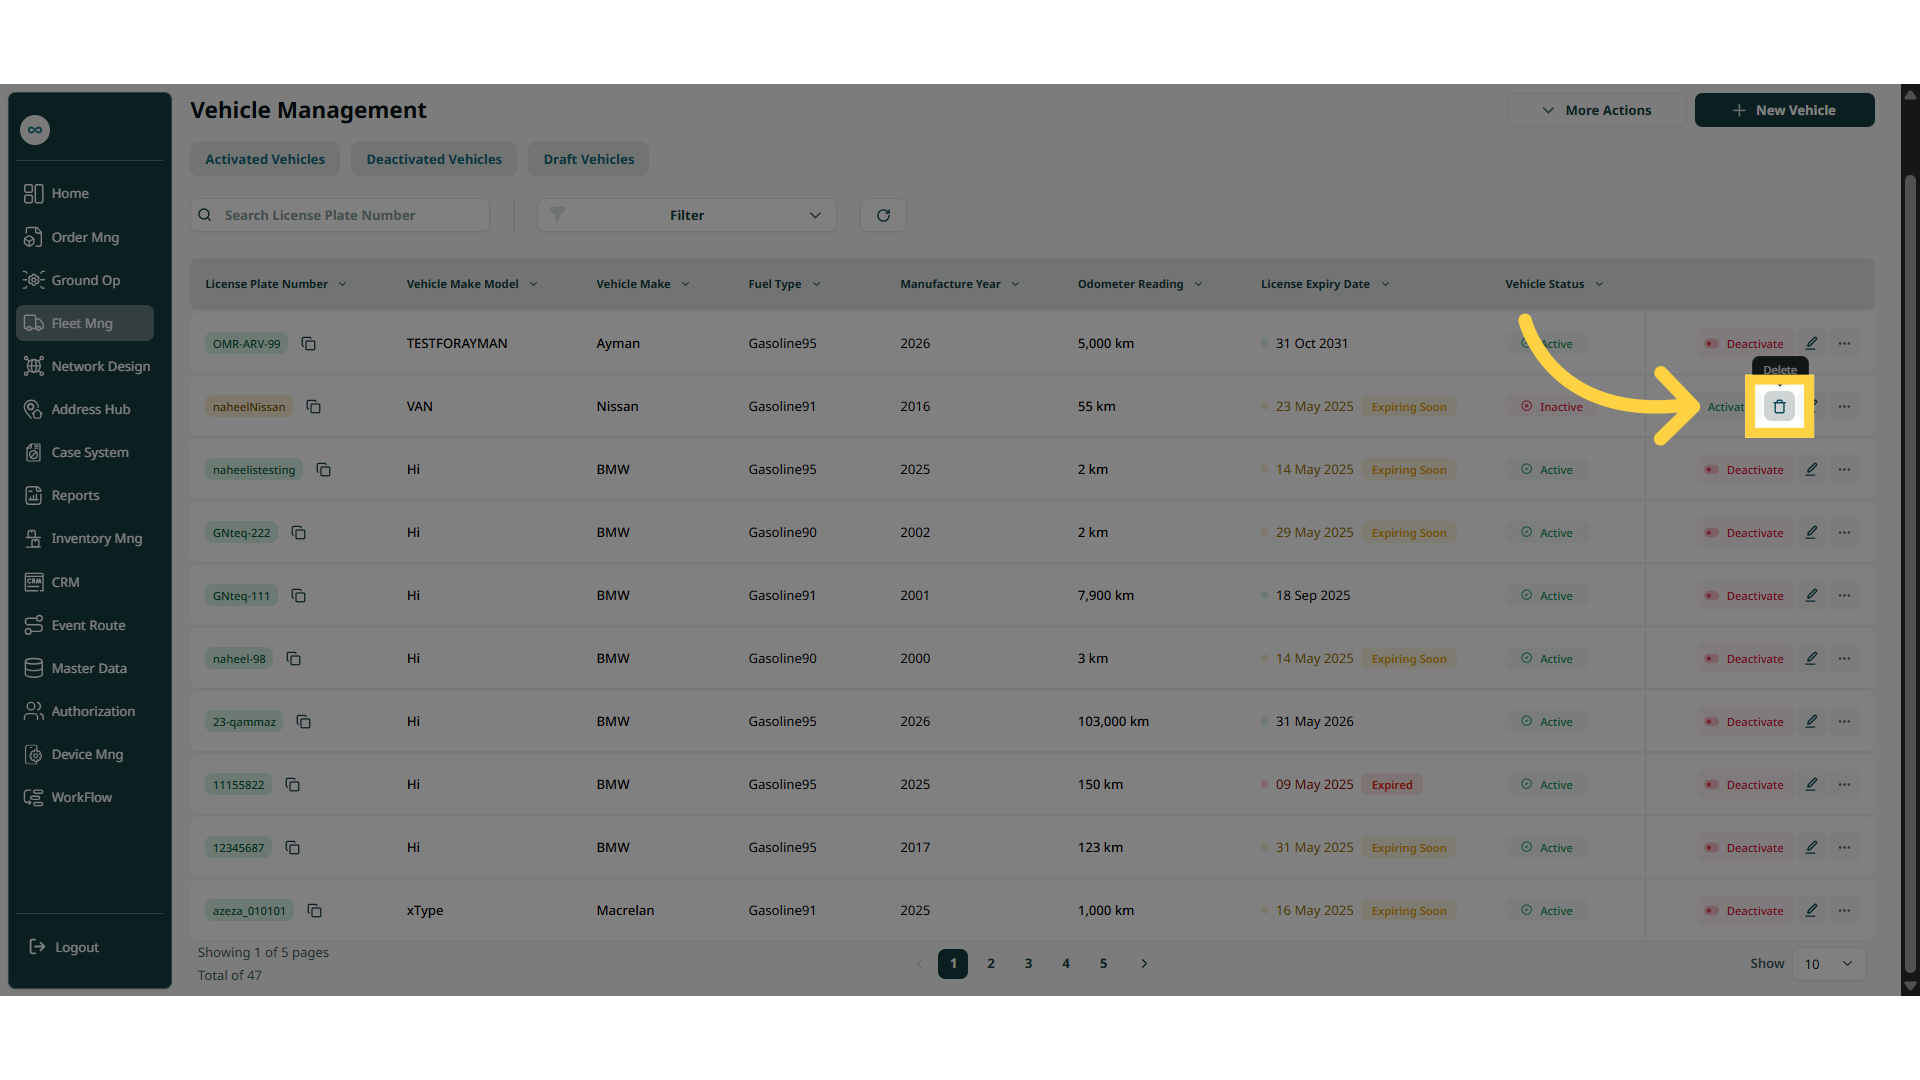
The user can delete existing vehicle but first it must be deactivated by navigating to the ‘Vehicles Management’ screen via the Fleet Management Module and clicking on Delete Vehicle button:
3. Add New Vehicle
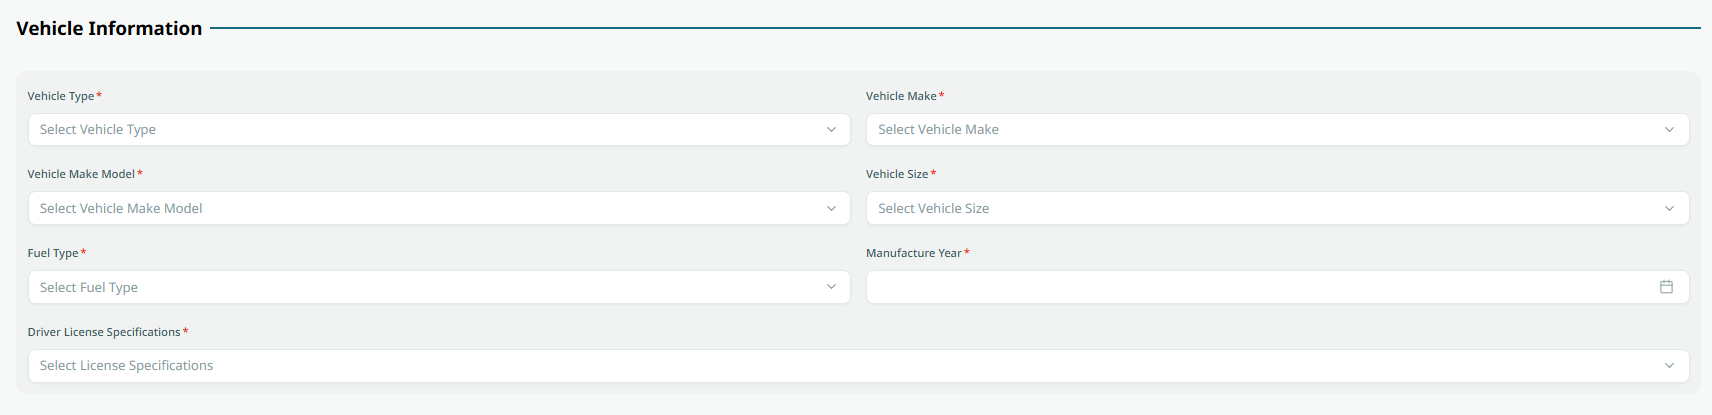
The user can create a new vehicle by navigating to the ‘Vehicles’ screen via the Fleet Management Module and clicking on New Vehicle button:
-
Vehicle Type: this field represents the type of vehicle (e.g., Truck, Trailer, Van, Sedan, Motorcycle, Temperature-Controlled, etc.).
-
Vehicle Make: this field represents the type of the vehicle e.g. (Suzuki, Nissan, Volvo, Daewoo…etc.)
-
Vehicle Make Model: this field represents the detailed vehicle name, e.g., Toyota Camry, Nissan Sunny, etc.
-
Vehicle Size: this field represents the vehicle's dimensions and shipment capacity.
-
Fuel Type: this field represents wish type of the fuel the vehicle uses.
-
Driver License Specifications: this field represents the vehicle class.
-
Model Year: this field represents the vehicle's manufacturing year.

-
License Plate Number: this field represents the vehicle’s registered number.
-
License number: this field represents the licenses registered number.
-
Licenses Expiry Date: this field represents the specific date on which a driver's license expires.
-
Insurance Expiry Date: this field represents the specific date on which the insurance expires.

-
Country: this field represents the place that the vehicle will serve.
-
Main Centre code: this field represents the city where the vehicle is registered or primarily operates.
-
Branch Code: this field represents the station or route that the vehicle will serve.(If the user chooses the vehicle type “Courier”)
-
Vehicle Route Type: this field represents the vehicle’s destination.
-
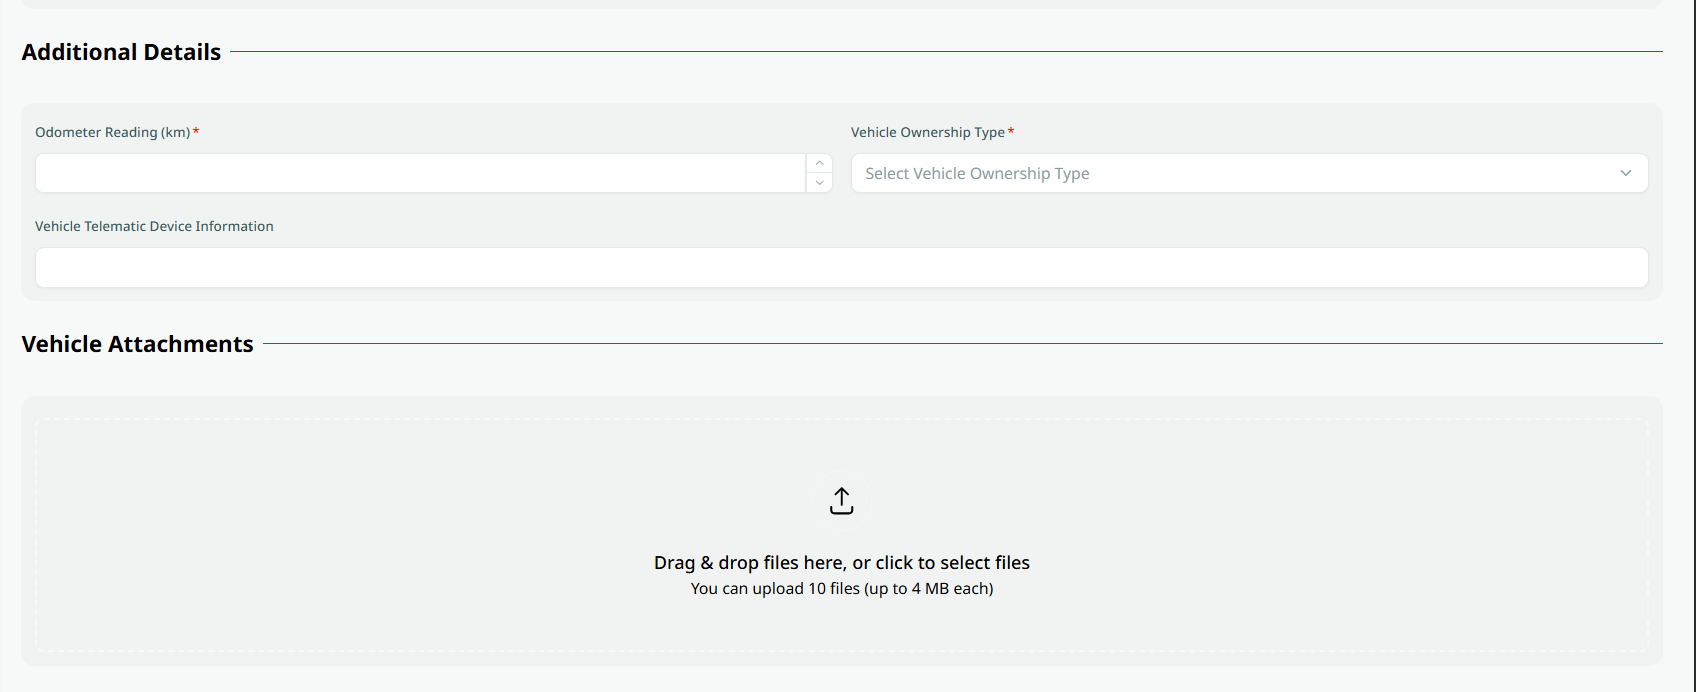
Odometer Reading (km): this field represents the reading refers to the total distance a vehicle has traveled, as recorded by its odometer
-
Vehicle Ownership Type: this field represents the status of the vehicle (e.g., Owned, Rental).
-
Vehicle Telematic Device Information: this field represents the tracking of the temperature of containers or vehicles carrying pharmaceutical products.
-
Attachments: the users can upload documents or photos to attach to the vehicle profile.
By clicking on ’Create as draft’, the system will keep the vehicle in draft status.
By clicking on Add Vehicle, the system will add the vehicle successfully to the system.