.png)
1. Shipment Clearance
1.1 Dashboard
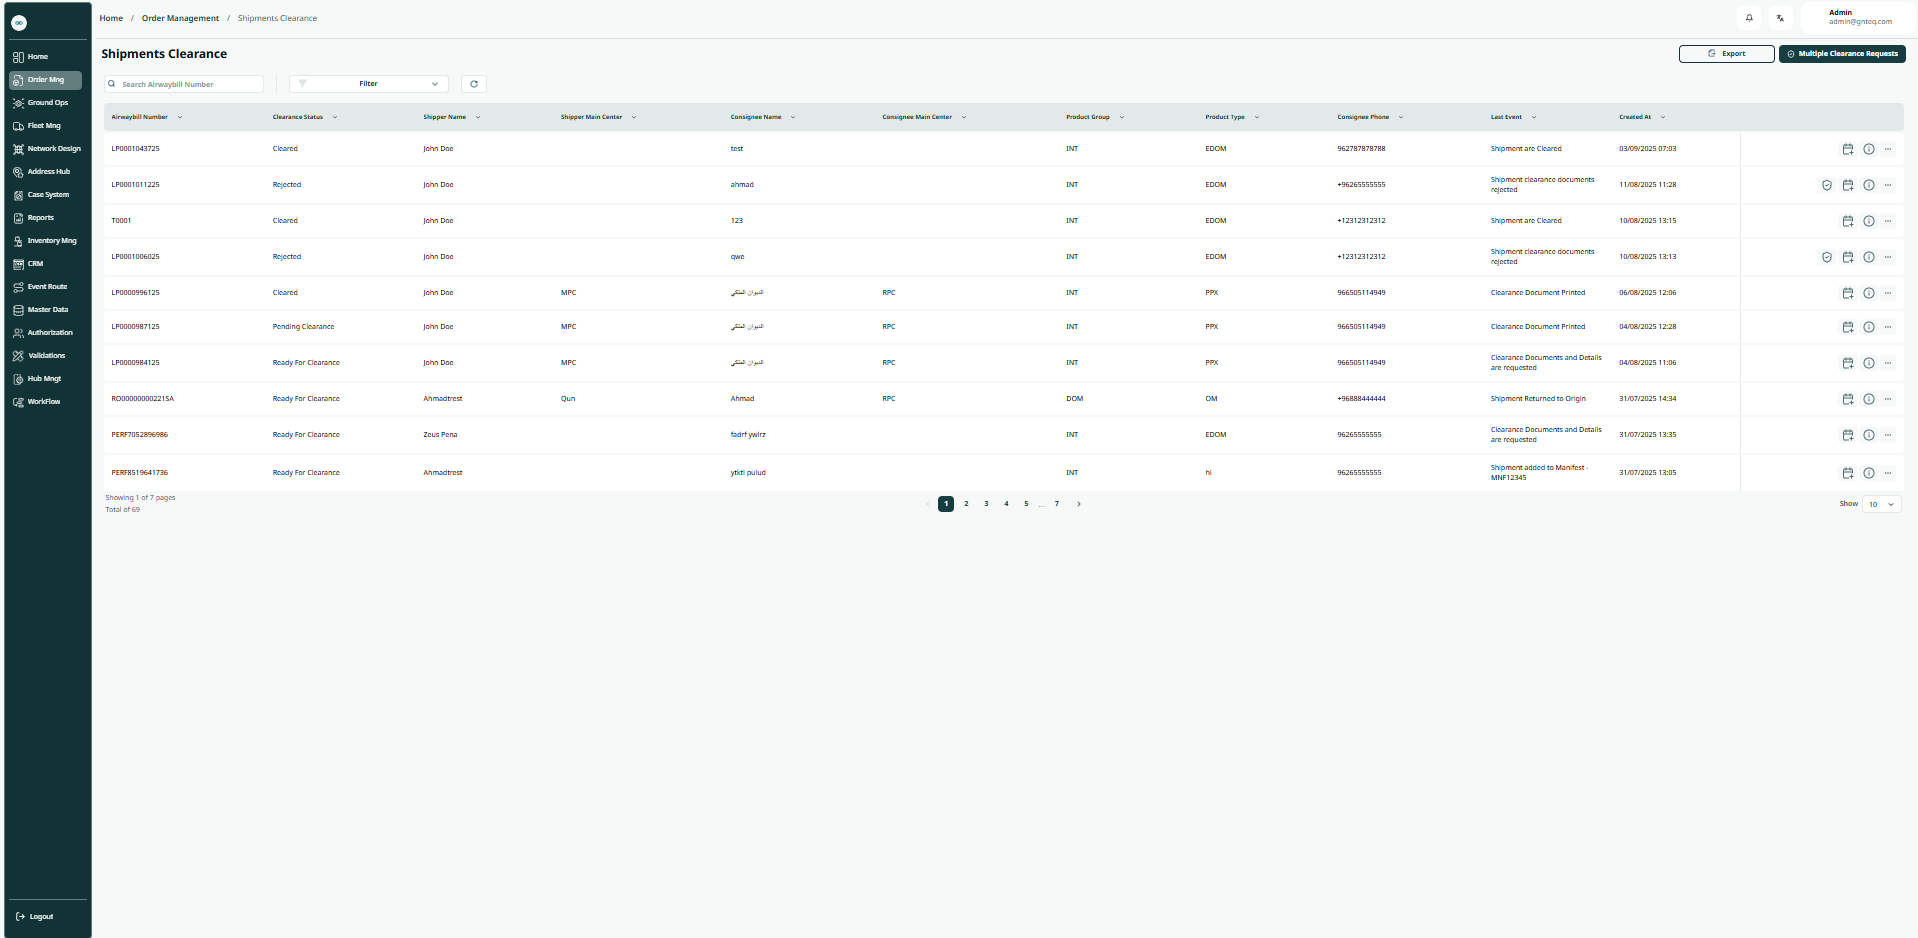
The user can view the defined shipment clearance in the system by navigating to the ‘Shipments Clearance’ screen in the Gateway from the left navigation panel as follows:
-
Multiple Clearance Requests: the user can add multiple clearances by clicking on” Multiple Clearance Request”
-
Export: the user can export the list as an Excel file by selecting export button.
-
Filters: the user can search for the shipment clearance by the shipper name, shipper main center, etc.
-
Search: The user can search for shipment clearance by entering the airwaybill number.
-
Rows Per Page: the user can select the number of items to show on each page.
-
Actions: by clicking on Actions, the user can add an event, view clearance information, view attachments, and view shipment details.
1.1.1 View Details
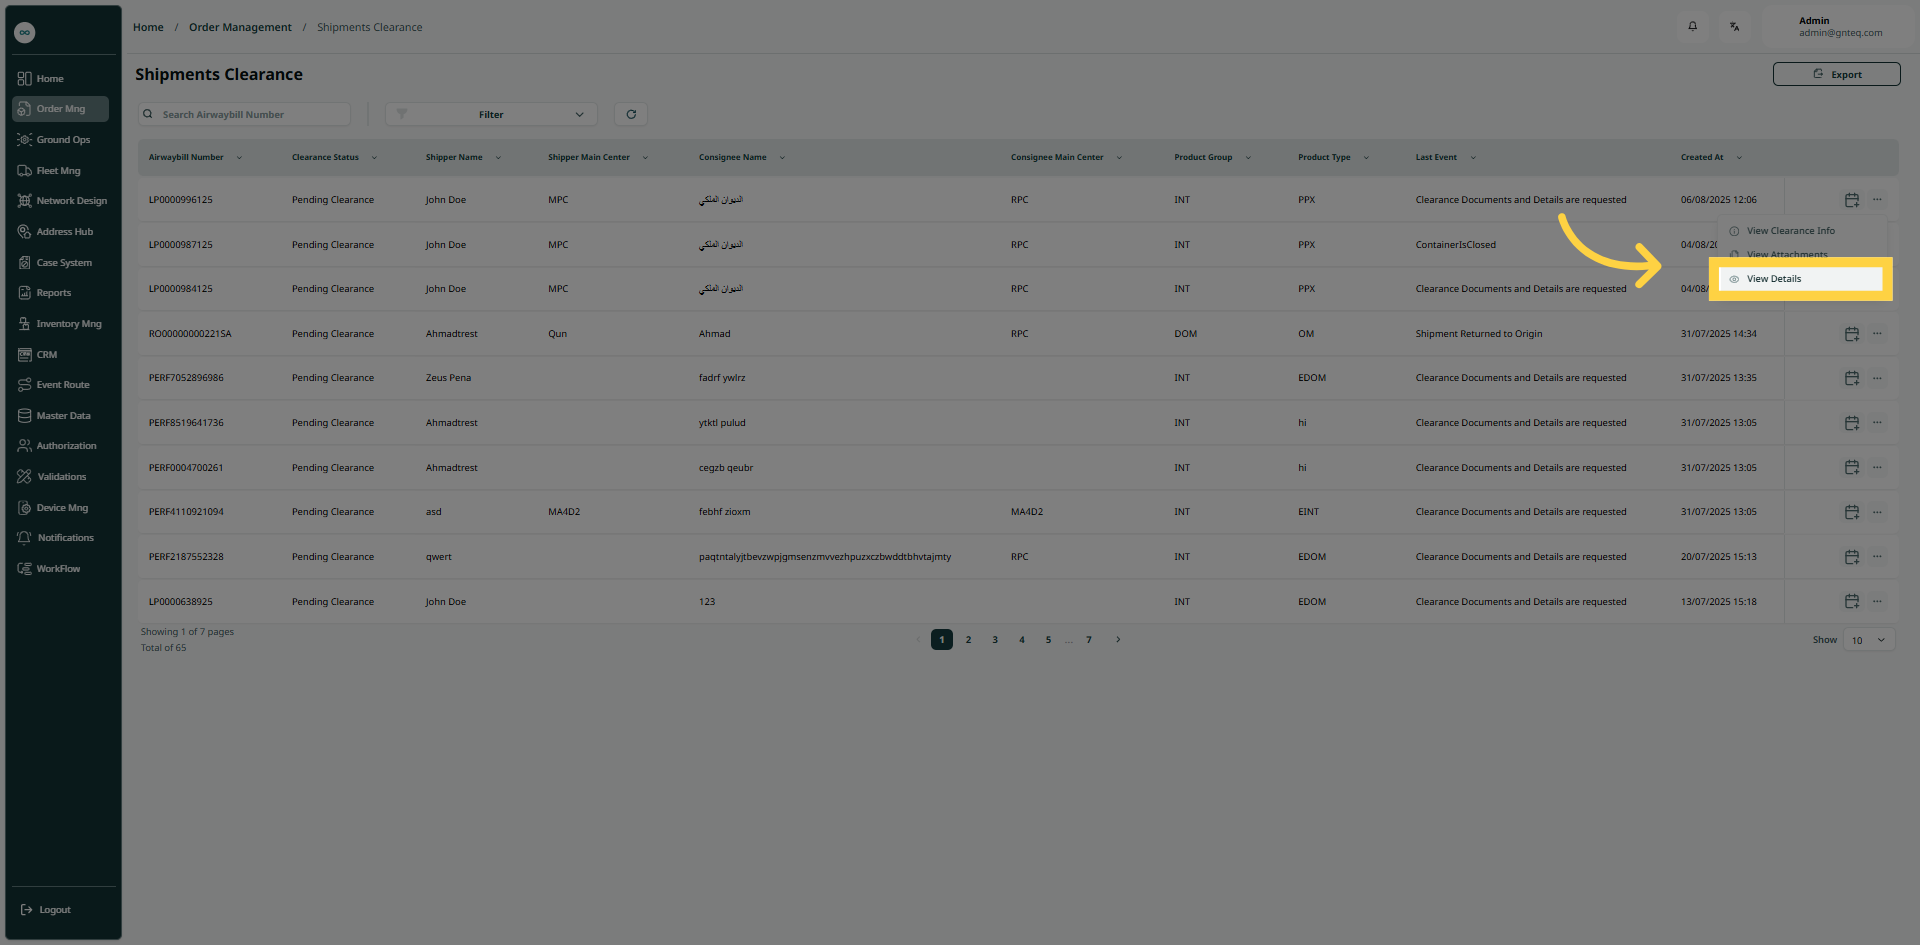
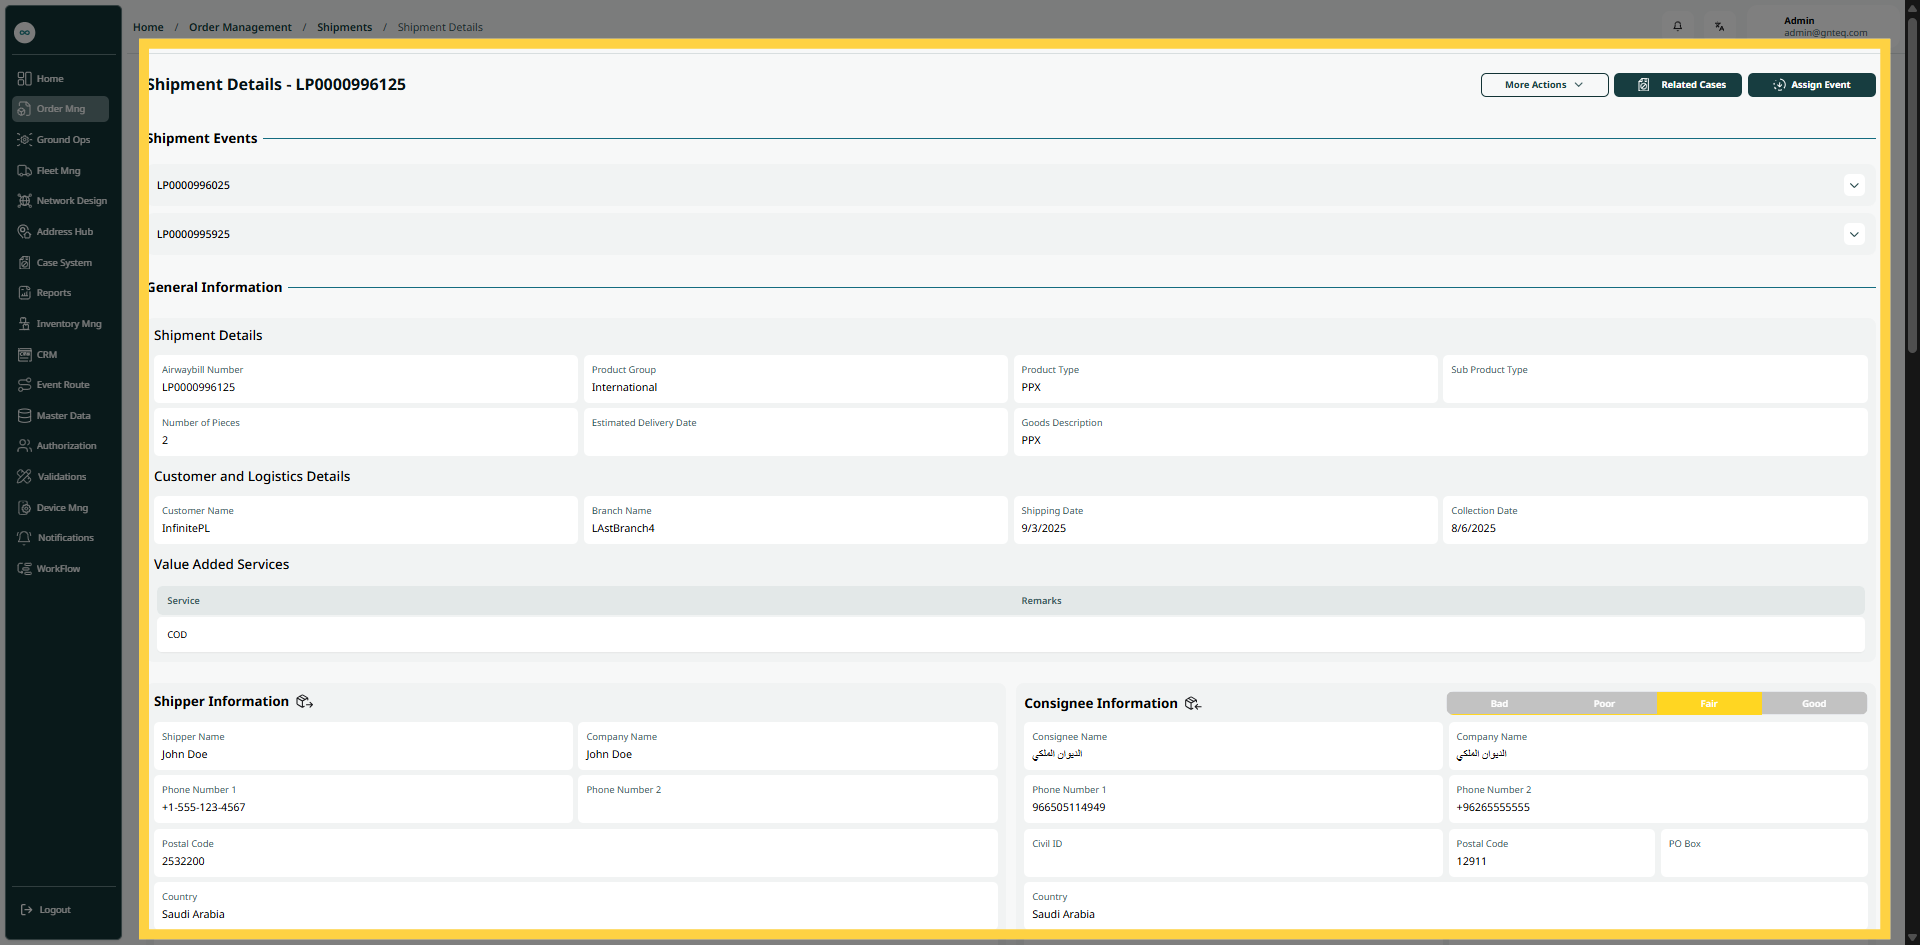
The user can view the shipment details by navigating to the ‘Shipments Clearance’ screen via the Gateway and clicking on View Details from Actions as follows:
1.1.1.1 Add Event
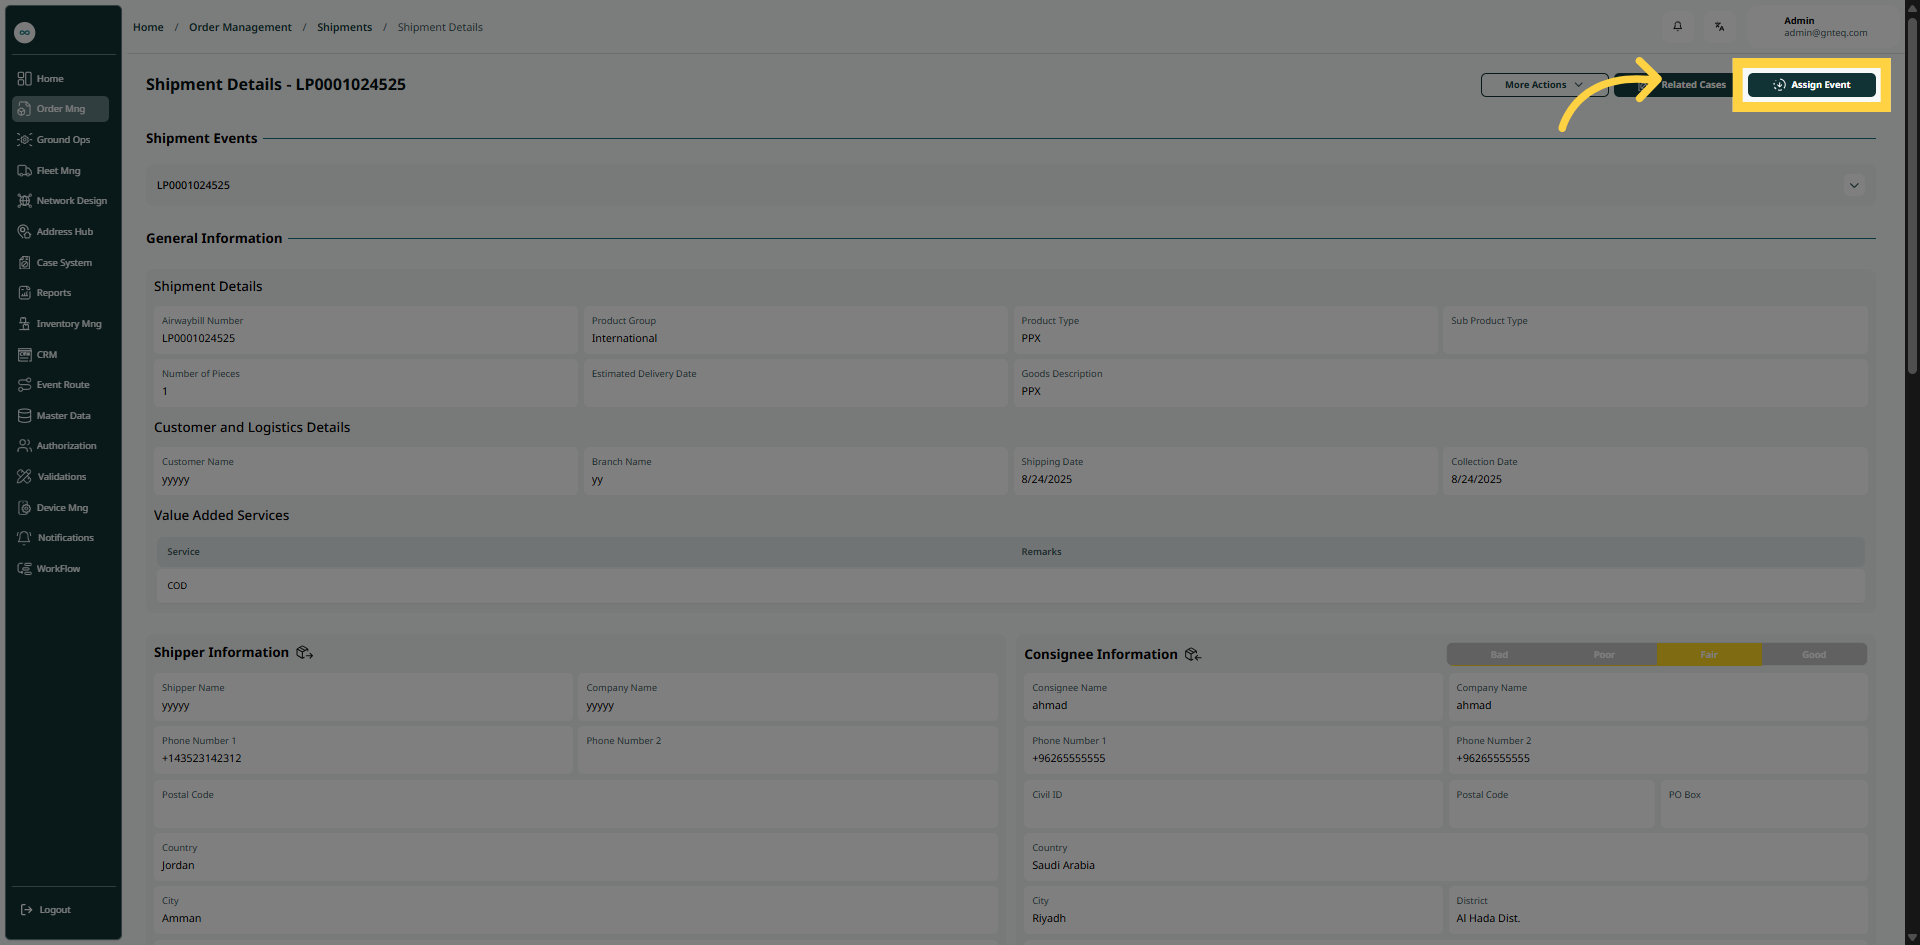
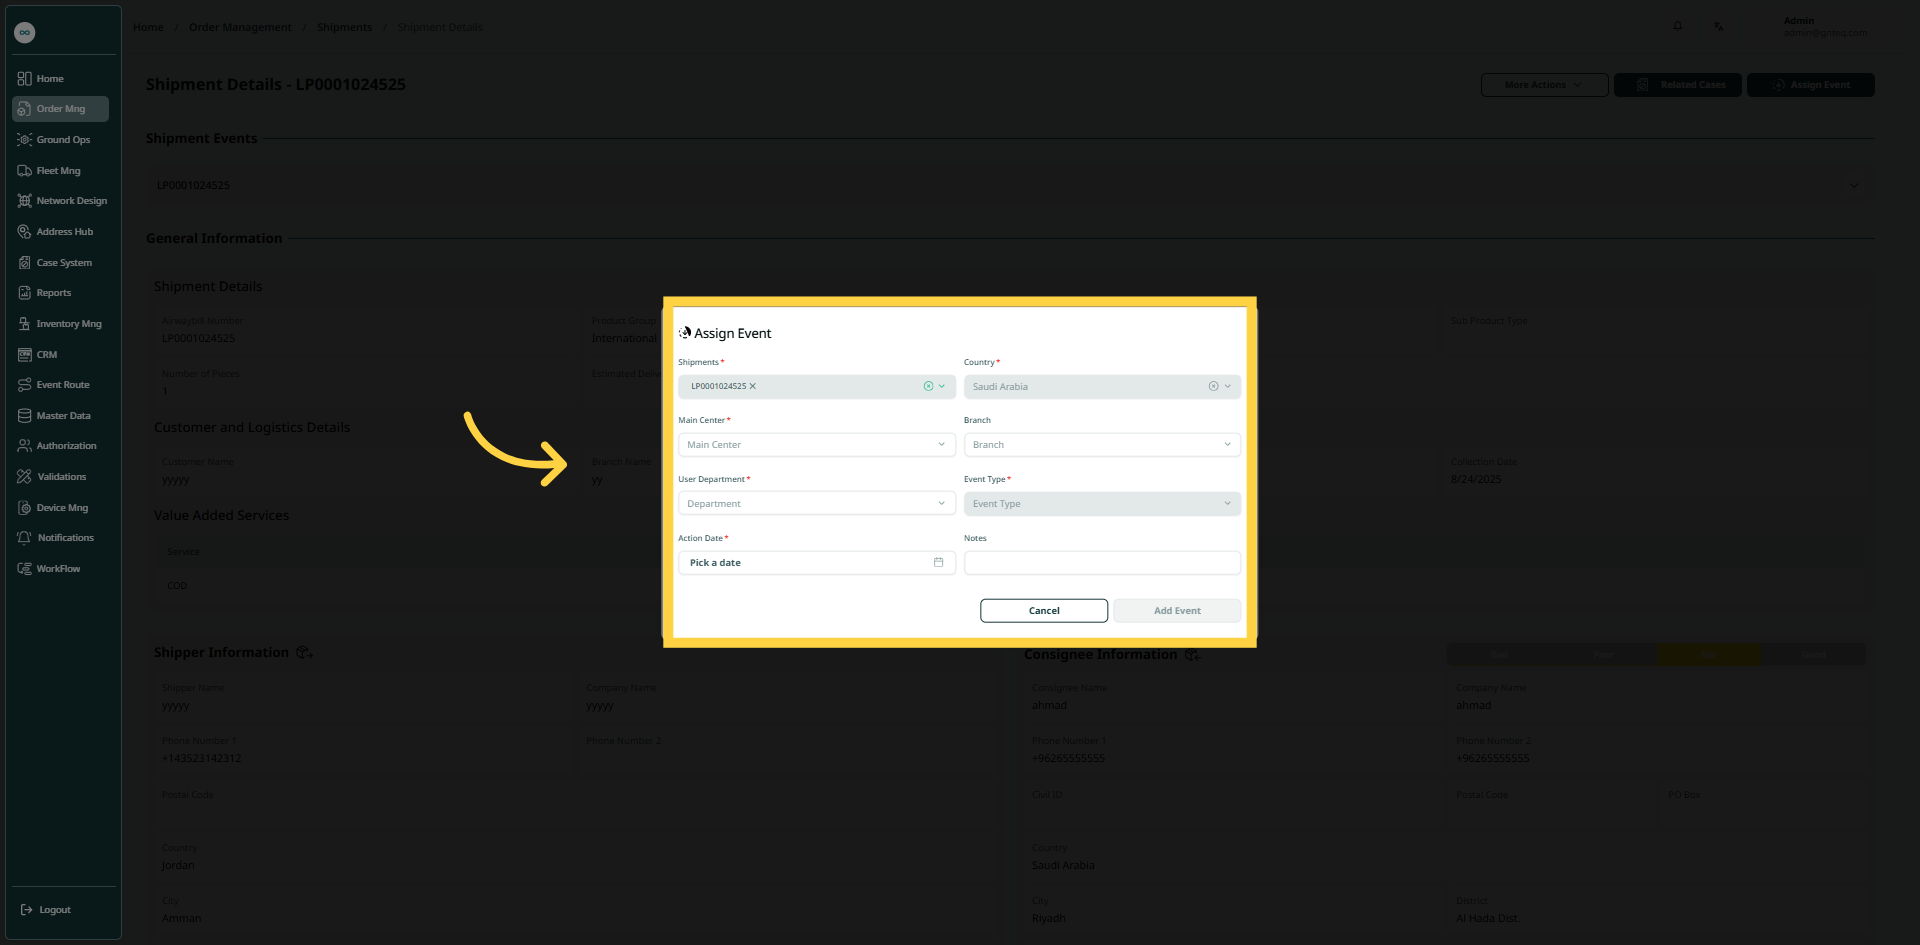
The user can add an event to the shipment by navigating to the ‘Shipments’ screen via the Gateway and clicking on View Details from Actions, then clicking on Assign Event as follows:
-
Shipments: this field represents the shipment airwaybill number.
-
Country: this field represents the name of the country.
-
Main Centre: this field represents the city where the shipment will arrive.
-
Branch: this field represents the station or route where the shipment will arrive.
-
User Department: this field represents the user section.
-
Event: this field represents the type of the event.
-
Action Date: this field represents the start date of the event.
-
Notes: this field represents notes about the event.
By clicking on Add Event, the event will be successfully assigned.
1.1.1.2 Related cases
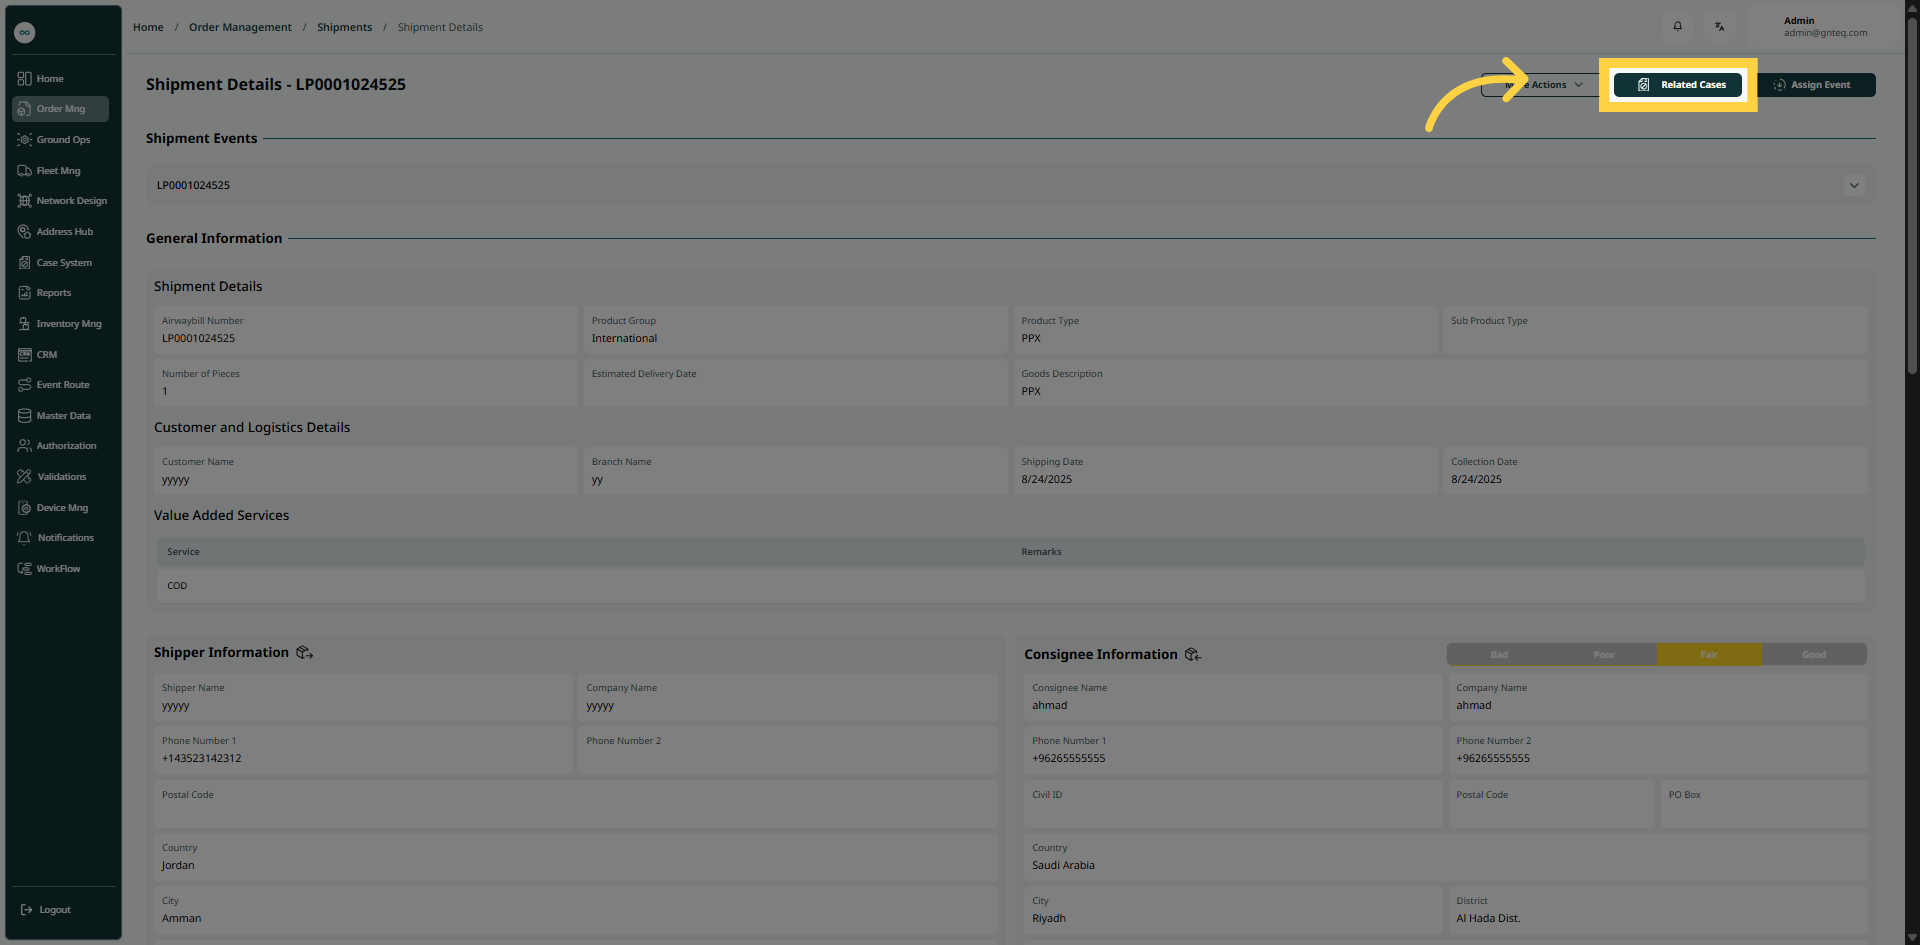
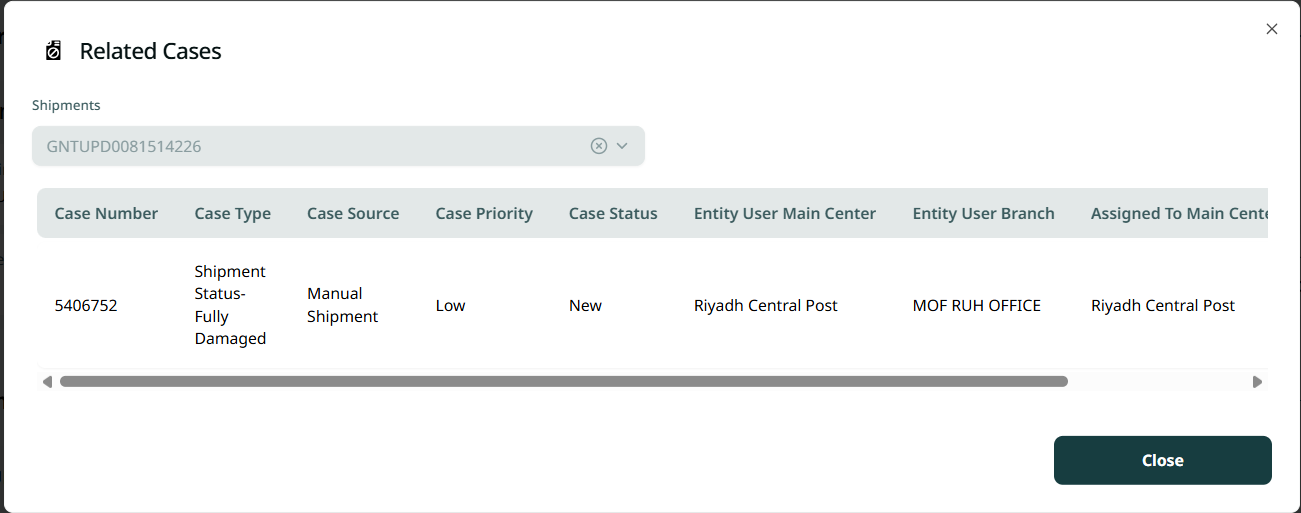
The user can check whether a shipment has any cases or issues by navigating to the “Shipments” screen via Gateway, clicking View Details from Actions, and then selecting Related Cases as follows:
1.1.1.3 More Actions
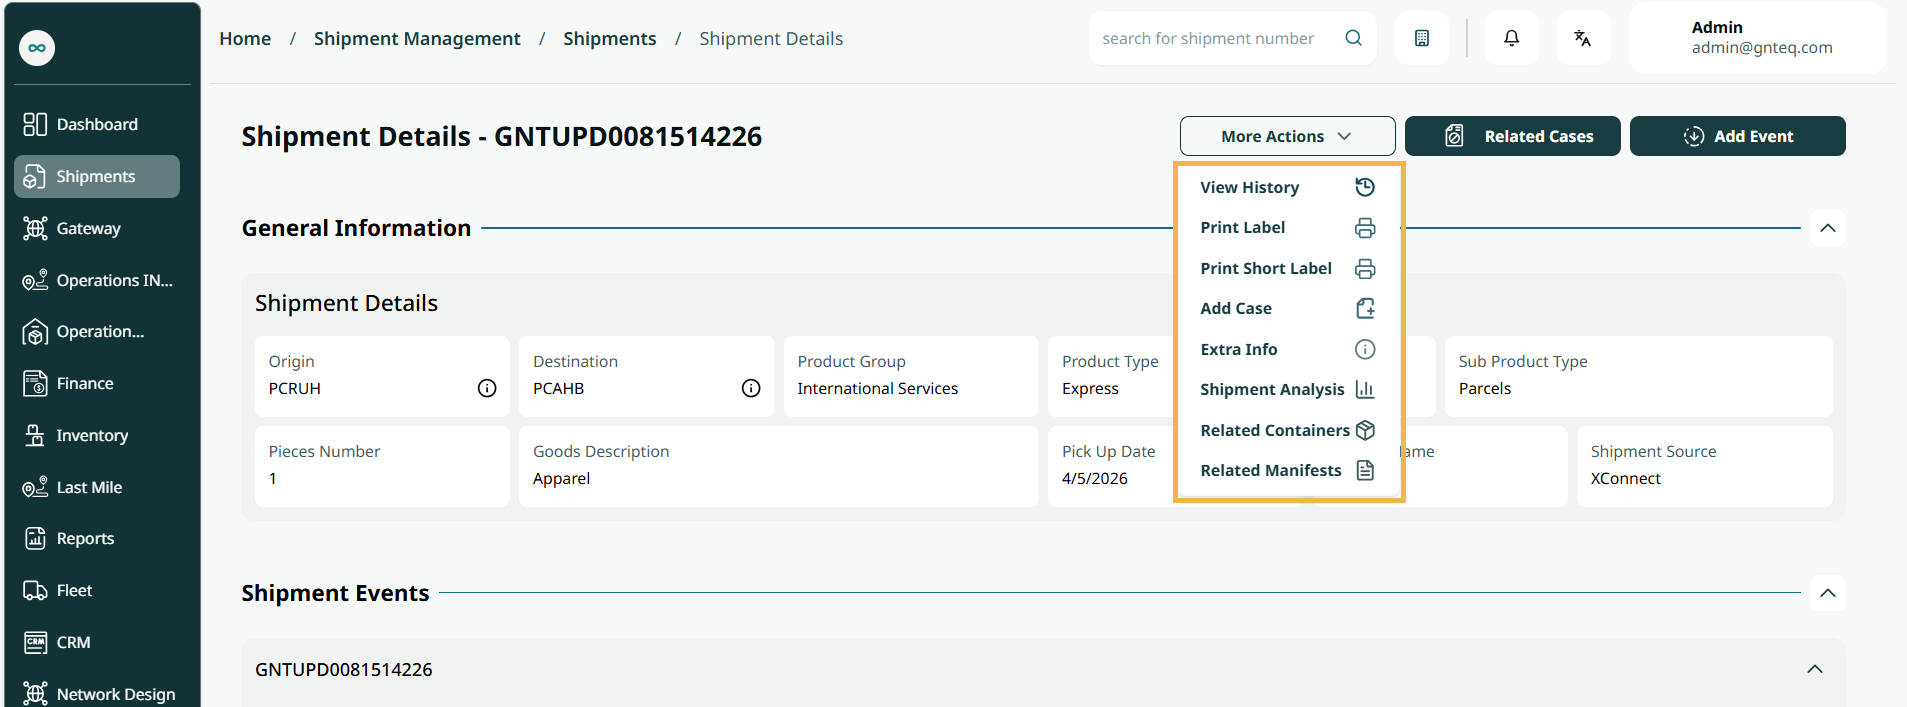
The user can view the shipment history, print the label, print the short label, add a case, extra information, analyze the shipment, related containers, or view related manifests by navigating to the Shipments screen via the Gateway module, clicking View Details from Actions, and then selecting More Actions as follows:
1.1.2 Add Event
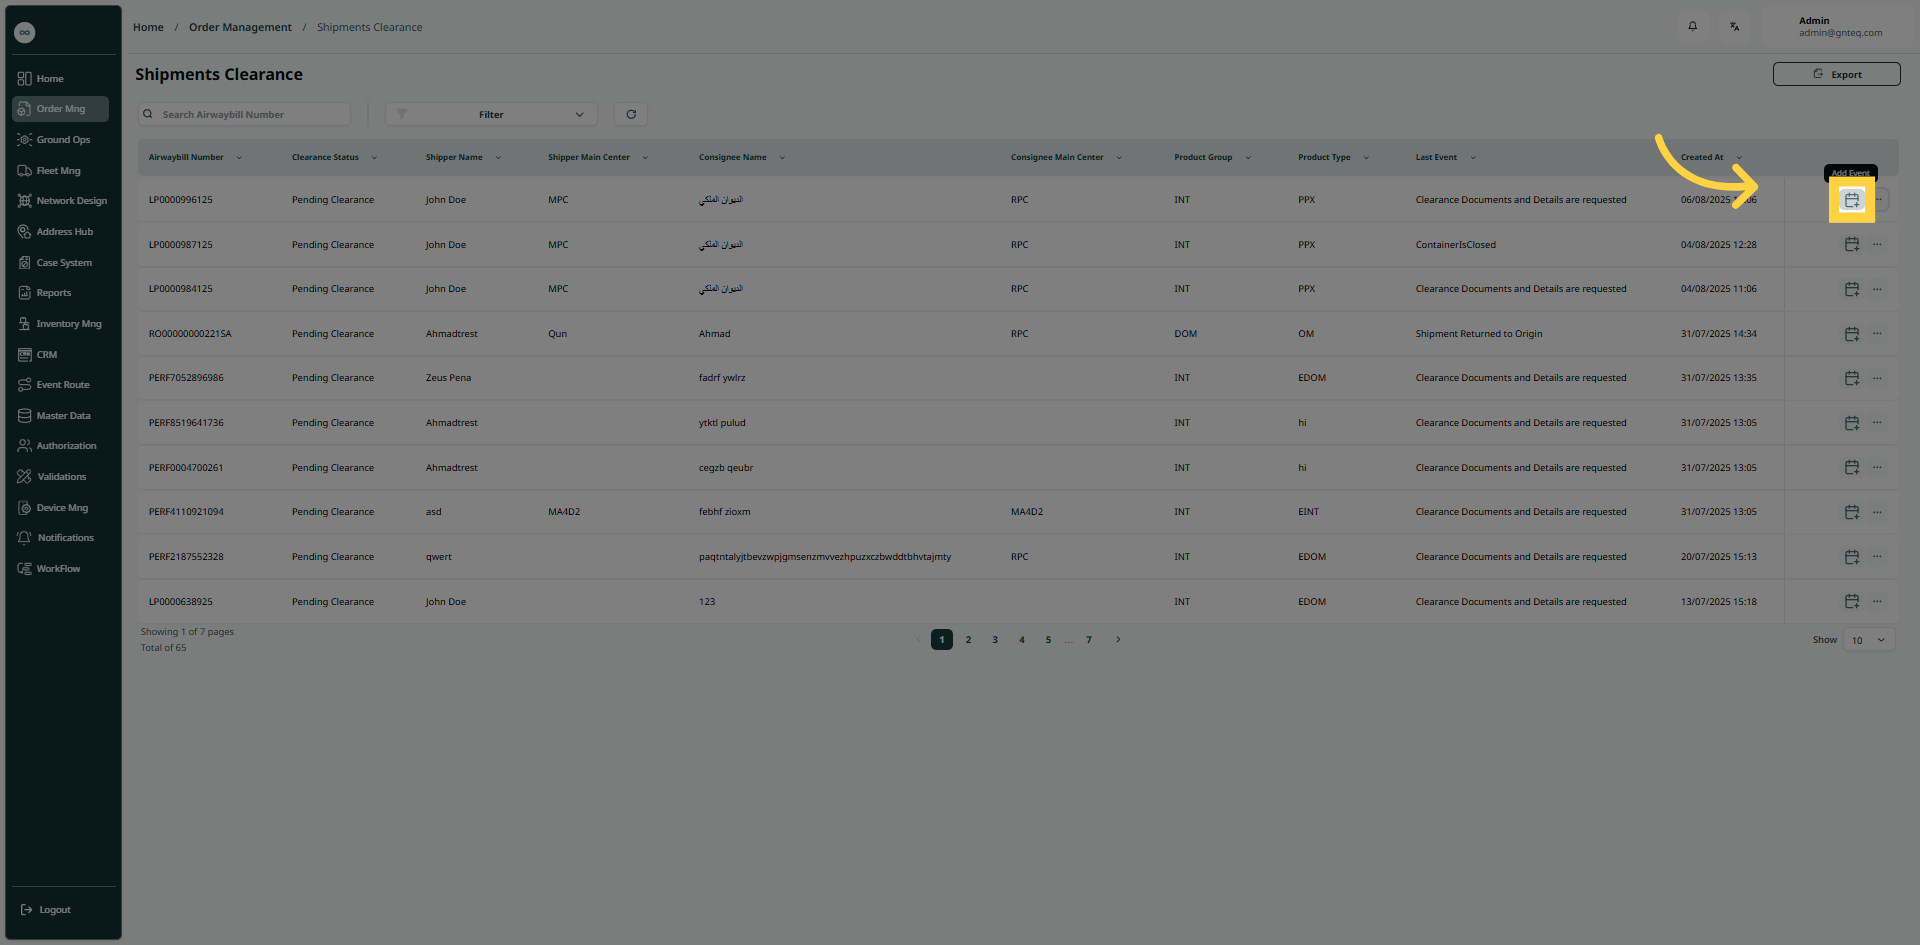
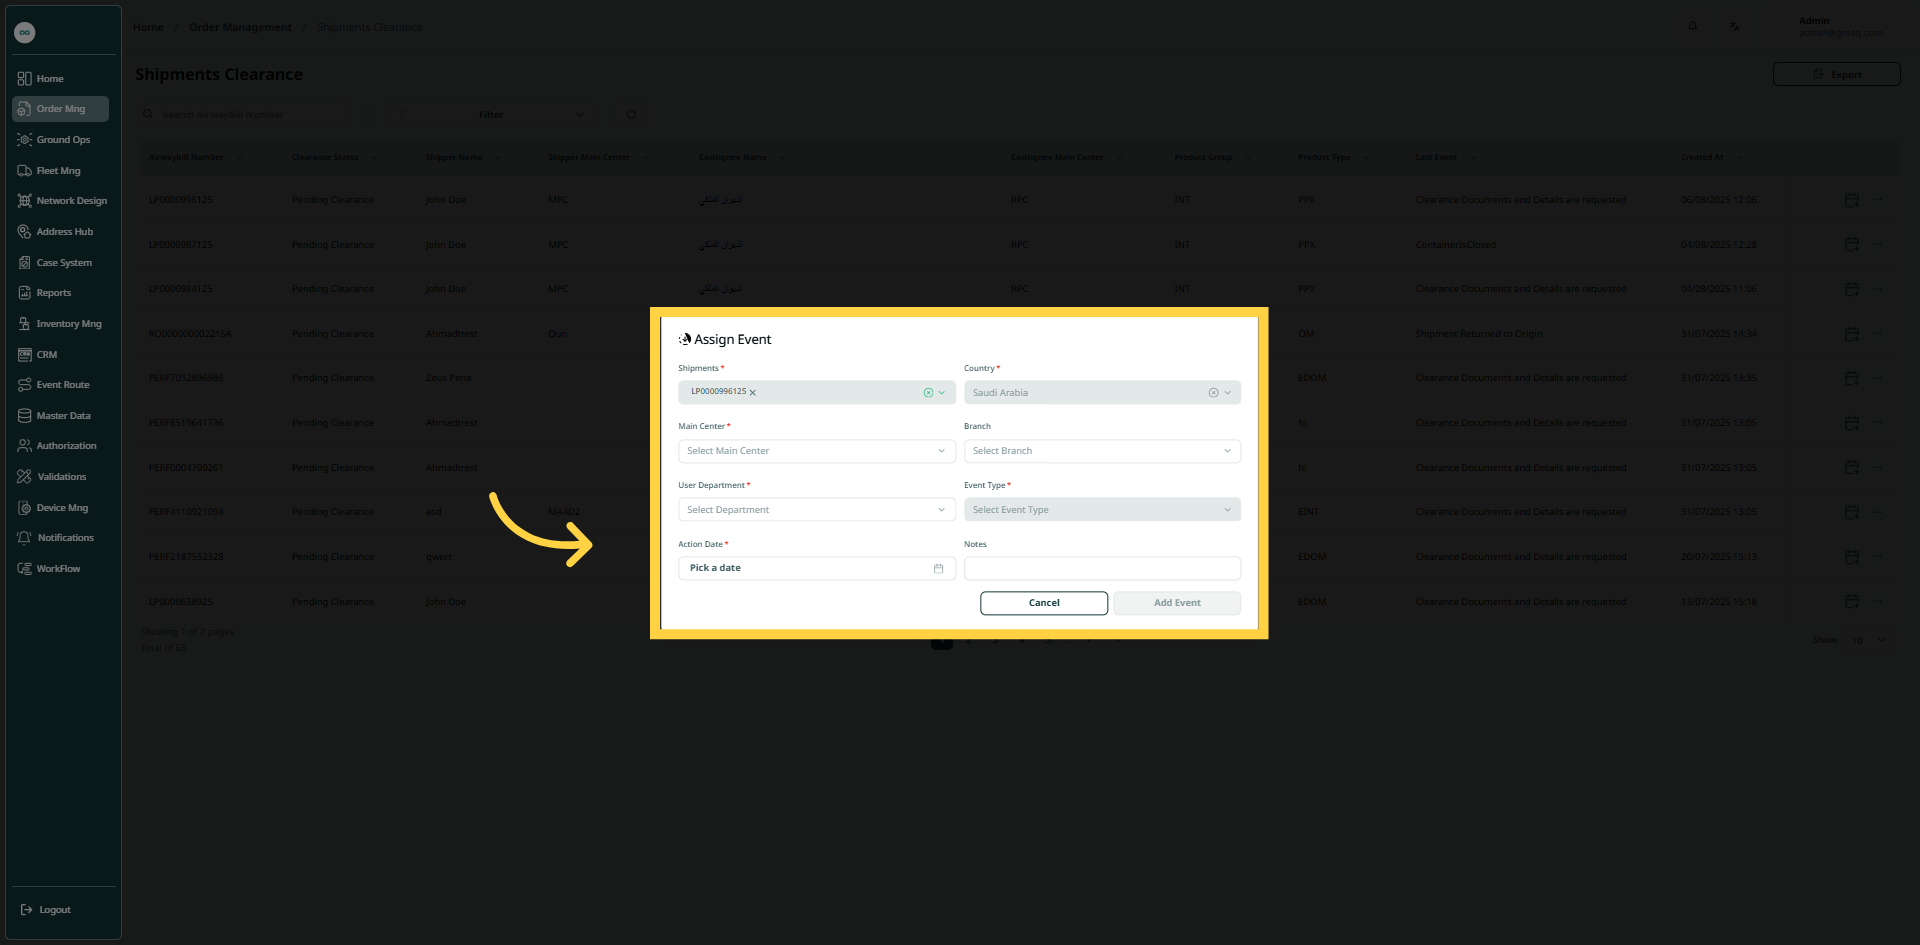
The user can add an event to the shipment clearance by navigating to the ‘Shipments Clearance’ screen via the Gateway and clicking on Add Event from Actions as follows:
-
Shipments: this field represents the shipment airwaybill number.
-
Country: this field represents the name of the country.
-
Main Centre: this field represents the city where the shipment is expected to arrive
-
Branch: this field represents the station or route where the shipment is expected to arrive
-
User Department: this field represents the user’s department.
-
Event: this field represents the type of the event.
-
Action Date: this field represents the start date of the event.
-
Notes: this field represents the notes about the event.
By clicking on Add Event, the event will be successfully assigned.
1.1.3 View Clearance Info
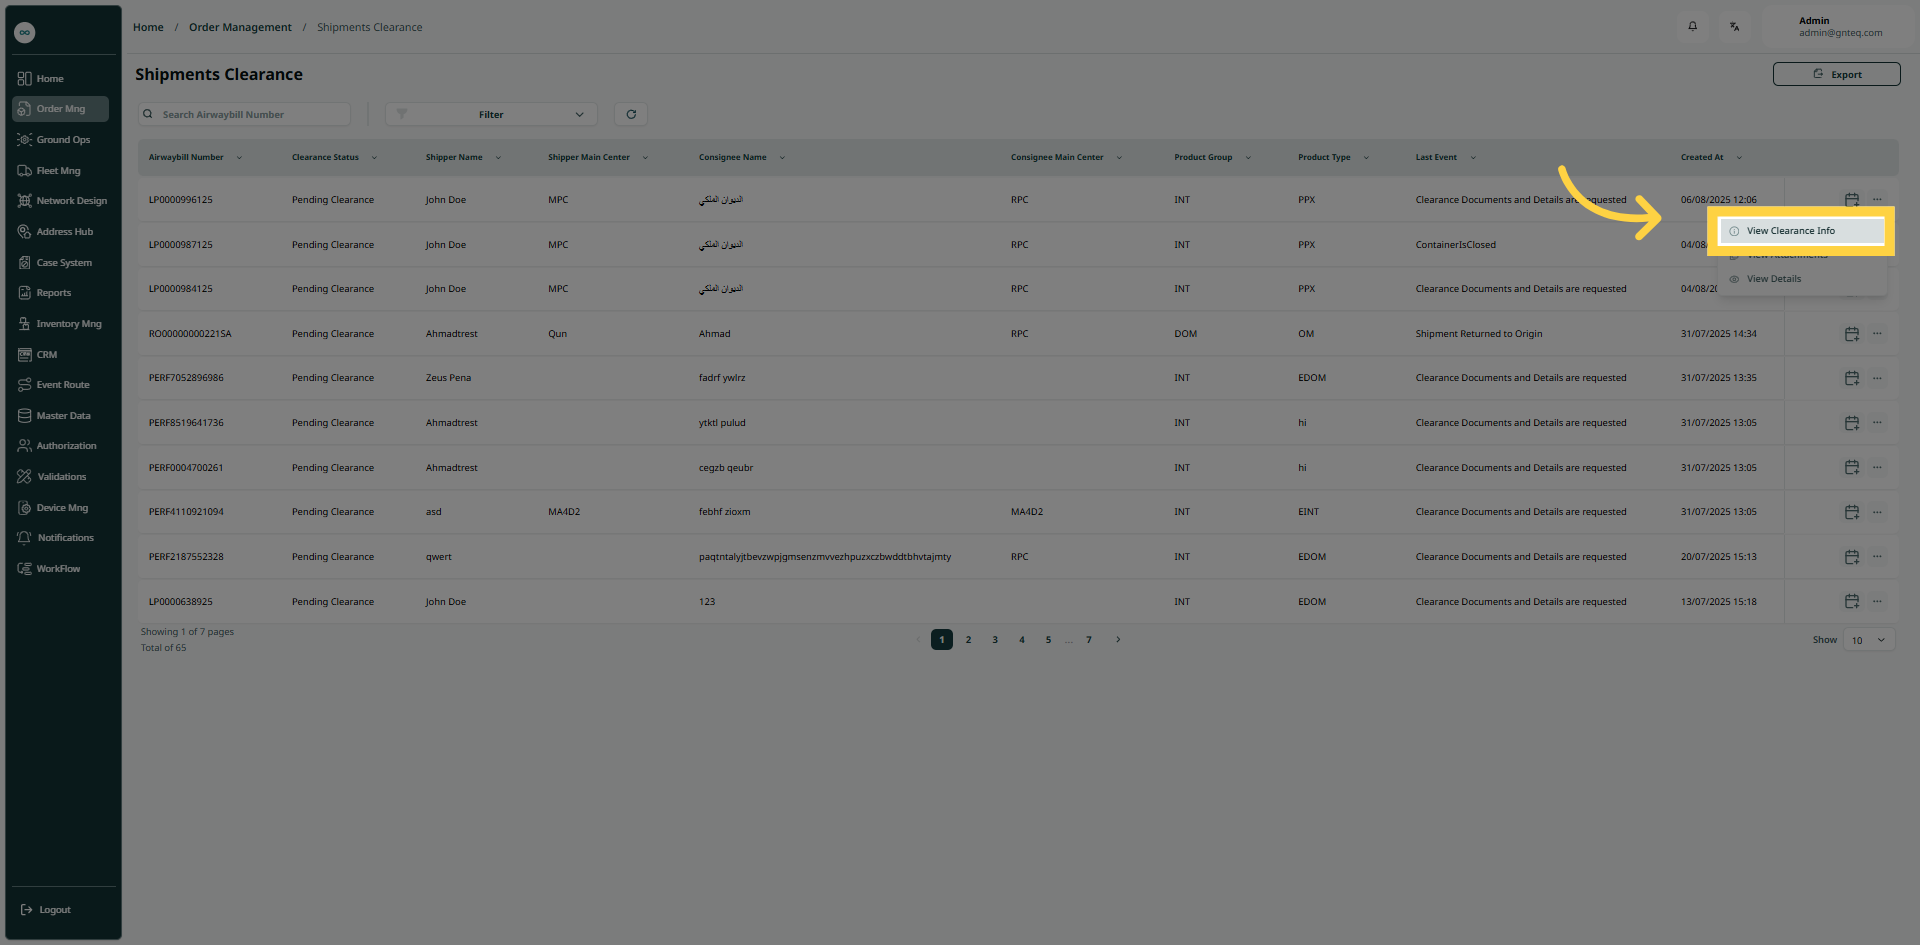
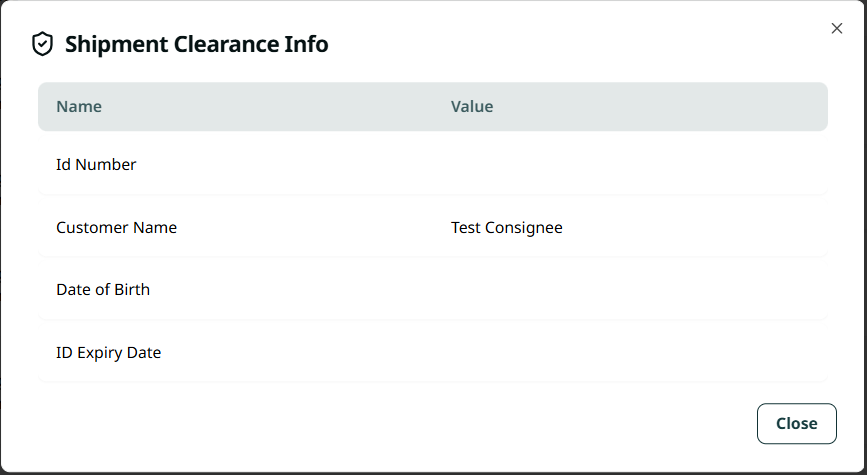
The user can view clearance information by navigating to the ‘Shipments Clearance’ screen via the Gateway and clicking on View Shipment Info from Actions as follows:
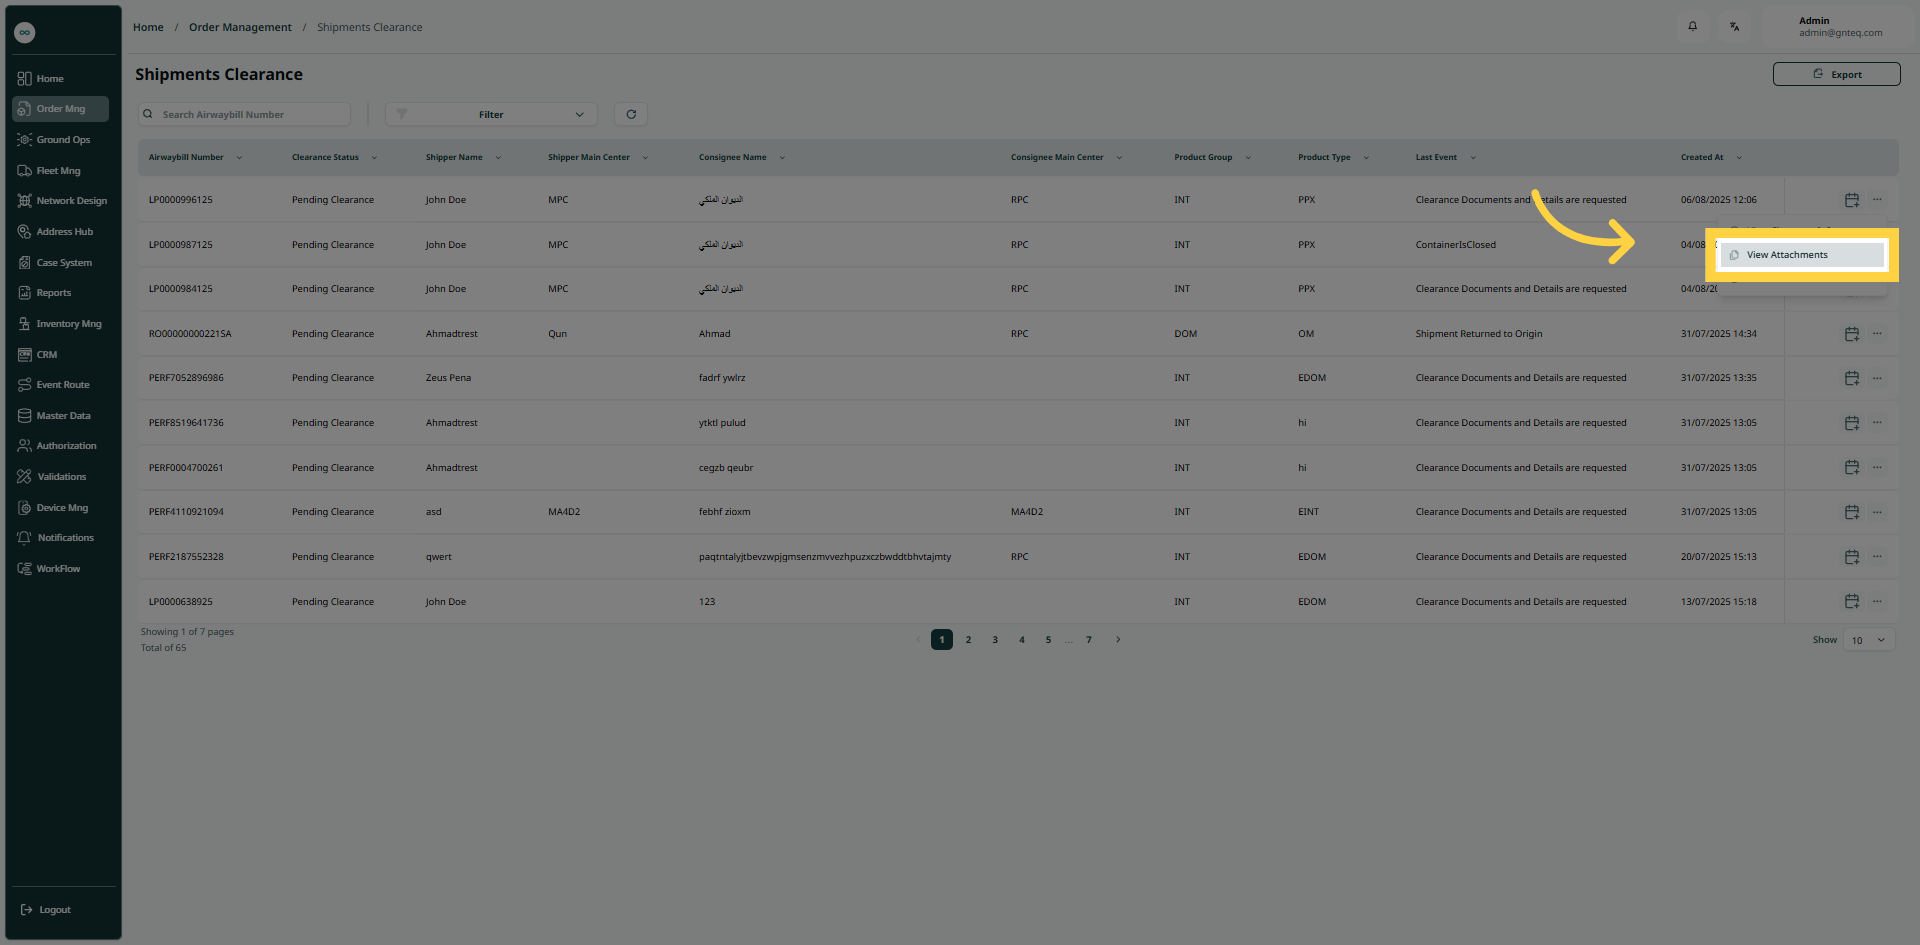
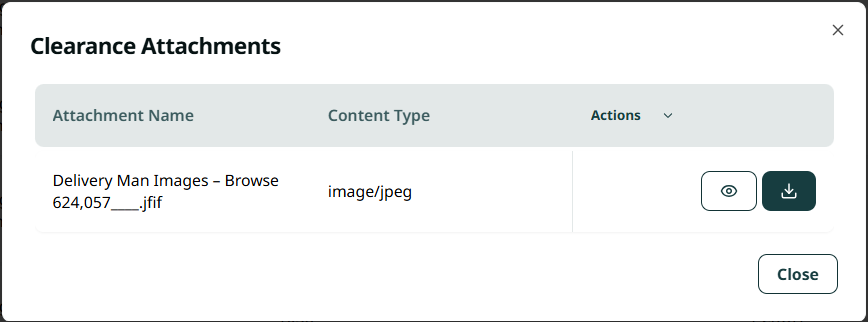
1.1.4 View Attachments
The user can view attachments related to the shipment clearance by navigating to the ‘Shipments Clearance’ screen via the Gateway and clicking on View Attachments from Actions as follows:
1.2 Add New Multiple Clearance Requests
The user can create a new multiple clearance on the system by clicking on Multiple Clearance Request to the “Shipment Clearance” screen via Gateway.
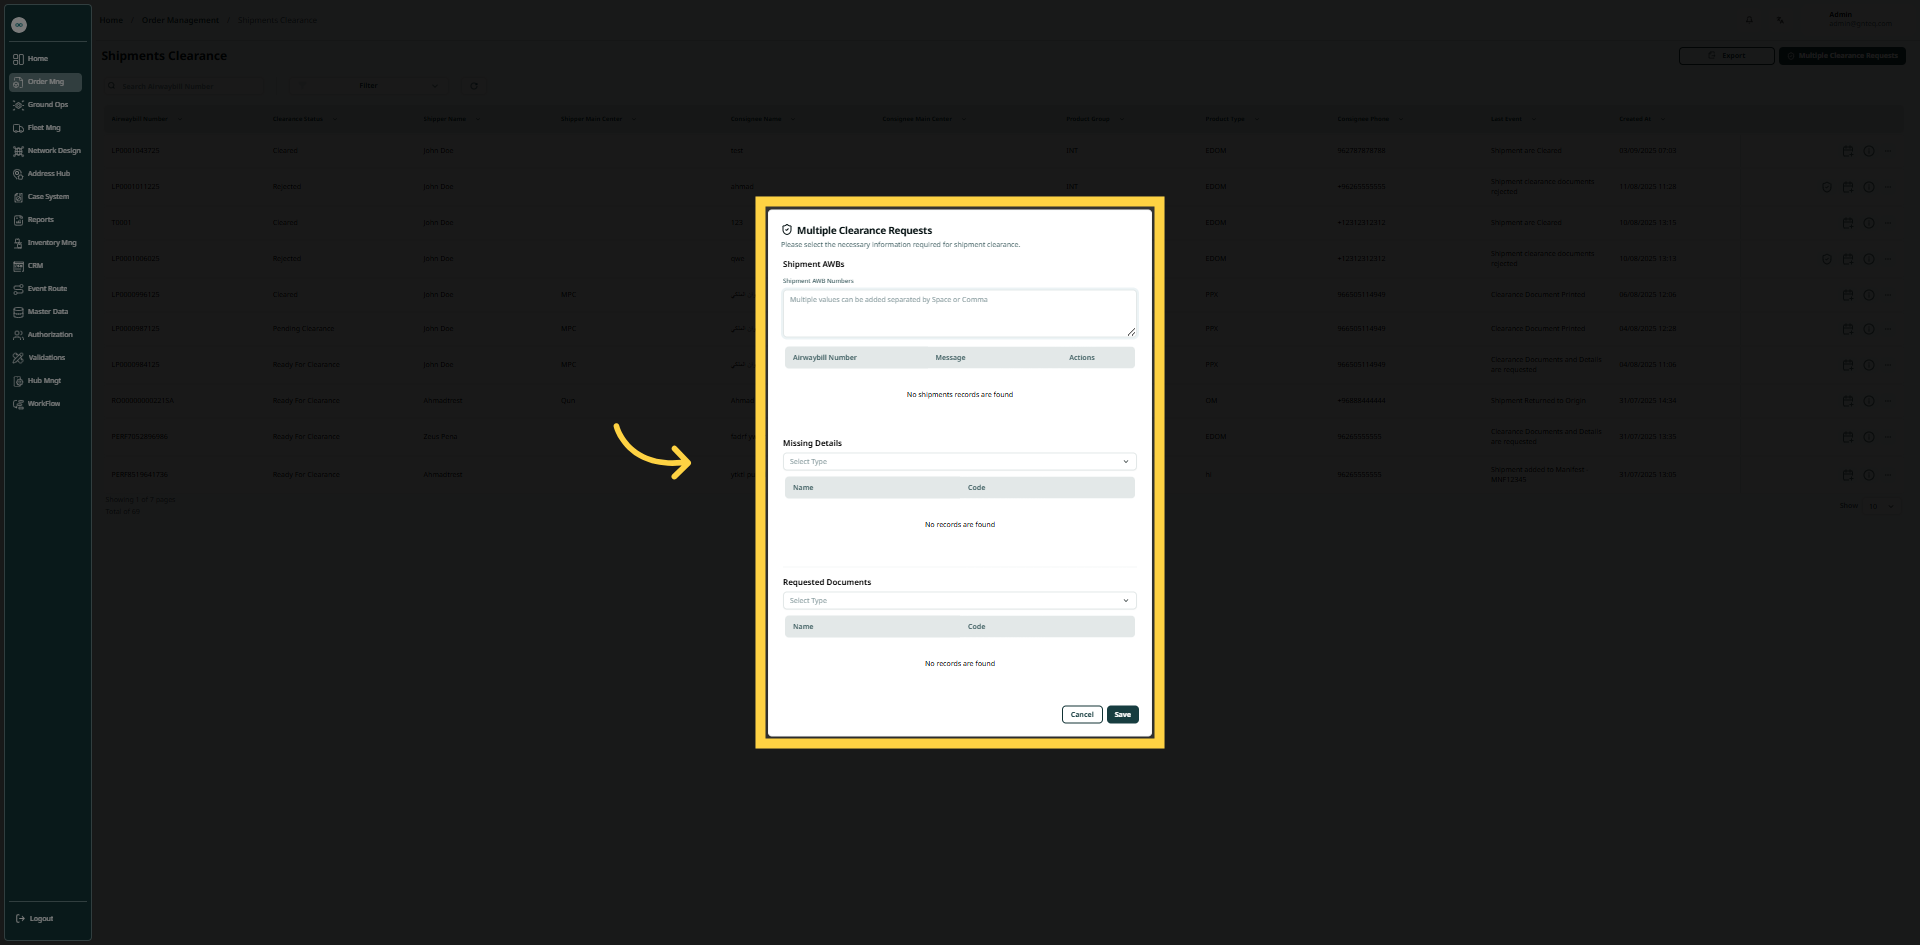
-
Shipment AWB Numbers: this field represents the shipment’s AWB numbers.
-
Missing Details: the missing information for the shipment
-
Requested Documents: this field represents the documents missing from the shipment
By clicking on Save, the clearance request will be created successfully.