.png)
Document History
|
Version |
Author |
Reviewer/Approver |
Date of Issue |
Page / Section |
Brief Description |
|---|---|---|---|---|---|
|
1.0 |
Jameel.S |
Deema.Z \ Asma.L |
20/1/2025 |
Courier Management |
Draft |
|
1.1 |
Deema.Z |
|
30/3/2026 |
|
Reviewed |
1. Courier Creation Overview
2. Dashboard
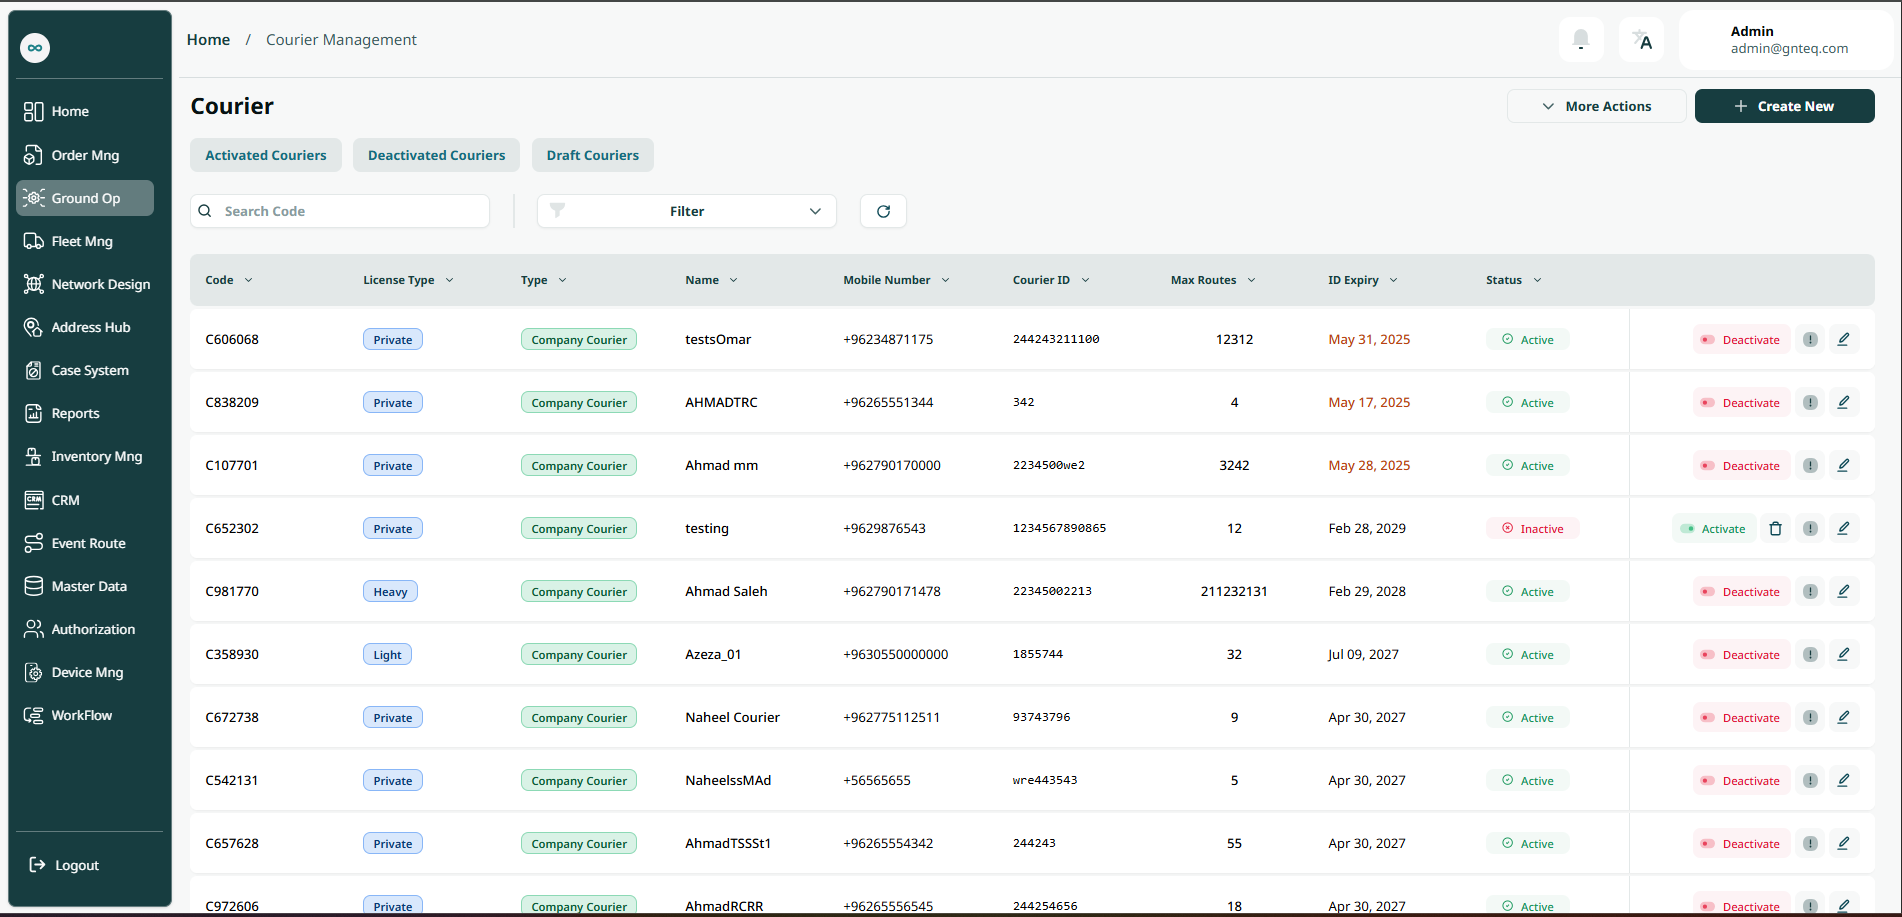
The supervisor can view their defined couriers in the system by navigating to the ‘Courier’ screen in the Last Mile Management from the left navigation panel as follows:
-
Create New: the supervisor can add new courier by clicking on ‘Create New’.
-
Export: the supervisor can export the list as an Excel file by by clicking on More Actions.
-
Import : the supervisor can upload the list as an Excel file by More Actions.
-
Filter: the supervisor can search for the courier by typing the courier name, mobile number, courier id ……. etc.
-
Search: The supervisor can search for courier by entering the code.
-
Rows Per Page: the user can select the number of items to show on each page.
-
Actions: by clicking on Actions, the user can edit the courier by going to the Edit courier section, or view courier details , and active or deactivate.
2.1 Edit Courier
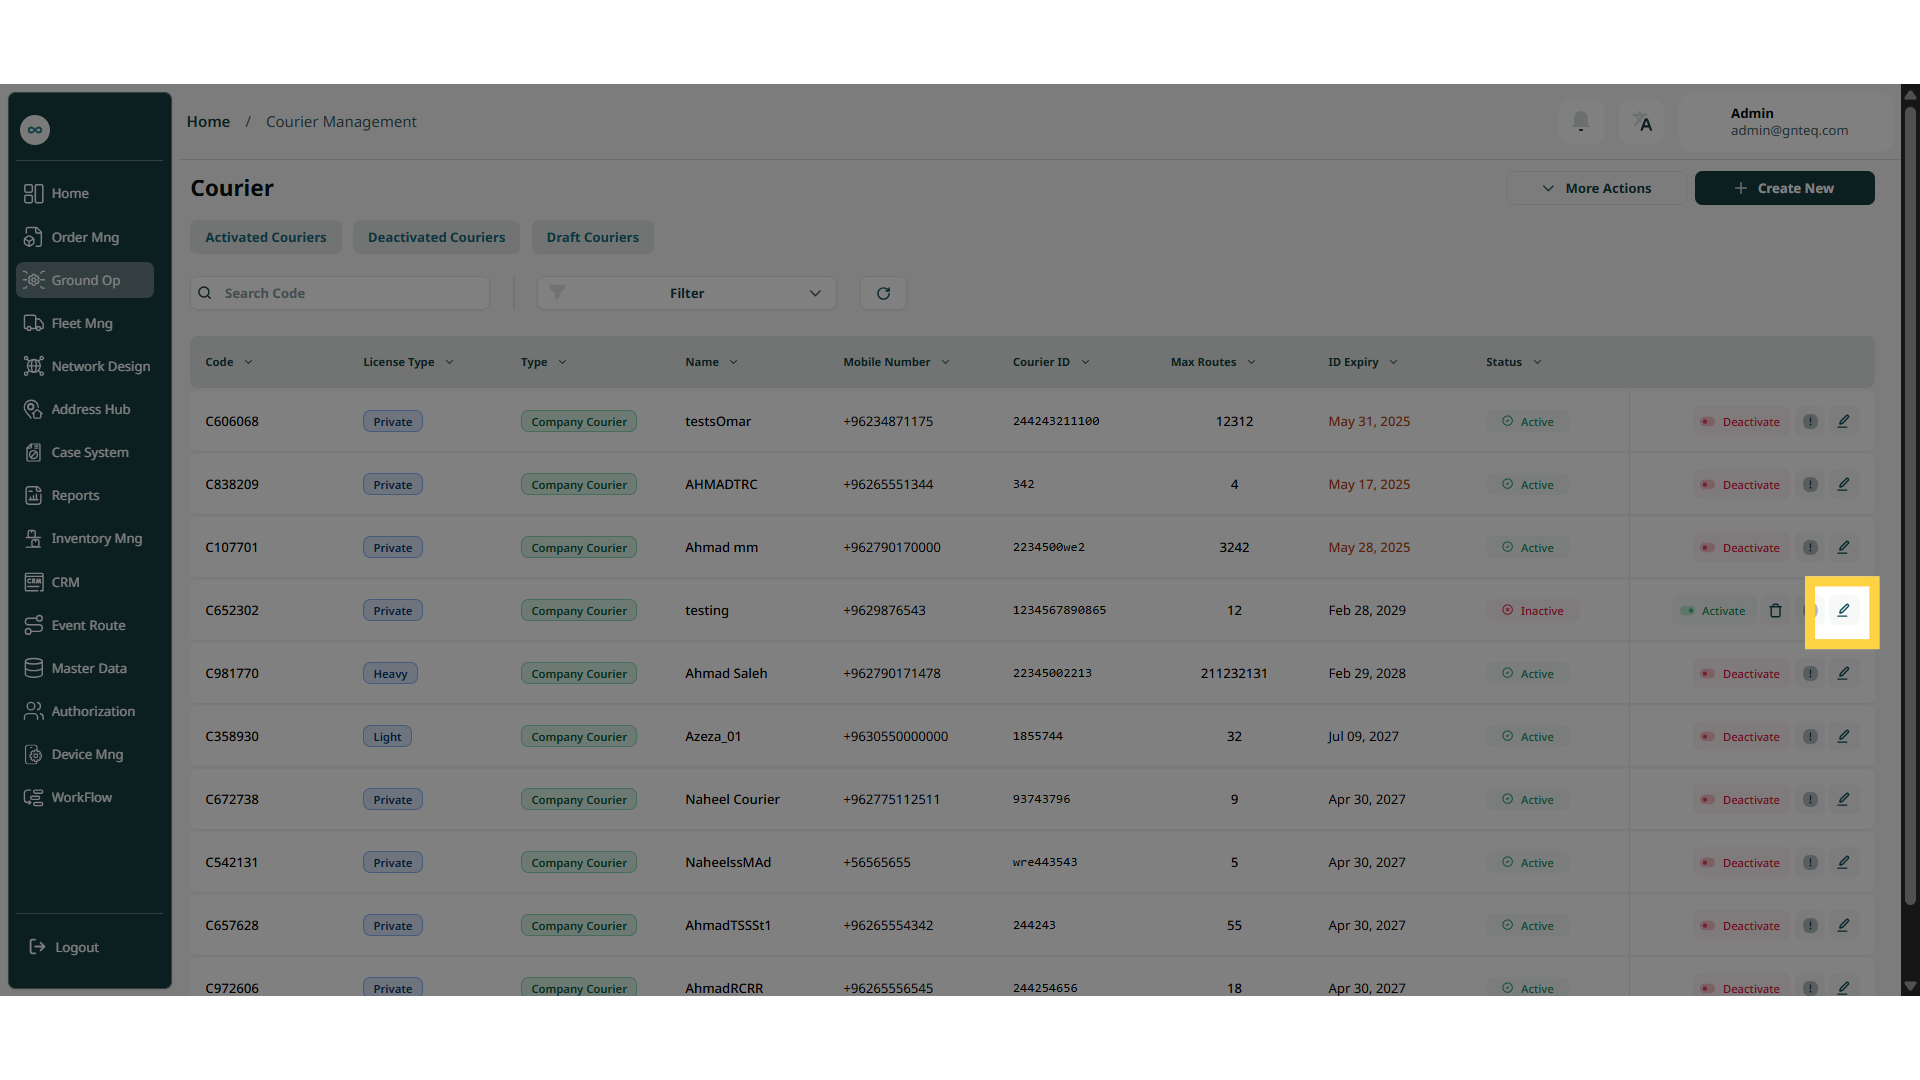
The supervisor can edit an existing courier by clicking on Edit from Actions by navigating to the ‘Courier’ screen via the Last Mile Management.
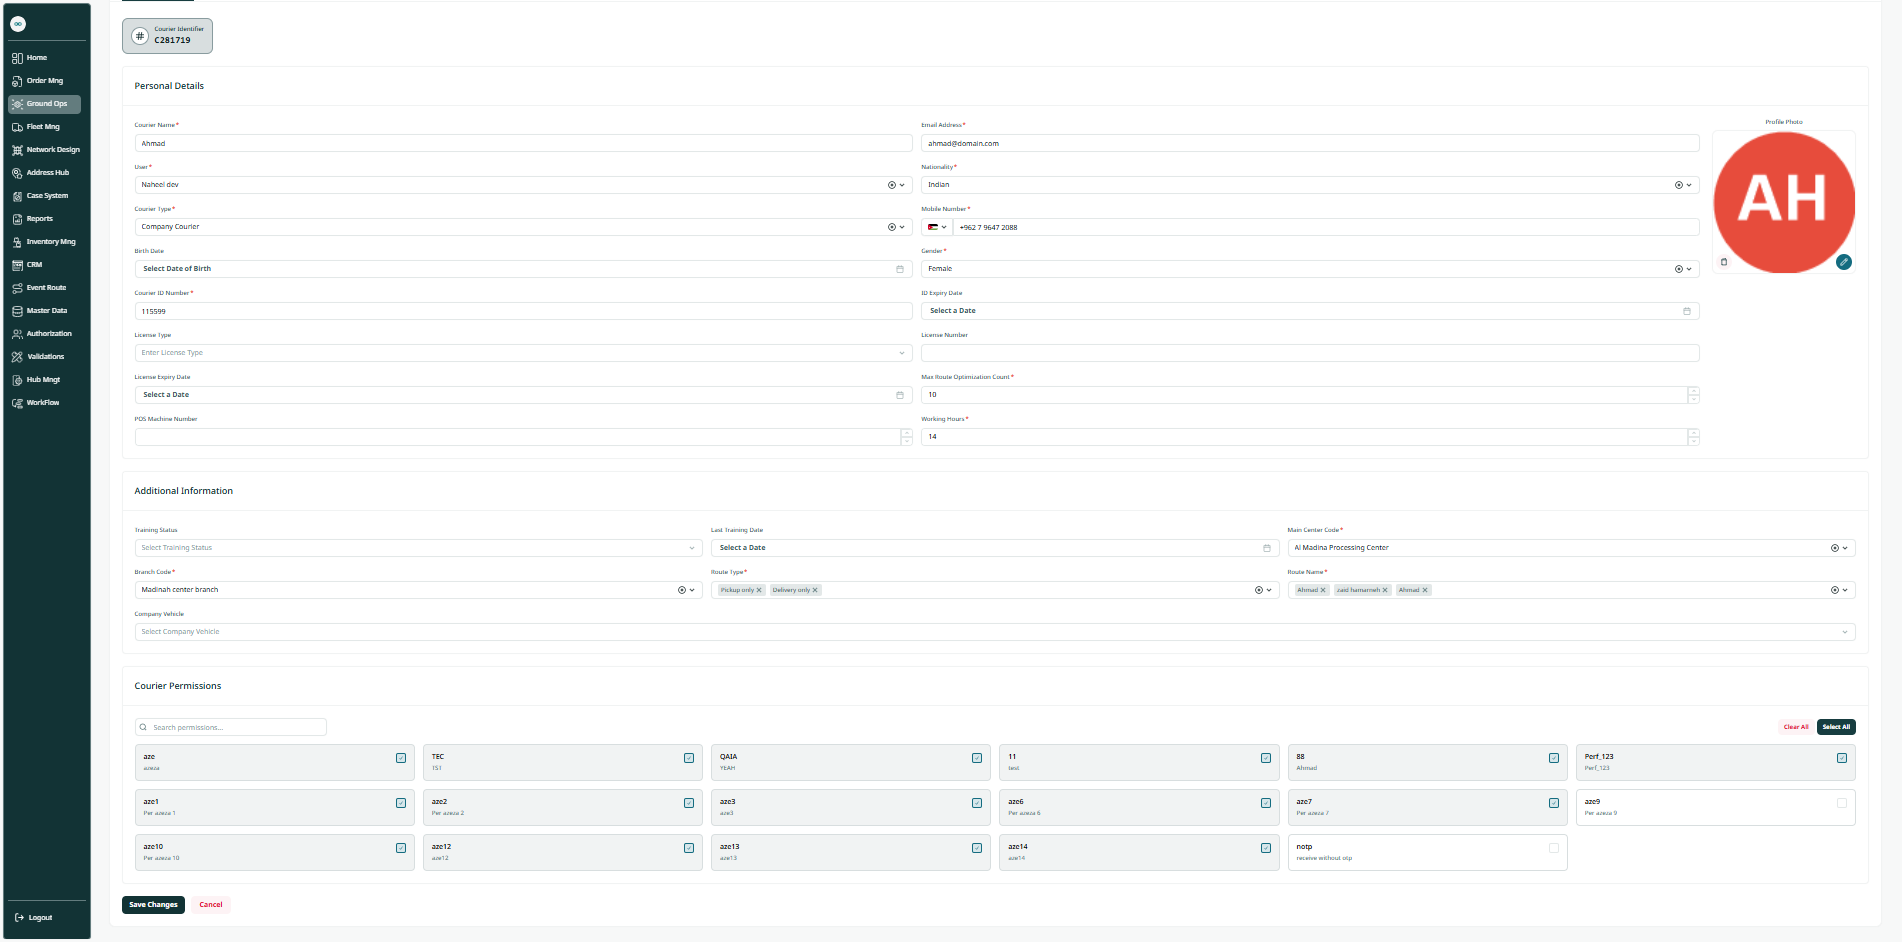
By clicking on Save Changes, the system updates the information successfully.
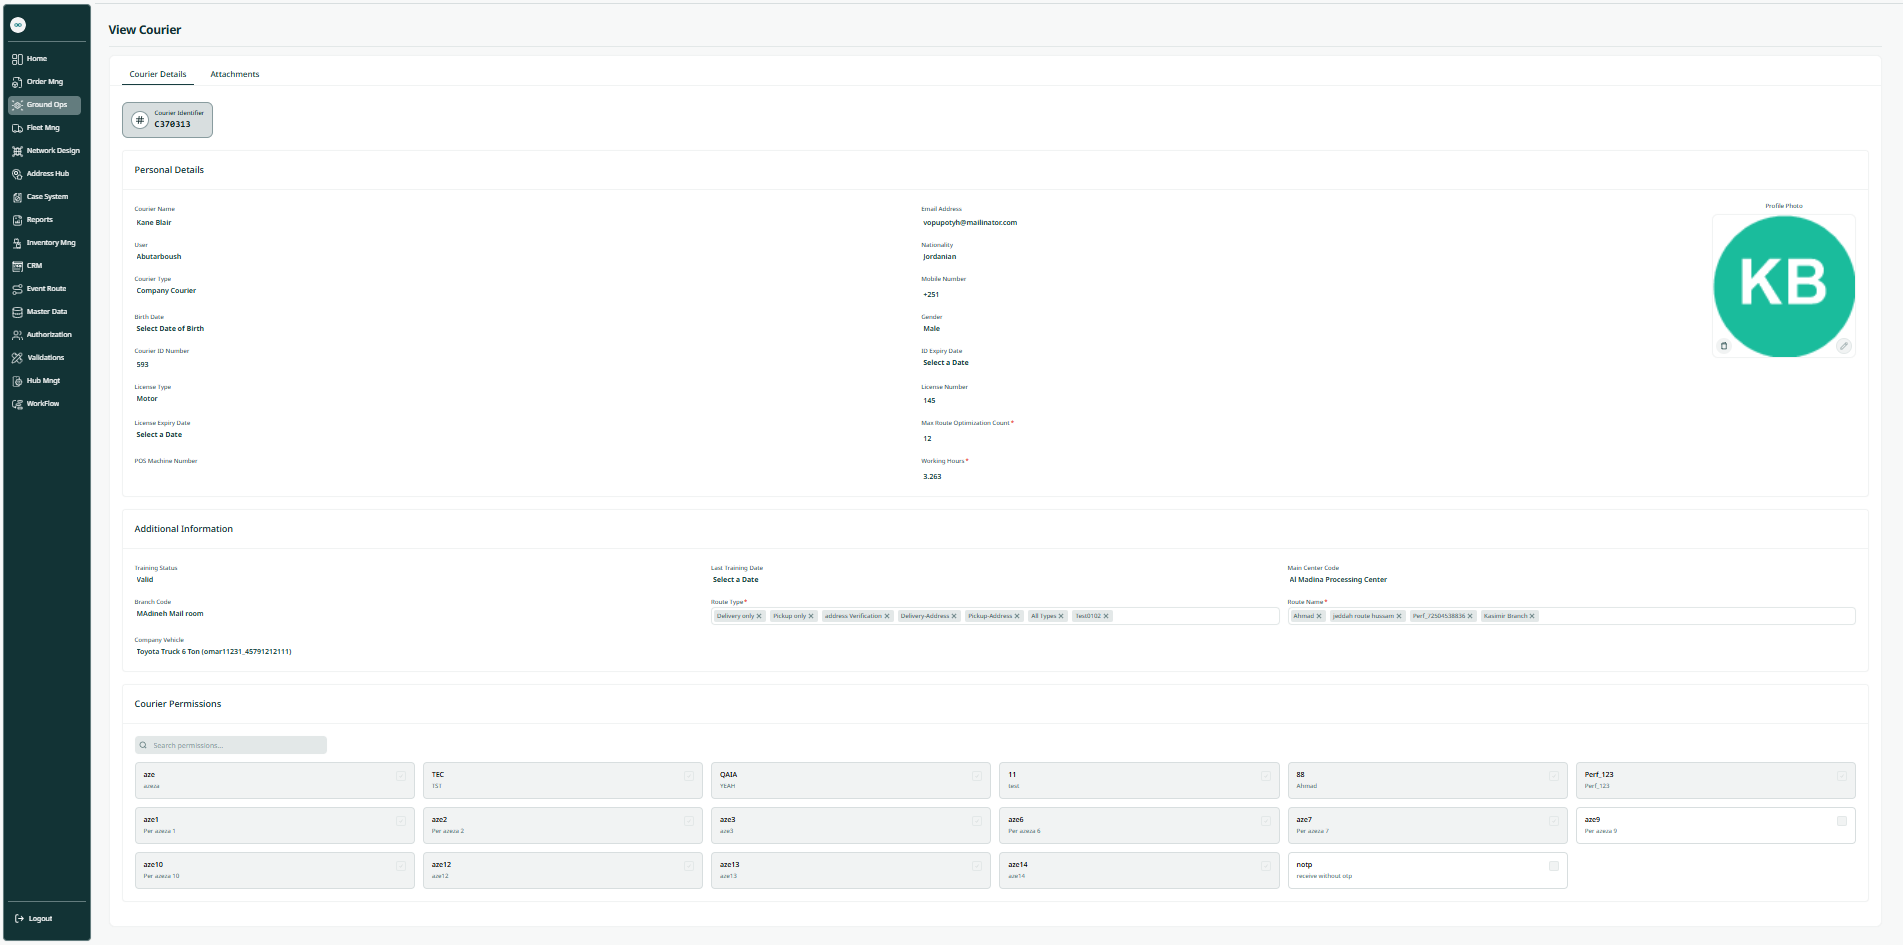
2.2 View Courier Details
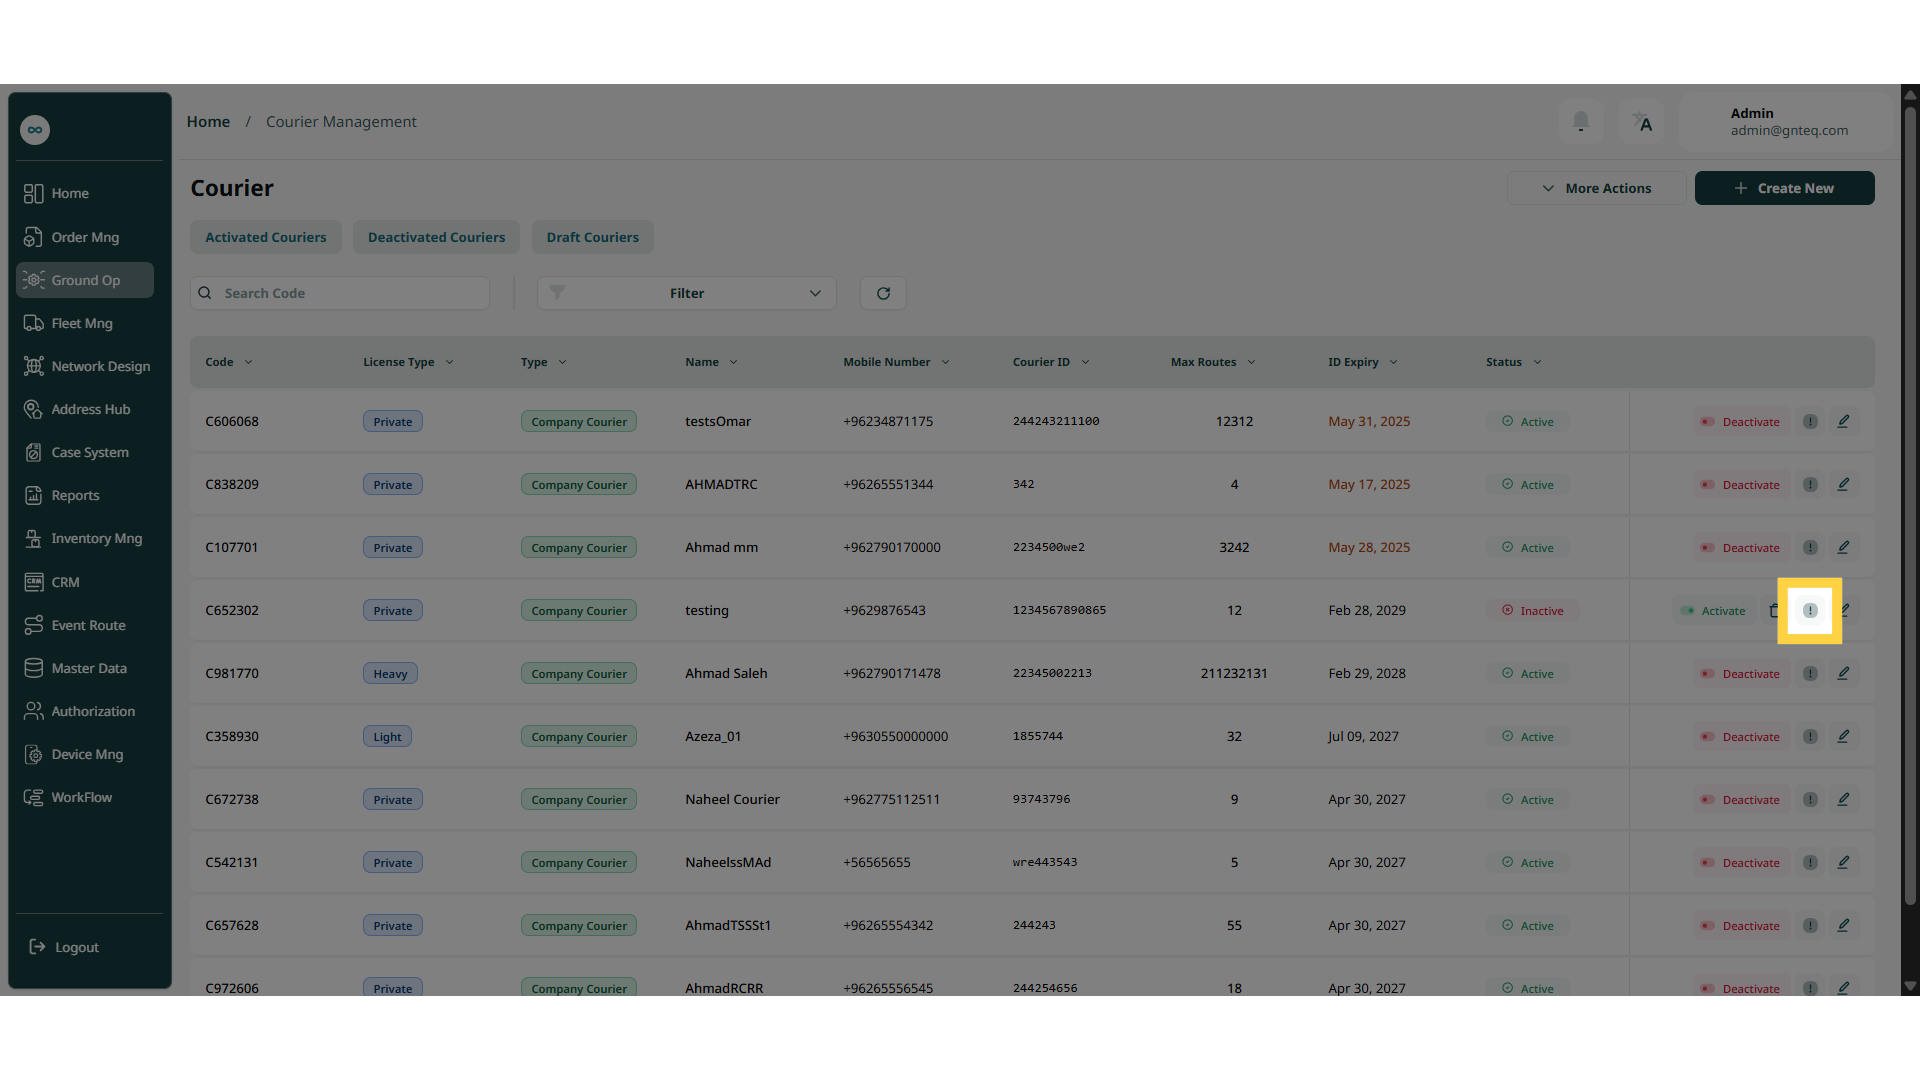
The supervisor can view details of the courier by clicking on View Details from Actions by navigating to the ‘Courier’ screen via the Last Mile Management.
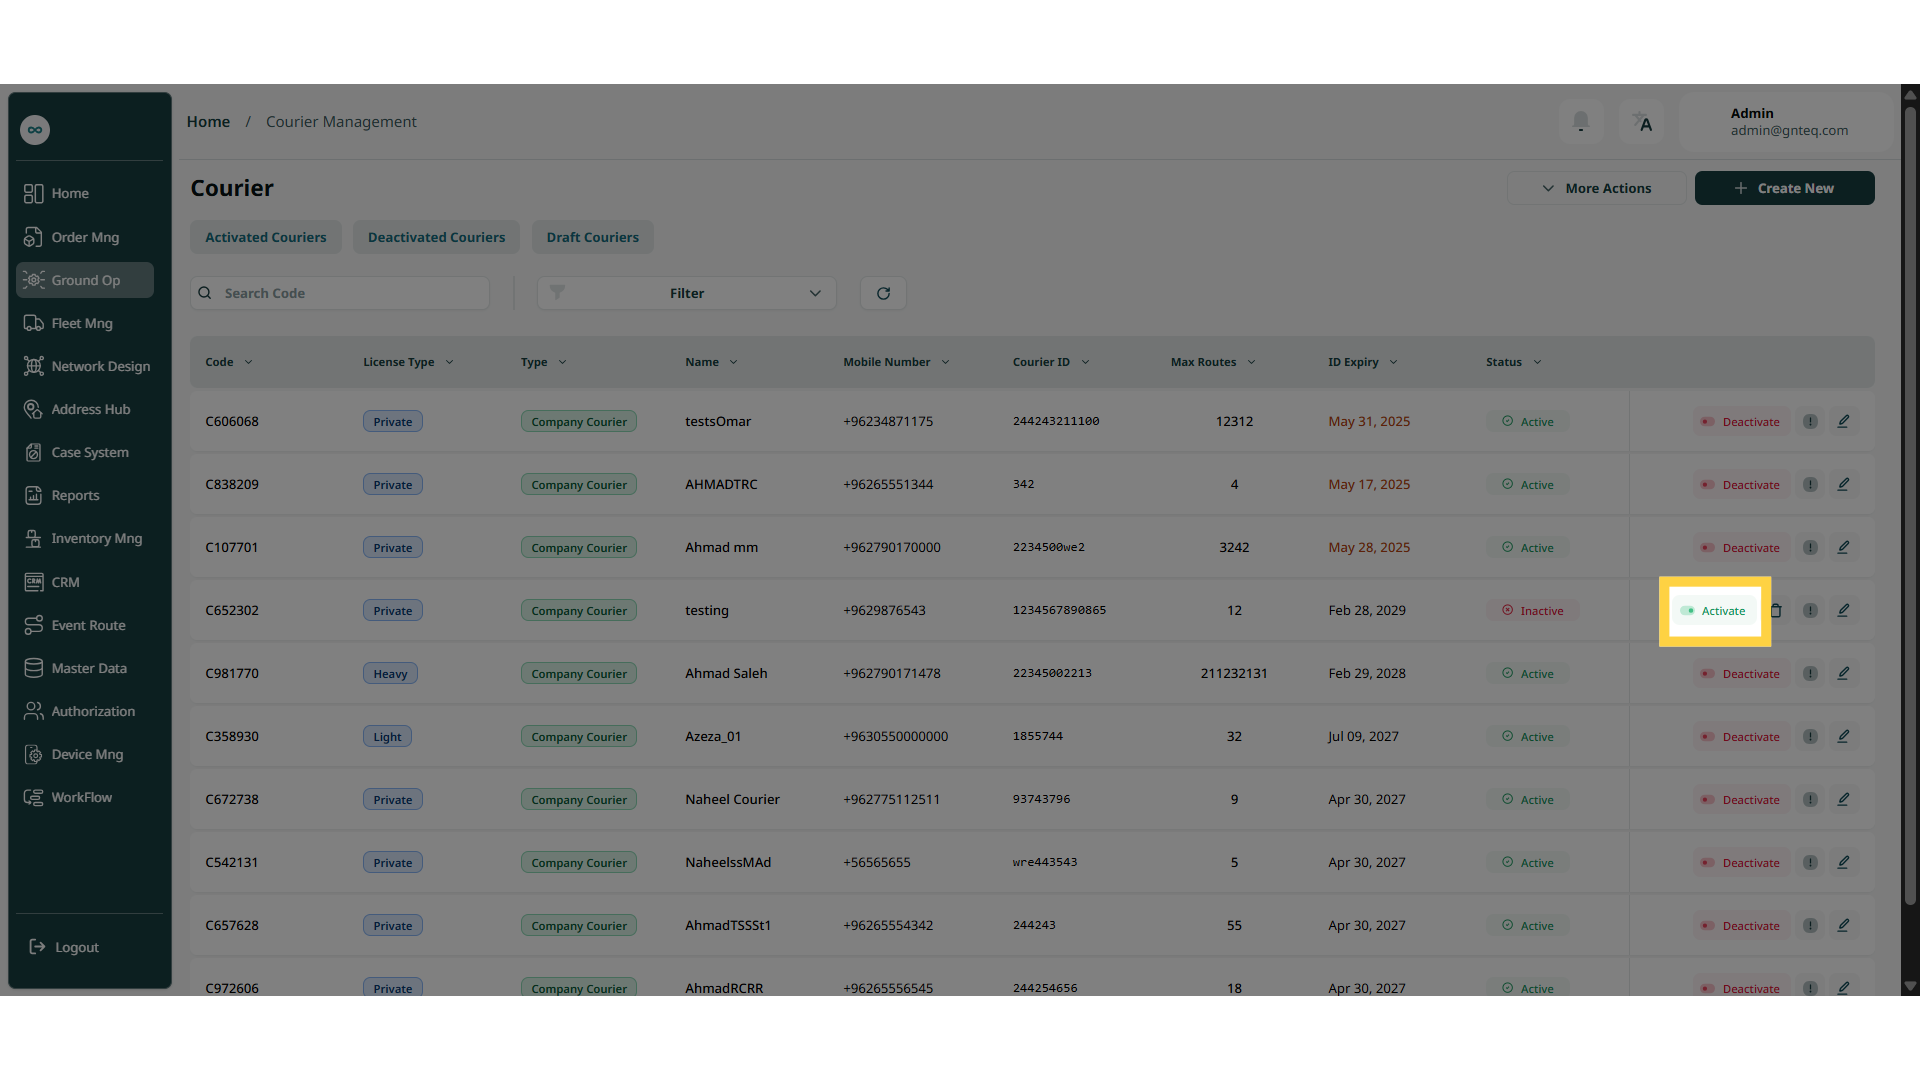
2.3 Active & Deactivate courier
The supervisor can active and deactivate the courier to be ready for service by clicking on Activate from Actions by navigating to the ‘Courier’ screen via the Last Mile Management.
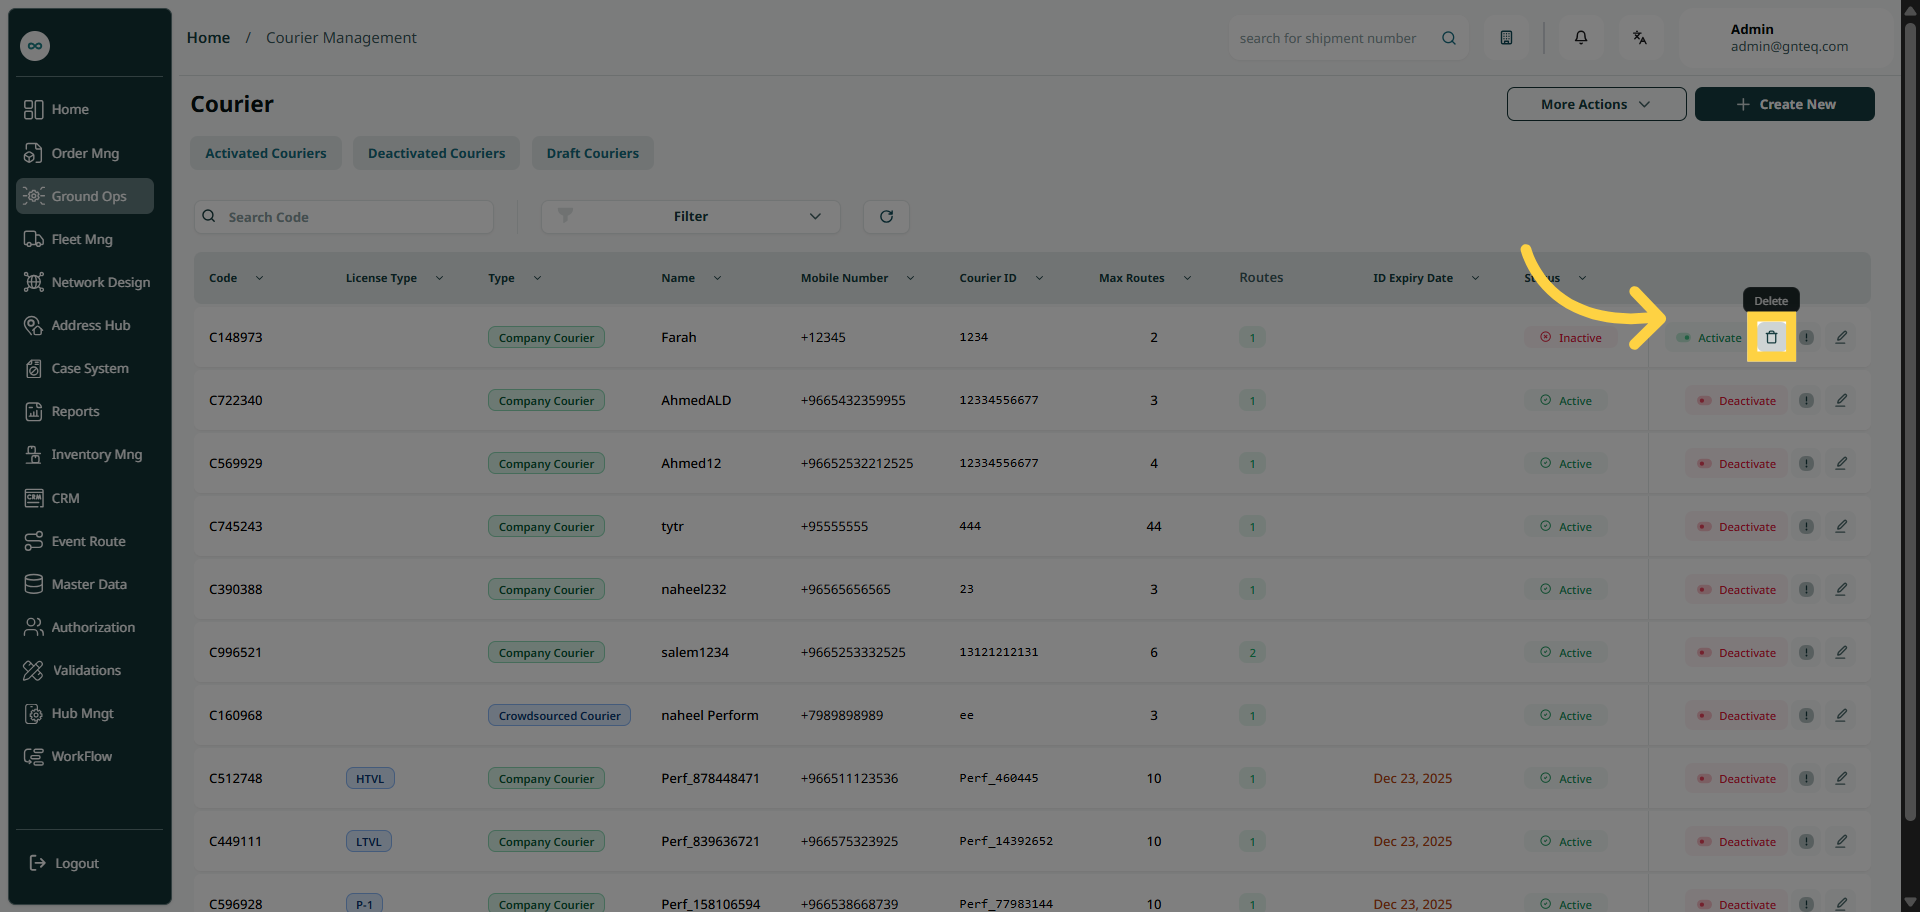
2.4 Delete Courier
The supervisor can delete the courier when it is deactivated by clicking on Delete from the Actions by navigating to the "Courier" screen via the Last Mile Management.
3. Add New Courier
The supervisor can create a new courier by navigating to the ‘Dashboard’ screen via the Last Mile Management and clicking on Create New button:
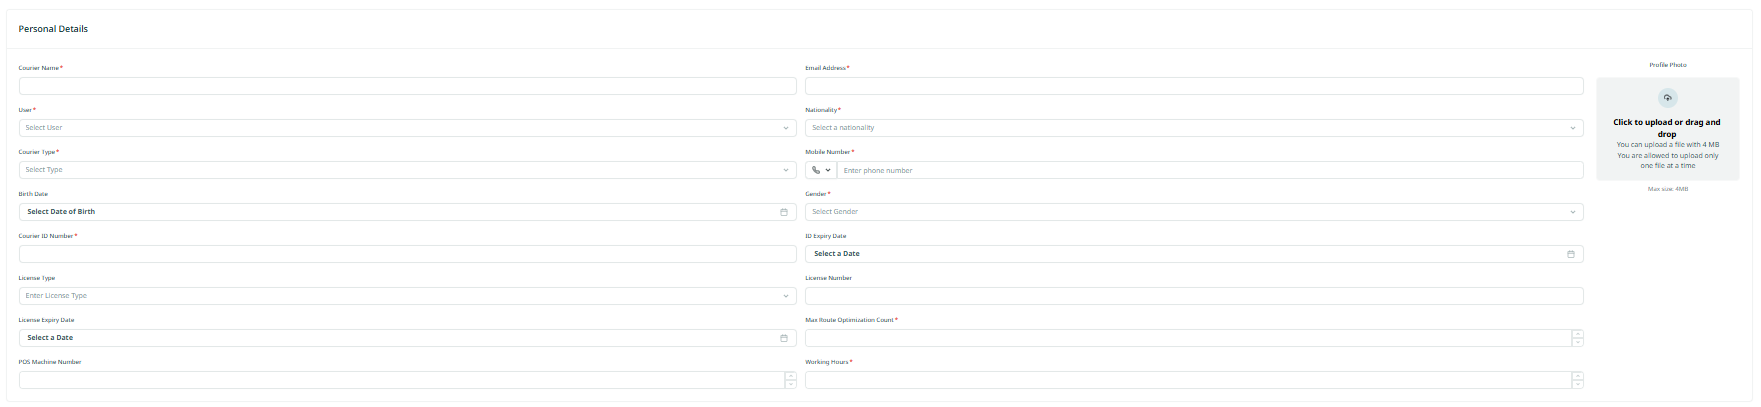
3.1 Personal Details
-
Courier Name: this field represents the courier’s full name.
-
Courier Type: this field represents the type of the courier’s e.g.(company courier, outside courier…..etc.)
-
User: This field represents the username.
-
Nationality: this field represents the nationality of the courier.
-
Gender: This field represents the delivery partner's gender (male, female).
-
Mobile Number: this field represents the courier’s main phone number.
-
Courier Id Number: this field represents the courier’s id number.
-
Id Expiry Date: this field represents the specific date on which the id expires.
-
License Number: this field represents the licenses registered number.
-
Licenses Type: this field represents the type of the licenses.
-
Licenses Expiry Date: this field represents the specific date on which the licenses expires.
-
Max Route Optimization Count: this field represents the maximum number of re-route.
-
POS Machine Number: this field represents an eight-digit sequence that uniquely identifies a point of sale (POS) terminal. Each courier is assigned their own unique POS Machine Number.
-
Working Hours: this field represent the the courier working hours.
-
Upload: the supervisor can upload pictures to attach them to the courier profile.
3.2 Additional Information
-
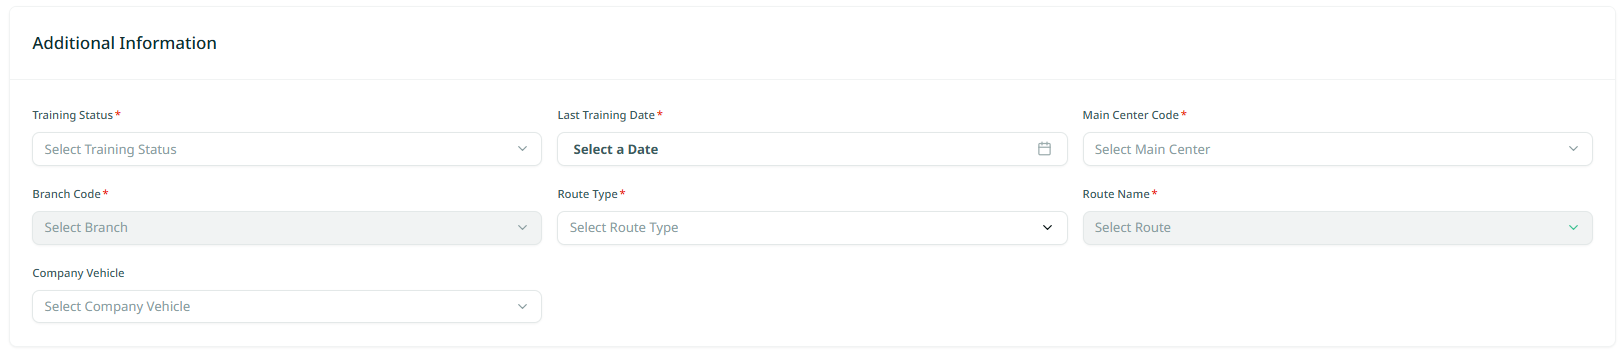
Training Status: this field represents the status of the courier’s training e.g.(valid, invalid).
-
Last Training Date: this field represents the date of last courier training.
-
Main Centre Code: this field represents the city where the vehicle is registered or primarily operates.
-
Branch Code: this field represents the station or route that the vehicle will serve.
-
Route Name: this field represents the name of the route that the courier will serve.
-
Company vehicle: this field represents the form of the vehicle that will assign to the courier.
-
Route type: this field represents the types of the courier trips.
3.3 Courier Permissions
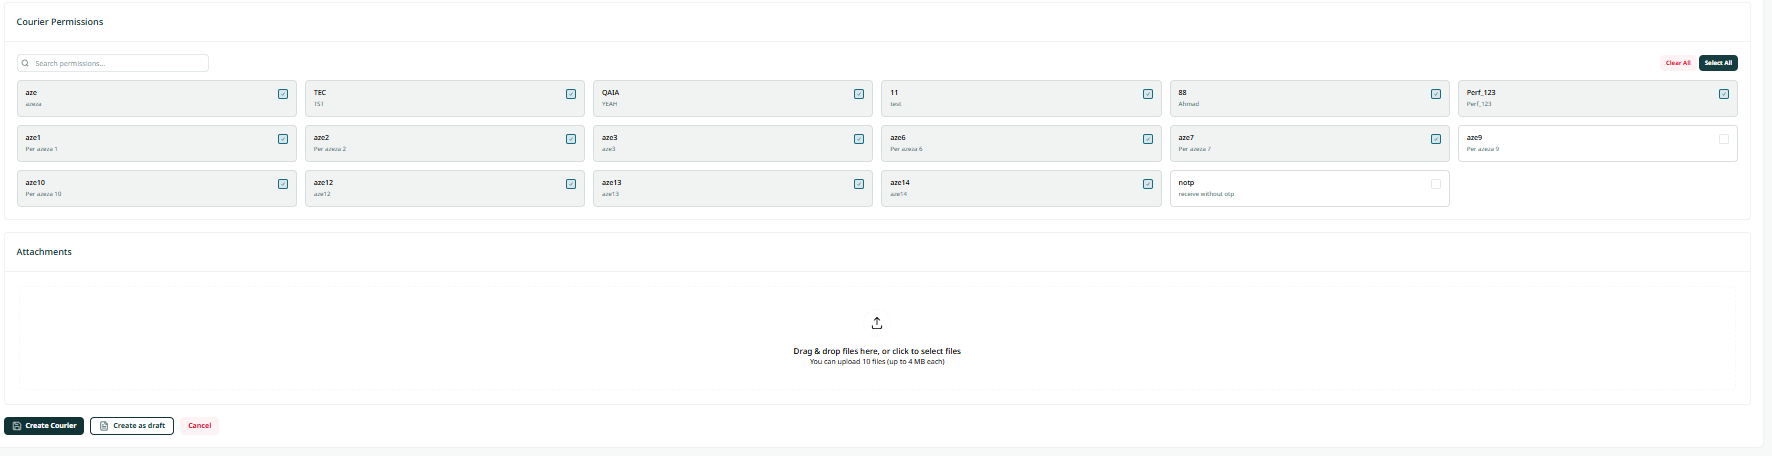
The supervisor can select the suitable permission for the courier select multiple permissions.
3.4 Attachments
The supervisor can attach files for the courier that contains information's or pictures that belong to the courier.
By clicking on ’Save Changes’, the system adds the Courier successfully.